
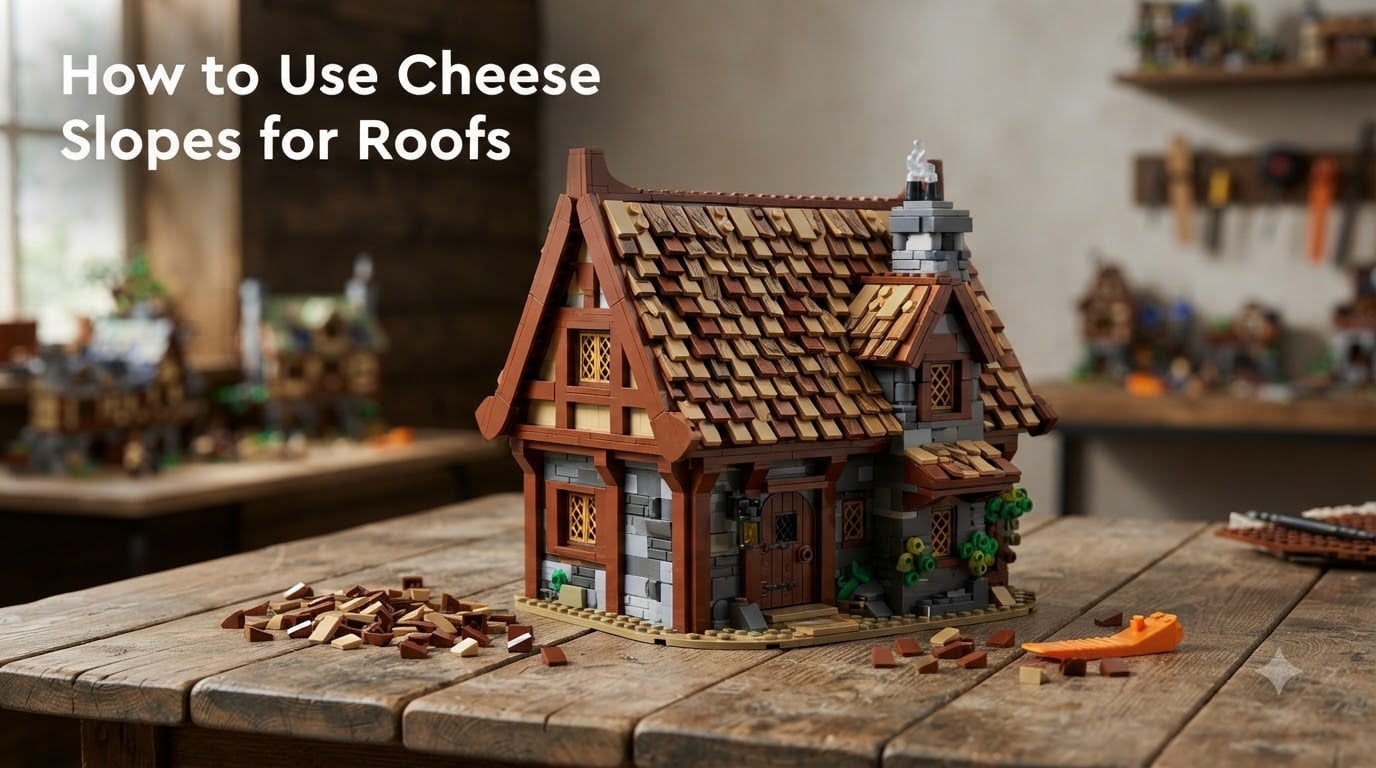
When I built my first medieval LEGO castle, every roof looked flat and plastic. The tiles were too smooth, the colors too uniform, and the whole thing screamed “toy” instead of “storybook village.” That changed the day I discovered cheese slopes. In this guide, I’ll show you how to use cheese slopes for roofs, the same technique that turns plain walls into weathered cottages and keeps my builds looking fresh build after build.
By the end of this article, you’ll know what cheese slopes are, how to attach them to angled plates, how to stagger them for realistic texture, and how to pull off advanced angles like 60-degree slopes. Let’s get your LEGO roofing looking less like a toy and more like a tiny medieval town.
Table of Contents
What Are Cheese Slopes and Why Use Them for Roofs?
Cheese slopes are 1×1 or 1×2 LEGO pieces with a shallow 25-degree slanted face, originally designed to make grills and panels. Their shape happened to be exactly what roof builders needed: a low-profile wedge that looks like a single roof shingle.
I reach for cheese slopes over standard tiles for three reasons. First, the 25-degree angle naturally mimics real roof shingles, so even a tiny shack looks architectural. Second, they come in dozens of colors, from terracotta to dark brown to deep green. Third, they tessellate, meaning they tile together without gaps when you line them up correctly.
Builders call them “cheese slopes” because the angled face looks like a slice cut from a wheel of cheese. That nickname stuck across the AFOL community, and it’s how you’ll find them discussed on Reddit, Flickr, and LEGO fan forums. If you’re searching for techniques, the term “cheese slope” will get you the most results.
How to Use Cheese Slopes for Roofs: Step-by-Step Tutorial
This is the exact process I use on every medieval MOC I build. Follow these steps and you’ll have a textured roof on your first try.
Step 1: Build the Wall Structure First
Always complete your building walls before touching the roof. The walls determine the footprint of your roof, so measuring twice here saves rework later. I make sure the top of each wall is a flat, even row of bricks.
Step 2: Add Angled Plates as the Roof Base
Place 1×2 or 1×3 angled plates along the top of your walls. These plates tilt at 25 degrees, giving the cheese slopes a sloped surface to grip. The angled plate is the foundation of the entire roof, so make sure they line up symmetrically on both sides of your building.
Step 3: Attach the First Row of Cheese Slopes
Snap your first row of cheese slopes onto the angled plates. Each slope should point downward, with the slanted face visible from the front of your building. Press gently but firmly, because cheese slopes only attach on one stud and can pop off if pushed sideways.
Step 4: Stagger Each Row by Half a Stud
This is where the magic happens. Instead of stacking each row directly above the last, offset every new row by half a stud. The result looks like real brickwork or shingles, with no obvious vertical seams running up the roof.
Step 5: Continue Until the Roof Is Complete
Keep adding staggered rows until the cheese slopes meet at the peak. For a peaked roof, alternate rows from each side so they close cleanly at the top. For a flat or shed roof, simply stop one row short of the opposite wall and cap with a smooth tile.
Step 6: Cap the Peak
Use a 1×1 plate, a smooth tile, or a chimney brick to cover the peak where the two sides meet. This hides any minor gaps and gives the roof a finished edge.
Creating Realistic Texture With Staggered Patterns
A roof made of identical cheese slopes in identical colors looks like a barcode. The fix is staggering. By offsetting each row by half a stud, you break the grid pattern and your eye reads the roof as a series of overlapping shingles, not a stack of bricks.
For extra realism, I mix two or three colors in the same row. A medieval cottage roof might use dark brown, reddish brown, and dark tan placed randomly. A terracotta Mediterranean roof can blend orange, dark orange, and a few tan pieces for sun-bleached patches. The randomness is what sells it.
Another trick from BrickNerd’s 15 Ways to Build a LEGO Roof guide: rotate some slopes 180 degrees so the slanted face points sideways instead of down. That breaks the visual rhythm and creates a thatched or hand-laid look that pure rows never achieve.
Achieving a 60-Degree Continuous Slope
The 25-degree slope from cheese slopes alone won’t give you a steep pitched roof. If you want a sharper 60-degree angle, you need to combine cheese slopes with headlight bricks and round SNOT bricks, a technique that builders on Reddit’s LEGO Techniques forum swear by.
Here’s how it works. A headlight brick is a 1×2 brick with a single stud on one face, perfect for sideways building (the SNOT technique, which stands for Studs Not On Top). When you alternate headlight bricks and round SNOT bricks along a wall, you create a stepped surface that the cheese slopes grip onto.
Each cheese slope attaches to either a headlight brick or a round SNOT brick, alternating down the roof. The result is a continuous, smooth 60-degree slope without visible gaps. It’s more complex than a 25-degree roof, but for towers, spires, and steep medieval houses, this is the only way to get the angle right.
I tested this on a wizard’s tower build last winter. The cheese slope version looked plastic; the 60-degree version looked like something from a fairytale book. Worth every extra minute of patience.
Choosing the Right Colors for Your Cheese Slope Roof
Color matters as much as technique. The BrickBlogger LEGO shingles guide reminds builders that cheese slopes come in the widest color range of any sloped LEGO piece, so use that variety.
For medieval and castle builds, I stick to dark brown, reddish brown, dark tan, and sand yellow. These earthy tones read as old stone and weathered wood shingles. For Asian-inspired architecture, dark red and green tiles work beautifully, especially on curved pagoda roofs. For cottages, mix light bluish gray with a few dark gray pieces to suggest moss-covered slate.
One mistake I made early on: using bright primary colors. A bright red and bright blue cottage roof looks like a toy, not a storybook building. Stick to muted, dusty shades, and your LEGO roofs will instantly look more realistic.
Combining Cheese Slopes With Other Roofing Pieces
Cheese slopes play well with other pieces, and mixing techniques is how you avoid the “all roofs look the same” problem that plagues large city builds. The Palace Cinema set, a community favorite, uses round bricks in a contrasting color to break up its cheese slope roof.
I regularly combine cheese slopes with these pieces:
- Curved slopes for rounded towers and domes
- Standard tiles for the ridge line or chimney caps
- Modified slopes for corners and decorative edges
- Round bricks in a contrasting color for accent rows
- Garage door panels for industrial or modern builds (slightly flimsy but visually striking)
The key is to change at least one element per roof. A row of round bricks across the middle, a different color at the eaves, or a chimney stack in a contrasting texture breaks the monotony without overwhelming the design.
Troubleshooting Common Cheese Slope Roof Problems
Even experienced builders hit snags with cheese slope roofs. Here are the issues I see most often and how to fix them.
Gaps in L-Shaped or Cross-Section Roofs
When your building has an L-shape or a cross section, the roof angles meet at odd points. Standard rows leave triangular gaps. The fix is to use cheese slopes in mixed sizes, 1×1 and 1×2, and rotate individual slopes to fill awkward spots. For bigger gaps, a flat tile angled into the corner hides the issue completely.
Cheese Slopes Popping Off
Cheese slopes only connect on one stud. They pop off if you squeeze the roof or pick it up by the roof itself. Always pick up the building by the walls, and consider adding a hidden plate underneath the slopes if your build will be handled a lot.
Roof Looks Too Uniform
If your finished roof looks like a barcode, you didn’t stagger enough. Pull up a few slopes, shift each row by half a stud, and add two more colors to the mix. The randomness is what sells realism.
Steep Angle Won’t Hold
If you want a steeper roof than 25 degrees but the 60-degree SNOT technique feels too advanced, try adding cheese slopes to a steeper angled plate. Some LEGO sets include 33-degree or 45-degree angled plates that give you more pitch without requiring headlight brick gymnastics.
Tips for Beginners
If this is your first cheese slope roof, keep it small. Build a 4×4 or 6×6 cottage first. Master the stagger on a simple peaked roof before tackling towers or L-shaped layouts. Buy cheese slopes in bulk from Pick a Brick so you have enough colors to experiment. And remember: a slightly imperfect roof still looks better than a perfectly smooth tile roof.
FAQ
What is the 25% rule for roofing?
The 25% rule refers to the slope angle of LEGO cheese slope pieces, which is 25 degrees. This shallow angle mimics real roof shingles and gives LEGO buildings an architectural look rather than a flat, toy-like appearance. Cheese slopes are 1×1 or 1×2 pieces with this built-in slant.
What angle can cheese slopes achieve?
Standard cheese slopes attached to angled plates give you a 25-degree slope. For steeper 60-degree slopes, you need to combine cheese slopes with headlight bricks and round SNOT bricks in an alternating pattern. This advanced technique creates a continuous smooth slope for towers and steep roofs.
How do you stagger cheese slope patterns?
Stagger by offsetting each new row of cheese slopes by half a stud from the row below it. This breaks vertical seams and creates a shingle-like pattern that looks like real overlapping roof tiles. Adding two or three colors per row increases the realism further.
How do you attach cheese slope shingles?
Attach cheese slopes to angled plates placed along the top of your walls. The angled plate provides the sloped surface. Press each cheese slope onto a single stud, ensuring the slanted face points downward and outward from your building.
Which colors work best for cheese slope roofs?
Earthy tones like dark brown, reddish brown, dark tan, and sand yellow work best for medieval and cottage builds. For Asian-inspired architecture, dark red and green tiles are ideal. Avoid bright primary colors, which look toy-like. Mixing two to three colors per roof adds realism.
Can you use cheese slopes without SNOT bricks?
Yes. The simplest cheese slope roof uses only angled plates and the cheese slopes themselves at a 25-degree angle. SNOT bricks are only needed for advanced 60-degree slopes or unusual angles. Beginners should start with the angled plate method before trying SNOT techniques.
Conclusion
Learning how to use cheese slopes for roofs is one of the highest-impact skills you can add to your LEGO building toolkit. A simple staggered pattern transforms plain walls into storybook cottages, medieval towers, and Asian-inspired temples, all without buying a single specialized set.
Start with a small 4×4 build, attach cheese slopes to angled plates in staggered rows, mix two or three earthy colors, and add a chimney or peak cap to finish. Once you’ve mastered the basics, try the 60-degree headlight brick technique for steeper roofs. Your LEGO city will never look the same.