
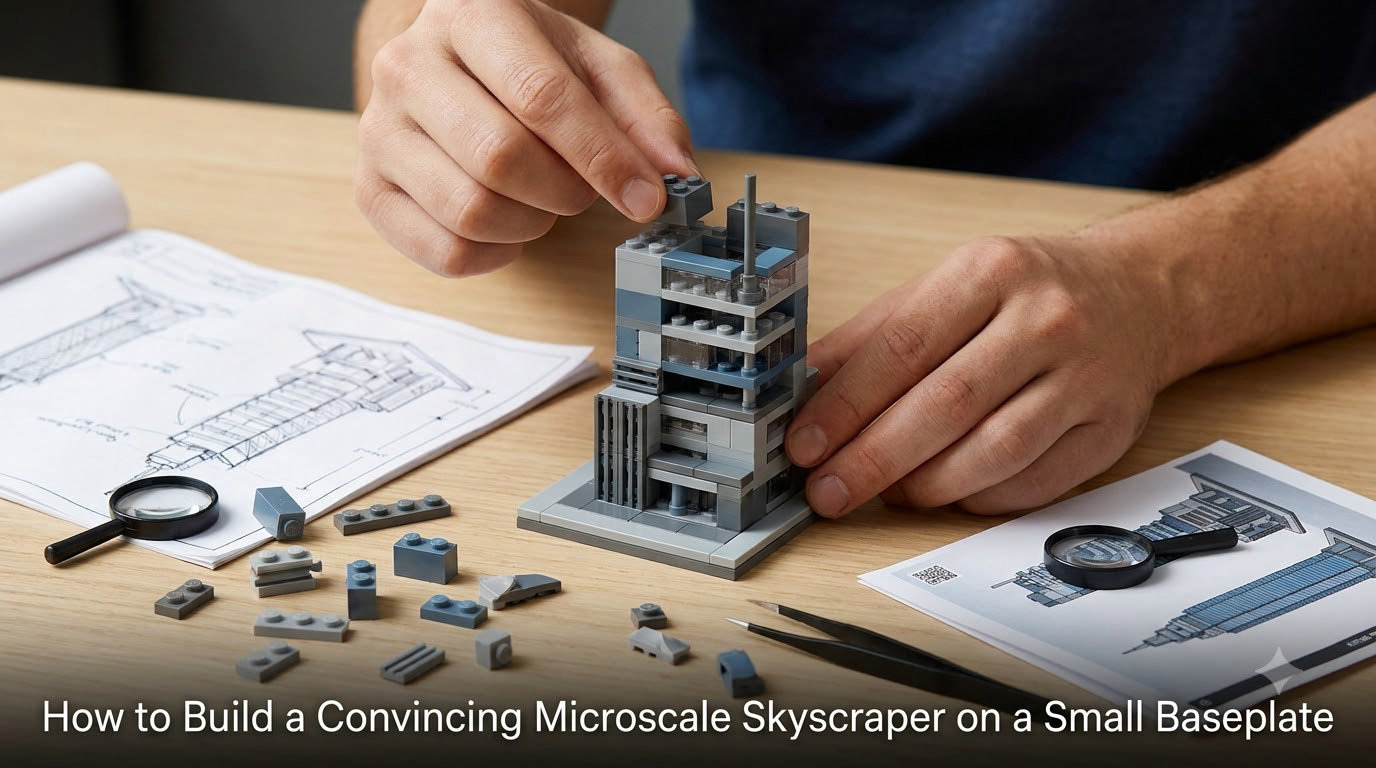
Building a microscale skyscraper on a small baseplate is one of the most rewarding challenges in LEGO. You are working with a tiny footprint — sometimes as small as 8 by 8 studs — and trying to capture the essence of a towering structure that, in real life, might be a hundred stories tall. That constraint forces creativity. Every single piece matters. A 1×1 slope becomes a cornice. A trans-clear tile becomes a glass curtain wall. Learning how to build a convincing microscale skyscraper on a small baseplate is about making every stud count.
I have been building microscale LEGO for years, and the skyscraper remains my favorite subject. In this guide, I will walk you through everything from choosing your scale to selecting the right pieces, planning your footprint, and executing the vertical techniques that make a tiny building look monumental. By the end, you will have a clear, step-by-step process for creating your own microscale skyscraper that looks impressive whether it sits alone or anchors a full city skyline.
Whether you are a seasoned AFOL or a relative newcomer looking for small space LEGO building ideas, these micro building techniques will give you a solid foundation. Grab your baseplate, sort your small parts, and let us get started.
Table of Contents
What Is Microscale LEGO Building and Why It Works for Skyscrapers
Microscale building in LEGO refers to creating structures smaller than minifigure scale, where a minifigure would appear absurdly large relative to the build. In true microscale, a single stud might represent a window, a floor, or an entire architectural feature. This compressed scale is what makes it so effective for tall, narrow structures like skyscrapers — you can imply enormous height without needing thousands of bricks.
Skyscrapers are arguably the ideal microscale subject. They are naturally vertical, geometrically simple, and defined by repetitive elements like window rows and floor lines. A real skyscraper has a strong silhouette — a tapered crown, a flat roof, or a spire — and that silhouette translates beautifully to microscale. You do not need interior details. You need clean lines, good proportions, and a believable sense of scale.
Many builders discover microscale through the official LEGO Architecture line, which often uses small footprints to depict famous buildings and skylines. Those sets are excellent references. They demonstrate how LEGO designers suggest immense structures using surprisingly few pieces, and studying them will sharpen your instincts for what reads as convincing at a small scale.
Planning Your Microscale Skyscraper on a Small Baseplate
Before you place a single brick, take time to plan. The biggest constraint in building a microscale skyscraper on a small baseplate is not height — it is footprint. A typical small baseplate might be 16 by 16 studs. If your skyscraper occupies 6 by 6 studs of that, you have room for a tiny plaza, a neighboring low-rise, or street furniture. If it eats up 10 by 10, you are building a monolith with no context.
Start by deciding how much of the baseplate your skyscraper will cover. I usually aim for roughly one-third to one-half of the available area. This leaves space for surroundings that sell the scale — a tiny park, a neighboring building, or even a microscale street. Those surrounding elements are what make viewers perceive your skyscraper as tall rather than just large.
Next, think about height. A common mistake is building too short. A convincing skyscraper on a 16 by 16 baseplate should rise at least 30 to 40 bricks tall. If your footprint is smaller, say 4 by 4 studs, you can push even higher. The ratio between width and height is what sells the skyscraper look. A building that is 4 studs wide and 40 bricks tall clearly reads as a tower. One that is 8 studs wide and 20 bricks tall reads as a chunky box.
I strongly recommend sketching your design digitally before building physically. Bricklink Studio is free and has a complete parts library. Building virtually lets you test proportions, count pieces, and experiment with techniques without digging through bins of tiny elements. Many experienced microscale builders I have spoken with on Reddit and at conventions design in Studio first, then build in real life.
How to Determine the Right Scale for Your Microscale Skyscraper
Scale is the foundation of every convincing microscale build. If you get the scale wrong, nothing else will look right no matter how clever your piece selection is. The concept experienced builders use is the seed piece — a single element that anchors your scale decision and serves as a reference point for the entire model.
A seed piece for a skyscraper might be a 1×1 brick with studs on two sides, a cheese slope, or even a specific window element. You look at that piece and ask: what does this represent at full size? If a 1×1 brick represents one floor of a building, then a 40-story skyscraper needs to be 40 bricks tall. If a 1×2 tile represents a window, then you know how wide each window bay should be.
Once you pick your seed piece, commit to it. Every proportion in your build should relate back to that reference. If a 1×1 brick is one floor, then a door — which in reality is shorter than a floor — should be smaller than a full brick height. This consistency is what separates convincing microscale builds from ones that look like random stacks of small pieces.
For skyscrapers specifically, I find the most useful scale reference is the window. Real skyscrapers are defined by their window grids. If you decide that each stud represents one window width, your building needs to be at least 4 to 6 studs wide to look like a real tower rather than a chimney. From there, you can calculate height based on the number of floors you want to imply.
Keep a ruler or stud-measuring guide handy. At microscale, a single stud off can throw off the entire proportion. I have rebuilt entire sections because I miscounted by one stud and the building looked wrong. Precision matters more here than at any other scale.
Best LEGO Pieces for Microscale Skyscraper Walls and Facades
Piece selection is where microscale skyscraper building becomes an art form. You are not building walls in the traditional sense — you are suggesting walls using surfaces, textures, and implied features. The right pieces can make a plain stack of bricks look like a gleaming glass tower or a detailed art deco landmark.
For smooth curtain-wall facades — the glass tower look — tiles are your best friend. 1×2 and 1×4 tiles in trans-clear, light bluish gray, or white create clean horizontal lines that read as continuous glass. Stack them with a one-plate gap between rows to suggest floor divisions. This technique mimics the banded glass appearance of modern skyscrapers with just two piece types.
For more textured facades, cheese slopes (the small 1×1 30-degree slope pieces) are incredibly versatile. Placed in rows, they suggest cornices, window hoods, or decorative banding. Headlight bricks — 1×1 bricks with a stud on the side — create recessed window openings that add depth to flat walls. Window panels and 1×2 transparent elements work as individual lit windows when viewed at distance.
Here are the pieces I reach for most when building microscale skyscrapers:
- 1×1 and 1×2 tiles in light bluish gray, dark bluish gray, white, and black
- Cheese slopes (design 50746) in matching colors for cornices and detailing
- 1×1 bricks with studs on sides (design 47905) for recessed window effects
- 1×2 and 1×4 jumper plates to offset window patterns by half a stud
- 1×1 round bricks and 1×1 round plates for spire construction and antenna details
- 1×2 grille tiles for louvered or mechanical floor appearance
- 1×1 trans-clear and trans-blue tiles for window glints
Color discipline is just as important as piece selection. Resist the urge to use too many colors. A convincing skyscraper typically uses two to three shades at most — a primary wall color, a secondary accent, and perhaps a contrasting crown or base. The LEGO Architecture Skyline sets demonstrate this beautifully, often using monochrome or near-monochrome palettes that read clearly as specific real-world materials like limestone, glass, or steel.
Step-by-Step: How to Build a Microscale Skyscraper on a Small Baseplate
Now let us walk through the actual construction process. I will break this into clear steps that you can follow whether you are building your first microscale tower or your fiftieth. This is the same sequence I use every time, refined over dozens of builds.
Step 1: Establish Your Footprint on the Baseplate
Place your baseplate flat and decide where your skyscraper will stand. Lay down a single layer of plates or tiles to mark the building footprint. This is your foundation layer, and it should be solid — every layer above it depends on this being stable and well-connected. If your baseplate is 16 by 16 and your skyscraper will be 5 by 5 studs, position it off-center to leave room for a small plaza or neighboring elements. A centered building on a square baseplate looks static and unnatural.
Step 2: Build the Base and Lower Floors
The first 6 to 8 brick heights form the base of your skyscraper, and this section should look heavier and more grounded than the tower above. Use darker colors or denser piece patterns here. Real skyscrapers often have a podium or wider base, so consider making the bottom 2 to 3 studs wider than the main shaft. Taper inward using slope pieces or jumper plates to create the transition from base to tower. This taper is one of the most effective techniques for selling vertical scale — the eye perceives the narrowing as height.
Step 3: Build the Main Shaft
The shaft is the tall, repetitive middle section of your skyscraper, and it is where the seed piece concept pays off. Choose your window pattern — banded horizontal, grid, or stacked — and repeat it consistently for the full height of the shaft. The repetition is what makes the building read as a multi-story structure. I typically build the shaft in sections of 4 to 6 bricks at a time, checking alignment frequently. Slight misalignments compound over height, so keep everything tight and square.
For the shaft walls, here is my go-to pattern: two rows of 1×2 tiles in your wall color, followed by one row of plates in a contrasting shade to suggest floor divisions. Repeat this three-tall pattern all the way up. It creates a banded appearance that strongly evokes modern curtain-wall construction. At a viewing distance of a foot or two, the texture reads as floors and windows without needing actual window pieces.
Step 4: Add Setbacks and Tier Transitions
Real skyscrapers, especially classic New York and Chicago styles, step inward as they rise. These setbacks are mandated by zoning laws and define the iconic silhouette of pre-war towers. To create setbacks in microscale, use jumper plates to shift your wall inward by half a stud, or use slope bricks to create a visible step. A setback roughly two-thirds of the way up dramatically improves the skyscraper silhouette. It creates a visual break that implies separate building masses stacked on top of each other.
Step 5: Build the Crown and Spire
The top of your skyscraper is where personality lives. Options include a flat modernist roof with mechanical details, a stepped pyramid using slope pieces, a domed crown using round elements, or a spire reaching skyward. For spires, 1×1 round bricks topped with a cone piece or a antenna element create an instantly recognizable skyscraper profile. The Chrysler Building, Empire State Building, and Bank of America Tower all have distinctive crowns — study real-world examples for inspiration.
Keep the crown proportional to the shaft. A crown that is too large will make your building look top-heavy and unstable. One that is too small will look like an afterthought. I aim for the crown to occupy roughly the top 15 to 20 percent of total height.
Step 6: Add Surrounding Context Elements
A skyscraper alone on a bare baseplate looks incomplete. Add a few small context elements to sell the urban scale: a tiny park using 1×1 round plates as trees, a neighboring low-rise building, or a suggestion of streets using tile patterns. These elements do not need to be detailed — they just need to exist at a consistent scale with your skyscraper. Even a 2×2 tile with a single round plate on top reads as a small tree from across the room, and that is all you need.
Step 7: Review, Adjust, and Photograph
Step back and look at your skyscraper from a distance of at least three feet. This is the viewing distance at which most people will see your model, and details that look essential up close often disappear. What reads from across the room is silhouette, proportion, and color contrast. If the building looks flat, add subtle texture. If it looks too wide, add height. If it looks unstable, widen the base. Take reference photos at this stage — camera angles reveal proportion issues the eye often misses in person.
Detailing Techniques That Make Microscale Skyscrapers Look Convincing
Detailing at microscale is not about adding more elements — it is about choosing the right few elements that imply complexity. The best microscale skyscrapers suggest enormous detail through strategic placement of a handful of small pieces. Here are the techniques that consistently produce convincing results.
Window patterns are the single most important detailing element. Even if you do not use transparent pieces, the pattern of recesses and projections on the facade should imply windows. Vertical window mullions can be suggested using 1×1 plates placed at regular intervals along a tile surface. Horizontal floor lines are best created with color banding — alternating shades of gray between rows creates the striped appearance of a multi-story building without needing separate window pieces.
Color banding deserves special attention. Many convincing microscale skyscrapers use two shades of the same color — light bluish gray and dark bluish gray, for example — to create subtle floor divisions. The contrast should be noticeable but not jarring. Think of it as the difference between limestone and granite on a real building facade. This two-tone approach is far more effective than using wildly different colors, which breaks the illusion of a single structure.
Setbacks and step-backs add visual interest to long vertical stretches. Every 8 to 12 bricks of height, consider a slight inward step. This breaks up the monotony of a straight shaft and mimics real skyscraper massing. Even a half-stud setback using jumper plates creates a visible shadow line that adds depth and realism.
For crown detailing, look at real skyscraper tops for inspiration. Art deco crowns use stepped pyramids created with cheese slopes and 1×1 slope bricks. Modern glass crowns use trans-clear tiles stacked in diminishing sizes. Communication antennas and spires use 1×1 round bricks, bars, and specialized antenna elements. A well-executed crown elevates the entire model from a tall box to a recognizable building.
Common Microscale Skyscraper Mistakes and How to Avoid Them
Even experienced builders fall into common traps when working at microscale. Here are the mistakes I see most frequently and how to prevent them.
Building too wide relative to height. This is the number one issue. A skyscraper that is 8 studs wide and 16 bricks tall looks like a shed, not a tower. Push for a width-to-height ratio of at least 1:6 for towers. If your footprint is 4 studs, aim for at least 24 bricks of height. When in doubt, go taller.
Using too many colors. Microscale amplifies color contrast because each piece represents such a large surface area at implied full size. A skyscraper with five colors looks like a toy, not a building. Limit yourself to two or three shades. If you want visual variety, use texture and pattern rather than color.
Ignoring structural stability. Tall, narrow builds are inherently unstable. Ensure your base is solidly connected to the baseplate and that the shaft is built with interlocking bricks, not just stacked plates. S-light lateral pressure can topple a wobbly microscale tower. Use 1×1 bricks with studs on sides to create internal cross-bracing where possible.
Inconsistent scale within the build. If your windows imply one scale but your doors imply another, the model will feel off. Keep your seed piece reference consistent throughout. This is especially important when adding context elements — a tree or car that is too large will make your skyscraper look smaller than intended.
Skipping the planning phase. I cannot count how many microscale builds I have started enthusiastically only to tear them apart halfway through because the proportions were wrong. Five minutes of planning — deciding footprint, height, scale, and color scheme — saves hours of rebuilding. Use Bricklink Studio or even a quick pencil sketch before placing a single piece.
Forgetting tweezers. Working with 1×1 elements by hand is frustrating and slow. A good pair of tweezers is the single most useful tool for microscale building. Many builders on Reddit and in LEGO forums swear by them, and after you use them once, you will never go back. They also help with placement precision, which is critical at this scale.
Frequently Asked Questions About Microscale Skyscraper Builds
What is the 5/2 rule in LEGO?
The 5/2 rule is a technique for building strong LEGO walls using overlapping bricks. For every 5 studs of wall length, overlap at least 2 studs with the adjacent brick. This prevents weak seams and ensures the wall holds together under stress. In microscale skyscraper building, this rule helps keep tall, narrow structures stable despite their small footprint.
How to build a mini skyscraper?
Start by choosing a small baseplate and deciding your building footprint — aim for 4 to 6 studs wide. Pick a seed piece to establish scale, build a wider base for the first 6 to 8 bricks, then construct the main shaft with a repeating window pattern. Add setbacks partway up, finish with a distinctive crown or spire, and surround the tower with small context elements like trees or a plaza to sell the urban scale.
What is the easiest LEGO scale to build?
Minifigure scale is generally considered the easiest because proportions are intuitive — a door fits a minifigure, a car fits a minifigure, and standard brick sizes map naturally to everyday objects. Microscale is more challenging because you must imply details rather than build them explicitly. However, microscale uses fewer pieces and less space, making it accessible for builders with limited collections.
How to make a skyscraper step by step?
First, establish your baseplate footprint and lay a solid foundation layer. Second, build a wider, heavier base section for 6 to 8 bricks. Third, construct the main shaft with a consistent repeating window or floor pattern. Fourth, add setbacks or tier transitions partway up. Fifth, build a proportional crown or spire. Finally, add surrounding context elements like small buildings, trees, or street details to reinforce the scale.
What pieces work best for microscale LEGO windows?
For microscale windows, 1×1 and 1×2 tiles in transparent colors work well for glints of glass. Cheese slopes suggest window hoods and cornices. Headlight bricks create recessed openings. Jumper plates offset window grids by half a stud for more complex patterns. Grille tiles suggest mechanical floors or louvers. The key is consistency — pick a window element and repeat it across the facade.
Final Thoughts on Building Microscale Skyscrapers
Learning how to build a convincing microscale skyscraper on a small baseplate is a skill that rewards patience and intentionality. The constraint of limited space pushes you to think differently about every piece, every proportion, and every color choice. That is what makes it such a satisfying branch of the LEGO hobby.
The techniques in this guide — seed piece scale determination, banded window patterns, setback massing, disciplined color palettes, and contextual surroundings — form a toolkit you can apply to any future build. Start with a single skyscraper on a 16 by 16 baseplate. Once you are happy with the result, try building a companion tower next to it, or expand to a full microscale city skyline. Each build teaches you something new about proportion, stability, and the art of suggestion.
Remember that the most convincing microscale builds are not the ones with the most pieces. They are the ones where every piece is deliberate. Study real skyscrapers, experiment with techniques, and do not be afraid to rebuild. Your first microscale skyscraper might take an afternoon. Your tenth will come together in under an hour, and you will see the world differently — noticing floor counts, facade patterns, and crown shapes on buildings you walk past every day.
Grab a small baseplate, sort your tiles and slopes, and start building upward. The skyline is waiting.