
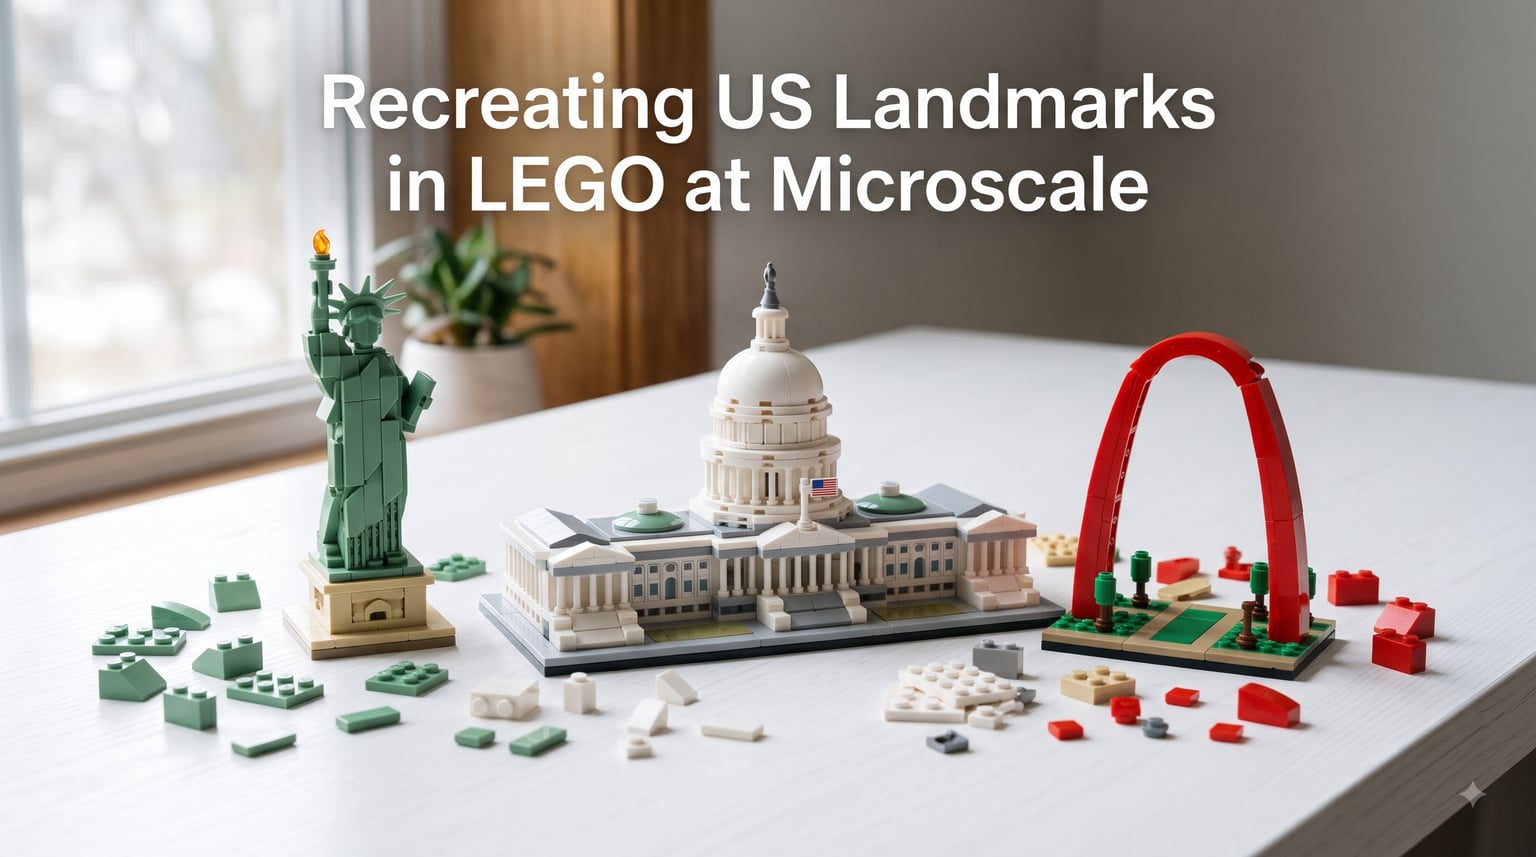
Recreating US Landmarks in LEGO at microscale is a specialized building style that compresses iconic buildings, monuments, and skylines into compact models smaller than minifigure scale. I have spent the last three years experimenting with microscale techniques, and the moment I rebuilt the Statue of Liberty in under 200 pieces I knew this niche deserved more attention. This guide covers everything you need to start your own microscale collection, from picking the right scale ratio to choosing which US landmark to tackle first.
Microscale building matters because full-size landmarks would take hundreds of thousands of pieces and years to finish. Microscale brings those massive structures down to desktop size, and the process teaches you how to “read” architecture through brick silhouettes. By the end of this guide, you will know the exact scale ratios, the pieces that work best, and the step-by-step workflow I use for every US landmark build.
Table of Contents
What Is Microscale LEGO Building?
Microscale LEGO building is a construction style that creates models smaller than minifigure scale, using standard LEGO elements to represent large objects like iconic landmarks. The general aim of microscale building is to capture the likeness and silhouette of the real thing using the smallest practical pieces.
Microscale sits below minifigure scale (the standard 1:40 ratio used for city buildings). Most microscale builders work in the 1:300 to 1:2000 range, with 1:650 being the most common ratio for modern LEGO Architecture sets. Anything smaller than 1:300 generally qualifies as “micro” because the pieces stop representing real-world objects and start representing clusters of them.
Microscale has roots in the original LEGO Modulex system from the 1960s. Modulex produced smaller bricks specifically for architectural models, and the scale carried forward when adult fans picked it back up in the 2000s. Today, microscale has its own thriving community on Flickr, Reddit, and Rebrickable, where builders share custom instructions for landmarks around the world.
Microscale vs Minifigure Scale at a Glance
Minifigure scale treats each brick as roughly 8 feet wide, which works great for a single storefront but becomes impractical for an entire city. Microscale treats each brick as a section of wall or a cluster of windows, which lets you fit an entire skyline on a single baseplate. The trade-off is detail: you have to suggest features rather than build them literally.
How to Choose the Right Scale for Your Build
Choosing the right microscale scale starts with two questions: how big is the real landmark, and how much shelf space do you have? A 1:650 ratio keeps most US landmarks under 30 cm tall. A 1:2000 ratio drops the same landmark to under 10 cm. I keep a small reference chart taped to my workbench for fast decisions.
Common Scale Ratios for Microscale Landmarks
1:300: Standard for detailed urban microscale. Works well for a single building or a small block of structures. Expect 300 to 600 pieces per landmark.
1:650: The LEGO Architecture default ratio. Captures the most detail per cubic centimeter. Good for landmarks with distinctive features like the White House or Lincoln Memorial.
1:1200: Mid-range cityscape scale. Lets you fit a downtown core onto a 32×32 baseplate. Loses fine detail but keeps silhouettes clean.
1:2000: Continent-spanning scale. Useful when you want to fit multiple landmarks together. Stick to landmarks with strong outlines, since small details vanish at this size.
When I am building a single US landmark, I default to 1:650. When I am building a skyline or a regional diorama, I drop to 1:1200. I only go smaller when I need to fit something truly massive, like the full Mount Rushmore on a single plate.
Measure your display shelf first. Most microscale builds between 15 and 25 cm tall look best because they line up with a standard bookshelf row. Anything taller competes with minifigure-scale buildings on the same shelf.
Essential Microscale Building Techniques
The best microscale building techniques rely on element repurposing, the 5/2 rule, and SNOT (Studs Not On Top) construction. These three skills cover about 90 percent of every microscale US landmark I have built. Mastering them turns a pile of small pieces into recognizable architecture.
The 5/2 Rule in LEGO
The 5/2 rule is a stability trick: for every 5 studs of horizontal length, drop down 2 plates vertically to lock the structure together. This rule prevents the wobble that ruins tall microscale towers. I apply it to every column, wall, and tower in my builds. Without the 5/2 rule, the Empire State Building replica I made last spring kept collapsing at the antenna stage.
Element Repurposing Tricks
Microscale thrives on turning the wrong piece into the right shape. A 1×1 tile with a clip becomes a fire escape. A roller skate element becomes a classic car. A green plant piece becomes a tree on a city block. The Brothers Brick and Bricksfanz both run galleries of these part-swaps, and they are how I finish my US landmarks without buying specialty elements.
Here are the swaps I use most often:
1×2 tiles become modern windows on skyscrapers.
Grille plates (1×2 with center stud) become arched doorways.
Minifigure legs become classical columns for federal buildings.
Boat hulls flipped upside down become curved roofs or hull-shaped domes.
Plant stalks and leaves become trees and landscaping.
SNOT Techniques for Clean Walls
SNOT (Studs Not On Top) lets you rotate elements so the studs face outward, which keeps wall surfaces clean. For US landmarks like the Capitol or Lincoln Memorial, clean white walls matter because the building’s shape is the entire point. I keep a small parts drawer of jumper plates, headlight bricks, and 1×1 plates with side studs just for SNOT work.
Famous US Landmarks to Recreate at Microscale
The best US landmarks to recreate at microscale are the ones with strong silhouettes and instantly recognizable shapes. Mount Rushmore, the Statue of Liberty, and the Gateway Arch all read clearly even when shrunk to under 10 cm. I keep a personal goal of building at least one new US landmark per month, and these are the builds that taught me the most.
Statue of Liberty
The Statue of Liberty is a perfect first microscale project. The green patina, the spiked crown, and the raised arm read clearly at any size. I built mine at 1:650 using a sand-green slope stack for the robe and a 1×1 cone for the torch flame. The base is a stack of grey plates wrapped with railing elements for the pedestal walkway.
Start with the pedestal as a simple 4×4 or 6×6 stack. Add the robe as a sloped cylinder. Cap the figure with a 7-point crown made from clip plates around a central stud. The torch arm is the hardest part. I use a flex hose piece bent at the elbow with a translucent yellow cone on top.
Mount Rushmore
Mount Rushmore rewards builders who can handle organic shapes. The mountain is a stacked slope build in dark tan and grey, with the four faces carved into a flat front panel. I used SNOT tiles to add the eye sockets and bridge of the nose. Master builder Rocco Buttliere has done Mount Rushmore at much larger scale, but a 1:2000 microscale version fits on a single 16×16 baseplate and still reads as Rushmore.
Golden Gate Bridge
The Golden Gate Bridge is more about span than height. Build the towers first as 2×2 stacked columns with red plates, then add the suspension cables using thin black flex hoses or string between the tower tops and the roadbed. The roadbed is a long flat plate in dark grey. I painted a paper water sheet underneath to suggest San Francisco Bay, though LEGO waves work too.
White House
The White House looks plain in photos but is surprisingly tricky at microscale. The trick is the columns. Use minifigure legs or 1×1 round bricks stacked to form the South Portico. The main body is a clean white SNOT box. I lost my first attempt to inconsistent column spacing, so I now use a brick separator to nudge pieces into even rows.
US Capitol Building
The Capitol is one of my favorite microscale builds because the dome is so recognizable. LEGO released an official set (21030) that captures the spirit, but a custom microscale version uses a hemisphere piece or stacked curved slopes for the dome. The Senate and House wings extend on either side, and the front steps are just a few stacked plates in white.
Gateway Arch
The Gateway Arch in St. Louis is a true microscale-friendly landmark. The whole structure is essentially a curved triangle. Use two long slopes meeting at the top for the arch itself, with a 1×1 plate underneath as the gap. The base is a small dark grey plate to suggest the riverside foundation.
Empire State Building
The Empire State Building needs height more than anything else. Build a square tapered tower in grey SNOT, with setbacks every few stories to mimic the real Art Deco profile. The antenna spire on top is a 1×1 stacked cylinder in dark grey. Add small 1×1 tiles as windows in vertical stripes down each face.
Lincoln Memorial
The Lincoln Memorial is one of the most satisfying microscale builds I have done. The Doric columns line up perfectly when spaced using the 5/2 rule. The statue inside is a simple white torso piece, and the steps are stacked grey plates in three tiers. The whole model fits in your hand but instantly reads as Lincoln.
Step-by-Step Guide to Recreating US Landmarks
Recreating US landmarks at microscale follows a five-step workflow I use on every project. This process takes me about 6 to 10 hours per landmark spread across a weekend. Rocco Buttliere has mentioned similar workflows in interviews, scaled up for his 114,000-piece Jerusalem build. The same principles apply whether you use 200 pieces or 100,000.
Step 1: Gather Reference Images
Start by collecting at least four reference photos of your landmark from different angles. I pull these from Wikipedia, Google Earth, and architectural sites. Save them to a folder on your phone so you can flip back and forth while you build. Print a single front-view image in miniature to keep next to your baseplate as a silhouette guide.
Step 2: Choose Your Scale and Footprint
Decide on a scale ratio based on the size of the real landmark and your available shelf space. Sketch the footprint on paper first. Most US landmarks fit on a 16×16 or 32×32 baseplate at 1:650. Lay out your planned footprint with pencil lines before placing any bricks.
Step 3: Build the Base and Silhouette
Start with the base or foundation. Add the main mass of the landmark using slope pieces for roofs and SNOT tiles for walls. Do not add details yet. The goal at this stage is to get the silhouette recognizable from across the room. I always check by stepping back two meters and squinting at the build.
Step 4: Add Architectural Details
With the silhouette locked in, add windows, columns, and signature features. This is where element repurposing shines. Add the Statue of Liberty’s crown, the Capitol’s dome, or the Lincoln Memorial’s columns. Photograph each detail layer so you can debug issues before they get buried.
Step 5: Final Touches and Display
Add landscaping, vehicles, and people if the scale allows. At microscale, a single LEGO microfigure or a minifigure leg as a pedestrian is plenty. Mount the finished build on a wooden base or display plate. Take final photos with good lighting against a clean background.
Best LEGO Sets for Microscale Building
The best LEGO sets for microscale building are the official LEGO Architecture landmarks, the 10255 Mini Modulars collection, and bulk brick packs from LEGO’s Pick a Brick wall. I started my microscale journey by disassembling a few Architecture sets I already owned, which gave me a deep library of white tiles, slopes, and SNOT plates to work with.
The LEGO Architecture Studio book is another solid resource. It contains design advice from top architects and showcases microscale landmark studies. Many microscale builders on Reddit cite it as their introduction to the niche.
For US landmarks specifically, the LEGO Architecture line includes the Lincoln Memorial (21022), US Capitol Building (21030), Statue of Liberty (21042), and White House (21054). These are larger than pure microscale but use the same techniques and pieces. I keep one on my desk for reference while I build the microscale versions.
BrickLink Studio is the planning tool I recommend for serious microscale builders. It is free, lets you build in 3D with a full parts catalog, and helps you calculate exact part counts before you spend money. Rebrickable is where I source custom instructions and rare parts when I need a specific element.
Common Mistakes to Avoid in Microscale Builds
The most common microscale mistakes are scale drift, ignoring proportions, and skipping the reference check. I have made all of them. Here is what to watch for before you commit hours to a build.
Scale drift: Mixing 1:650 and 1:1200 elements in the same build breaks the illusion. Pick one scale and stick with it.
Wrong piece choices: Standard 1×1 bricks look chunky at microscale. Use 1×1 tiles and plates for cleaner surfaces.
Weak bases: Tall microscale towers wobble if the base is too small. Always build at least a 4×4 footprint for towers over 15 plates tall.
Skipping references: Building from memory leads to inaccuracies. Keep your reference photos open the entire time.
Over-detailing: Adding too many small pieces at microscale turns into visual noise. Suggest details with 2 or 3 elements rather than 10.
Photography and Display Tips for Microscale Builds
Microscale builds benefit from forced perspective and clean backgrounds. I shoot my microscale US landmarks on white poster board with two small LED panels for soft lighting. A macro lens or clip-on phone lens helps capture the tiny details. Display cases with clear acrylic lids keep dust off and protect the build from curious hands.
For shelf display, group microscale landmarks by region. A DC monuments shelf with the Capitol, Lincoln Memorial, and White House reads as a complete diorama. A west coast shelf with the Golden Gate Bridge, Hollywood sign, and Space Needle tells a different story. Both work.
FAQs
What is microscale in LEGO?
Microscale in LEGO refers to building models smaller than minifigure scale, typically between 1:300 and 1:2000 ratio. Builders use standard LEGO elements to suggest full-size structures and landmarks, focusing on silhouette and proportion rather than literal detail.
How to build a LEGO building step by step?
Start by gathering reference images of the real building. Choose a scale ratio (1:650 is most common). Sketch the footprint, build the base and silhouette first, then add architectural details, and finish with landscaping and display mounting.
What is the 5/2 rule in LEGO?
The 5/2 rule is a stability technique for microscale builds. For every 5 studs of horizontal length, drop down 2 plates vertically. This locks the structure together and prevents tall towers and walls from wobbling or collapsing.
Are LEGO Architecture sets to scale?
LEGO Architecture sets use approximately 1:650 scale, which qualifies as microscale because it is smaller than minifigure scale. Each Architecture model represents a real-world landmark proportionally, though proportions are sometimes simplified for buildability.
What was the first LEGO Architecture set?
The first LEGO Architecture set was the LEGO Architecture Studio book released in collaboration with Wired magazine, followed by the Sears Tower set in 2008. The theme officially launched with the 2008 release that included the Empire State Building, Seattle Space Needle, and others.
How do I choose the right scale for my microscale build?
Pick a scale based on the landmark’s real size and your shelf space. Use 1:650 for single detailed landmarks, 1:1200 for cityscapes, and 1:2000 for continents or regions with multiple landmarks. Measure your display area before you start building.
Start Building Your Microscale US Landmark Today
Recreating US Landmarks in LEGO at microscale is one of the most rewarding niches in the hobby. You start with a pile of small pieces and end with a desktop-sized version of the Statue of Liberty, Mount Rushmore, or the Capitol dome. I have built dozens of microscale US landmarks over the past three years, and each one teaches me something new about both architecture and LEGO techniques.
Pick one landmark from this guide, gather your references, and set aside a weekend. Start with the Statue of Liberty if you want a forgiving first project, or jump into the Lincoln Memorial if you want to practice column work. The microscale community on Reddit and Rebrickable is full of builders sharing instructions, so you will never run out of inspiration. Have fun building, and I would love to see what you create.