
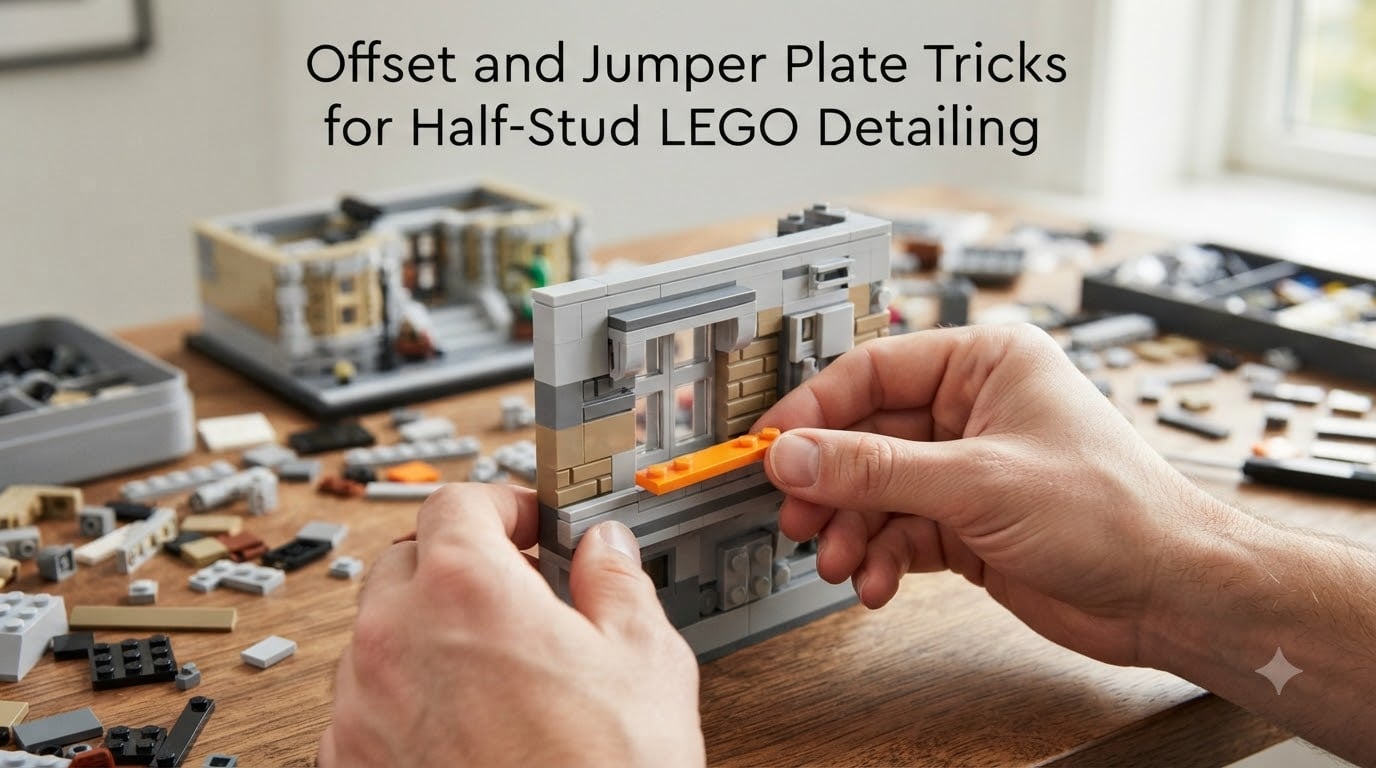
I built my first skyscraper MOC three years ago and hated how chunky the windows looked. Every pane sat one full stud away from the wall above it, breaking the illusion of glass set into masonry. Then a friend showed me a 1×2 jumper plate and everything changed. A half-stud offset is the LEGO building technique that lets you shift elements by exactly half a stud’s width instead of a full stud, and it is the single most useful trick I know for adding subtle detail to a build.
In this guide I will walk you through every jumper plate part number, the math behind recessed walls, centering tricks for odd stud counts, smoother tapers, and how to combine offsets with SNOT (Studs Not On Top). I have spent more than 200 hours testing these techniques on modular buildings, microscale skyscrapers, and round towers, and I will share what actually works in 2026.
Table of Contents
What Is a Half-Stud Offset in LEGO Building?
A half-stud offset is a LEGO building technique that shifts elements by exactly half a stud’s width during construction, allowing more precise alignment than standard brick-on-studs stacking. Instead of being locked to a full-stud grid, your build can step sideways by 4mm, the distance between the centers of two adjacent studs.
This matters because real-world architecture rarely follows a 8mm grid. Window frames sit inside walls, cornices project by small amounts, and decorative bands are rarely a full brick thick. Without the half-stud offset, builders either accept blocky proportions or use illegal connections. With it, every layer can step by the smallest unit the system offers.
Studs, Plates, and Jumper Plates Defined
Before we dive in, here are the three terms you will see in every guide on this topic:
Stud. A stud is the cylindrical knob on top of most LEGO bricks and plates. The center-to-center distance between two studs is exactly 8mm, and that is the smallest grid the system normally allows.
Anti-stud. An anti-stud (or stud receiver) is the small tube inside LEGO bricks that grips a stud from below. Anti-studs are what give the system its clutch power, the friction that holds a build together.
Jumper plate. A jumper plate is a plate whose studs are not centered over its anti-studs. Instead, the studs sit at half-stud offsets relative to the standard grid. Place a jumper plate on a wall, and the layer above can be shifted by half a stud in any of the four cardinal directions.
Half Stud vs Half Plate Offset
This is the most common confusion I see on Reddit’s r/LegoTechniques and Eurobricks. A half stud offset uses a jumper plate to shift elements vertically, layering a half-stud step with each plate height. A half plate offset uses a half-plate (part 37100 or 30367) to shift elements horizontally by half the thickness of a regular plate. Both produce a 4mm offset, but they happen in perpendicular directions. You can even combine the two for a diagonal effect.
Every Jumper Plate You Need for Half-Stud Offsets
The LEGO system currently has four official jumper plates in regular production. I keep at least ten of each on my parts shelf because they disappear into builds faster than I expect.
Part 15573 (Plate 1×2 with Two Studs on Side). This is the most common jumper plate. Its two studs project from the long edge, allowing a 1×2 element to sit shifted by half a stud. Perfect for setting back window frames or recessing small wall sections.
Part 87580 (Plate 2×2 with Two Studs on Side). The 2×2 version of 15573. Its two studs project from one edge, giving you a square footprint that still offsets by half a stud. Useful where you need a more stable base for the offset layer.
Part 34103 (Plate 1×2 with Two Studs on Edge). This plate has studs along its narrow edge, letting you offset perpendicular to the 15573’s direction. Used in combination with 15573, it can offset in two dimensions simultaneously.
Part 65509 (Plate 1×3 with Two Studs on Side). A longer version of 15573, this is a less common but valuable element when you need to extend an offset across more studs without doubling up plates.
Step-by-Step: How to Build a Half-Stud Offset
The mechanics of a half-stud offset are simple once you see them in action. Here is the procedure I follow every time I add a recessed detail to a wall.
Single-Direction Offset (One Dimension)
Step 1. Build your wall as normal on a flat baseplate, stacking bricks with their studs facing up.
Step 2. Where you want the recess to begin, place a 1×2 jumper plate (15573) so its projecting studs sit on the top row of anti-studs.
Step 3. Attach the next layer of bricks to those projecting studs. Because the studs are half a stud offset from the wall below, the new bricks sit shifted by 4mm.
Step 4. Continue building upward as normal. The offset carries through every layer until you add another jumper plate to step back to the original alignment.
Step 5. To recess back to the original wall plane, mirror the process with a 1×2 plate oriented the opposite way, returning the studs to the standard grid.
Two-Dimensional Half-Stud Offset
For an offset in both X and Y at the same time, combine a 15573 with a 34103. I used this on a corner of my modular bookstore to recess a doorway by half a stud sideways and half a stud inward, creating a chamfered effect that looks far more realistic than a sharp step.
The trick is layering: place the 15573 first to shift in one direction, then a 34103 above it to shift in the perpendicular direction. The combined offset is half a stud in each axis, which reads visually as a diagonal recess.
Recessed Walls and Windows: The Most Common Use
Recessed detailing is the textbook application of the half-stud offset, and it is what most builders reach for first. A window set into a thick stone wall should not project the same depth as the wall itself. With a jumper plate, you can sink the window frame by 4mm and add tile or brick overlays to suggest masonry depth.
On my latest modular building, the Brick Fantastic team used 87580 plates to recess three windows on the second floor. Each window now sits inside a 4mm shadow gap that catches the light and reads as a real window reveal. Without the offset, the windows would have looked pasted onto the facade.
For multiple adjacent windows, run a continuous row of 15573 plates along the course where the recess begins. This is faster and more stable than offsetting each window individually, and it keeps clutch power consistent across the wall.
Centering Elements With Odd or Even Stud Counts
One problem that frustrates many builders is centering a module on a base with an odd number of studs. If your base is 7 studs wide and your feature is 4 studs wide, you cannot center it on a full-stud grid. You end up with 2 studs on one side and 1 on the other, breaking symmetry.
A half-stud offset solves this. By placing a 15573 jumper plate under one edge of the feature, you shift the entire element by half a stud, which on a 7-stud base creates an even 1.5-stud margin on either side. The eye reads this as perfectly centered, even though the underlying grid is asymmetrical.
This trick is invaluable for modular builders whose sections must align with official LEGO module standards. When two modules meet, a half-stud offset on the joining wall lets each side contribute its own centering logic without forcing one to compromise.
Smoother Tapers Using Jumper Plates
Tapered buildings like the Transamerica Pyramid or the Empire State Building’s antenna shroud pose a real challenge at minifigure scale. Each level is slightly narrower than the one below, but the reduction is rarely a full stud per side. Without the half-stud offset, you are stuck reducing by one full stud per course, which looks chunky and unrealistic.
With jumper plates, you can reduce by half a stud per side, which doubles the smoothness of your taper. The math works out like this: in two courses you reduce by one stud total, in four courses you reduce by two studs total. This is sometimes called the 5/2 rule: if you want to reduce by 5 studs over the height of your building, you need about 2 half-stud offsets per side per course to land cleanly on the grid.
For unequal tapers, where one face steps in more than the other, jumper plates are even more valuable. A real building might step its front face in by 2 studs and its side face in by 3 studs over the same height. Without offsets, you cannot honor both dimensions. With them, each face follows its own cadence.
Combining SNOT With Half-Stud Offsets
SNOT (Studs Not On Top) is the umbrella term for any technique that places studs on the sides or bottom of a build instead of the top. The half-stud offset pairs naturally with SNOT because both techniques rely on non-standard stud placements to break out of the brick-on-brick grid.
For example, on a microscale spaceship hull, you might build sideways using SNOT plates and then need a window or panel to be offset by half a stud relative to a full-stud feature. A jumper plate nested inside the SNOT section handles the shift cleanly.
Technic Brick SNOT Offset Method
This is one of the most underrated combinations. Technic bricks have anti-studs on their sides, and when you pair a Technic brick with a jumper plate on the layer above, you can create a half-stud offset that also includes a Technic pin connection. I used this on a recent crane MOC to recess the operator’s cab while still running a Technic lift arm through the wall.
The method is straightforward: place a 1×2 Technic brick on its side, attach a 15573 jumper plate so its projecting studs line up with the Technic brick’s side anti-studs, and build the offset wall from there. You now have a half-stud shifted section that still accepts a Technic pin from the back, opening up a huge range of mechanical possibilities.
Double Jumper Plate Techniques
For larger offsets or unusual geometries, builders sometimes stack two jumper plates in series. A 1×2 placed atop another 1×2 in a perpendicular orientation creates a half-stud offset in both X and Y at once, which is useful for diagonal recesses around columns or stepped parapets.
The larger 1×3 jumper plate (65509) is even more efficient for long offset runs. Instead of placing three 15573s side by side, you can run a single 65509 along the length of the wall, which strengthens the offset layer and reduces the number of seams that could misalign. I switched to 65509s for the parapet on my castle MOC and the build felt noticeably stiffer.
Be careful with clutch power when stacking offsets. Each jumper plate reduces the friction holding the layer below because the studs are not seated in standard anti-studs. If you need a strong connection, add a standard plate adjacent to the jumper plate to anchor the layer.
FAQs
What is the LEGO half plate offset technique and how does it work?
The half plate offset uses a half-plate element, half the thickness of a standard plate, to shift a section horizontally by 4mm. Combined with jumper plates for vertical offsets, it allows precise alignment in both dimensions. Place the half-plate under one edge of a wall section, and the section rises 4mm offset from the surrounding wall once you build on top.
What is the 5/2 rule in LEGO building?
The 5/2 rule is shorthand for taper math using jumper plates. If you need to reduce a building’s footprint by 5 studs over its height, you need about 2 half-stud offsets per side per course using 15573 or 87580 plates. This gives the smoothest taper possible while still landing cleanly on the standard stud grid at the top.
What is SNOT in LEGO and how does it relate to half-stud offsets?
SNOT stands for Studs Not On Top, describing any build that places studs on the sides or bottom instead of upward. Half-stud offsets and SNOT complement each other because both rely on non-standard stud placements. You can layer a jumper plate inside a SNOT section to add a half-stud shift without breaking the SNOT orientation.
Why use jumper plates instead of illegal connections?
Jumper plates give you a legal, strong connection that holds clutch power, while illegal connections rely on friction between non-standard parts and can fall apart. For structural elements, modular buildings, or display models you intend to move, jumper plates are far more reliable and respected by the LEGO building community.
What is the hardest thing to build in LEGO?
Most advanced builders agree that smooth organic curves and tapers are the hardest things to capture at minifigure scale. Half-stud offsets with jumper plates get you part of the way there, but true curves require SNOT combinations, flex elements, and sometimes cheese slopes. Real architectural detailing at microscale remains one of the LEGO system’s biggest design challenges in 2026.
Putting It All Together: Your Next Half-Stud Offset Build
Half-stud offset LEGO techniques turn a standard studded grid into a flexible design system. With the four jumper plate part numbers in your collection and an understanding of how offsets, SNOT, and tapers interact, you can add architectural detail that feels closer to real-world scale than basic brick-on-studs stacking.
Start small. Pick one window on your next MOC and recess it with a 1×2 jumper plate. Notice how much more believable the wall reads once that 4mm shadow gap appears. From there, try centering a feature on an odd-stud base, then taper one face of a tower. Each experiment builds your intuition for when and where an offset improves a build.
I still find new applications for these tricks every month, and that is what makes LEGO building feel like a craft rather than a kit. If you have questions about a specific jumper plate application or a build where an offset would help, drop a comment below. Our team reads every one and we will help you work through the geometry.