
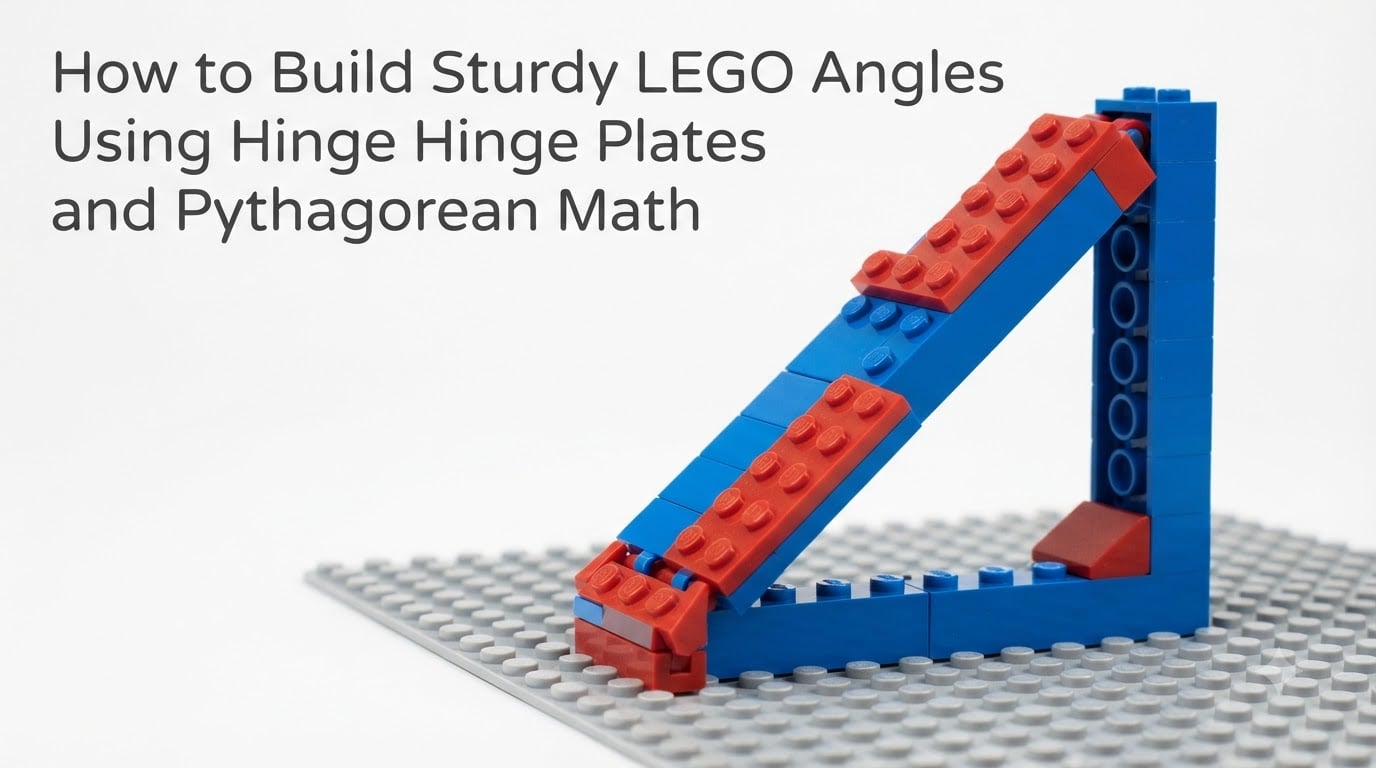
I built my first LEGO castle at age nine, and every wall stood perfectly perpendicular to the next. Straight lines. Square corners. Ninety degrees, every single time. Boring. By age fourteen I had tried to make a slanted roof and watched my hinge plates flop apart like a broken jaw. The fix turned out to be 2,500 years old. Pythagorean math, the same theorem Greek surveyors used to lay out temples, is what holds an angled LEGO wall together today. In this guide I will show you how to use that math, hinge plates, and a few other techniques to build LEGO angles that do not wobble.
By the end you will understand the LEGO grid problem, the 5/2 rule, how to read a Pythagorean triples table, and four proven techniques for off-grid building. You will also get a beginner-friendly walkthrough, a full section on near triples for 45-degree angles, and tips I learned the hard way for keeping angle connections sturdy. Whether you build modular buildings, architectural replicas, or wild sci-fi MOCs, these techniques will change what your models can do.
Table of Contents
Understanding the LEGO Grid Problem
Every LEGO brick locks onto the studs of the piece below it. Studs are spaced exactly 8mm apart, center to center, on every standard baseplate and every standard brick. That rigid spacing is what gives LEGO its satisfying click and what makes your builds hold together when you drop them. The catch is that bricks only connect in 90-degree increments along the grid.
Want a wall that points northeast? Your studs do not know what northeast means. Want a hexagonal tower, a chamfered corner, or a roof that slopes at 30 degrees? You cannot just rotate a brick and snap it down. The studs underneath will not line up with the tubes inside the rotated brick. To break free of the grid you have to use specific pieces (hinge plates, turntables, wedges) and you have to plan your geometry with the same math that surveyors have used since ancient Egypt.
The grid problem is the reason most builders never build at an angle. They try once, the piece does not snap down, and they give up. The trick is understanding that angled LEGO building does not try to defeat the grid. It uses the grid. You build triangles whose corners sit on grid points, and the angled sides become your off-grid walls.
What is the 5/2 rule in LEGO?
The 5/2 rule is a quick mental shortcut that experienced builders use to estimate whether an off-grid angle will actually lock in place. The rule says: if the rise over the run of your angled wall equals roughly 5 divided by 2 (a slope of 2.5), then you have a viable angle that will look right, fit within standard LEGO tolerances, and feel sturdy. Anything steeper than that becomes tricky with standard hinge plates, while anything shallower flops around without reinforcement.
The 5/2 ratio comes from the fact that a triangle with sides in the ratio 5:5:7 (a near triple) sits at about 50.7 degrees from horizontal. That is the practical upper limit for a clean 45-ish degree wall using common pieces. If you remember nothing else from this section, remember this: aim for slopes near 5/2 and your hinges will thank you. Slopes gentler than 5/2 are easier to stabilize. Slopes steeper than 5/2 need turntables or dual hinge plates to hold their shape.
The Pythagorean Theorem Explained for LEGO
The Pythagorean theorem is one sentence long: in a right triangle, the square of the longest side equals the sum of the squares of the two shorter sides. Written as a formula, it is a² + b² = c². The longest side (c) is called the hypotenuse. The other two sides (a and b) are the legs that meet at a 90-degree corner.
Why does this matter for LEGO? Because when you build an angled wall on a flat base, you are essentially building the hypotenuse of a triangle. The two legs of that triangle run along the baseplate, measured in studs. If those legs have whole-number stud counts (like 3 studs and 4 studs), the hypotenuse will land cleanly on another stud, and your wall will lock in place instead of hovering awkwardly between studs.
When the three sides are all whole numbers, mathematicians call it a Pythagorean triple. The smallest and most famous triple is 3-4-5. That means a triangle with legs of 3 studs and 4 studs has a hypotenuse of exactly 5 studs. Check the math: 3² + 4² = 9 + 16 = 25 = 5². It works. LEGO builders have known this trick since the 1970s, but the math behind it is what makes everything else in this guide click.
Here is the key insight. LEGO studs form a regular grid of integer coordinates. Every stud is at a point like (0, 0), (1, 0), (2, 3), (5, 12), and so on. A Pythagorean triple tells you which pairs of grid points are a whole-number distance apart. When you know those distances, you can run a straight brick or plate between two studs that are not in the same row or column, and the piece will sit flush. That is the entire secret to off-grid building.
Quick vocabulary check
Hypotenuse means the longest side of a right triangle, opposite the 90-degree corner. Pythagorean triple means any set of three whole numbers (a, b, c) that satisfies a² + b² = c². Near triple means a set of three whole numbers that is close to satisfying the formula but not exact, used as a workaround for tricky angles like 45 degrees. Stud means the round bump on top of a LEGO brick. Stud spacing means the 8mm distance between the centers of adjacent studs.
Pythagorean Triples Reference Table for LEGO Builders
Every triple below will produce an angled wall that lands cleanly on stud intersections. The angle column tells you how steep the wall will stand when the legs are along your baseplate. Use this table whenever you plan a new angled build.
| Leg A (studs) | Leg B (studs) | Hypotenuse (studs) | Approx. Angle | Practical for LEGO? |
|---|---|---|---|---|
| 3 | 4 | 5 | 36.87° | Excellent for small models |
| 5 | 12 | 13 | 22.62° | Excellent for gentle slopes |
| 6 | 8 | 10 | 36.87° | Excellent (same angle as 3-4-5) |
| 7 | 24 | 25 | 16.26° | Great for low roof pitches |
| 8 | 15 | 17 | 28.07° | Excellent mid-range slope |
| 9 | 12 | 15 | 36.87° | Excellent for medium models |
| 9 | 40 | 41 | 12.68° | Very gentle, large builds |
| 10 | 24 | 26 | 22.62° | Great for long ramps |
| 12 | 16 | 20 | 36.87° | Excellent, very sturdy |
| 12 | 35 | 37 | 18.92° | Good for large architectural models |
| 15 | 20 | 25 | 36.87° | Excellent for big builds |
| 16 | 30 | 34 | 28.07° | Excellent mid-range |
| 20 | 21 | 29 | 43.60° | Great for steep angled walls |
| 20 | 48 | 52 | 22.62° | Great for very long ramps |
| 28 | 45 | 53 | 31.89° | Excellent for large modular builds |
| 33 | 56 | 65 | 30.51° | Excellent for very large builds |
| 48 | 55 | 73 | 41.11° | Great for near-45-degree walls |
| 65 | 72 | 97 | 42.08° | Excellent for massive angled walls |
Notice the 36.87-degree angle repeating across many triples. That is because 3-4-5, 6-8-10, 9-12-15, 12-16-20, and 15-20-25 are all just scaled versions of the same triangle. The shape is identical. Only the size changes. Pick whichever scale fits the size of your model. A small diorama might use 3-4-5. A giant castle might use 15-20-25. The angle is the same.
The 5-12-13 family (and its relatives like 7-24-25 and 10-24-26) gives a gentler slope of about 22 to 16 degrees. These are the angles you want for low-pitched roofs, ramps, or sleek modern building facades. The 8-15-17 family sits in the middle at about 28 degrees, which is perfect for the roof of a residential house.
For steep angles near 45 degrees, the 20-21-29 and 48-55-73 triples are your friends. These get you to 43.6 and 41.1 degrees respectively, which is close enough to 45 that most viewers will not notice the difference. For exact 45-degree builds, skip ahead to the near triples section below.
Hinge Plate Technique: Step-by-Step Beginner Guide
Hinge plates are flat plates with one or more built-in hinge knuckles. When you press two hinge plates together, the knuckles form a working hinge. The most useful pieces for off-grid building are the 1×2 hinge plate (Design 4215), the 1×4 hinge plate (Design 2529), and the 2×2 hinge plate with angled knuckles. Each one lets you rotate one section of bricks relative to another before locking it at a chosen angle.
The genius of hinge plates is that they connect two sections of bricks while allowing rotation. You build one section flat on the baseplate, build the second section flat nearby, then snap the hinge knuckles together and fold. The hinge holds the two sections together while letting you dial in the exact angle. Once the angle is right, you lock it by adding bricks above or plates behind.
Here is the exact sequence I use when I teach this in person. It works for a complete beginner who has never built off-grid before.
Step 1: Plan your triple
Decide which Pythagorean triple you want. For your first attempt I recommend 3-4-5. The legs are short enough that the model stays compact, and the resulting 36.87-degree angle looks dramatically different from a standard 90-degree wall. Grab your reference table above and circle the triple you plan to use.
Step 2: Lay down the leg bricks
Build two lines of bricks on your baseplate, one 3 studs long and one 4 studs long, meeting at a 90-degree corner. Use a 1×2 brick at the corner to anchor both lines. These two legs form the bottom edges of your right triangle. Make sure both legs are firmly attached to the baseplate.
Step 3: Place your hinge plate
Snap a 1×4 hinge plate flat onto the end of one leg (the 4-stud leg works well). Make sure the hinge knuckle runs perpendicular to the leg, pointing toward the open side of the triangle. The hinge should be able to swing freely toward where the hypotenuse will go.
Step 4: Build the hypotenuse
Attach a matching 1×4 hinge plate to the bottom of a row of bricks exactly 5 studs long. When you snap the two hinge plates together, the row will fold upward at an angle. The hinge knuckles should mesh cleanly with no forcing.
Step 5: Set your angle
Hold the hypotenuse bricks so the free end lines up directly over the end of the 3-stud leg. That is your 3-4-5 angle. Press the hinge closed gently until it clicks into a tight position. If the fit is slightly off, double-check your stud counts. A common beginner mistake is counting the hinge plate itself as part of the hypotenuse length.
Step 6: Lock it in
Build a layer of plates across the back of the angle to triangulate the wall. Two plates spanning from the hypotenuse down to the base create a rigid triangle that resists wobble. This is the secret to sturdiness and we will dig into it more in the tips section below.
Which hinge plate should you use?
Pick the 1×4 hinge plate for general angled walls. Pick the 1×2 hinge plate when space is tight or you only need a small swing. Pick the 2×2 hinge plate when you are building a heavy wall and need more gluing surface. Avoid using only one hinge in a tall wall. Two hinges spaced apart are far sturdier than one hinge in the middle.
Some builders prefer the click hinge variant, which has a ratcheting mechanism that locks at fixed angles. Click hinges are great for prototypes because they hold their angle without reinforcement. Standard friction hinges are better for final builds because they allow finer adjustment and sit flush when closed.
Near Triples for 45-Degree Angles
A perfect 45-degree angle would require a triangle with two equal legs and a hypotenuse equal to leg times the square root of 2. Since the square root of 2 is an irrational number (roughly 1.41421356 and on forever), there is no Pythagorean triple that gives exactly 45 degrees. You cannot build a perfect 45-degree angled wall with whole-number stud lengths. The math simply does not allow it.
That is where near triples come in. A near triple is a set of three whole numbers that gets you very close to the angle you want without exactly satisfying a² + b² = c². For 45 degrees, the near triples are 5-5-7, 7-7-10, 12-12-17, and 17-17-24. Each one represents an isosceles right triangle that is just slightly steeper or shallower than a perfect 45.
| Leg A (studs) | Leg B (studs) | Hypotenuse (studs) | Approx. Angle | Error vs 45° |
|---|---|---|---|---|
| 5 | 5 | 7 | 44.4° | -0.6° (slightly shallow) |
| 7 | 7 | 10 | 45.0° | +0.0° (effectively perfect) |
| 12 | 12 | 17 | 45.0° | +0.0° (effectively perfect) |
| 17 | 17 | 24 | 45.0° | +0.0° (essentially perfect) |
| 29 | 29 | 41 | 45.0° | +0.0° (essentially perfect) |
The 7-7-10, 12-12-17, and 17-17-24 combinations land almost exactly at 45 degrees. The math works out so cleanly because the LEGO tolerances (about 0.1mm per stud) absorb the tiny imperfection. A wall built with a 12-12-17 near triple will look indistinguishable from a perfect 45-degree wall at normal viewing distance.
The reason these near triples work so well is that LEGO bricks are physically forgiving. The tubes inside a brick are slightly wider than the studs on top, which creates a tiny bit of play. That play, multiplied across 17 studs, gives you enough wiggle room to absorb the fractional difference between an integer hypotenuse and the true square-root-of-2 length. In pure math the angle is not 45 degrees. In real plastic, it is.
How to make a 45 degree angle with LEGO
Step 1: Build two parallel legs of 12 studs each, meeting at a 90-degree corner with a hinge plate at the open end. Step 2: Build the hypotenuse as a row of bricks exactly 17 studs long, capped with a matching hinge plate. Step 3: Fold the hypotenuse up until both ends meet the open ends of the legs. Step 4: Add a layer of plates across the back to lock the triangle rigid. That is your 45-degree angled wall, and it will hold its shape even if you pick up the model.
For smaller models, use 7-7-10 instead. For very large models, use 17-17-24 or 29-29-41. The technique is identical. Only the brick counts change.
Turntable Technique
Turntables are circular pieces that rotate freely in 8 fixed positions. The 2×2 turntable (Design 4213) and the larger 4×4 turntable (Design 48173) are the workhorses of off-grid LEGO building. Each one gives you a hinged joint that clicks into one of eight angles, separated by 45 degrees.
When you need an angle that no Pythagorean triple can deliver, drop a turntable in. You get perfect 22.5-degree increments for free, no math required. The trick is to reinforce the turntable with bricks on both sides, since a turntable on its own tends to wobble under load.
Turntables shine when you need rotation rather than a fixed angle. A radar dish, a rotating gun turret, or a spinning sign all benefit from a turntable at the pivot point. The turntable holds the two halves of your model together while allowing full 360-degree rotation.
For round shapes, place a turntable in the center of your model and build outward radially. A circle built around a turntable rotates smoothly and can be set to any angle. Combine turntables with short hinge plates for compound angles that would otherwise be impossible. The LEGO Group uses this exact combination in the Carousel set and the Ferris Wheel to create smooth circular motion.
One advanced trick: stack two turntables with a plate between them. The bottom turntable handles rotation while the top turntable handles tilt. This combo gives you a ball-joint-like range of motion in a very compact footprint. Technic builders use this for articulating robot arms and steering mechanisms.
Mirrored Hypotenuse Technique
The mirrored hypotenuse trick lets you build chamfered corners without using two separate triangle builds. Build your angled wall as a single 3-4-5 triangle. Then build a mirror copy of that triangle and attach it back-to-back at the hypotenuse. The two hypotenuses share studs, and you are left with a clean angled edge that points outward in both directions.
This technique shines on building corners. Instead of a 90-degree corner, you get two angled walls forming a wider, chamfered corner. It is the same technique used on real-world buildings to soften hard corners and it shows up in modular LEGO buildings like the Assembly Square and the Creator Expert skyscrapers.
The mirrored hypotenuse works because both triangles share the same hypotenuse length. If your first triangle is 3-4-5, the mirror is also 3-4-5, just flipped. The two hypotenuses sit on the same row of studs, and the angled walls fan outward from that shared edge. The result is a V-shaped corner that looks intentional and architectural.
You can chain mirrored hypotenuses to create faceted curves. Three mirrored 3-4-5 triangles in a row give you a six-sided shape. Five mirrored triangles give you a ten-sided shape that looks almost round. This is how official LEGO sets build octagonal towers and round turrets without using a single curved piece.
Tips for Sturdy Angle Connections
The single biggest reason angled LEGO builds wobble is missing triangulation. A hinge plate on its own is a joint, not a structure. To make the joint rigid you have to close the triangle behind it. Lay a plate across the gap between the hypotenuse and the base. That single plate converts a wobbling flap into a stiff truss.
Think of it this way. A triangle is the only two-dimensional shape that cannot be deformed without changing the length of its sides. If you build a triangle out of LEGO plates, it holds its shape. If you build a square out of plates, it can flex at the corners. Triangulation means deliberately building triangles into your model so that the angles cannot drift.
Layer your plates. One plate is good. Two plates side by side is better. Three plates across the back of a tall angled wall is what the official LEGO designers reach for. The more you triangulate, the less wobble you get. For tall walls, run a vertical plate from the top of the angled section down to the baseplate to create a second triangle.
Use the longest practical hinge plate. A 1×4 hinge plate gives you four studs of connection. That distributes stress across more studs and keeps the joint tight. Avoid stacking multiple small hinges when one long hinge will do the same job. A single 1×4 hinge is stronger than two 1×2 hinges placed side by side.
Lock your angle before building above it. The moment your hinge plate is in position, snap a brick or two above the joint to lock the angle in. The weight of bricks above pushes the hinge closed and keeps it from drifting. This is especially important for click hinges, which can ratchet to the next position under load.
Avoid mixing hinge plates with friction pins unless you know what you are doing. Mixing systems can lead to connections that look right but pop apart under stress. If you must mix, test the joint by pressing on it from multiple angles before trusting it to hold weight.
Common mistakes to avoid
Do not forget to count the hinge plate itself when measuring your hypotenuse. The hinge plate adds one stud of length to each end. If your target hypotenuse is 5 studs and you build a 5-stud brick plus two hinge plates, your actual hypotenuse is 7 studs and your angle will be wrong.
Do not build an angled wall without anchoring both ends. An angled wall with only one anchored end acts like a lever. Any weight on the free end will pry the hinge open. Anchor both ends to the baseplate or to nearby walls before adding height.
Do not expect a single layer of plates to hold a tall angled wall. Tall walls need triangulation on multiple levels. Add a plate layer every four to six bricks of height to keep the wall rigid.
Jumper Plates for Half-Stud Offsets
Jumper plates (Design 3794, the 1×2 plate with one center stud) open up another dimension of off-grid building. A jumper plate shifts the stud grid by half a stud in one direction. When you stack jumper plates in specific patterns, you can create attachment points at half-stud increments that would otherwise be impossible.
This matters for angles because some Pythagorean triples require fractional stud counts when scaled down. The 3-4-5 triple at half scale would be 1.5-2-2.5 studs, which is not buildable with standard bricks. But with jumper plates, you can create attachment points at 1.5 and 2.5 stud offsets, effectively building the half-scale triple.
Combine jumper plates with hinge plates for even more angle options. A jumper plate on the baseplate gives your hinge plate a half-stud-shifted anchor point, which opens up near triples that would not otherwise work. This is an advanced technique, but it dramatically increases the range of angles you can achieve.
Real-World Examples from Official Sets
The LEGO Creator Expert Modular Building series uses hinge plate angles constantly. The Bookshop, the Detective’s Office, and the Corner Garage all contain at least one 3-4-5 angled wall, often paired with a mirrored hypotenuse to soften a corner. The Parisian Restaurant uses a 5-12-13 triple for its slanted roofline.
The LEGO Architecture skyline sets rely on near triples for their chamfered skyscraper tops. The 12-12-17 near triple shows up in several buildings, giving the models their signature tapered silhouettes. The Statue of Liberty set uses mirrored hypotenuses to create the flowing folds of the robe.
On the Technic side, the Porsche 911 GT3 RS and the Lamborghini Sián use Pythagorean triples for body panels that flow off-grid from a rigid chassis. The curved fenders and sloped hoods are all built on right triangles hidden under the surface bodywork. The math is identical to what you use for a castle wall, only the scale and the cosmetic covering change.
Once you start looking for Pythagorean triples in official sets, you will see them everywhere. The trick is to look at the underlying structure, not the decorated surface. Strip away the stickers and the printed tiles, and you will find right triangles holding the whole thing together.
Frequently Asked Questions
What is the 5/2 rule in LEGO?
The 5/2 rule is a quick mental shortcut for LEGO builders. If the rise over the run of your angled wall equals roughly 5 divided by 2 (a slope of 2.5), the wall will be sturdy and look right with standard hinge plates. The rule comes from the 5-5-7 near triple, which sits at about 50.7 degrees and is the practical upper limit for a clean 45-ish degree wall using common pieces.
How to make a 45 degree angle with LEGO?
Use a near triple like 12-12-17. Build two parallel legs of 12 studs each, meeting at a 90-degree corner. Build the hypotenuse as a row of bricks exactly 17 studs long, capped with a matching hinge plate. Fold the hypotenuse up until both ends meet the open ends of the legs, then add plates across the back to lock the triangle rigid.
Is brick bending illegal?
Brick bending is not illegal in any formal sense, but it is discouraged in official LEGO contests and it can damage or stress your bricks over time. The LEGO Group does not ban the practice outright, but competitive builders almost always avoid it because bent bricks lose their clutch power and look unprofessional.
What’s the hardest thing to build in LEGO?
Among the techniques in this article, building a perfectly stable off-grid angled wall is one of the harder challenges. Round shapes using turntables, accurate replicas of complex real-world architecture, and large-scale mosaics are all in the same category of advanced builds. None of them are impossible for a determined hobbyist, but they all require patience and planning.
Why are my LEGO angles wobbly?
Wobble usually comes from missing triangulation. A hinge plate on its own is a joint, not a structure. Add a plate across the back of the triangle formed by the hinge and the base. The plate closes the triangle and converts the wobbling flap into a rigid truss. Layer multiple plates for taller walls.
Which LEGO hinge plate should I use for angled walls?
Pick the 1×4 hinge plate for most angled walls because it gives you four studs of connection and distributes stress well. Pick the 1×2 hinge plate for tight spaces or short walls. Pick the 2×2 hinge plate for heavy or tall walls that need more gluing surface. Use two hinges spaced apart rather than one hinge in the middle whenever possible.
Conclusion
Learning how to build sturdy LEGO angles using hinge plates and Pythagorean math is the single biggest upgrade you can make to your building skills. The Pythagorean theorem and a handful of hinge plates are everything you need to escape the 90-degree grid. Plan your angle around a Pythagorean triple, snap on a 1×4 hinge plate, fold the hypotenuse into place, then triangulate the back with a plate or two. For 45-degree walls, swap in a near triple like 12-12-17. For round shapes, anchor a turntable at the center. For chamfered corners, mirror your triangle back-to-back. Remember the 5/2 rule as a quick sanity check, and your angles will stay standing instead of flopping apart.
Build a 3-4-5 triangle today. Tomorrow, scale it up to 12-16-20. By next weekend you will be looking at every architectural photo in a new way, scanning for slopes and chamfers you can replicate in bricks. Off-grid LEGO building is a skill that compounds with practice, and the math never changes. Once you internalize a handful of triples and one or two reinforcement tricks, every model you build from here on out can break free of the grid.