
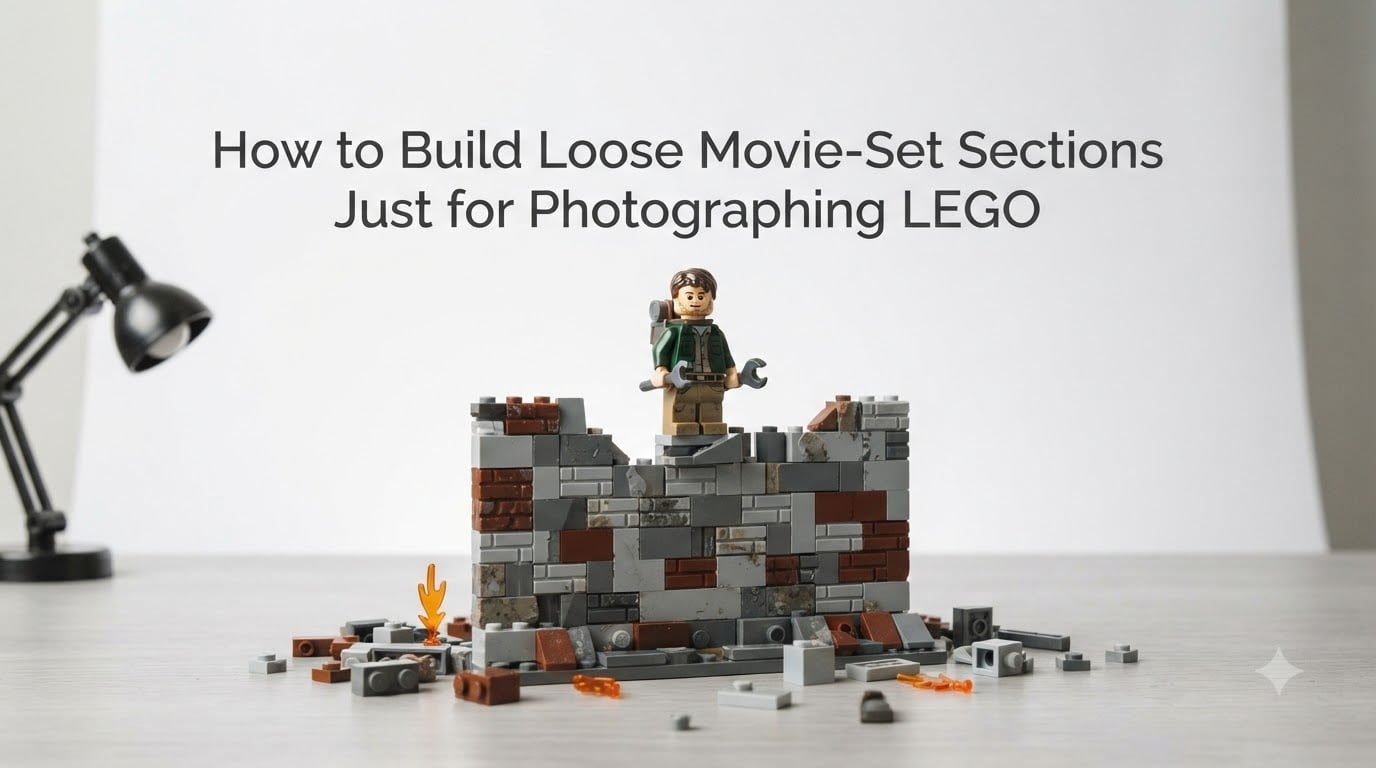
Every great LEGO photo tells a story, and the best stories need a set. But here is the problem most photographers run into: building a full, permanent MOC for a single photo shoot eats hours of time and a mountain of bricks. That is where loose movie-set sections come in.
Loose movie-set sections are partially connected LEGO builds designed specifically for photography. They hold together just long enough to get the shot, then break down for the next scene. You build the front, the side the camera sees, and skip the rest.
Our team has spent years shooting minifigures, dioramas, and action scenes using these exact LEGO photography techniques. In this guide, I will walk you through everything from planning your shot list to choosing the right partial connections so your sections stay put during the shoot and come apart cleanly afterward.
Whether you are shooting a minifigure duel, a destruction scene, or a weathered post-apocalyptic street corner, building loose sections gives you speed, flexibility, and creative freedom that permanent builds simply cannot match.
Table of Contents
Why Build Loose Sections for LEGO Photography
Loose section building flips the traditional LEGO philosophy on its head. Instead of pressing every stud down tight, you build with intent: only what the camera sees, held together only as long as needed.
Speed and Flexibility
A loose section takes a fraction of the time to build compared to a fully assembled set. I have built an entire alleyway backdrop for a minifigure shoot in under 20 minutes because I only constructed the wall the lens was aimed at.
When you want to swap scenes between shots, loose sections let you reconfigure in minutes. Pull apart one section, rotate a few pieces, and you have a completely new environment without starting from scratch.
Cost Efficiency
Because you are only building the visible portion, you use far fewer bricks. A loose wall section might use 40 pieces where a complete freestanding wall would need 200. This matters enormously if your brick collection is limited.
You also avoid buying specific pieces for structural integrity. Since the section only needs to survive a photo session, you can use whatever you have on hand.
Creative Freedom for Action Shots
Permanent builds lock you into one scene. Loose sections let you create destruction effects mid-shoot. You can photograph a minifigure dodging debris, then actually knock the debris loose and capture the collapse in real time.
This is something no competitor in the LEGO photography space talks about. Every guide covers camera settings and lighting, but none address building destructible sets specifically for photography. That is exactly the gap we are filling here.
Materials and Pieces You Need
You do not need specialty parts for loose section building. In fact, the most useful pieces are the ones already sitting in your parts bin.
Here is what I reach for on nearly every loose section build:
- Plates and tiles in various sizes for quick flat surfaces
- Bracket pieces for creating L-shaped corners that stand on their own
- Technic pins and friction connectors for joints that hold but release easily
- Hinge plates for adjustable angles and temporary positioning
- 1×1 and 1×2 bricks for filling gaps and adding texture to visible surfaces
- Baseplates or large flat plates for a stable foundation
Beyond bricks, a few non-LEGO tools make the process smoother. A pair of brick separators helps you disassemble sections quickly between shots. A cutting mat or large flat surface gives you a workspace where you can lay out multiple sections side by side.
For outdoor shoots, bring something to weigh down the base. A small sandbag or even a book placed behind the section prevents wind from toppling your set before you press the shutter.
How to Build Loose Movie-Set Sections Just for Photographing LEGO
This is the core process I use every time I build a loose section for a photography session. Follow these steps in order and you will have a camera-ready set that holds together for the shoot and comes apart cleanly afterward.
Step 1: Plan Your Scene and Shot List
Before snapping a single brick together, decide what the camera will see. Write down every angle you plan to shoot. This tells you exactly which faces of the set need to be built and which can stay empty.
I usually sketch a simple overhead view showing where the section, minifigure, and camera will sit. This 30-second drawing saves me from overbuilding every time.
If your shot list includes three angles, you may need three visible faces. For a single head-on shot, one face is all you need.
Step 2: Build a Stable Base Frame
Every loose section needs a foundation that will not shift during the shoot. Start with a large flat plate or baseplate. Build a low border of bricks around the perimeter to give the section something to lean against.
The base frame does double duty: it stabilizes the visible section and provides a surface for positioning minifigures and props. Keep the base one or two bricks tall so it stays out of frame.
For taller sections like walls or buildings, add a small brace behind the section using a few stacked bricks. This brace is never seen by the camera but prevents the section from tipping forward.
Step 3: Use Partial Stud Connections
Partial stud connections are the heart of loose building. Instead of pressing a brick fully onto the studs below, rest it on just one or two studs. The piece stays in place for the photo but lifts off with zero effort.
This technique works especially well for wall sections. Stack bricks with each piece attached by a single stud to the layer below. The wall holds its shape for the camera but pulls apart in one motion.
I have built entire building facades this way. From the camera, the wall looks completely solid. Behind the scenes, the whole thing is held together by a handful of stud connections.
Step 4: Add Friction-Fit and Pin Connections
Some sections need more stability than partial studs provide. This is where Technic pins and friction connectors earn their place. A pin connection holds pieces firmly enough to survive the shoot but releases with a gentle pull.
Use friction pins for corners where two walls meet at a right angle. The pin holds the angle steady while letting you disassemble the corner without breaking apart individual bricks.
Hinge plates serve a similar purpose. They let you set an exact angle for your section, lock it visually for the shot, and then fold flat for storage. I use hinges constantly for angled rooftops and tilted floor sections.
Step 5: Build in Modular Sections
Never build a loose set as one continuous structure. Break it into modules: a left wall, a right wall, a floor piece, a backdrop. Each module is self-contained and connects to the others using partial studs or pins.
Modular building means you can swap individual pieces between shoots. That wall section from yesterday’s castle scene becomes today’s city building with a few tile swaps. You can rearrange modules on the fly without rebuilding from scratch.
I store my most-used modules in small bins labeled by theme: castle, city, sci-fi, nature. When inspiration hits, I grab the relevant bin and start composing within minutes.
Step 6: Position for the Camera Angle
Once your sections are built, place them based on your planned camera angle. Check the composition through your lens before locking anything in. This is when you spot gaps that need filling or areas that are overbuilt.
If a section looks unstable from one direction but the camera never sees that direction, leave it. Stability only matters on the axis the camera captures.
Take a test shot at your intended aperture and check depth of field. If the background section is going to blur into bokeh, you can simplify or even remove parts of it that no one will ever see.
Connection Techniques That Hold But Come Apart Easily
The secret to loose building is choosing the right connection type for each situation. Here are the five techniques I rely on, ranked from lightest hold to strongest.
Resting connections are the simplest. A piece sits on top of another with no stud engagement at all. Use these for flat surfaces like floors and tabletops where gravity does all the work.
Single-stud connections engage just one stud between two pieces. They hold horizontally well enough for static shots and release instantly. Ideal for stacked wall sections.
Edge connections use the side of a brick rather than the top. SNOT (studs not on top) techniques let you create textured faces that slot into place without full engagement. These are perfect for visible facades where you want detail without commitment.
Friction pin connections use Technic pins between beam pieces. They provide a firm hold that survives minor bumps but pull apart cleanly. Use these for structural corners and load-bearing joints.
Tension builds use opposing forces to hold pieces in place. A long plate wedged between two vertical sections stays put through pressure alone. Tension builds are excellent for ceilings and overhead elements that have no easy connection points.
Mix and match these techniques across a single set. A wall might use single-stud connections for the body, friction pins at the corners, and a tension-built lintel over a doorway. Each piece comes apart independently when the shoot wraps.
Best Scene Types for Loose Section Photography
Loose sections shine in specific types of scenes. Here are the situations where this approach beats traditional building every time.
Action sequences need sections that can change between frames. A loose street section lets you reposition a minifigure mid-stride, adjust debris patterns, and shift camera angles without rebuilding. For freeze-frame action shots, build the section slightly loose so pieces shift naturally when you simulate motion.
Destruction scenes are where loose building truly comes alive. Build a wall section using single-stud connections, frame your shot, then physically push the wall over while shooting in burst mode. The partial connections release just enough to create realistic collapse patterns.
Weathering and decay effects are easier with loose pieces. Partially attach tiles and plates to suggest crumbling masonry or rusted metal. Gaps between loose pieces read as damage and wear without any permanent modification to your bricks.
Dynamic environments like rain, snow, or wind scenes need sections you can modify between takes. Loose building lets you add drift material around a minifigure’s feet, adjust the angle of a tilting sign, or scatter debris patterns differently for each exposure.
Scale illusion shots benefit from loose backdrops. Build a forced-perspective scene where foreground and background sections are sized to trick the eye. Because the sections are loose, you can fine-tune the spacing between foreground and background until the illusion works.
Lighting Considerations for Loose Sections
Loose section building changes how light interacts with your set. Gaps between partially connected pieces let light leak through in ways that permanent builds do not. This can be a feature or a problem depending on how you handle it.
Check for light leaks before your shoot. Hold a light behind the section and look through the camera. If you see bright lines between bricks, either tighten those connections or plan to block the light from behind.
Diffused lighting works best for loose sections because it minimizes shadows in the gaps between pieces. Overcast natural light is ideal for outdoor shoots. The clouds act as a giant softbox, wrapping light around the section without creating harsh shadows in connection gaps.
For indoor shoots, a light box handles small sections beautifully. For larger builds, position two diffused lights at 45-degree angles to fill in the shadows between loose pieces. A reflector on the shadow side bounces light back into deep gaps.
Avoid direct flash on loose sections. The hard light hits every edge and gap, making the build look exactly like what it is: a collection of separate pieces. If you must use flash, bounce it off a white card or wall to soften it.
Forum photographers consistently report that harsh shadows on shiny LEGO surfaces are their number one pain point. Loose sections make this worse because of the increased number of edges and gaps. Diffusion is not optional here, it is essential.
Storage and Reuse of Loose Pieces
The whole point of loose building is reuse. When a shoot wraps, break everything down and sort the pieces for next time. I sort by color and size into small compartment boxes, which makes rebuilding similar sections fast.
Keep your modular sections partially assembled if you have the storage space. A wall corner that took five minutes to build can sit on a shelf ready for its next shoot. Only fully disassemble pieces that are unique or needed for a different project.
Label everything. A small piece of tape on each bin telling you what theme those pieces serve saves enormous time when inspiration strikes at midnight.
Combining Loose Sections with Official LEGO Sets
Loose sections do not replace official sets, they extend them. Place a loose built backdrop behind an official set to create a fuller environment. The official build provides structural stability and instant detail while the loose section adds scale and context.
I frequently use a loose wall section behind an official vehicle or building set to create the illusion of a larger world. The camera sees a complete street scene. Behind the lens, only the front row of the loose section exists.
This hybrid approach gives you the best of both worlds: the polish of official LEGO design and the flexibility of loose construction.
What is the best lens for LEGO photography?
A macro lens in the 90mm to 105mm range is ideal for minifigure photography because it lets you focus close while maintaining a comfortable working distance. For larger loose section builds, a standard 50mm or 35mm lens works well. The key is choosing a lens that gives you enough depth of field control to keep your subject sharp while blurring the background.
How do I diffuse light for LEGO photography?
Use a white diffusion panel or tracing paper between your light source and the LEGO set. For small sections, a light box provides all-around diffusion. For larger builds, position two diffused LED panels at 45-degree angles. Outdoors, shoot on overcast days when clouds act as a natural diffuser.
What is ISO and how does it affect LEGO photography?
ISO controls your camera sensor’s sensitivity to light. A low ISO like 100 or 200 gives the cleanest images with minimal noise, which matters for capturing fine LEGO details. Raise ISO only when you need faster shutter speeds in low light. Keep ISO as low as your lighting allows for the sharpest results.
How do I focus manually for LEGO photography?
Switch your lens to manual focus and use focus peaking if your camera supports it. Magnify the live view to check critical focus on your minifigure’s face or the key detail in your scene. Manual focus gives you precise control over which part of the loose section stays sharp, especially at wide apertures with shallow depth of field.
Should I use flash for LEGO photography?
Direct on-camera flash creates harsh reflections and highlights every gap in a loose section build. If you use flash, bounce it off a white ceiling or wall, or diffuse it through a softbox. Continuous diffused lighting is generally easier to work with for LEGO photography because you can see the effect before shooting.
Can you use loose LEGO pieces for photography scenes?
Yes, loose LEGO pieces are excellent for photography. Build partial connections using single-stud engagement, friction pins, or tension builds so sections hold together for the shoot but come apart easily. This approach lets you create temporary sets, destruction effects, and dynamic scenes without committing bricks to a permanent build.
Conclusion
Building loose movie-set sections for photographing LEGO is a skill that transforms how you approach every shoot. You spend less time building, use fewer bricks, and gain creative freedom to try scenes that permanent builds would never allow.
Start with a simple single-wall section using partial stud connections. Add lighting, frame your shot, and see the difference for yourself. Once you experience how fast and flexible this approach is, you will never go back to building full permanent sets just for a photo. Keep experimenting with these LEGO photography techniques and your portfolio will grow faster than ever.