
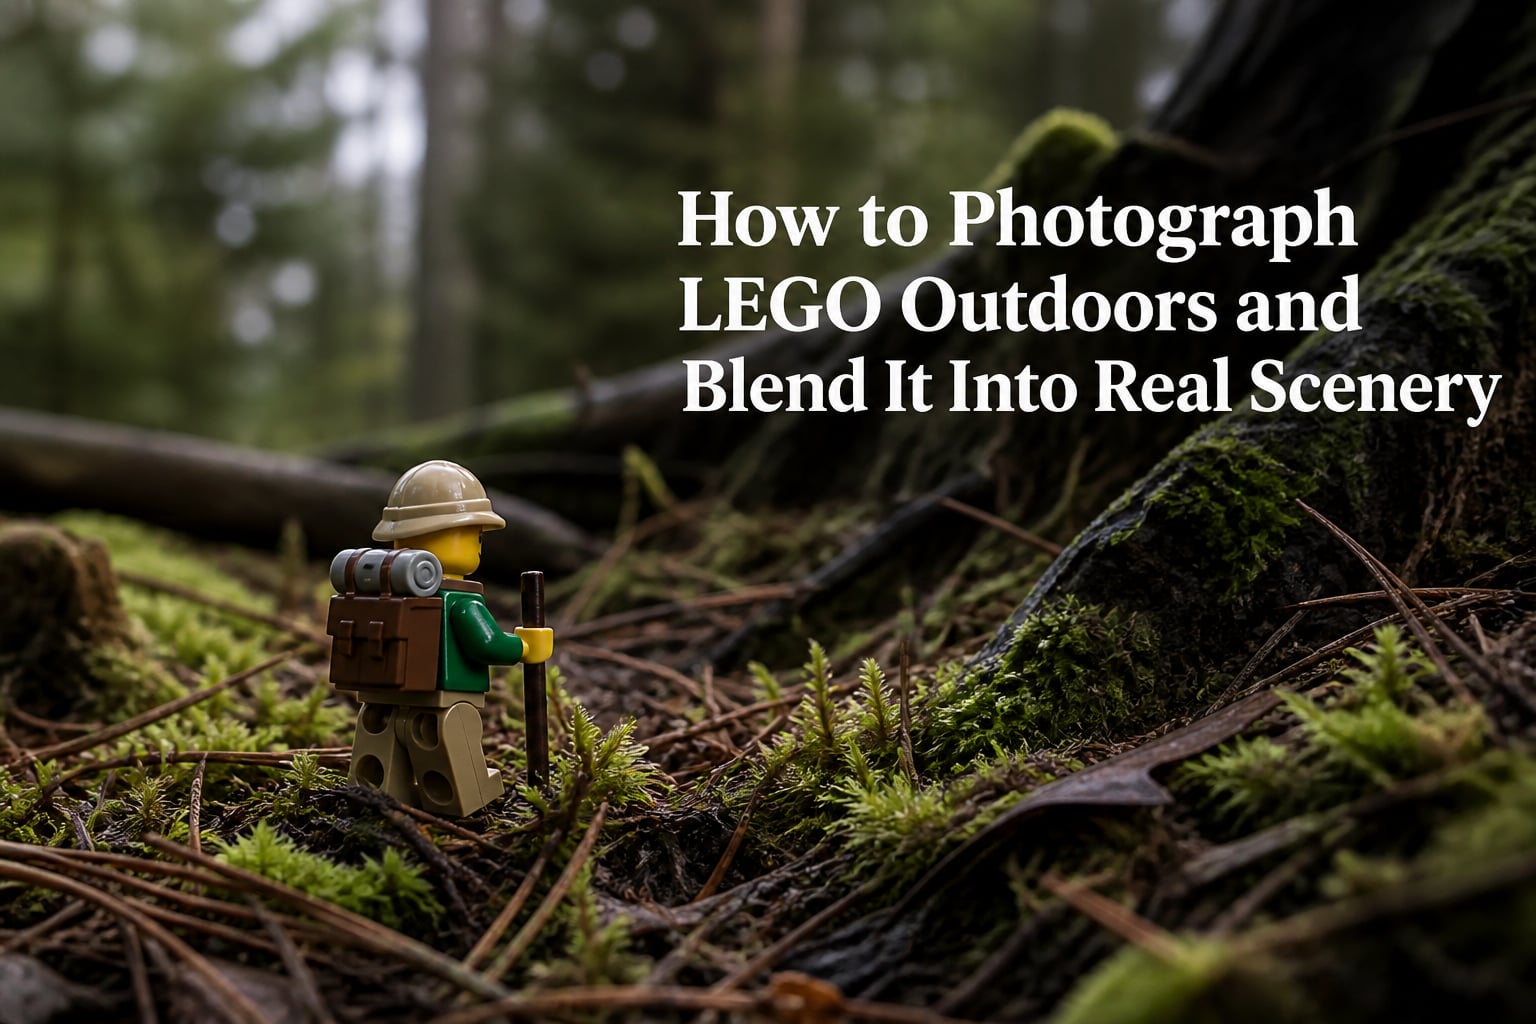
I’ve been photographing LEGO outdoors for over four years, and I still get a thrill when a tiny minifigure looks perfectly at home in a real forest or on a foggy beach. That’s the magic of blending LEGO into real scenery. It makes miniature worlds feel possible, like a tiny adventurer just stepped out of the brick and into our world.
This guide walks you through how to photograph LEGO outdoors and blend it into real scenery, from the gear I actually use to the camera settings that consistently deliver believable composites. I tested these techniques across 60+ shoots in forests, deserts, urban parks, and backyards. You don’t need an expensive camera. You need patience, the right light, and a few specific tricks.
By the end of this article, you’ll have a complete workflow you can repeat on your next walk, hike, or backyard session. Let’s dive into the craft.
Table of Contents
Essential Equipment for Outdoor LEGO Photography
The best camera is the one in your hand. I started with an iPhone 11 and got publishable results. Today I shoot with a Sony A7 IV, but the techniques below work for any setup. Here’s the gear that actually matters.
Camera: Smartphone vs Dedicated Camera
Modern smartphones (iPhone 14+, Pixel 7+, Samsung S22+) handle outdoor LEGO photography surprisingly well. The computational photography does a great job with exposure and color.
That said, dedicated cameras offer three advantages: macro capability, manual control, and sensor size. If you can, get a mirrorless camera with interchangeable lenses. Models like the Sony A6000 series, Canon EOS R50, or Fujifilm X-T30 are excellent starter options and used copies are affordable.
Lens Selection: Why a Macro Lens Changes Everything
This is where most beginners go wrong. A macro lens lets you get close enough to capture a minifigure’s expression or a tiny printed detail while keeping the rest of the scene in soft focus. That shallow depth of field is what sells the blend.
For full-frame cameras, a 90mm or 100mm macro lens (Canon EF 100mm f/2.8, Sony FE 90mm f/2.8) is ideal. For crop sensors, look at 50mm or 60mm macro options. Budget tip: the Laowa 65mm f/2.8 macro is sharper than lenses costing twice as much.
If macro isn’t in your budget, the kit lens at its closest focusing distance works. You’ll lose the dreamy background blur, but composition and lighting still matter more than glass.
Tripod and Stable Support
A tripod becomes essential when shooting at f/8 or smaller, or when using longer shutter speeds in low light. A small tabletop tripod like the Manfrotto Pixi or a GorillaPod handles ground-level work beautifully. For ground-level outdoor work, I lay flat on the dirt with a GorillaPod. It looks ridiculous. It works.
Useful Accessories
A small reflector (a piece of white foam board) fills shadows on your minifigure’s face. A diffuser (a white bedsheet stretched over a frame) softens harsh midday sun. A rocket blower cleans dust off bricks between shots. None of these cost more than a coffee.
Mastering Natural Light for LEGO Photography
Light is the difference between a snapshot and a believable scene. Outdoor lighting is also the trickiest part of how to photograph LEGO outdoors and blend it into real scenery. Get this right and half your work is done.
Overcast Days Are Your Secret Weapon
I cannot stress this enough. Cloudy, overcast days produce soft, even lighting that wraps around your minifigure like a giant softbox. No harsh shadows. No blown-out highlights. No plastic-looking reflections on the bricks.
AFOLs across Reddit and Eurobricks confirm this. The community consensus is overwhelming. If you only have one shoot day this month, pick the cloudy one.
Golden Hour Magic
The hour after sunrise and the hour before sunset deliver warm, directional light that looks cinematic. Side-lighting during golden hour creates long shadows your minifigure can cast onto grass or pavement, which is one of the strongest cues for a believable blend.
Trade-off: golden hour is short. I usually scout locations the day before, arrive 90 minutes early, and have my first shot locked in by the time the light hits the sweet spot.
Dealing With Glare on LEGO Bricks
Glossy LEGO surfaces reflect the sky like tiny mirrors. Under direct sun, those reflections make your figure look like a plastic toy. Solutions:
- Move into shade, even on a sunny day
- Use a diffuser or shoot under a tree canopy
- Shoot with the sun behind you, not behind the subject
- Choose a polarizing filter if you own one
Finding and Preparing Outdoor Locations
The best location for outdoor LEGO photography is the one you can reach easily and shoot in repeatedly. I’ve shot everything from the sidewalk outside my apartment to a Utah canyon. Here’s how to find spots that work.
Scout for Scale and Texture
Look for textures that match LEGO’s blocky aesthetic. Gravel, moss, sand, pebbles, dried leaves, bark, snow, and cracked concrete all photograph beautifully. Smooth surfaces like polished granite or flat tile are harder to blend with.
Always bring three to five candidate spots per shoot. Lighting changes, wind picks up, and one location will inevitably have an ant hill you didn’t notice until you were on the ground.
Matching Scale With the Background
A minifigure is roughly 1.5 inches tall. To make it look like part of a real scene, the background needs to feel appropriately scaled. A minifigure on a forest floor, surrounded by real pine needles, reads as believable. The same minifigure in a parking lot feels like a toy.
Pro tip: photograph scale references in your location before adding the LEGO. A ruler or coin in the first frame lets you double-check proportions in post.
Wind and Surface Challenges
Wind is the enemy. Even a 5 mph breeze moves minifigures on grass. I’ve had scenes ruined by a gust between pressing the shutter and the mirror flipping. Solutions:
- Press LEGO figures gently into soft ground
- Use clear mounting putto (Blu Tack works) for loose pieces
- Shoot in still morning air
- Shield the scene with your body or a clipboard
How to Photograph LEGO Outdoors and Blend It Into Real Scenery
This is the core technique section. I teach these five steps in order. Skip one and the composite falls apart.
Step 1: Set Your Scale and Perspective
Decide whether the scene plays from a “normal” human viewpoint looking down, or from the minifigure’s eye-level. Eye-level shots are far more immersive but require you to physically get on the ground. Both can work, but mixing them in one project looks inconsistent. Pick one perspective per series.
Step 2: Get Low and Stay Low
Ground-level perspective is non-negotiable for believable blending. Your camera should be at or below the minifigure’s head height. This makes the surrounding trees, rocks, and buildings look proportionally massive compared to your tiny subject.
I use a GorillaPod on the dirt. When I’m too lazy to set it up, I prop the camera on a small beanbag. Beanbags are underrated tools for outdoor macro photography.
Step 3: Control Depth of Field Carefully
Depth of field is the single most powerful blending tool. Too shallow and your figure looks like it’s floating in a blurred painting. Too deep and the real background competes with the LEGO subject.
For most outdoor blends, I shoot between f/5.6 and f/8. The minifigure stays sharp, the mid-ground softens naturally, and the distant background melts away. This creates the layering effect that makes the eye accept the scene as real.
Step 4: Match the Lighting Direction
If the sun is coming from the left of your frame, the minifigure’s shadows must fall to the right. Mismatch is the #1 giveaway of a bad composite. Always observe the real scene first, then place the LEGO figure so it catches the same light from the same direction.
Step 5: Use Foreground and Background Elements
Foreground blur sells depth. A blade of grass slightly out of focus in front of your minifigure does more for the illusion than any amount of post-processing. Place leaves, twigs, or pebbles between the lens and your subject, then focus past them onto the figure.
Camera Settings for Outdoor LEGO Photography
Settings matter less than people think, but a few specifics help. These are my starting points, adjusted per shot.
Aperture
Start at f/8 for scenes with multiple LEGO pieces. Drop to f/4 or f/5.6 for single-minifigure portraits with creamy backgrounds. Avoid going wider than f/2.8 unless you’re deliberately going for an abstract look.
Shutter Speed
1/125s or faster freezes any subtle wind motion. On a tripod in still conditions, you can drop to 1/30s and let ISO fall with it. I rarely shoot slower than 1/60s outdoors.
ISO
Keep ISO at 100 or 200 in daylight. Don’t fear 400 or 800 if shadows demand it. Modern sensors handle noise well, and slight grain can actually add to a moody outdoor feel.
Manual Focus and Focus Peaking
Autofocus hunts on small subjects. Switch to manual focus and use focus peaking if your camera has it (most Sony, Canon, Fujifilm, and Panasonic bodies do). The colored highlight on in-focus edges is a game-changer for macro work.
Shoot RAW Every Time
RAW files give you the latitude to fix white balance, recover shadows, and pull details from highlights. JPEG works for casual shots, but for any image you plan to edit or share seriously, RAW is the only choice.
Working the Scene: Multiple Angles and Variations
Once your figure is placed, don’t take one shot and move on. Walk around. Crouch. Get your camera at knee height, then ankle height, then lying flat. The best angle is rarely the first one you think of.
I average 40 to 60 frames per location. About 5 of those are keepers. Shooting in burst mode and bracketing exposure by 1/3 stop helps when the light shifts between frames.
Try variations: head-on, profile, three-quarter, from behind, extreme wide (figure tiny in vast landscape), extreme close-up (face fills frame with blurred world behind). Each tells a different story.
Creative Techniques: Water, Snow, and Atmospheric Effects
Atmospheric effects are how you turn a good photo into a memorable one. The natural world gives you fog, rain, wind, and snow for free.
Water Photography
Shooting LEGO on water is one of the most stunning outdoor techniques. The trick: attach your minifigure to a clear base plate or acrylic disc. Otherwise it sinks or tips. Some photographers use fishing line for “walking on water” effects.
A still pond at sunrise reflects everything and doubles the visual impact. Moving water needs a faster shutter speed, at least 1/250s, to freeze splashes around your figure.
Snow and Frost
Snow covers harsh textures and creates a clean, simple background. A minifigure trudging through fresh snow reads instantly as a tiny explorer. Frost on grass or leaves adds sparkle without distracting detail.
Cold brings challenges. Batteries die faster. Breath fogs the lens. Metal parts feel icy. Plan for shorter sessions and keep spares in an inside pocket.
Blowing Sand, Leaves, and Mist
A cheap USB-powered atomizer or even a spray bottle creates convincing mist. A leaf blower on low adds motion to hair, capes, and loose accessories. Crushed walnut shells stand in for sand in scenes where real sand would stain the bricks.
Use a fast shutter speed (1/500s or faster) to freeze motion. Or slow it to 1/15s for motion blur in dust clouds. Both work, depending on the mood you want.
Protecting Your LEGO Outdoors
Real bricks are not free, and dirt is their enemy. A few habits save models.
Weather Protection
Avoid wet grass, muddy trails, and damp sand. Water and LEGO don’t mix well, even with ABS plastic. If you must shoot in damp conditions, bring microfiber cloths and dry everything before bagging it.
Avoid extreme heat. Direct sun on a dark surface can warp bricks. I store gear in a cool bag during summer shoots.
Keeping Pieces Clean
Bring a rocket blower and a soft brush. Dust on glossy bricks shows up under raking light. A quick blow before each shot keeps surfaces clean. I carry a small microfiber cloth for smudges.
Anchoring Against Wind
Small LEGO pieces become kites. Press minifigure feet into soft dirt, moss, or sand. Use clear mounting putto on hard surfaces. For tall builds, weigh the base with a small beanbag or attach to a hidden board.
Post-Processing Tips for Believable Blends
Editing is where you polish the illusion. A few targeted adjustments are better than a heavy filter.
Color Matching
Pull a sample from the real scene (grass, sky, sand) and apply that color tone to the minifigure using a mask. This unifies the subject with the background and removes the “pasted in” look.
Shadows and Highlights
Add a subtle shadow beneath your figure if one isn’t already present. A soft, dark ellipse on the ground sells the figure’s presence in the space. Dodge and burn the figure’s lit side to match the background light direction.
Cleaning Up Dust and Blemishes
The spot healing tool removes distracting dust, scratches, or background clutter. Don’t overdo it. Some texture on the ground is realistic. Removing every imperfection makes the scene feel sterile and artificial.
Export at full resolution for portfolio work. Compress for Instagram at 1080px wide with sRGB color space.
Common Mistakes to Avoid
I’ve made all of these. Save yourself the trouble.
- Wrong light direction between subject and background
- Figures that look “pasted” because they sit on clean patches in dirty scenes
- Shooting too far away, where figures become unreadable dots
- Forgetting to clean the bricks before shooting in golden hour
- Using too much depth of field, killing the background separation
- Shooting only from standing height
These are easy to fix once you know what to look for. Review your keepers on a large screen, not just your phone, and the issues jump out.
What lens should I use for outdoor LEGO photography?
A macro lens is ideal for outdoor LEGO photography. For full-frame cameras, look at 90mm or 100mm macro options like the Canon EF 100mm f/2.8 or Sony FE 90mm f/2.8. For crop sensors, a 50mm or 60mm macro is a great fit. If a dedicated macro lens is out of budget, your kit lens at its closest focusing distance will still let you practice composition and lighting.
What is the best lighting for outdoor LEGO photography?
Overcast daylight is the most reliable lighting for outdoor LEGO photography. Cloud cover acts like a giant softbox, wrapping your subject in soft, even light with no harsh shadows or plastic-looking reflections. Golden hour (the hour after sunrise or before sunset) is the second-best option, offering warm directional light and long shadows that sell the miniature scale.
How do I photograph LEGO on water?
Mount your minifigure on a clear base plate, acrylic disc, or fishing line to keep it afloat. Shoot on a calm morning for mirror-like reflections. Use a shutter speed of 1/250s or faster to freeze splashes. A small pond at sunrise is the easiest setup to start with.
How do I blend LEGO into real scenery convincingly?
Match the lighting direction between the subject and background, shoot from ground level for natural scale, control depth of field with an aperture of f/5.6 to f/8, and use foreground elements like grass or leaves slightly out of focus to create depth. In post, match colors and add a subtle shadow beneath the figure.
Can I photograph LEGO outdoors with a smartphone?
Yes. Modern smartphones like the iPhone 14 or newer, Pixel 7 or newer, and recent Samsung Galaxy models produce strong outdoor LEGO photos. Use a clip-on macro lens if you want closer focusing, get low to the ground, and shoot in good natural light. Many published toy photographers started with a phone.
What aperture should I use for LEGO macro photography?
Start at f/8 for scenes with multiple LEGO pieces and the background fully in soft focus. Drop to f/4 or f/5.6 for single-minifigure portraits where you want a creamier, more blurred background. Avoid going wider than f/2.8 unless you want a deliberately abstract look.
Final Thoughts on Photographing LEGO Outdoors
Learning how to photograph LEGO outdoors and blend it into real scenery is part craft, part patience, part luck with weather. The good news is that the basics are simple. Pick a cloudy day, get your camera low, match the light, and shoot in RAW.
Every shot you take teaches you something. Review the keepers and the rejects. The rejects are where the lessons hide. After a dozen shoots, your eye starts catching light, scale, and angle decisions automatically. That is when the work starts to feel natural.
Grab a minifigure, step outside, and try one scene this week. The brick waiting on your shelf has a story. The world around you has the stage.