
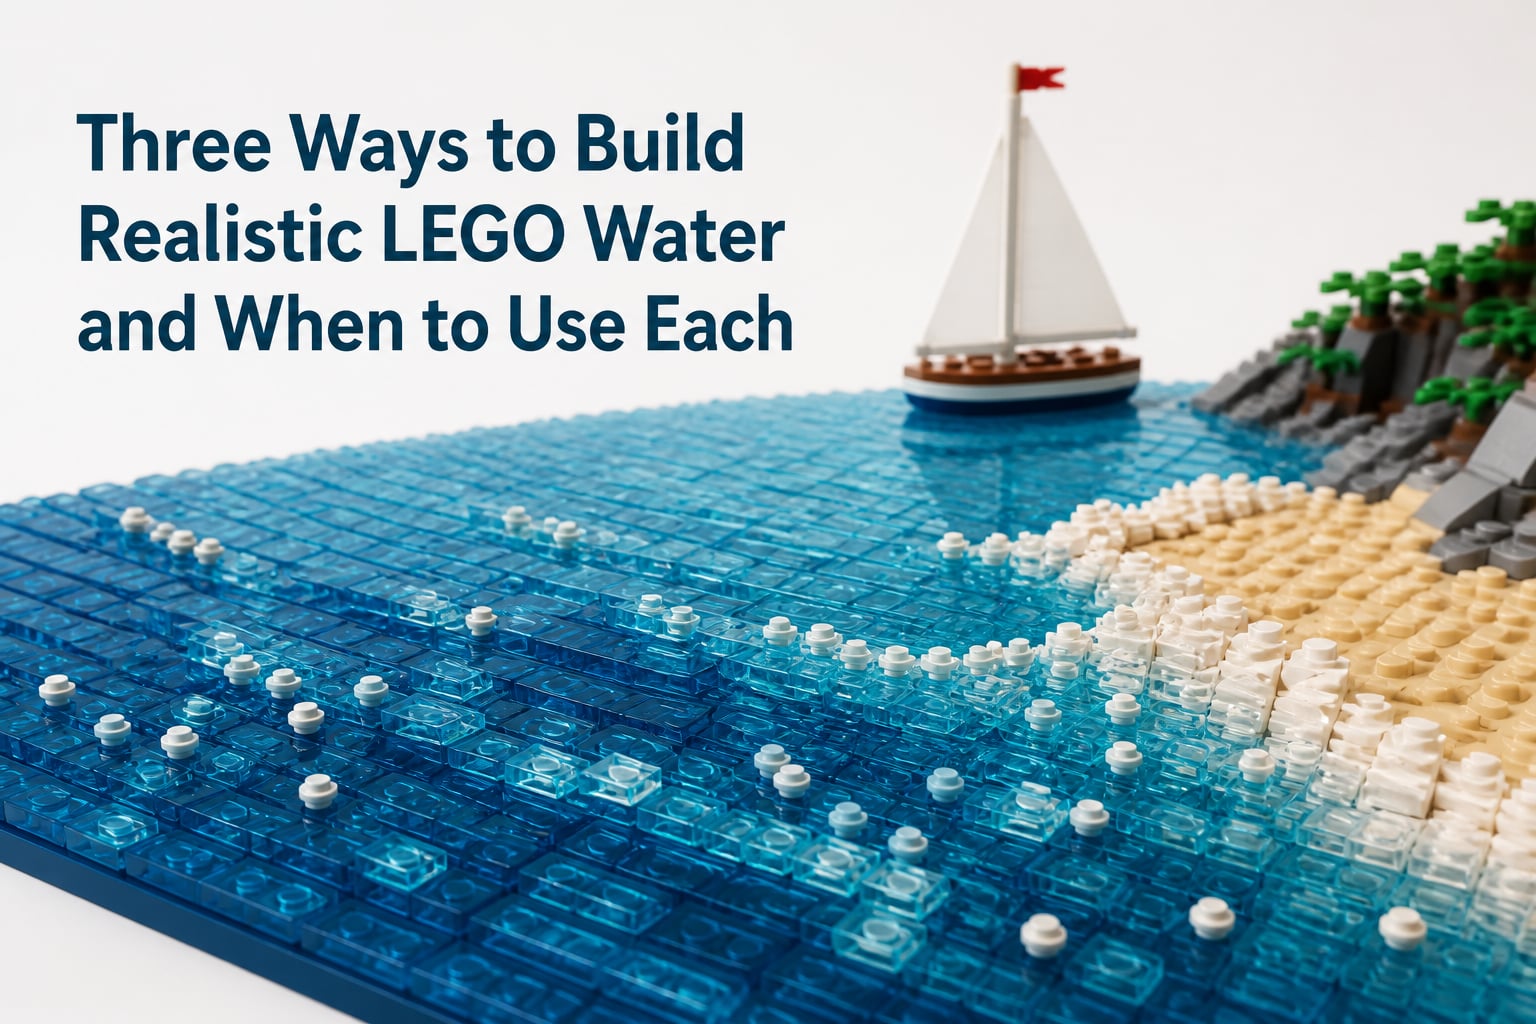
Water looks deceptively simple in LEGO builds. You grab some blue pieces, stack them up, and call it an ocean, right? Then you take a photo and the result looks flat, plastic, and nothing like the swirling seas you see in professional MOCs.
I have rebuilt the same pirate harbor scene four times over the years because the water never felt right. After testing dozens of LEGO water techniques across ocean, river, pool, and pond builds, I have landed on three methods that consistently produce realistic results. Each one works best in a specific situation, and knowing when to use each is what separates a beginner build from a display-worthy MOC.
This guide walks through those three LEGO water techniques, then gives you a clear decision framework for choosing the right one based on your project, scale, and budget.
Table of Contents
Why Building Realistic LEGO Water Is Harder Than It Looks
Water in real life has depth, movement, transparency, and reflection. LEGO pieces are opaque plastic blocks. That mismatch is exactly what makes water one of the hardest things to fake convincingly in brick form.
The biggest complaint I see on r/lego is that finished builds have water that looks “sticky” or “flat.” That happens when builders rely on a single solid color, usually medium blue, laid in uniform rows. The result reads as paint, not water.
Realistic LEGO water techniques solve this by adding at least two of these four qualities: texture, depth, transparency, and variation. The three methods below each attack different combinations of those qualities.
Method 1: SNOT Technique – Bricks Sideways for Smooth Water
The SNOT technique (Studs Not On Top) flips your bricks on their side so the studs face outward instead of up. When you do this with smooth blue bricks, the visible face becomes a clean, seamless surface with no stud dots to interrupt the water effect.
What SNOT Means and Why It Works
SNOT is shorthand builders use for any technique where studs face sideways or downward instead of upward. For water specifically, sideways-facing bricks create a smooth, glossy-looking plane that reads as a calm lake or open ocean.
The secret is that LEGO bricks are slightly shiny. When you rotate them sideways, you expose that glossy finish, and the light reflects off it like a real water surface. This is the same reason automotive designers use SNOT bricks for car hoods and truck beds.
How to Build a SNOT Water Surface Step by Step
Step 1: Build your base layer normally with bricks facing studs-up, just like any other section. This hidden structural layer holds everything together.
Step 2: On top of the base, attach bricks sideways using the side stud holes. A 1×2 or 1×4 brick rotated 90 degrees works perfectly for a single row.
Step 3: Stagger subsequent rows so the seams do not line up. Bricklayers call this a running bond, and it eliminates visible joints across the water surface.
Step 4: For a larger body of water, use plates sideways (1×2 or 1×4 plates rotated) to keep the build height low and proportional.
Best Use Cases for SNOT Water
SNOT works best when you want a calm, glassy surface with no wave action. Use it for swimming pools, hot tubs, calm lakes, fountains, and still harbor scenes. It is also the cheapest of the three methods because you can use any solid blue brick you already own.
Avoid SNOT for moving water like rivers or crashing surf. The smooth surface will fight against the motion you are trying to suggest.
Method 2: Translucent Tiles and Plates for Depth
Translucent pieces are the second pillar of professional LEGO water techniques. Transparent blue tiles and plates let light pass through, which mimics how real water behaves. Light hits the surface, sinks a little, and bounces back, creating that recognizable watery glow.
Why Translucent Pieces Mimic Real Water
Real water is not actually blue. It is transparent, and we see blue because the water absorbs other wavelengths of light. Translucent LEGO pieces replicate this trick. When you layer trans-blue or trans-light-blue tiles, light penetrates the surface and creates a sense of depth that opaque pieces cannot match.
The community on r/lego consistently rates translucent tiles as the single biggest upgrade for any water scene. One builder noted that going from solid blue plates to trans-blue tiles made their harbor scene look “five times more realistic” with no other changes.
How to Layer Trans-Blue and Trans-Clear Tiles
Step 1: Start with a darker base. Use solid dark blue plates or bricks as the bottom layer. This represents the deep water beneath the surface.
Step 2: Add a layer of trans-clear or trans-light-blue tiles on top. The translucent layer lets you see the darker base through it, which creates the depth illusion.
Step 3: For shallow areas, use trans-medium-blue or trans-azure tiles to lighten the effect near the shore. This color gradation is what makes professional builds feel realistic.
Step 4: Optional advanced layering: place a few trans-white or trans-clear 1×1 round plates scattered across the surface to suggest foam or sun glint.
Best Use Cases for Translucent Tile Water
Translucent tiles are perfect for tropical ocean scenes, swimming pools, aquariums, and tropical lagoon builds. They shine in any context where you want viewers to feel they could see into the water.
The downside is cost. Trans-blue tiles run roughly 10 to 15 cents each on BrickLink, and a single ocean scene can easily require 100 or more. Budget accordingly if you are planning a large build.
Method 3: 1×1 Round and Stud Pieces for Texture
The third method is my favorite for chaos and movement. Small round pieces, especially 1×1 round plates, 1×1 cones, and 1×1 studs in light colors, scatter across a darker blue base to suggest waves, foam, and surface chop.
How Small Round Pieces Create Movement
When you place dozens of small round pieces at varying heights and angles, the eye reads the variation as turbulence. This works because real ocean surfaces are never uniform. There are always peaks, troughs, and whitecaps breaking the pattern.
The trick is randomness. Builders who lay their 1×1 pieces in neat rows get a polka-dot effect that looks artificial. Builders who scatter them with deliberate irregularity get waves.
Building Waves With 1×1 Studs
Step 1: Build a flat SNOT or solid blue base layer as your ocean floor.
Step 2: Use 1×1 round plates in white, trans-white, and trans-light-blue. Place them in irregular clusters, with denser concentrations where you want the heaviest wave action.
Step 3: For breaking waves, stack a 1×1 cone or 1×1 round brick on top of select plates. The vertical jump simulates a wave crest.
Step 4: Add a few cheese slopes (the curved 1×1 or 1×2 pieces) angled into the wave clusters. Cheese slopes are perfect for surf crashing onto a beach because the curve mimics how water curls.
Best Use Cases for Round Piece Water
Round pieces excel at stormy seas, river rapids, waterfalls, beach surf, and any scene with energy. They are also the best LEGO water technique for micro-scale builds, where you cannot fit tiles or sideways bricks without breaking the scale.
For micro builds (anything below minifig scale), 1×1 round plates are often your only option. Translucent tiles would dominate the scene and SNOT bricks would look chunky.
When to Use Each Method: A Decision Guide
Here is the framework I use whenever I start a new water scene. It comes down to three questions: how calm is the water, what scale am I building at, and what is my budget.
Quick Comparison of All Three Methods
SNOT bricks work best for calm water, full minifig scale, and tight budgets. They look smooth and reflective, but they read as solid plastic up close.
Translucent tiles work best for clear tropical water, full minifig scale, and medium budgets. They look the most realistic but require sourcing specific colors.
1×1 round pieces work best for turbulent water, any scale including micro, and low-to-medium budgets. They look textural and dynamic, but can look busy if overdone.
Matching Method to Project Type
For an ocean or large lake: start with SNOT for the open water, then add trans-blue tile patches for depth in the shallows, and finish with 1×1 round pieces for whitecaps.
For a river: SNOT works for slow stretches, but switch to 1×1 round pieces with cheese slopes for rapids. Avoid translucent tiles because rivers rarely have the clarity that tiles suggest.
For a beach scene: combine all three. SNOT for the open ocean, trans-blue tiles fading to white for the surf zone, and dense 1×1 round clusters for the wave crash.
For a swimming pool: pure translucent tiles, every time. Solid blue would look like a tarp, and round pieces would clutter the clean pool aesthetic.
For a micro build: skip SNOT and tiles. Use only 1×1 round plates and trans-clear dots. Anything larger throws off the scale.
Scale Considerations: Micro vs Minifig
At minifig scale, all three methods work and the choice is purely stylistic. At micro scale (smaller than minifig), 1×1 round pieces become mandatory because tiles and SNOT bricks would look oversized.
A common mistake is using trans-blue tiles at micro scale. The tiles are large relative to the rest of the build, and the effect stops reading as water and starts reading as glass slabs.
Advanced Tips: Mixing Techniques Like a Pro
None of the top LEGO builders I have studied limit themselves to a single technique. The Ninjago Movie set 70620 is a perfect example. Its designers used a darker blue base for deep water, lighter trans-blue tiles for shallow banks, and small white elements scattered along the shore for surf foam.
That same layered approach works in your own builds. Start with the deepest, calmest layer using SNOT. Add translucent tile patches where light should penetrate. Finish with 1×1 round clusters for surface texture.
Another pro trick is the cheese slope orientation. Builders often place cheese slopes upside down, with the curve facing up. This creates a small ridge that reads as a wave crest when combined with white round pieces around it.
Common Mistakes to Avoid With LEGO Water
Mistake 1: Using only one shade of blue. Real water shifts in color based on depth, angle, and reflection. Mix at least two blues plus a translucent layer.
Mistake 2: Laying pieces in perfect rows. Uniform patterns read as artificial. Stagger seams and vary piece placement.
Mistake 3: Forgetting the shore transition. Water meeting land should have foam, debris, or color change. A hard line between blue bricks and tan bricks looks like a swimming pool edge.
Mistake 4: Skipping trans pieces to save money. Translucent elements do the heavy lifting for realism. Without them, even a perfect SNOT build will look flat.
Mistake 5: Using cheese slopes flat. Cheese slopes only look like waves when angled upward. Flat placement just looks like decoration.
Cost Considerations and Sourcing Your Pieces
Translucent pieces are the priciest LEGO water technique, but there are ways to keep costs reasonable. Pick-a-Brick walls at official LEGO stores are the best source for trans-blue tiles at retail pricing. A single cup of trans-light-blue 1×2 tiles typically runs around 4 dollars and contains 40 to 50 pieces.
BrickLink is the best source for bulk orders and rare colors. Sort by color and piece type, then buy from a single store to minimize shipping. Most sellers offer mixed lots of trans-blue pieces at 5 to 8 cents per piece if you are willing to buy 200 at a time.
SNOT bricks are nearly free because you can use any solid blue brick from your existing collection. This is why SNOT is the perfect starting method for beginners who do not want to invest in specialty pieces.
1×1 round plates and studs are also affordable. A bag of 100 mixed 1×1 rounds in white and trans-clear costs around 6 dollars on BrickLink, which is enough for several large builds.
For a complete ocean scene at minifig scale, plan on roughly 30 to 50 dollars in specialty pieces if you are sourcing through BrickLink. Pick-a-Brick can bring that down to 15 to 25 dollars if you have a LEGO store nearby.
FAQs
What are the three main LEGO water techniques?
The three main LEGO water techniques are SNOT (bricks placed sideways for smooth surfaces), translucent tiles and plates (for depth and transparency), and 1×1 round or stud pieces (for wave texture and movement). Each method works best for specific scenarios like calm lakes, tropical oceans, or stormy seas.
Which LEGO water technique is best for beginners?
SNOT (bricks placed sideways) is the best technique for beginners because it uses any solid blue bricks you already own, requires no specialty pieces, and produces a clean, calm water surface. Once you are comfortable with SNOT, add translucent tiles for depth and 1×1 round pieces for texture.
How do you make waves with LEGO bricks?
To make waves with LEGO bricks, scatter 1×1 round plates in white, trans-white, and trans-light-blue across a darker blue base. Stack 1×1 cones or round bricks on select plates to suggest wave crests, and angle cheese slopes upward to mimic breaking surf. Random placement is key, neat rows look artificial.
Can you mix different LEGO water techniques in one build?
Yes, mixing LEGO water techniques produces the most realistic results. A common professional approach is to use SNOT bricks for the open ocean base, translucent tiles for shallow patches, and 1×1 round pieces for foam and wave action. The Ninjago Movie set 70620 is a great example of this layered approach.
Three LEGO Water Techniques to Build Realistic Water: Final Thoughts
The three LEGO water techniques covered here, SNOT bricks for smooth calm surfaces, translucent tiles for depth and clarity, and 1×1 round pieces for wave texture, each solve a different problem. Your job as the builder is to match the technique to the scene.
Start with SNOT on your next build because it costs nothing and teaches you how light interacts with sideways bricks. Then invest in a Pick-a-Brick cup of trans-blue tiles for your second build. By your third project, you will instinctively know when to reach for each method.