
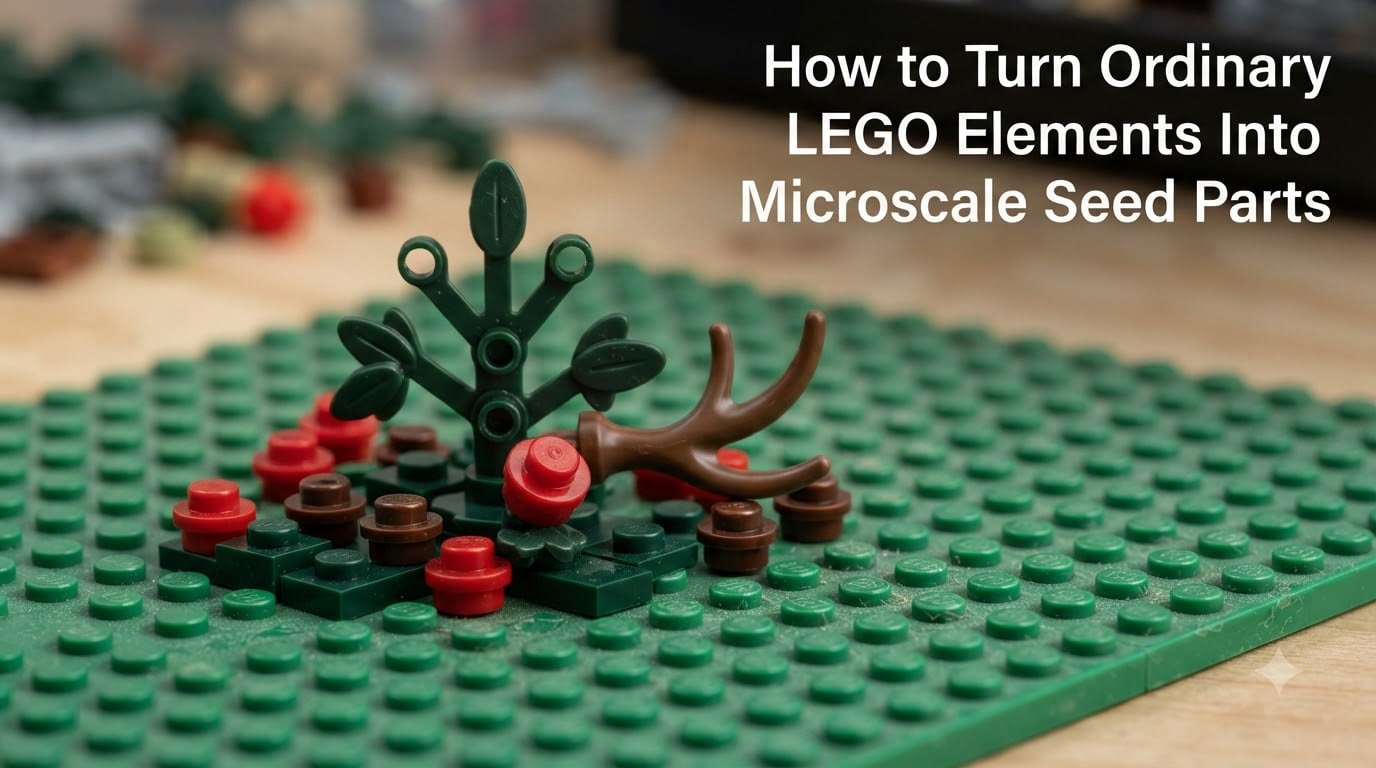
Microscale seed parts are tiny botanical details made from ordinary LEGO pieces that simulate seeds, pods, and plant elements in microscale MOCs. I have spent the last three years building microscale landscapes, and the seed parts are what separate a flat scene from one that feels alive.
In this guide, I will walk you through the exact pieces, techniques, and step-by-step process I use to turn ordinary LEGO elements into microscale seed parts. You will learn which parts work best, how to handle scale issues, and how to create variety without buying rare elements.
Table of Contents
What Are Microscale Seed Parts in LEGO Building
Microscale seed parts are the small, seed-shaped elements that add botanical realism to a microscale scene. They are different from foliage pieces, which usually represent leaves, branches, or full canopies.
Seed parts simulate specific botanical features such as pine cones, seed pods, berries, and small clustered fruits. A 1×1 round brick can become a single berry. A stack of cheese slopes can form a textured seed pod.
The scale ratio for microscale seed parts is roughly 1:48 in relation to minifig scale. This means each seed part should be small enough to fit on a fingertip while still showing texture and color variation. Getting this ratio right is the difference between a scene that looks impressive and one that looks like a pile of bricks.
Seed parts are usually 2 to 4 studs wide and 1 to 3 plates tall. Anything larger begins to look like foliage rather than a seed. Anything smaller loses its visual identity in the scene.
Essential LEGO Pieces for Building Seed Parts
You do not need rare or expensive pieces to build effective microscale seed parts. The best results come from a small set of common elements that you can find in most basic LEGO sets.
Here are the pieces I use most often in my own builds:
1×1 round brick (30077) – Perfect for single berries, small seeds, and pod bases
6 stemmed plant piece (19119) – Adds texture and stem detail to seed clusters
1×1 round plate (3958) – Used as ground bases and seed shadows
2×2 round plate (4032) – Forms seed pod tops and cluster anchors
Minifig antler element (68310) – Repurposed as seed stem branching
Cheese slope (85984) – Creates wedges and pointed seed shapes
Wedge plate (87697) – Adds directional texture to seed pods
Jumper plate (1×2 with 1 stud on side) – Allows grid-breaking placement
Almost every seed part I have built uses at least three of these elements. The 1×1 round brick is the workhorse. The 6 stemmed plant piece adds the organic flair that makes a seed look like it belongs in nature.
Minifig antlers are my secret weapon. Builders often think of antlers as fantasy pieces, but they work beautifully as branching stems for seed pods. They also connect to round bricks through friction, which makes assembly fast.
Basic Techniques for Microscale Seed Part Construction
Before you start building, you need to understand three core techniques that make microscale seed parts possible: SNOT building, legal connections, and friction connections.
SNOT Building (Studs Not On Top)
SNOT building is the practice of placing studs on the sides of bricks rather than on the top. This is essential for microscale work because it lets you build outward in multiple directions without wasting vertical space.
To start SNOT building, place a 1×2 jumper plate on a base. The single offset stud lets you attach another plate sideways. From there, you can stack pieces in any direction using plates with side studs.
Legal vs Illegal Connections
Legal connections are officially supported by LEGO and use standard stud-and-tube geometry. Illegal connections exploit friction between pieces that were not designed to clip together.
For seed parts, friction connections are usually fine. The pieces are small and rarely stressed. A 1×1 round brick clipped onto a minifig antler prong holds firmly enough for display purposes.
I use both legal and illegal methods in my builds. Legal connections give stability. Illegal connections open up creative possibilities that legal methods cannot match.
Stud on Side Technique
The stud on side technique is the simplest way to break out of the grid. Place a 1×1 round plate sideways onto a SNOT brick. Now you have a single connection point that faces the direction you want.
This technique is the foundation of every microscale seed pod I build. It lets you attach a stem piece to the side of a berry cluster without needing a base plate underneath.
Step-by-Step Guide to Building Microscale Seed Parts
Now I will walk you through building a basic seed pod. This is the project I teach beginner builders at my local LEGO user group. It takes about 15 minutes once you have the pieces sorted.
Step 1: Gather Your Pieces
You will need six 1×1 round bricks, two 6 stemmed plant pieces, one 2×2 round plate, and one minifig antler. Pick two contrasting colors for the bricks and plant pieces. I usually use dark green for the stem and reddish brown for the berries to simulate a winterberry look.
Step 2: Build the Core Seed Body
Take the 2×2 round plate and place it flat on your work surface. This will be the base. Stack two 1×1 round bricks on top of the plate in a diagonal pattern. This creates a tight cluster of seeds that reads as a single botanical element.
Step 3: Attach Stem Details
Take the minifig antler and clip it into the side of the top 1×1 round brick using friction. The antler should point upward at a slight angle. This is the main stem.
Now take one 6 stemmed plant piece and attach it to the tip of the antler. The plant piece should splay outward in multiple directions. This adds the organic, branching shape that makes a seed pod look real.
Step 4: Add Finishing Touches
Use the remaining 1×1 round bricks to add small berry clusters at the base of the antler stem. Place them in groups of two or three, with each cluster pointing in a different direction.
Add the second 6 stemmed plant piece as a final accent. Tuck it into the back of the cluster so the stems peek out from behind the berries. This adds depth and makes the seed pod look fuller.
Step 5: Place in Scene
Place your finished seed pod on a 1×1 round plate in your microscale landscape. The plate acts as a shadow and prevents the pod from looking like it is floating.
Step back and look at the scene from arm’s length. If the seed pod reads as a distinct botanical element, you have done it right. If it looks like a stack of bricks, try adjusting the colors or simplifying the design.
Variations and Modifications for Different Seed Types
The basic seed pod is just the start. Once you master the technique, you can adapt it to create pine cones, berry clusters, seed pods, and seasonal variations.
Pine Cone Variations
Replace the 1×1 round bricks with cheese slopes stacked in a pyramid pattern. Use dark brown or olive green for the cones. Attach a 6 stemmed plant piece to the top as a single needle cluster.
Pine cones work best when they are slightly taller than they are wide. Aim for a 2×3 stud footprint with a height of 3 plates.
Seed Pod Designs
Seed pods need a curved, elongated shape. Use a 1×1 round brick as the base and stack three more bricks in a staggered column. Add a 6 stemmed plant piece to the top as the opening where seeds spill out.
Light tan and sand yellow work well for dried seed pods. For fresh pods, try bright green or yellow-green.
Berry Clusters
Berry clusters are the simplest variation. Group five or six 1×1 round bricks in a tight circular pattern. Use a single 6 stemmed plant piece as a leaf cluster at the top.
Bright red, deep purple, and white all work for berries. Avoid yellow or orange unless you are building citrus trees.
Seasonal Variations
For autumn builds, add a few 1×1 plates in orange, red, and yellow around the base of your seed pods. These simulate fallen leaves and add seasonal context.
For winter builds, use only white and light blue-gray seed parts. Replace the 6 stemmed plant piece with a single bar piece to simulate bare branches.
Common Mistakes to Avoid When Building Seed Parts
I have made every mistake in the book while building microscale seed parts. Here are the issues that come up most often and how to fix them.
Scale Inconsistencies
The most common mistake is mixing scales. A 1×1 round brick next to a 2×2 round plate can look like two completely different objects in microscale. Stick to a 2:1 ratio or smaller for every botanical element.
If a seed pod looks too big, reduce the number of pieces. If it looks too small, add a single 1×1 round plate underneath to give it visual weight.
Over-Cluttering
Beginners often pack too many seed parts into one scene. A microscale forest should have empty space between trees. Limit yourself to 3 to 5 seed parts per square foot of base plate.
When in doubt, remove one seed part. The scene will almost always look better with less.
Color Choices That Clash
Bright primary colors rarely work in microscale nature scenes. Use earth tones, muted greens, and soft browns. Save the bright colors for the focal points of your build.
Test your colors by viewing the seed part from across the room. If the colors scream for attention, mute them.
Unstable Connections
Friction connections can fail if you stack too many pieces on a single clip point. Limit each antler or stem piece to 3 to 4 elements attached to it. Use a 1×1 round plate as an anchor if you need more stability.
FAQs
What LEGO pieces work best for microscale seed parts?
The best LEGO pieces for microscale seed parts are the 1×1 round brick (30077), 6 stemmed plant piece (19119), 2×2 round plate (4032), and minifig antler (68310). These four elements cover about 80 percent of the seed parts I build. Adding cheese slopes and jumper plates gives you everything you need for botanical detail.
How long does it take to build microscale seed parts?
A basic seed pod takes about 15 minutes once you have the pieces sorted. Berry clusters can be built in 5 minutes. Pine cones and seed pods with more detail take 20 to 30 minutes. Plan around 1 to 2 hours for a full set of microscale seed parts to populate a forest scene.
What is the difference between foliage and seed parts?
Foliage refers to leaves, branches, and canopy elements that represent the green parts of a plant. Seed parts refer to specific botanical features like berries, pine cones, seed pods, and small fruits. Seed parts are usually smaller than foliage pieces and add specific detail rather than overall shape.
Can you build microscale seed parts with basic LEGO sets?
Yes. Most microscale seed parts can be built using pieces found in basic LEGO sets, including Creator, City, and Classic themes. The 1×1 round brick is one of the most common pieces in any LEGO collection. You only need 5 to 10 different element types to build a wide variety of seed parts.
Final Thoughts on Building Microscale Seed Parts
Microscale seed parts are one of the most rewarding techniques in LEGO building. A handful of small pieces can transform a flat scene into a living landscape. The key is to start with the basics, master the 1×1 round brick and 6 stemmed plant piece, then branch out into variations.
Practice with the step-by-step guide above. Once you have built three or four seed parts, you will start seeing new possibilities. That is when microscale LEGO building becomes addictive.
Now it is your turn. Pull out your LEGO collection, grab a few 1×1 round bricks and plant pieces, and start building your first microscale seed parts. Share your results in the comments below – I would love to see what you create.