
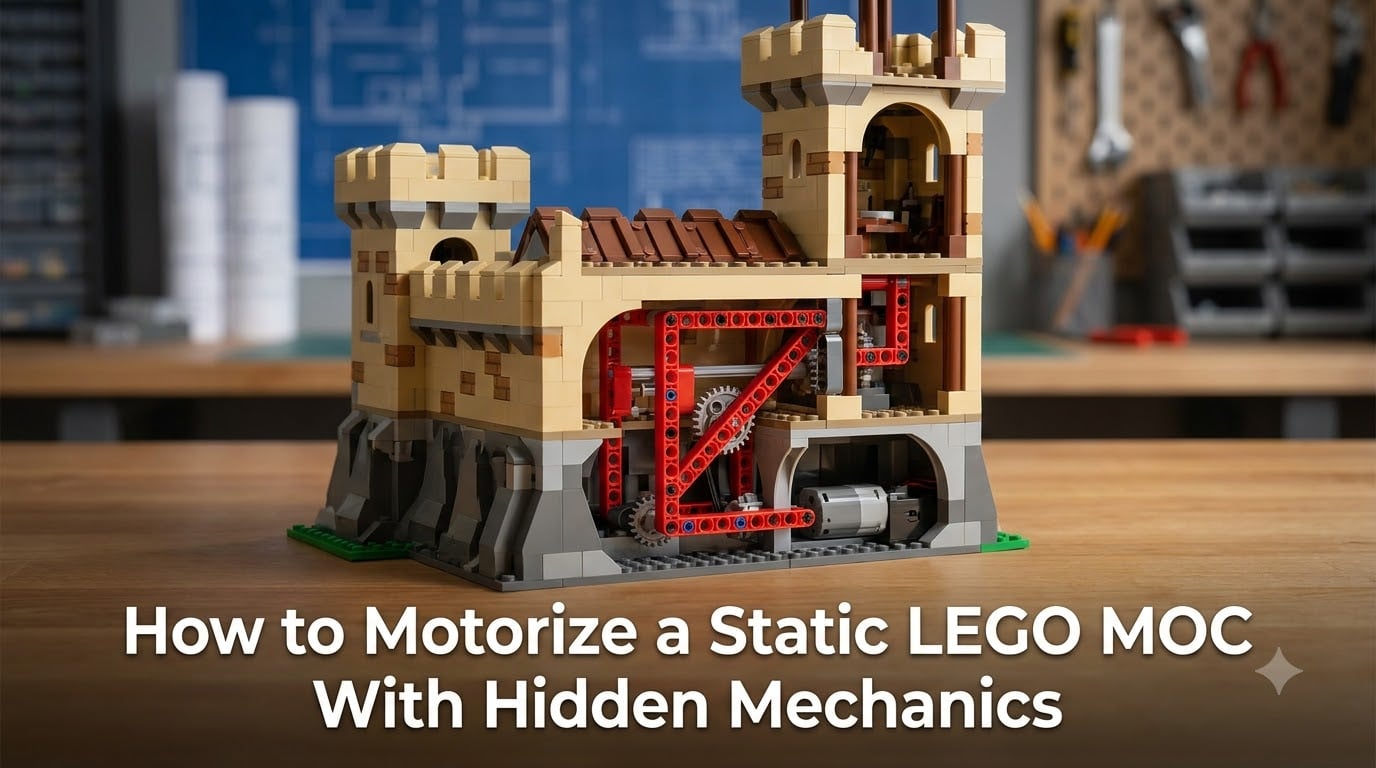
There is something genuinely magical about a LEGO creation that moves on its own. One moment your MOC is sitting still on a shelf, and the next a hidden motor spins a gear, a wall slides open, or a train rolls down the track — and nobody can see where the power is coming from. That surprise factor is exactly why so many builders want to learn how to motorize a static LEGO MOC with hidden mechanics.
Our team has spent years building motorized displays for conventions, and the single biggest lesson is this: the motor is easy. Hiding it well — while keeping it accessible for repairs — is where most builders get stuck. I have watched gorgeous MOCs grind to a halt at a show because the builder could not reach a snapped belt or a jammed gear buried three layers deep in the build.
This guide walks you through the entire process from start to finish. You will learn which motorization system to choose, how to plan your mechanism layout before you build, how to conceal everything for that seamless look, and how to keep your model running smoothly for hours at a convention. I will also share the repair-access techniques and troubleshooting tips that experienced builders use after learning things the hard way.
Whether you are converting an existing static creation or planning a motorized build from scratch, the approach is the same: plan the movement first, build around access, and hide the mechanics last. Let us get into it.
Table of Contents
Understanding LEGO Motorization Systems
Before you build anything, you need to pick a power system. LEGO has two main motorization platforms, and they are not fully compatible with each other. Your choice affects everything from motor availability to how you control your MOC.
LEGO Power Functions (Legacy but Reliable)
Power Functions is the older system, but it is still wildly popular among MOC builders. It uses a simple battery box connected to motors via square connector cables. You control everything with an infrared remote and receiver — no phone or app required.
The big advantage here is simplicity. Plug in a battery box, connect a motor, and it runs. The disadvantage is that Power Functions is officially retired, so finding new components means turning to the secondary market or third-party sellers. Many builders still prefer it because it just works, with no Bluetooth pairing or firmware updates to worry about.
LEGO Powered Up (The Current System)
Powered Up is LEGO’s current platform. It uses smart hubs with Bluetooth connectivity, USB-C charging on newer models, and reversible connector cables. You control motors through the Powered Up app on a phone or tablet, or you can write custom programs using PyBricks for autonomous operation.
The trade-off is that Powered Up requires a smart device to operate, which some builders find annoying. However, the system gives you features that Power Functions cannot match: speed regulation, programmable sequences, rotation sensors, and absolute position control. For a convention display that runs autonomously all day, Powered Up is hard to beat.
Which System Should You Choose?
If you want plug-and-play simplicity and you can find the parts, Power Functions works great for basic motorized MOCs. If you want programmable movement, precise speed control, or autonomous operation, Powered Up is the way to go. Most builders I know have migrated to Powered Up for new projects while keeping Power Functions for older builds.
Choosing the Right Motor for Your MOC
Selecting the wrong motor is the most common mistake I see from builders new to motorization. LEGO makes several motor types, each designed for specific applications. Picking the right one saves you from stripped gears, burnt-out motors, and frustrating rebuilds.
Motor Types at a Glance
Servo Motors are designed for steering. They rotate to a set angle and return to center, making them ideal for steering mechanisms but not for continuous rotation. XL Motors deliver high torque at lower speed — perfect for moving heavy elements like drawbridges or rotating large structures.
L Motors and M Motors offer a balance of speed and torque for general-purpose applications. The Train Motor is purpose-built for locomotives and fits neatly under train frames. For linear push-and-pull motion, the Linear Actuator converts rotational force into straight-line movement, which is excellent for cranes and lifting mechanisms.
Matching Motor to Movement
Think about what your MOC needs to do. A rotating carousel needs continuous rotation, so an L Motor or M Motor works well. A drawbridge that lifts and lowers needs controlled angular movement, making a Linear Actuator or geared-down XL Motor the better choice. A steering mechanism needs a Servo Motor.
Torque matters more than speed for most MOC applications. You can always gear up for speed, but a motor that cannot generate enough torque will stall, overheat, and eventually fail. When in doubt, go with the bigger motor and gear it down.
How to Plan Your Hidden Mechanism Layout
The biggest difference between a motorized MOC that looks professional and one that looks like a science project is planning. I learned this the hard way after building an entire three-story castle and then realizing I had no way to fit a battery box inside it.
Draft Your Movement First
Before laying a single brick, sketch out what your MOC will do. Will a section rotate? Slide? Pivot? Rise and lower? Each type of movement dictates a different mechanism, and each mechanism requires different space inside the build. I use graph paper for this step, drawing the mechanism path and marking where the motor and power source will sit.
This planning phase is also when you decide on access points. Every motor, every battery box, and every gear train needs a way to be reached for repairs. Building a gorgeous MOC with no access panels means that the first time something breaks, you are tearing the whole thing apart.
Designing Around the Power Source
The battery box or hub is usually the largest single component in your mechanism. Plan its location early. A Powered Up hub measures roughly 4 by 8 studs, while a Power Functions battery box is even larger. If you cannot fit the power source inside the MOC, you may need to run a cable through the base to a hidden external battery.
For convention displays, I always plan a removable base or false floor that conceals the battery while allowing me to swap it out in under two minutes. Builders who skip this step end up performing surgery on their MOCs in the middle of a crowded show floor.
How to Motorize a Static LEGO MOC With Hidden Mechanics: Step-by-Step
Here is the complete process I follow for every motorized build, from initial concept to running display. These steps assume you already have a static MOC or a clear plan for one.
Step 1: Identify the Movement You Want
Decide exactly what your MOC will do. Be specific: “the tower door slides open and closed” rather than just “it moves.” This specificity determines your mechanism type, motor choice, and space requirements. Write it down so you stay focused during the build.
Step 2: Build the Mechanism as a Standalone Module
Never integrate the mechanism into your MOC before it works on its own. Build the gear train, linkage, or actuator as an independent module on your workbench. Test it with the motor you plan to use, running at the speed and load it will encounter in the final build. This step catches problems early, when they are easy to fix.
I have seen too many builders bury an untested mechanism inside a model and then discover the gear ratio is wrong or the motor stalls under load. Building and testing the module first is the single most important habit you can develop.
Step 3: Build the MOC Around the Mechanism
With a working mechanism in hand, construct the MOC so the mechanism sits inside it naturally. This is where you integrate Technic liftarms, axles, and gears into a System or Technic shell. Use pins and brackets to secure the mechanism module so it does not rattle or shift during operation.
Step 4: Route Power and Plan Cable Paths
Run the connector cable from the motor to the battery box or hub along a planned path. Avoid running cables through moving parts or pinch points where they can get caught or severed. Use smooth tile pieces to create cable channels along the inside of the build, keeping wires tidy and out of sight.
Step 5: Build Concealment Structures
Now add the outer shell and decorative elements that hide the mechanism from view. Use false walls, removable panels, and strategic brick placement to conceal motors, gears, and cables. Make sure these concealment elements do not interfere with the mechanism’s movement.
Step 6: Test With the Full Build Assembled
Run the mechanism with the MOC fully assembled and closed up. Listen for grinding, clicking, or straining sounds that indicate friction or binding. Watch for smooth, consistent movement at the speed you intended. If something is wrong, this is the time to find it — not at the convention.
Step 7: Document Everything With Photos
Before you close up the model for the last time, photograph the mechanism from every angle. Take pictures of cable routing, gear placement, and the access panels removed. When something breaks at a show and you need to remember how it goes back together, these photos are your lifeline.
Step 8: Create a Repair Kit
Assemble a small kit with spare gears, axles, pins, rubber bands, and any custom parts your mechanism uses. Bring this kit to every convention. I also recommend bringing a small screwdriver or brick separator for emergency access. The builders who have repair kits are the ones whose MOCs stay running all weekend.
Common Mechanisms You Can Build
Once you understand the basics, a world of mechanical possibilities opens up. Here are the most useful mechanism types for motorized MOCs, along with when to use each one.
Rotating Mechanisms
Continuous rotation is the simplest movement to motorize. A motor connected directly to a turntable or axle via gears creates smooth, ongoing rotation. This is perfect for carousels, rotating signs, radar dishes, and display platforms. Use a worm gear for slow, high-torque rotation that holds its position when stopped.
Sliding Mechanisms
Sliding movement uses a gear rack driven by a spur gear, or a linear actuator pushing a platform along rails. Sliding is ideal for hidden doors, extending bridges, and reveal mechanisms. The key challenge is keeping the sliding element on its track — use tile rails and guide pins to prevent the sliding section from derailing.
Pivoting and Lifting Mechanisms
Pivoting uses a motorized axle as a hinge point, often through a system of liftarms and linkages. This is how drawbridges, crane arms, and opening roofs work. For heavy lifting, pair the motor with a linear actuator, which provides massive mechanical advantage in a compact footprint.
Reciprocating Mechanisms
Reciprocating motion converts rotation into back-and-forth movement using a cam or crank linkage. This creates piston movement, pumping action, or walking motion. Reciprocating mechanisms are more complex to build and tune, but they produce some of the most eye-catching movement in a MOC.
Hiding Motors and Wires for a Clean Look
The “hidden” part of hidden mechanics is what makes a motorized MOC impressive. Anyone can bolt a motor to the side of a model. Concealing it so the build looks completely static until the moment it moves — that takes craft.
False Walls and Hollow Structures
The most reliable hiding technique is building double-walled structures. The outer wall is the visible part of your MOC, while an inner wall creates a cavity where motors and gears live. Leave one section of the inner wall as a removable panel so you can access the mechanism without disturbing the outer shell.
I use jumper plates (the 1×2 offset tiles) to create panels that pop off easily but stay securely in place during display. The BrickNerd approach of sectioned tops that lift off in layers is also excellent for taller builds where vertical access is easier than side access.
Cable Management Inside LEGO Builds
Powered Up and Power Functions cables are surprisingly manageable if you plan for them. Route cables along the inside corners of your build using 1×2 grille tiles or smooth tiles as channels. Leave slight slack in the cable so movement does not stress the connector. Avoid sharp bends that can damage the wires over time.
For builds with multiple motors, consider using a hub with multiple ports to minimize cable sprawl. Label each cable with a small colored sticker so you know which motor it controls when you are troubleshooting in a dim convention hall.
Strategic Visual Distraction
Sometimes you cannot fully hide a component, so you disguise it. A motor visible through a window becomes a piece of machinery in a factory scene. A battery box becomes cargo in a truck bed. Think about how the visible mechanical elements can become part of the model’s story rather than an eyesore.
Power Management and Battery Considerations
Power is the lifeblood of a motorized MOC, and managing it poorly is the fastest way to have your display die halfway through a convention day.
Battery Life at Conventions
A Powered Up hub running motors continuously will drain its batteries in roughly 2 to 4 hours, depending on the load. For an all-day convention, you need spare batteries or a USB-C power bank connected to the hub. Power Functions battery boxes last a bit longer but still need swapping during extended runs.
I always bring at least two fully charged backup power sources for each motorized MOC. Label them and keep them in your repair kit so you can swap quickly without hunting through your bags.
Running From Mains Power
Some builders ask about running motors from wall outlet power instead of batteries. This is possible using a regulated power supply connected to a Powered Up hub or a Power Functions extension wire, but it introduces trip hazards and limits where you can place your MOC. For most convention displays, battery power is the safer and more flexible option.
If you do use mains power, tape down every cable and use a surge protector. Nothing ruins a show faster than someone tripping over your power cord and pulling your MOC off the table.
Testing, Troubleshooting, and Maintenance
A motorized MOC is a machine, and machines need testing and maintenance. The builders whose models run flawlessly at shows are the ones who test relentlessly and maintain proactively.
Test Early, Test Often
This is the golden rule of motorized MOCs. Test the mechanism as a standalone module before integration. Test it again after integration. Test it after concealment. Test it for an extended period — at least 30 minutes of continuous running — to catch issues that only appear under sustained load.
I run every motorized MOC for a full hour before bringing it to a show. If a gear is going to slip or a rubber band is going to stretch, I want to find out on my workbench, not in front of a crowd.
Common Problems and Fixes
Stalling or grinding sounds usually mean too much friction or insufficient torque. Check for misaligned gears, add lubrication, or switch to a higher-torque motor. White dust on gears indicates plastic-on-plastic wear — this is a sign you need lubrication immediately before the gears degrade further.
Stretched rubber bands are a frequent issue at conventions. Bring spares and replace them when they lose tension. Inconsistent movement often points to a loose gear or axle — check that all connections are secured with bushings and that gears are properly meshed.
Lubrication Tips
LEGO gears and axles benefit from light lubrication, especially for builds that run for extended periods. Use a plastic-safe lubricant like Tri-Flow or a small amount of silicone-based lubricant on gear teeth and axle contact points. Never use petroleum-based products like Vaseline, which can degrade ABS plastic over time.
Apply lubricant sparingly — a tiny amount on the contact points is all you need. Too much attracts dust and creates a gunky mess that causes more problems than it solves. Wipe off any excess with a cloth before reassembling the mechanism.
Frequently Asked Questions
What is the 5/2 rule in LEGO?
The 5/2 rule is a community guideline for LEGO train displays stating that modules should be 5 studs wide between rails with a 2-stud gap for connections. It relates to standardized display layouts, not motorization directly, but it is useful to know if you display motorized train MOCs at shows.
How to make LEGO motors work?
To make LEGO motors work, connect a motor to a compatible power source using the correct connector cable. For Power Functions, plug the motor into the battery box output port. For Powered Up, connect the motor to a port on the smart hub and use the Powered Up app or PyBricks to control it. Always test the motor standalone before integrating it into a build.
Why are some LEGO techniques called illegal?
LEGO building techniques are called illegal when they stress bricks beyond their design limits, such as bending flexible elements too far or compressing parts in ways they were not meant to fit. These techniques can damage pieces over time. When motorizing a MOC, avoid illegal techniques around moving parts since the added stress from motion can cause failures.
Can you motorize a non-Technic LEGO set?
Yes, you can motorize non-Technic or System builds. The trick is integrating Technic elements like liftarms, axles, and gears inside a studded structure. Use Technic bricks with pin holes to create mounting points for motors and gears within the System shell. Many builders successfully add hidden mechanics to castle, city, and creator-style MOCs.
What is the best motor for LEGO MOCs?
There is no single best motor — it depends on your application. For heavy lifting, the XL Motor or a Linear Actuator provides the most torque. For general-purpose rotation, the L Motor offers a good balance. For trains, use the dedicated Train Motor. Start with an L Motor or M Motor if you are new to motorization and add specialized motors as your builds demand them.
How do I hide LEGO motors in my build?
Hide motors using false walls, hollow structures, and removable panels. Build double-walled sections where the inner wall creates a cavity for the motor while the outer wall shows clean brickwork. Use jumper plates to create access panels that pop off for repairs. Route cables along tile-lined channels inside the build to keep them out of sight.
Conclusion
Learning how to motorize a static LEGO MOC with hidden mechanics transforms your builds from impressive static displays into living, moving creations that captivate audiences. The process comes down to a few core principles: choose the right power system for your needs, plan your mechanism layout before you build, test every module standalone before integration, and always design for repair access.
Start small with a simple rotating mechanism, then work your way up to sliding doors, lifting bridges, and multi-motor autonomous displays. Document everything with photos, build a repair kit, and bring spare power sources to every show. Do these things consistently and your motorized MOCs will run reliably through any convention.
Now grab some gears, pick a motor, and start building. Your static MOC is waiting to come alive.