
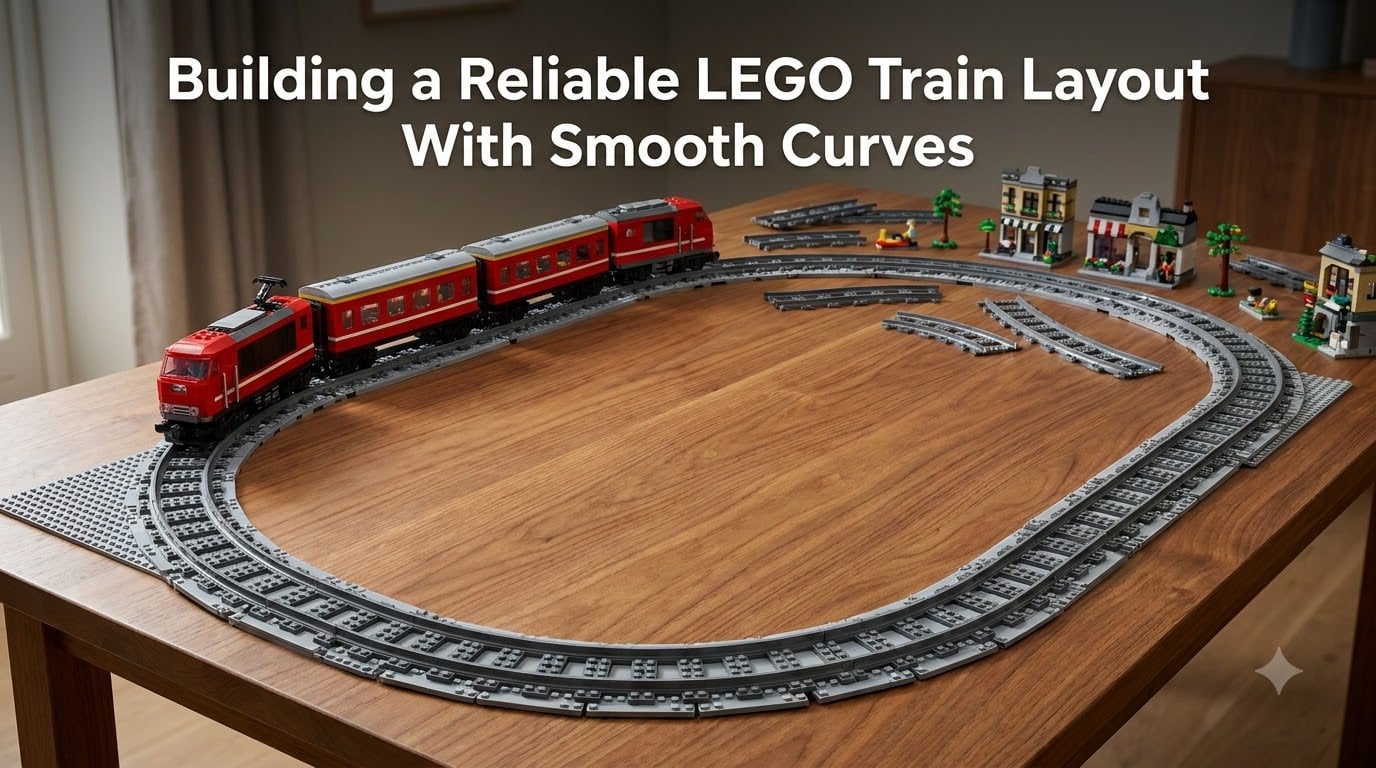
Building a reliable LEGO train layout with smooth curves is the single most important thing you can do to keep trains from derailing and to let longer locomotives run without stalling. I have spent years setting up layouts for shows, holiday displays, and home use, and the curve problem always comes first. If you get the curves right from the start, everything else falls into place.
A LEGO train layout smooth curves approach means using wider radius turns, proper track geometry, and careful planning rather than the default tight circles straight out of the box. This guide walks you through every step of building a layout that runs smoothly, from understanding R40 track geometry to advanced techniques for building wider curves using only standard LEGO pieces.
You will learn why standard LEGO curves cause problems for longer trains, how to calculate the right radius for your available space, and the step-by-step polygon method for creating smooth curves without third-party parts. I have tested every technique here on my own layouts, and I will share the common derailment causes I see most often so you can avoid them.
Table of Contents
Why Smooth Curves Matter for LEGO Train Layouts
Smooth curves matter because they directly affect whether your trains stay on the track. The standard LEGO R40 curve is tight enough that longer locomotives and passenger cars struggle to navigate without jumping the rails. When I first built my winter village layout using default curves, my Emerald Night passenger cars derailed on every single loop until I widened the turn radius.
Wider curves solve three problems at once. They prevent derailments on longer rolling stock, they let heavier locomotives maintain speed through turns without stalling, and they look far more realistic than the abrupt 90-degree turns you get from standard LEGO curved track pieces.
The LEGO train community on Reddit consistently confirms this. Builders report that standard R40 curves require short rolling stock to navigate without problems, while R104 curves look beautiful but demand significantly more table space. The sweet spot for most builders sits somewhere in between, which is exactly what the smooth curve techniques in this guide help you achieve.
Understanding LEGO Track Geometry (R40, R56, R104)
LEGO track geometry refers to the standardized measurements LEGO uses for its train track system. The most important number to understand is the curve radius, which is measured in studs from the center of the curve to the centerline of the track.
R40 is the standard LEGO curve radius. A full circle built from standard curved track pieces uses 16 segments, and the resulting circle measures 40 studs from center to track centerline. This is the radius you get from every box of LEGO curved track sold since the introduction of the current track system.
R56 is a wider radius that some builders achieve by offsetting track using LEGO plates and tiles. It provides noticeably smoother running for medium-length rolling stock. R104 is significantly wider still and is the radius most experienced builders recommend for realistic-looking layouts with longer locomotives and passenger cars.
Here is how the three compare in practical terms. R40 fits in a 32 by 32 stud square footprint and handles short four-stud rolling stock well but derails longer cars. R56 needs roughly a 56-stud radius circle and handles most standard LEGO trains comfortably. R104 requires substantial space but lets even custom-scale locomotives run smoothly.
One critical detail from the Eurobricks community: clone curves that are wider than standard typically come in steps with a 16-stud offset from center to center. This means R56 sits 16 studs wider than R40, and R104 sits another offset beyond that. Understanding this step pattern helps you plan how much additional table space each upgrade demands.
Basic Layout Shapes: Circles and Ovals
Circles and ovals form the foundation of nearly every LEGO train layout. A circle is the simplest continuous-running layout you can build, and an oval adds straight sections that give your trains room to stretch out and pick up speed.
To build a full circle using standard R40 curved track, you need exactly 16 curved pieces. The completed circle measures approximately 35 inches or 89 centimeters across. This is the starting point I recommend for beginners because it teaches you how track pieces fit together and how trains behave on curves.
Building an oval is the next step. A basic oval uses 16 curved pieces for the two semicircular ends and any number of straight pieces for the two parallel sides. Monty’s Trains, one of the most referenced LEGO train planning resources, notes that a layout using 12 straight pieces and 16 curved pieces covers roughly 35 by 55 inches or 89 by 140 centimeters of space.
When you add straights to form an oval, keep the count equal on both sides. If one straight section has six pieces and the other has seven, the curve at each end will not connect properly and your oval will be slightly skewed. I learned this the hard way on my second layout and spent an hour troubleshooting a gap that would not close.
For smoother running, add as many straight pieces as your space allows between the curved ends. The longer the straight sections, the more realistic the operation feels and the less time your trains spend on tight curves where derailments are most likely.
Step-by-Step Smooth Curve Building Techniques
The polygon method is the most reliable way to build smooth curves using only standard LEGO straight track pieces. Instead of relying on tight curved segments, you approximate a wide arc using many short straight sections angled slightly from one another. Holger Matthes, whose smooth curve technique is widely referenced in the LEGO train community, demonstrated this method at LEGO Fanwelt using only straight pieces and a minimum of five other LEGO elements.
Here is the step-by-step process I use.
Step 1: Decide your target radius. Wider radius means smoother running but more space. For a first attempt, aim for something around R104 or wider. The radius calculation for a polygon curve depends on the number of segments and the length of each straight piece, with the total reaching up to 238 studs for a very smooth arc.
Step 2: Lay out your baseplate or table surface. You need a flat, stable surface. Mark the center point of your planned curve using tape or a LEGO stud as a reference peg.
Step 3: Connect straight track pieces end to end. Use the pivot built into every LEGO track connector to angle each piece slightly from the previous one. The key insight from experienced builders is this: on corners, the smooth curved rail goes on the inside and the rough edged rail goes on the outside.
Step 4: Adjust the angle incrementally. Do not force a sharp angle at any single joint. Instead, distribute the total curve across many joints with small angles at each one. The more pieces you use, the smoother the resulting curve appears and the better trains handle it.
Step 5: Secure the track to the base. Use LEGO plates underneath to lock the track pieces in position. Without anchoring, the accumulated angular pressure from many slightly-turned joints will push the track out of alignment over time.
Step 6: Test before finalizing. Run your longest train through the curve at operating speed. If it derails or hesitates, widen the radius by adding more straight pieces or reducing the angle at each joint.
The best advice I ever received on this technique from the Reddit LEGO trains community is simple: build the straight track first, then connect the curve. Lay down your main straight runs, then work the curve between them rather than starting at the curve and hoping the straights line up.
Common Derailment Causes and Solutions
Derailments on curves are the number one frustration for LEGO train builders, and almost every one traces back to a small number of fixable causes. Here are the problems I see most often and how to solve each one.
Misaligned track joints. Even a single raised or twisted connector can catch a wheel flange and throw a train off the track. Press every connection firmly and check that rails sit flush across joints.
Dirty or damaged wheels. Dust and pet hair build up on wheel treads and flanges, reducing grip and causing slips on curves. Clean your wheels regularly with a soft cloth or a specialized cleaning car.
Tight radius for long rolling stock. Standard R40 curves simply cannot handle cars longer than about six studs between bogie pivots. If your train derails consistently on the same curve, the radius is too tight. Either shorten your rolling stock or widen the curve using the polygon method described above.
Bogie alignment problems. Bogies must rotate freely to follow the curve. If a bogie is too stiff or binds against the chassis, the wheels cannot align with the rail and derailment follows. Check that bogie pivot points have enough clearance and that no internal parts rub during turning.
Rough rail edges facing the wrong way. One rail on every LEGO curved track piece has a smooth outer edge and the other has a slightly rougher edge. The smooth rail must face the inside of the curve. If pieces are reversed, the rough edge catches wheels on the outer rail.
Speed through curves. Trains carrying momentum into a tight curve can climb the outer rail and derail. Reduce speed before curves, especially with top-heavy locomotives or freight loads.
Switch issues. LEGO switches use a spring mechanism that lets trains push through regardless of the points setting, but this can cause derailments if the points are not fully seated. Always confirm the switch position is locked before a train passes through.
Switch and Siding Configurations
Switches and sidings turn a simple loop into a functional railroad. A switch, also called a turnout, lets your train leave the main line and enter a secondary track. Sidings give you a place to park trains, run passing maneuvers, or load and unload cargo.
A passing siding runs parallel to the main line with switches at both ends, allowing two trains to pass each other on a single-track layout. A stub-end siding has a switch at one end only and dead-ends at the other, which is useful for parking locomotives or freight cars at a station.
When placing switches near curves, leave at least one straight piece between the switch and the curve. A switch immediately followed by a tight curve forces trains through two challenging track geometry features at once, and derailments become nearly guaranteed. The smooth curve principle applies here too: transitions between switches and curves should be gradual, not abrupt.
For continuous-running layouts, consider a loop-to-loop configuration where the train reverses direction at each end using a switch loop. This gives you the operational interest of point-to-point running without needing a huge footprint.
Space Planning and Layout Software
Planning your layout before you lay a single piece of track saves time, money, and frustration. Measure your available surface first, then design within those constraints rather than building a layout and hoping it fits.
For a standard R40 circle, you need a surface at least 35 inches or 89 centimeters wide in both directions. Adding straight sections for an oval extends one dimension. Wider curve radii demand proportionally more space, with R104 circles requiring more than double the footprint of R40.
Two free software tools dominate the LEGO train planning space. BlueBrick is a long-standing favorite that lets you design layouts digitally with accurate track piece representation. Track Designer is another option that some builders prefer for its interface. Both tools let you count exactly how many straight and curved pieces your planned layout requires before you start pulling parts from storage.
I always sketch my layout digitally first, count the required pieces, and confirm I own enough before building. This prevents the frustrating moment of being three curved pieces short with a layout half assembled on the table.
Third-Party Track Alternatives
Third-party track gives you access to wider curve radii without the labor of the polygon method, and flex track pieces let you bend a single length of track into any curve you need. Several manufacturers produce LEGO-compatible track in R56, R72, R104, and even larger radii.
If you run custom locomotives or long passenger cars and have the table space, investing in R104 or R88 third-party curves dramatically improves reliability and visual appeal. The LEGO train community broadly agrees that wider radii look nicer and run better, with the main tradeoff being the space they demand.
Flex track is especially useful for filling awkward gaps where standard straight and curved pieces do not quite connect. It conforms to whatever radius you need, though very tight bends in flex track can still cause derailments just as standard R40 curves do.
For builders who want to stick with pure LEGO parts, the polygon method remains the best option. It requires patience and a large supply of straight track, but it achieves the same smooth-running results without relying on any non-LEGO components.
Tips for Different Train Types
Different trains have different curve requirements based on their wheelbase and rolling stock length. Short freight cars and small shunting locomotives handle R40 curves without issue, which is why most official LEGO train sets ship with standard curved track.
Longer passenger cars and steam locomotives with rigid frames need wider curves. The Emerald Night, Horizon Express, and similar sets with cars longer than six studs between bogie pivots will derail on R40 curves unless you slow to a crawl. For these trains, plan for R56 minimum and R104 whenever possible.
Winter village layouts often combine short holiday-themed cars with a single longer locomotive. In these cases, design your curves for the longest piece of rolling stock in the consist. If the locomotive can make the turn, the shorter cars behind it will follow without trouble.
FAQs
What is the best radius curves for custom LEGO trains?
R104 is the best radius for custom LEGO trains and longer rolling stock. It handles most locomotive lengths smoothly and looks realistic. If space is limited, R56 is the minimum recommended radius for medium-length custom trains, while R40 should only be used for short four-stud rolling stock.
How do you build smooth curves with LEGO train track?
Build smooth curves using the polygon method: connect many straight track pieces end to end, angling each one slightly to distribute the curve across many small turns rather than one sharp bend. Use at least five LEGO elements to anchor the track, secure everything to a baseplate, and test with your longest train before finalizing the layout.
What is the standard LEGO curve radius (R40)?
R40 is the standard LEGO curve radius, measuring 40 studs from the center of the curve to the track centerline. A full R40 circle uses 16 curved track pieces and measures approximately 35 inches or 89 centimeters across. It is the radius included with every standard LEGO train track set.
How to prevent LEGO trains from derailing on curves?
Prevent derailments by using wider curve radii, ensuring all track joints sit flush, cleaning wheels regularly, checking that bogies rotate freely, positioning the smooth rail toward the inside of curves, and reducing train speed before entering turns. Never place a switch immediately before a tight curve.
How many pieces of curved track for a full circle?
You need exactly 16 standard LEGO curved track pieces to build a full R40 circle. Each piece represents 22.5 degrees of the circle, so 16 pieces complete the full 360 degrees.
Conclusion
Building a reliable LEGO train layout with smooth curves comes down to understanding your track geometry, choosing the right radius for your trains and available space, and applying proven techniques like the polygon method to create wider arcs without third-party parts. Every derailment has a cause, and almost every cause is fixable with the troubleshooting steps covered here.
Start simple with a basic oval if you are new to LEGO trains, then gradually widen your curves and add sidings as your skills and available space grow. Plan digitally before you build physically, test with your longest train before finalizing, and remember that the smooth rail always faces the inside of the curve.
Your next step is to measure your table or floor space, decide which curve radius fits, and sketch your first layout. Grab your track pieces and start building. The techniques in this guide will keep your trains running smoothly for hours of reliable operation.