
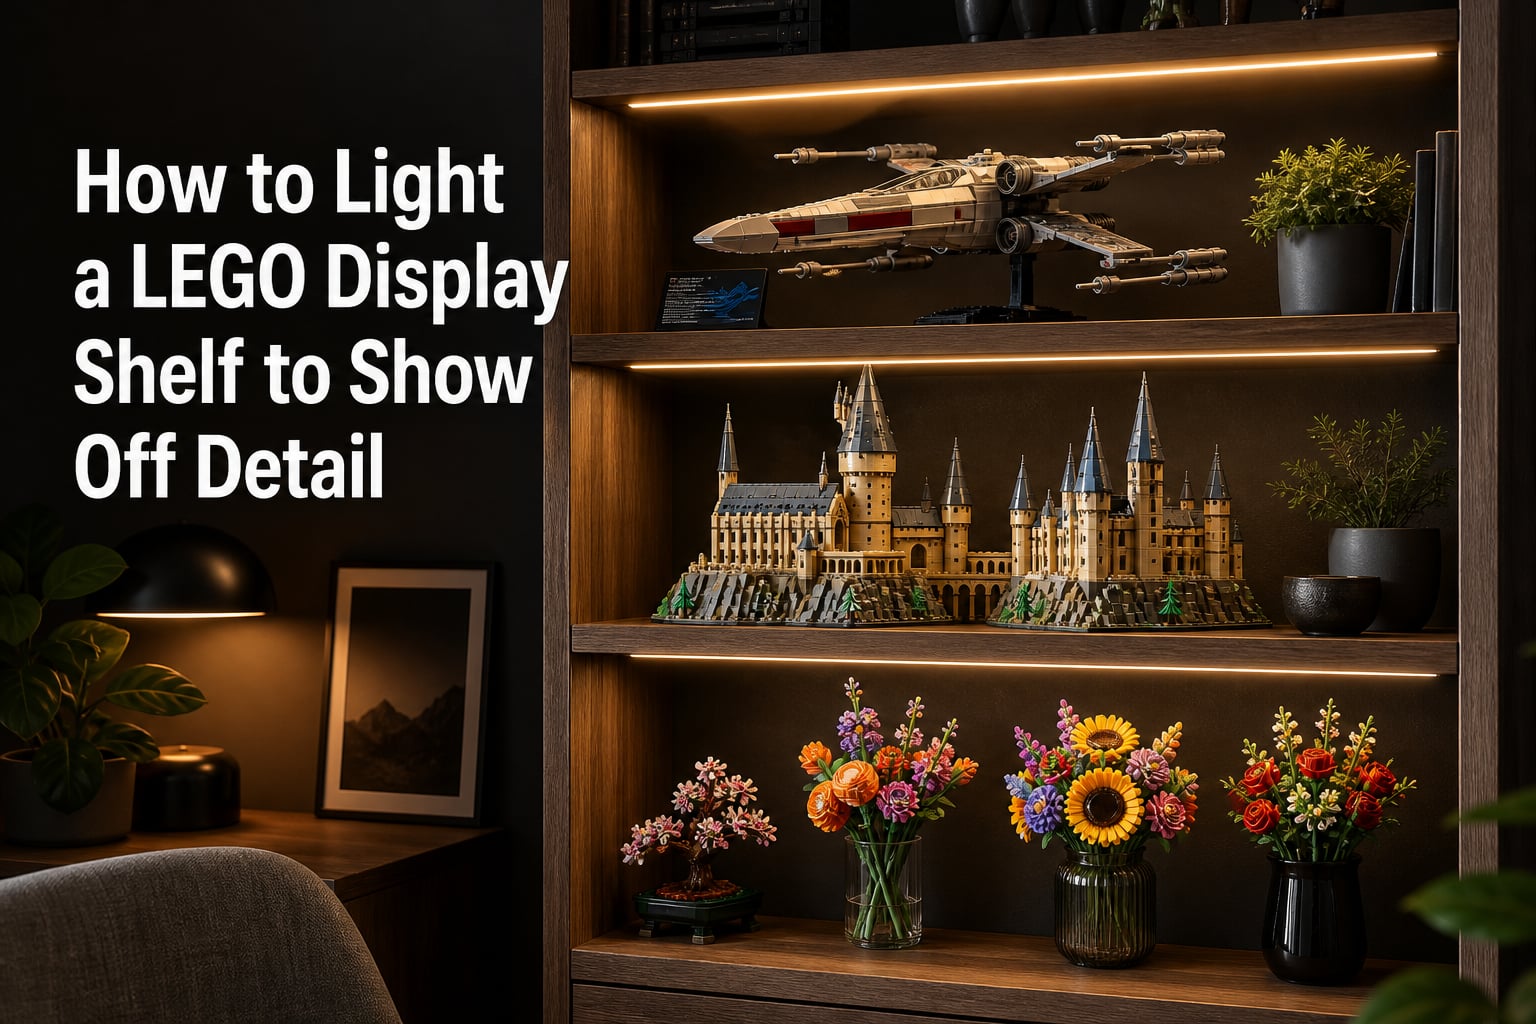
Building the set is only half the fun. The other half is showing it off — and that is exactly why so many collectors ask me how to light a LEGO display shelf to show off detail without spending a fortune or damaging their bricks.
I have spent the last three years lighting my own shelves, watching friends do the same, and lurking in places like r/lego and Eurobricks. What I have learned is that even a basic LED setup can turn a dull collection into something that genuinely looks gallery-quality. You do not need fancy branded kits either.
This guide walks through everything you need to know: the types of LED lighting that work best on shelves, which colour temperature flatters your builds, the power options worth considering, and a complete step-by-step installation process that anyone can follow. I will also tackle the LEGO 5 2 rule — a question that keeps popping up in search and forums but rarely gets a clear answer.
By the end, you will know exactly which lights to buy, where to mount them, and how to make your collection look like a museum exhibit. Let us get into it.
Table of Contents
Why Lighting Matters for LEGO Displays
The single biggest mistake I see from new collectors is leaving their builds in whatever light the room already has. Standard ceiling bulbs cast shadows downward, which means the underside and inner detail of your sets sit in darkness. You built those details — you should be able to see them.
Properly placed LED lighting pulls detail out of the shadows and gives each set the kind of focused attention you would expect in a shop window. A UCS Millennium Falcon suddenly shows off every greebled panel. A LEGO Botanical bouquet looks like it is catching real daylight. The transformation is immediate and the cost is modest.
There is also a preservation angle that matters. Traditional incandescent and halogen bulbs emit UV light and noticeable heat. Over time, both can degrade the ABS plastic LEGO uses — leading to yellowing and brittle pieces. Quality LED lighting is UV-free and produces almost no heat, which is why every experienced collector on r/lego recommends switching to LED if you have not already.
Finally, intentional lighting signals that your collection is curated. It turns a “pile of toys on a shelf” into a display. That psychological shift is what separates a hobbyist corner from a proper showcase.
Types of LED Lighting for LEGO Shelves
Not all LED lights do the same job. The four types below cover virtually every LEGO shelf setup I have seen, and each has a specific strength.
LED Strip Lights
LED strip lights are the workhorse of LEGO display lighting. They are flexible ribbons studded with tiny LEDs, usually with an adhesive backing that sticks directly along the underside of a shelf. I use them on nearly every shelf in my display room.
The big advantage is even, shadow-free coverage across an entire row of sets. You can cut most strips to length, which makes them ideal for awkward shelf sizes. Look for strips with high LED density (more LEDs per metre means fewer visible “dots” of light and smoother illumination). The trade-off is that cheap strips can produce a slightly harsh or uneven glow, so it is worth spending a little more on a strip rated CRI 90+.
Puck Lights
Puck lights are small, round, individual light units — think of them as miniature spotlights. They are perfect when you want to highlight a single hero set on a shelf, like a large Technic supercar or a Statue of Liberty build.
I like puck lights for displays where one set deserves centre stage and the surrounding sets are secondary. Most puck lights run on batteries or USB, which means no visible wiring to neighbouring lights. The downside is that they illuminate a focused circle rather than a wide strip, so you need multiple pucks to light a long shelf evenly.
Spotlights
Adjustable spotlights are what you typically see mounted above or below shelves in retail displays. They give you a directed beam that you can angle precisely at a set — great for creating drama on a tall build like the Tower of Orthanc or the Eiffel Tower.
Spotlights produce stronger, more focused light than puck lights. That makes them the best choice for large or tall displays where you need to throw light a fair distance. The risk is glare: angle them too steeply and you get bright reflections off shiny LEGO surfaces. Take time to dial in the angle.
Bias Lighting
Bias lighting is placed behind your display rather than in front of it. The light bounces off the wall behind the shelf, creating a soft glow around your sets rather than directly illuminating them.
This is the technique I recommend when you want an ambient, premium feel rather than a brightly lit shop window. It reduces eye strain and makes your sets “float” against a halo of light. It works especially well with dark walls — the contrast makes the LEGO colours pop. Many collectors combine bias lighting with a strip along the shelf edge for the best of both worlds.
Choosing the Right Colour Temperature
Colour temperature, measured in Kelvin (K), is the single most important specification after brightness. It determines whether your LEGO sets look warm and cosy, neutral and natural, or cool and clinical.
I tested all three ranges on my own shelves over a weekend, and the difference is dramatic. Here is what each range does to a LEGO display.
Warm White (2700K–3000K)
Warm white light leans yellow-orange, similar to an old incandescent bulb. It flatters earthy tones — browns, tans, dark reds, golds — which makes it a strong pick for Castle, Pirate, and historic themes. LEGO Botanical sets also look natural under warm light, since real flowers are usually photographed in golden-hour daylight.
The risk with warm white is that bright primary colours (red, yellow, blue) can look slightly muddy. If your shelf is full of Classic Space or modern City sets, warm white may dull them.
Neutral White (3500K–4000K)
Neutral white is the all-rounder I personally recommend if you can only pick one temperature. It is close to natural daylight and renders LEGO colours accurately across the board. Most collectors I have spoken to settle on 4000K as the sweet spot for a mixed-theme shelf.
Neutral white works for every LEGO theme without distorting colour. It is also the most flattering for photographs — if you share your display on Instagram or Flickr, neutral light gives you the truest colour reproduction.
Cool White (5000K and Above)
Cool white is bright, blue-tinged light that mimics overcast daylight. It makes whites appear brighter and gives a clean, modern feel. Star Wars and Space sets love cool white because the bluish tint reinforces the sci-fi atmosphere.
Be careful going too cool, though. Above 6500K, the light starts to feel clinical and harsh. Skin tones on minifigures can look washed out. I would not go above 5500K for a LEGO display.
Why CRI Matters Just as Much as Kelvin
CRI stands for Colour Rendering Index — a score from 0 to 100 that tells you how accurately a light source shows colours compared to natural sunlight. Cheap LEDs often have a CRI of 70 or 80, which makes LEGO colours look flat or slightly off.
I always look for LED strips and bulbs rated CRI 90 or higher. The price difference is small, but the colour accuracy improvement is immediately visible. A CRI 95+ strip will show your LEGO sets the way the designers intended, with every colour rendering true. This is one upgrade worth paying for.
Understanding the LEGO 5 2 Rule
This question comes up constantly in search and on forums, yet almost no guide actually answers it — so let me clear it up.
The “LEGO 5 2 rule” is not an official LEGO company rule. It is a community guideline that says, roughly, you should keep five studs of clearance around a displayed set and ensure at least two studs of space above it for lighting and airflow. The idea is to give each build breathing room so it does not look cramped, and to leave room for LED strips or cables without them pressing directly against the bricks.
In practice, the rule is a reminder that crowding sets together ruins the visual impact and makes lighting harder to install. If you follow the 5 2 spacing, you will find that strip lights sit cleanly along shelf edges, puck lights have room to spread their beam, and each set reads as a deliberate centrepiece rather than part of a cluttered mass.
I treat it as a flexible guideline rather than a law. Some sets — like a dense Minifigure army — look better packed tight. But for hero builds, giving them their own real estate with proper lighting clearance is what separates a great display from a crowded one.
USB vs Battery Power: Which Should You Choose?
Once you have picked your light type and colour temperature, the next decision is how to power them. This choice affects both your installation and your daily experience more than most people expect.
USB-Powered Lighting
USB is my default recommendation for any permanent display. You can plug USB LED strips into a wall adapter, a USB power bank, or even a powered USB hub hidden behind the shelf. The lights stay on as long as power is connected, which means no swapping batteries.
The main advantage is consistency. USB power delivers steady brightness and you can run multiple strips off a single hub with splitters. The trade-off is cable management — you will have visible USB cables running from your shelves to a power source. With some planning (cable channels, routing along shelf undersides, or behind furniture), this is entirely manageable.
Battery-Powered Lighting
Battery-powered lights, especially puck lights and small strip sections, are the no-wiring option. They are ideal for shelves where running a cable is impractical — wall-mounted floating shelves, corners far from an outlet, or rented spaces where you cannot modify the walls.
The catch is maintenance. Depending on brightness, you will be replacing or recharging batteries every few weeks. Button-cell lights (the tiny ones often used inside individual sets) last longer but produce dim light. If you have more than a handful of battery lights, the upkeep becomes tedious.
My Recommendation
If your shelf is near a power source, go USB. The reliability is worth the cable routing effort. Reserve battery power for spots where USB genuinely cannot reach, or for small displays where one puck light is all you need.
One trick I use: a single USB hub behind my main shelf powers six separate strip sections. One wall plug, six lit shelves, zero battery changes. That setup has run flawlessly for over two years.
Lighting Recommendations by LEGO Theme
Different LEGO themes benefit from different lighting approaches. Here is what I have found works best for the most popular categories.
Star Wars and Space Sets
Star Wars UCS ships and Space sets thrive under cool white light (5000K–5500K). The bluish tint reinforces the sci-fi mood and makes white and light-grey panels pop. Use spotlights angled from above to create dramatic shadows under wings and hulls — this mimics the look of a ship lit by a nearby star.
For internal lighting (cockpit glow, engine flares), small LED kits designed for specific sets work well. These are the one case where branded kits genuinely add value, since the lights are pre-measured for the set’s interior.
LEGO Botanical Collection
Bonsai trees, flower bouquets, and wildflower sets look most natural under warm white (2700K–3000K). Real plants are photographed in warm daylight, and matching that temperature makes the artificial flowers read as more lifelike. Use a strip light along the shelf edge for soft, even coverage rather than a harsh spotlight.
Technic Supercars and Vehicles
Technic models are all about mechanical detail — gears, pistons, working steering. Neutral white (4000K) is ideal because it renders the grey and black technical pieces accurately without adding warmth or coolness. A spotlight from the front-low angle reveals the internal mechanism detail that gets lost under overhead light.
Architecture and Landmarks
Architecture sets are predominantly white, tan, and light grey. They look stunning under neutral white (4000K) with a bias lighting setup behind them. The soft backlight creates depth and makes the silhouette of each building stand out. Avoid cool white here — it can make the tan pieces look slightly green.
Minifigure Displays
Minifigures are small, which means you need focused light at close range. A row of small puck lights or a high-density LED strip mounted just above the figures works best. Keep the brightness moderate — minifigures are detailed but small, and too much light creates harsh reflections on the glossy plastic. Neutral white renders minifigure colours most accurately.
Castle, Pirates, and Historic Themes
These themes are dominated by browns, greys, dark reds, and golds — colours that warm white (2700K–3000K) flatters beautifully. The warm light gives castles and pirate ships an atmospheric, candlelit quality that suits the historic subject matter. I also like adding a subtle bias light behind a castle display to create depth against the wall.
Step-by-Step Installation Guide
Installing LED lighting on a LEGO shelf is a straightforward weekend project. Here is the process I follow every time I add lighting to a new shelf.
Step 1: Plan Your Layout
Before buying anything, measure your shelves. Note the width and depth of each shelf, the location of the nearest power outlet, and which sets will sit where. Sketch a simple diagram showing where each light strip or puck will go. This prevents overbuying and ensures you have enough cable length to reach power.
Step 2: Choose and Cut Your Strips
Buy LED strips slightly longer than your shelf width. Most strips have clearly marked cut points (usually every 5 to 10 cm) — only cut at these lines. Cutting elsewhere will break the circuit. If your strip is slightly short, it is better to leave a small gap at one end than to cut too aggressively.
Step 3: Clean the Mounting Surface
This step gets skipped more often than any other, and it is why strips fall down. Wipe the underside of the shelf with rubbing alcohol and let it dry completely. Dust and grease are the enemy of adhesive backing. A clean surface means your strips stay put for years.
Step 4: Mount the Lights
Peel the adhesive backing a few centimetres at a time and press the strip firmly against the shelf underside. Work slowly — once the adhesive contacts the surface, it is hard to reposition without weakening the bond. Position the strip about 1 to 2 cm back from the front edge of the shelf so the light washes forward over your sets rather than glaring directly outward.
Step 5: Route and Hide Cables
Run power cables along the back corner of the shelf, securing them with small adhesive cable clips. If you are using a USB hub, tuck it behind or beneath the shelf unit. For floating shelves with no visible mounting surface, use flat ribbon cables that can be painted or hidden with a thin trim piece along the shelf edge.
Step 6: Test and Adjust
Power everything on before you put your sets back. Check for dark spots, glare, or uneven coverage. This is the time to reposition a puck light or add a short strip extension to fill a gap. Once your sets are in place, minor lighting problems become much harder to fix.
Step 7: Dim If Needed
If your lights feel too bright — a common issue with high-density strips — add a simple inline dimmer. These cost only a few pounds and let you dial in the perfect brightness. I run most of my shelves at about 60 percent brightness, which gives a comfortable, ambient glow rather than a stark spotlight effect.
DIY vs Branded Lighting Kits: Cost Breakdown
One of the most common questions on r/lego is whether branded lighting kits are worth the money compared to a DIY approach. Having done both, here is my honest breakdown.
Branded Kit Options
The three big names in LEGO lighting are Light My Bricks, Lightailing, and Brick Bling. Light My Bricks is the premium option — well-designed kits with custom components for specific LEGO sets, but at a high price that can approach half the cost of the set itself. Lightailing and Brick Bling offer similar per-set kits at lower prices, though component quality and instructions vary.
Branded kits shine when you want internal lighting for a specific set — glowing engines, lit cockpits, illuminated interiors. They come with pre-measured wires, custom bricks that hide cables, and step-by-step instructions designed for that exact model. If you are lighting a single hero set, a branded kit saves hours of fiddly work.
The DIY Approach
For shelf-level lighting (illuminating the shelf your sets sit on), DIY is almost always the better value. A quality reel of CRI 90+ LED strip, a USB power adapter, and a basic dimmer can light an entire bookcase of shelves for a fraction of what one branded kit costs.
I have seen collectors on Reddit build outstanding shelf lighting using nothing more than angled wooden battens mounted under shelves with LED strips glued along the edge. The total cost per shelf was under £15, and the result looked every bit as good as a commercial solution.
My Honest Recommendation
Use DIY LED strips for general shelf illumination — it is cheaper, more flexible, and the results are excellent. Reserve branded kits for individual sets where internal lighting adds real magic (Star Wars cockpits, Modular Building interiors, Hogwarts castle windows). This hybrid approach gives you the best visual impact for the least money.
Common Mistakes to Avoid
After helping several friends light their shelves, the same mistakes come up repeatedly. Here are the ones to watch for.
Do not skimp on CRI. A CRI 70 strip will save you a few pounds but flatten every colour on your shelf. The difference between CRI 80 and CRI 90+ is immediately visible — spend the small premium.
Do not mount strips too close to the front edge. If the LEDs are visible when you look at the shelf, you get glare and a harsh line of light. Pull them back 1 to 2 cm so the light grazes the shelf surface instead.
Do not mix colour temperatures on the same shelf. Warm white on one side and cool white on the other looks jarring and uneven. Pick one temperature per shelf and stick with it.
Do not forget cable management until the end. Plan your cable routes before you mount anything. Retroactively hiding cables on a fully loaded shelf is a frustrating, slow job.
Frequently Asked Questions
How to light a LEGO display?
The best way to light a LEGO display is to mount LED strip lights along the underside of each shelf, about 1 to 2 cm back from the front edge, powered by a USB hub. Use a colour temperature of 4000K (neutral white) for accurate colour rendering, and choose strips rated CRI 90 or higher. Add puck lights or spotlights to highlight individual hero sets.
What is the LEGO 5 2 rule?
The LEGO 5 2 rule is a community guideline suggesting you leave about five studs of clearance around a displayed LEGO set and at least two studs of space above it for lighting and airflow. It helps each build stand out, prevents a cluttered look, and leaves room for LED strips and cables without pressing against the bricks.
How to aesthetically display LEGO?
To display LEGO aesthetically, group sets by theme, leave breathing room around hero builds, use consistent colour temperature lighting (4000K neutral white is a safe choice), and add a bias light behind the display for depth. Dust-proof cases or glass-fronted shelves keep sets clean, and a dark wall behind your display makes colours pop.
What is the best way to light a display cabinet?
The best way to light a display cabinet is with a thin LED strip mounted along the top inside edge, pointing downward, combined with a dimmer to control brightness. For tall cabinets, add a second strip on a lower shelf. Use USB power for reliability, choose CRI 90+ strips for colour accuracy, and keep the colour temperature consistent across all shelves.
Wrapping Up
Knowing how to light a LEGO display shelf to show off detail comes down to four choices: the right light type, the right colour temperature, reliable power, and clean installation. Get those four things right and your collection transforms from a row of plastic models into something that genuinely looks curated.
Start simple — a single CRI 90+ LED strip on your main shelf, neutral white, USB-powered — and expand from there. You will see the difference the first evening you switch the lights on. Your bricks have been waiting for this.