
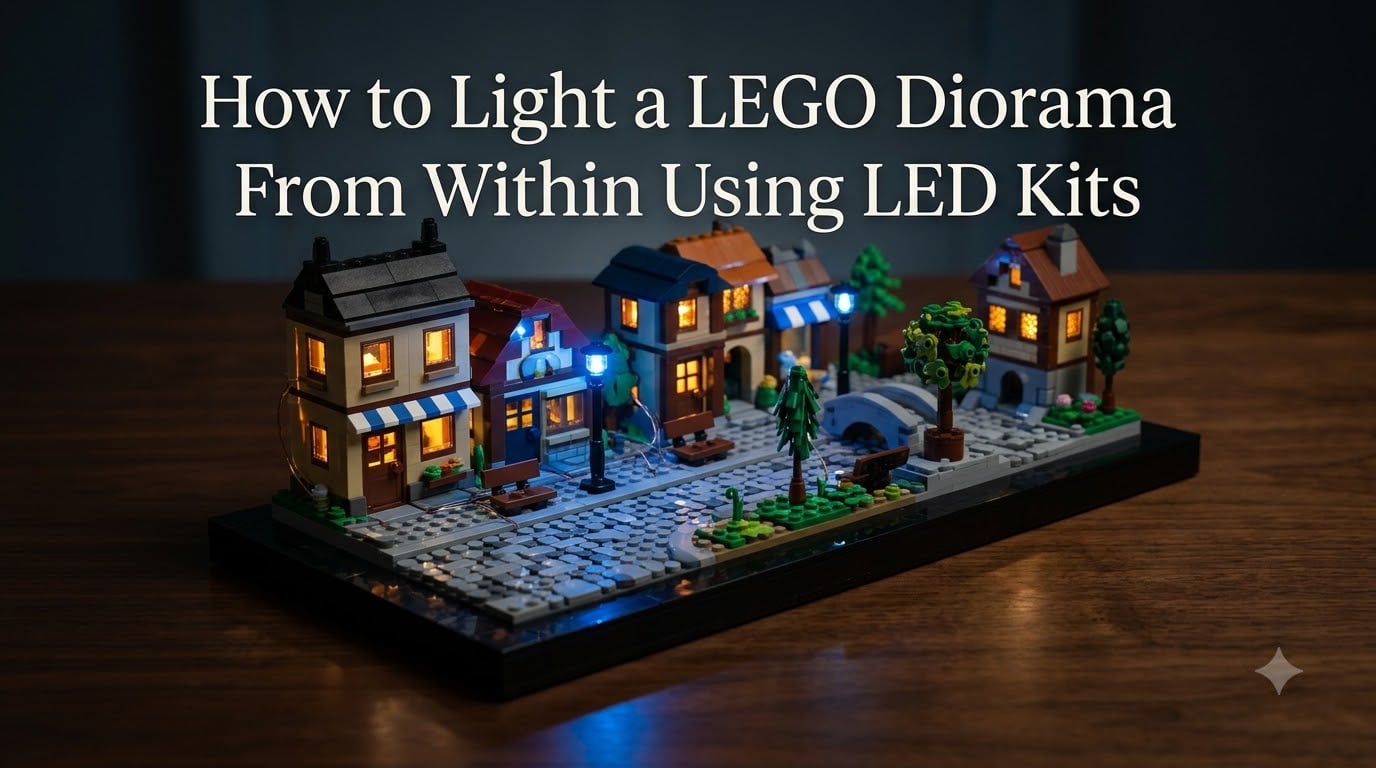
Learning how to light a LEGO diorama from within using LED kits changed the way I display my builds forever. What used to look like a nice model on a shelf suddenly became a living, breathing miniature world with glowing windows, flickering streetlights, and depth you could feel.
If you have ever stared at your diorama and thought something is missing, that something is almost always light. Interior LED lighting adds drama, draws the eye to details you spent hours building, and tells a story that plain bricks cannot.
This guide walks you through the entire process from start to finish. I will cover the types of LED lights available, how to plan your layout, step-by-step installation, wire-hiding techniques, power options, safety, troubleshooting, and advanced effects. Whether you are lighting your first small scene or planning a massive multi-level MOC, you will find practical, tested advice here.
Everything in this article comes from hands-on experience. I have burned out LEDs, fought with wires that would not fit between studs, and learned the hard way why over-lighting kills the mood. Let me save you those headaches.
Table of Contents
What Is Diorama Lighting and Why It Matters
LED diorama lighting means placing small, low-power light-emitting diodes inside and around your LEGO build to illuminate windows, interiors, streetlights, vehicles, and environmental features from within. The wires run through the internal structure of the build, hidden between bricks, so all you see is the glow.
Lighting matters because it transforms a static model into a scene with atmosphere. A dark window is just a hole. A lit window tells you someone lives there. A cold blue glow from an alley changes the emotional tone of your entire display.
Here is what good interior lighting does for a diorama:
- Creates depth through light and shadow, making flat builds feel three-dimensional
- Highlights architectural details that get lost under normal room lighting
- Sets mood and time of day, from warm sunset to cold nighttime
- Draws attention to the focal points you want people to notice first
- Turns a display piece into a conversation starter that demands attention
LEGO builders who display their work, AFOLs building custom MOCs, and diorama collectors all benefit from lighting. Even a modestly lit scene outperforms a perfectly built but unlit display every time.
Types of LED Lights for LEGO Dioramas
Choosing the right type of LED is the first decision you need to make. Each type serves a different purpose, and most dioramas benefit from combining two or three types for layered lighting.
Bit Lights (Single LEDs)
Bit lights are individual LED units mounted on tiny wires, usually 5mm or smaller. They are the workhorse of LEGO lighting because they fit inside a single 1×1 transparent brick or behind a minifigure-scale lamp post.
Best uses: interior room lights, small window glows, headlights, indicator lights, and single-point accents. Most beginner kits are built around bit lights because they are versatile and easy to place.
Strip Lights and Light Bars
Strip lights are flexible circuits with multiple LEDs spaced along a thin ribbon. Light bars are rigid versions with the same concept. Both provide broader, more even illumination than individual bit lights.
Best uses: large interior spaces like warehouse floors, under-baseplate ambient glow, ceiling lighting in modular buildings, and backlighting behind translucent panels. Strip lights cover more area per component, so you need fewer connections.
Spotlights and Flood Lights
Spotlights use a focused beam to highlight a specific element like a statue, vehicle, or minifigure. Flood lights cast a wider wash of light for general scene illumination. Both add dramatic direction to your lighting.
Best uses: highlighting hero elements, simulating overhead streetlights, creating focused pools of light in dark scenes. Use sparingly because too many spotlights flatten the contrast that makes lighting interesting.
Effects Lights
Effects lights include flickering LEDs for fireplaces and campfires, color-changing RGB units, and flashing LEDs for emergency vehicles or sci-fi scenes. These add motion and life to a static diorama.
Best uses: fireplace flicker, blinking warning lights, sci-fi control panels, lightning effects, and any scene where you want the eye to catch movement. A single flickering fireplace LED can become the centerpiece of a room interior.
Quick Comparison
For small accent points and single windows, bit lights are your best bet. For large areas and ambient fills, strip lights do the heavy lifting. Spotlights add drama to focal points, and effects lights bring motion. Most successful dioramas use a combination rather than just one type.
Light-As-You-Build vs After-Build: Choosing Your Method
There are two main approaches to installing LED lighting in a LEGO diorama, and the one you pick affects everything about your workflow.
Light-As-You-Build
This method involves installing lights as you construct the diorama, integrating wires and LEDs into the structure at each stage. You lay cable routes before sealing up walls, place LEDs before closing ceilings, and plan power connections before finishing the base.
Pros: cleanest wire routing possible, LEDs positioned exactly where you want them, no disassembly required. This is the preferred method for purpose-built MOCs where lighting is part of the design from day one.
Cons: requires planning before you start building, slower construction process, harder to make changes once a section is closed up. If you decide to add more lights later, you may need to partially disassemble.
After-Build Installation
This method involves adding lights to an already completed build. You thread wires through existing gaps, use transparent bricks as light diffusers, and route cables through whatever openings the structure allows.
Pros: works with existing sets and completed builds, no need to plan ahead, easier to experiment with different lighting setups. This is the method most beginners use with pre-made kits designed for official LEGO sets.
Cons: wire routing is messier and more visible, limited placement options based on existing structure, may require partial disassembly to access interiors. The results are good but rarely as clean as light-as-you-build.
My recommendation: use light-as-you-build for custom MOCs and dioramas you are designing from scratch. Use after-build installation when you are adding lights to an existing set or a completed model. Both can produce great results when done carefully.
Planning Your Lighting Layout
Planning is the step that separates a professional-looking lit diorama from a tangled mess of wires and hotspots. Before you install a single LED, spend time mapping out your lighting design.
Decide the Story Your Lighting Tells
Ask yourself what time of day your diorama represents. A cozy winter village at dusk needs warm amber light spilling from windows. A sci-fi corridor needs cold blue and white with sharp shadows. A medieval marketplace at night needs scattered firelight and torch glow.
Your lighting narrative determines color temperature, brightness, and placement. Write it down in one sentence before you start. It keeps you focused when you are staring at a pile of components.
Map Your Light Points
Take photos of your diorama from multiple angles. Print them or open them in an annotation app. Mark every location where you want a light with a dot or number. This becomes your installation map.
A good rule of thumb from experienced MOC builders is approximately three light strips or six individual bit lights per floor of a modular building. Adjust based on the size of your spaces and how dramatic you want the effect.
Plan Cable Routes
For each light point, draw the path the wire will take to reach the power source. Look for internal cavities, Technic pin holes, hollow brick channels, and gaps between plates. Identify where wires will exit the build and connect to power.
If a light point has no viable cable route, either move it or plan to modify the structure. This is exactly why light-as-you-build is so effective for MOCs. You can leave channels open during construction.
Choose Color Temperature
Warm white, around 2700K to 3000K, gives a cozy, residential, or vintage feel. Cool white, 5000K to 6500K, feels modern, clinical, or cold. Mixing both in the same scene can create realistic contrast, like a warm interior visible through cold blue exterior glass.
Budget Your Components
Count your planned light points and list the components you need. Bit lights typically cost less per unit than strip lights or effects lights. Pre-made kits bundle everything you need for specific sets but may not fit custom builds. For MOCs, buying individual components gives you more flexibility and often costs less overall.
How to Light a LEGO Diorama From Within Using LED Kits: Step-by-Step Installation
This is the core process for installing LED lighting in a LEGO diorama. Follow these steps in order, and you will avoid the most common problems that derail lighting projects.
Step 1: Test all components before installation. Connect every LED, strip light, and effects light to your power source before placing anything inside the build. A dead LED discovered after you have sealed up a wall is incredibly frustrating. Test each component individually and label working ones with small pieces of tape.
Step 2: Lay out your power infrastructure first. Decide where your power source, expansion boards, and connection hubs will sit. These should be accessible, either underneath the baseplate or in a hidden compartment. Route main power cables before placing any individual lights so you are not working around obstacles.
Step 3: Install primary light points. Start with your largest or most important lights, usually strip lights for big interiors and main spotlights. Position them and connect to power. Turn them on while you work so you can see the effect and adjust placement in real time.
Step 4: Route wires through internal channels. Thread wires through the gaps you planned in your layout phase. Use Technic pin holes, hollow stud channels, and the space between stacked plates. Keep wires flat against internal surfaces so they do not interfere with brick connections.
Step 5: Add secondary and accent lights. Once your main lights are placed, add bit lights for windows, individual room accents, and small details. Connect each one to your expansion board and test immediately. If a light does not work, you catch it before moving on.
Step 6: Use connector boards and expansion hubs. Most LED kits include small expansion boards that let you connect multiple lights to a single power line. Place these in accessible locations and use them to consolidate wires. This keeps your cable routing organized and makes troubleshooting easier later.
Step 7: Secure loose wires inside the build. Use small LEGO pieces, Technic pins, or even transparent tape to hold wires in position. Loose wires can shift during handling and either disconnect or become visible through gaps. A wire that is firmly in place today should still be in place after you move the diorama to a display shelf.
Step 8: Seal up the structure section by section. Close walls, floors, and ceilings one section at a time. After sealing each section, test all lights again. This way, if something stops working, you know exactly which section caused the problem and can reopen just that area.
Step 9: Connect to power and do a full test. Once everything is assembled, connect your final power source. Check every light point. Look for dark spots where a wire may have come loose, overly bright areas where you might want to dim or diffuse, and any visible wires that need attention.
Step 10: Photograph the result in a dark room. Take your diorama into a dark room and photograph it with no other lights on. This reveals the true effect of your lighting and exposes problems you cannot see under normal room light. Over-bright hotspots, dark gaps, and wire shadows all become obvious.
Cable Management: Hiding Wires in Your Diorama
Visible wires are the number one complaint from LEGO lighting builders. It is also the single biggest difference between amateur and professional-looking results. Here are the techniques that actually work for hiding cables in enclosed dioramas.
Use Ultra-Thin Wire
Standard LED wire is often too thick to fit between LEGO studs without creating visible gaps. Ultra-thin wire, sometimes labeled as 2.0 wire or 30-gauge, slips between studs so the bricks still press together firmly. This is the single most effective upgrade you can make for clean cable management.
Route Through Technic Pin Holes
Technic bricks have hollow pin holes that are perfect for running wires through the interior of a wall or beam. Stack Technic bricks vertically and thread wires through the channel they create. This keeps wires completely hidden inside the structural elements of your build.
Run Cables Under Baseplates
The space beneath a baseplate, between the studs on its underside, is a natural cable channel. Route your main power lines and long runs of wire under the baseplate and bring them up through holes at specific points. This is especially effective for dioramas built on multiple stacked baseplates.
Use Hollow Brick Channels
Many LEGO bricks have hollow interiors designed for stud connections but equally useful as wire channels. Tiles with hollow studs, modified bricks with side holes, and grille tiles all provide routing options. Plan your build to include these components in strategic locations.
Color-Match Wires to Surroundings
Black wires disappear against dark bricks and in shadowed interiors. White wires blend with light-colored walls and snow scenes. If a wire must be visible somewhere, choose the color that matches its background. Some kit manufacturers offer wire color options, and you can also sleeve wires with heat-shrink tubing in matching colors.
Create a Hidden Power Compartment
Design a section of your base that opens or lifts away to house the power source, expansion boards, and excess wire length. This keeps the messiest part of your installation hidden but accessible. For enclosed dioramas, a removable back panel or hinged floor section works well.
Power Options and Safety Considerations
USB Power
USB power is the most popular option for LEGO lighting because it is safe, widely available, and easy to connect. A standard USB port provides 5 volts, which is ideal for most LED kits. You can power your diorama from a wall adapter, a USB power bank, or even a computer port.
USB works well for permanent displays near an outlet. Use a right-angle USB cable to keep the connection flush against your base, and consider a USB switch so you can turn lights on and off without unplugging.
Battery Power
Battery packs offer portability and eliminate visible power cables running to a wall. Most kits use either AA battery boxes or coin cell holders. Battery power is ideal for displays at conventions, temporary setups, or dioramas without access to an outlet.
The tradeoff is battery life. LED kits draw relatively little power, but batteries still need replacing or recharging. Rechargeable lithium battery packs with USB output are a good middle ground for frequently lit displays.
Wall Plug Adapters
For large dioramas with many lights, a dedicated wall adapter provides consistent power without battery changes. Match the voltage and current rating to your kit requirements. Using an adapter with too high a voltage will burn out your LEDs.
Are LED Lights Safe for LEGO?
Yes, LED lights are safe for LEGO when used correctly. LEDs generate very little heat compared to incandescent bulbs, so there is no risk of melting or warping ABS plastic under normal conditions. The key safety considerations are voltage matching, avoiding short circuits, and not overloading power boards.
Always match the voltage of your power source to the rating of your LED components. Do not connect more lights to a single expansion board than it is rated for. If any component feels warm to the touch after running for an hour, disconnect it and investigate.
Color Theory and Mood Setting
Color choice does more than make your diorama look pretty. It controls the emotional response of anyone viewing your display. Understanding a few basics of color theory will dramatically improve your lighting results.
Warm colors like amber, orange, and red suggest comfort, age, and energy. Use warm white for residential interiors, firelight, and vintage scenes. Warm light feels lived-in and welcoming, perfect for winter villages, medieval taverns, and cozy cottages.
Cool colors like blue, cyan, and white suggest technology, cold, and sterility. Use cool white for modern interiors, laboratories, and sci-fi corridors. Blue light works for nighttime exteriors, underwater scenes, and ice environments. Cool light feels precise and sometimes unsettling.
The most compelling dioramas combine warm and cool light in the same scene. A warm-lit interior visible through a window from a cold blue exterior creates instant narrative tension. This contrast is what separates good lighting from great lighting.
Colored LEDs in red, green, and other hues are useful for specific effects like neon signs, emergency lights, and alien technology. Use them as accents rather than primary light sources, since saturated color across an entire scene flattens the visual depth.
Common Mistakes to Avoid
After lighting dozens of builds, I see the same mistakes repeated by builders at every level. Avoid these and you will save yourself hours of frustration.
Over-illuminating the scene. This is the most common mistake. More lights does not mean better lighting. A scene that is uniformly bright loses all drama and depth. Less is almost always more. Start with fewer lights than you think you need and add more only if the scene feels too dark.
Using wire that is too thick for LEGO stud spacing. Standard craft wire or cheap LED kit wire may be too thick to fit between studs without forcing bricks apart. This creates visible gaps and weakens structural connections. Always choose ultra-thin wire rated for LEGO-scale builds.
Not planning cable routes before building. Retrofitting wires into a completed build leads to visible cables, partial disassembly, and compromised structural integrity. Even for after-build installations, sketch your wire paths before you start threading anything.
Ignoring color temperature consistency. Mixing warm white and cool white randomly creates a disjointed, unrealistic look. Use warm and cool intentionally, not accidentally. Decide your palette upfront and stick to it.
Forgetting to test components before installation. Installing a dead LED inside a sealed wall means either living with a dark spot or tearing apart your build. Always test every component before placing it.
Skipping diffusion. Bare LEDs create harsh hotspots that look like tiny stars rather than realistic light sources. Placing a transparent or translucent LEGO element over an LED diffuses the light into a soft, natural glow. Experiment with different transparent colors for varied effects.
Troubleshooting Common LED Lighting Problems
Even careful installations develop problems. Here are the most common issues and how to fix them, drawn from real forum discussions and personal experience.
LED Flickering
Flickering is one of the most common complaints, especially when filming lit dioramas. The usual cause is PWM dimming from an incompatible controller or power source. PWM dimming rapidly switches the LED on and off to reduce brightness, which is invisible to the eye but shows up clearly on camera.
To fix camera-visible flickering, use a constant-current power source rather than a PWM dimmer. If you need dimming, use analog dimming or a resistor-based approach instead of PWM. For flickering caused by loose connections, check every connector and solder or crimp any questionable joints.
Dead or Dim LEDs
If an LED is completely dead, first test the power source and the expansion board port with a known working LED. If the port works, the LED itself has failed and needs replacement. If the port does not work, the expansion board may be damaged or overloaded.
Dim LEDs usually indicate insufficient power. Check whether you have exceeded the current rating of your power source or expansion board. Remove some lights and see if the remaining ones brighten up. If so, you need a higher-capacity power supply.
Loose Connections
Vibration from moving or handling your diorama can loosen plug-in connections. The tiny connectors used in LED kits are particularly vulnerable. Press each connector firmly and consider securing them with a dab of removable adhesive or a small piece of tape inside your hidden power compartment.
Wires Visible After Assembly
If you discover visible wires after final assembly, you have limited options. Small wires visible through gaps can sometimes be pushed inside using a thin tool like a toothpick or tweezers. For more visible problems, black wire against dark backgrounds can be hidden with a small LEGO piece placed strategically. If all else fails, plan to rebuild that section with better routing.
Advanced Effects: Flickering, Color-Changing, and Microcontrollers
Once you master basic lighting, you can explore dynamic effects that bring your diorama to life. These range from simple pre-built effect modules to full microcontroller-based systems.
Pre-Built Effects Modules
The simplest way to add dynamic effects is to buy pre-built flicker or flashing modules. These are small circuits that connect between your LED and power source and automatically create a flickering pattern. No programming or soldering required. They are perfect for fireplaces, campfires, and malfunctioning lights.
Color-Changing RGB LEDs
RGB LEDs contain red, green, and blue elements that combine to produce any color. With a simple controller, you can cycle through colors, set specific hues, or create slow color transitions. These work well for sci-fi scenes, magic effects, and mood lighting that changes over time.
Getting Started with Microcontrollers
For full control over your lighting, a microcontroller like an Arduino or a small RP2040 board lets you program custom effects. You can control individual lights, create synchronized patterns, simulate lightning storms, and respond to sensors or buttons.
You do not need to be a programmer to get started. Beginner-friendly boards like the Adafruit QT Py or Arduino Nano have extensive community tutorials written specifically for LED control. Start with a simple sketch that blinks one LED, then build from there.
A basic microcontroller setup requires the board itself, a constant-current LED driver chip like the AW9523, your LEDs, and a power source. The driver chip handles the electrical work so your microcontroller only handles the logic. This approach avoids soldering directly to LED legs and keeps your wiring clean.
Advanced builders use I2C communication to control dozens of LEDs from a single microcontroller, enabling complex synchronized effects like running light sequences, simulated radar sweeps, and reactive lighting that changes based on ambient light sensors. This level of control is overkill for a simple display but incredible for a centerpiece showpiece.
Frequently Asked Questions
How do I light up a diorama?
To light up a diorama, plan your light points and cable routes first, then install LEDs inside the structure using thin wires threaded between LEGO studs. Connect all lights to an expansion board, route wires through internal channels and under baseplates, and power everything with a USB adapter or battery pack. Test each component before sealing up sections of your build.
How do LEGO lighting kits work?
LEGO lighting kits use small LEDs connected to thin wires that thread between LEGO studs and connect to a central expansion board. The board links to a power source like a USB adapter or battery pack. Ultra-thin wire fits between bricks without creating gaps, and transparent LEGO elements diffuse the LED light into a soft glow.
What is the best lighting for a diorama?
The best lighting for a diorama combines bit lights for small accent points, strip lights for large area illumination, and spotlights for dramatic focus. Use warm white for cozy residential scenes and cool white for modern or sci-fi settings. The most effective approach layers two or three light types rather than relying on just one.
Are LED lights safe for LEGO?
Yes, LED lights are safe for LEGO. LEDs produce very little heat, so there is no risk of melting or warping ABS plastic under normal use. The key safety rules are matching the power source voltage to your LED components, not overloading expansion boards beyond their current rating, and disconnecting any component that feels warm after extended use.
How do I hide wires in my LEGO build?
Hide wires by using ultra-thin 30-gauge wire that fits between studs without gaps, routing cables through Technic pin holes and hollow brick channels, running main lines under baseplates, and color-matching wire to surrounding bricks. Design a hidden compartment in your base for the power source and expansion boards. Plan cable routes before or during construction for the cleanest results.
Can I use LED light kits designed for official LEGO sets in custom MOCs?
Pre-made kits designed for official LEGO sets often do not fit custom MOCs properly because the wire lengths and connection points are designed for specific set geometry. For custom builds, buying individual LED components gives you more flexibility. You can use the same types of bit lights and strip lights but cut and route wires to match your own structure.
Conclusion
Knowing how to light a LEGO diorama from within using LED kits opens up a completely new dimension of building. Your displays go from static models to immersive miniature worlds that capture attention and tell stories through light and shadow.
Start simple. Pick a small section of your diorama, install a few bit lights, and see the transformation for yourself. Once you experience the difference lighting makes, you will approach every future build with cable routes and light points in mind from the very first brick.
Remember the core principles: plan before you build, use ultra-thin wire, test every component before installation, avoid over-illumination, and always photograph your results in a dark room to catch problems early. With these fundamentals, every diorama you light from this point forward will look better than the last.
Grab your LED kit, clear a workspace, and start experimenting. Your LEGO builds deserve to be seen in their best light.