
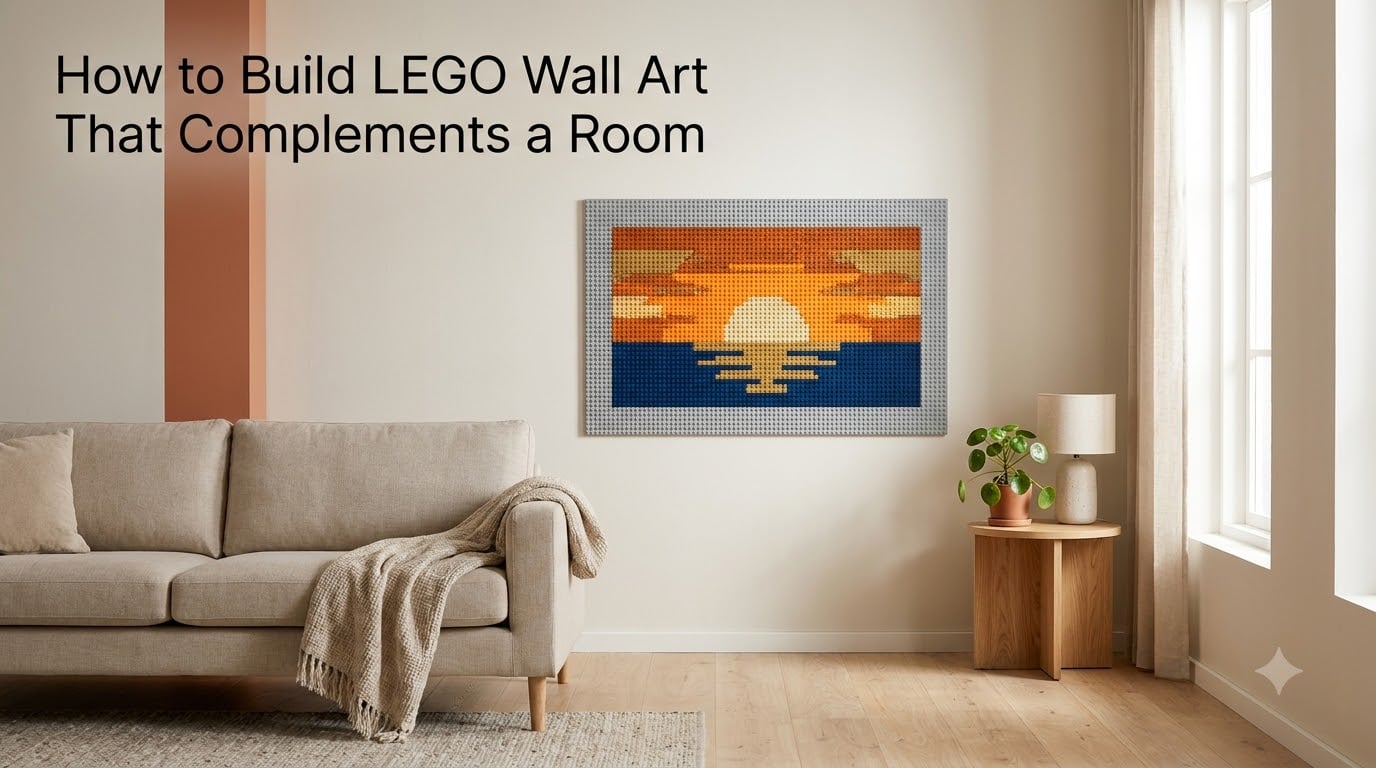
I built my first LEGO wall art piece for our playroom three years ago, and it has been replaced, redesigned, and rebuilt more times than I can count. That is exactly the point. When you learn how to build LEGO wall art that complements a room, you get something no canvas or framed print can offer: artwork your family can change with the seasons, the mood, or the latest obsession.
LEGO wall art has grown from a niche hobby project into a recognized interior design technique. Designers and homeowners now use bricks, baseplates, and custom mosaics to add color, texture, and personality to living rooms, home offices, kids’ bedrooms, and even minimalist spaces. The reason is simple. LEGO art is interactive, modular, and personal in a way that store-bought art rarely is.
In this guide, I will walk you through the full process. You will learn the materials you need, a step-by-step method for designing and mounting your piece, the design principles that make wall art actually work in a room, color coordination tips, room-by-room recommendations, mounting options, advanced techniques, and maintenance. I will also answer the most common questions I see on forums and Pinterest.
Table of Contents
What Is LEGO Wall Art?
LEGO wall art is any decorative installation that uses LEGO bricks, plates, or baseplates as its primary visual medium. It can take many forms, from a small framed mosaic to a full statement wall. The two most common formats are baseplate-based designs and freeform brick builds.
A baseplate is a thin LEGO plate with studs on top and a flat back. It mounts to your wall and acts like a pixel grid. You then build your artwork on top of it using standard bricks. Baseplates come in common sizes like 32×32 studs, 48×48 studs, and large modular boards that connect together.
A MOC (My Own Creation) is any LEGO build you design yourself, as opposed to following official set instructions. MOC wall art is what gives your installation a personal feel and lets you match the exact colors, theme, and scale of your room.
You can also create mosaic wall art, where each “pixel” is a 1×1 brick in a different color, reproducing a photo, pattern, or design. Mosaics are how most people achieve painterly or photographic LEGO art on a wall.
Materials and Tools You Need
Before you start, gather everything on this list. Having the right materials from the beginning saves you from taking the whole project back down because a single strip of adhesive failed.
- LEGO baseplates in your chosen size (32×32, 48×48, or modular boards)
- LEGO bricks in your color palette, including plates and tiles for fine details
- 1×1 round plates or tiles for mosaic pixel work
- Strong wall adhesive such as 3M Command Strips (large picture-hanging variety), heavy-duty double-sided tape, or construction adhesive
- Wooden backing board (plywood or MDF) if you want a framed floating look
- Brick separator tool for taking builds apart without cracking bricks
- Level, measuring tape, and pencil for accurate placement
- Stud finder if you plan to screw into drywall
- Optional: lighting kit for backlighting or accent LEDs
I always recommend buying 10-15% more bricks than your design needs. Color matching across production batches can vary, and you will want a few spares in case a piece gets lost or damaged.
How to Build LEGO Wall Art: Step-by-Step Process
Below is the exact process I follow on every project. It works whether you are making a small 32×32 mosaic or a multi-board statement wall. Take your time with steps 1 and 2; most failed LEGO wall art projects fail at the planning stage, not the build.
Step 1: Plan Your Design Concept
Start with the room, not the bricks. Measure the wall where the art will hang. Note the existing color palette, furniture style, and the focal point you want the LEGO art to support. Then sketch a simple design on paper or in a free design tool. For mosaics, software like Stud.io or Pixel Art Converter can convert an image into a brick-by-brick color map.
Decide on three things early: the size (in studs), the color palette (no more than 6-8 colors keeps the design cohesive), and the visual style (mosaic, abstract, geometric, or themed scene).
Step 2: Choose and Prepare Your Baseplates
Pick baseplates that fit your wall space. A 32×32 baseplate is roughly 10 inches square and works for small accent pieces. For larger installations, 48×48 baseplates or multiple 32×32 plates connected edge-to-edge give you more flexibility. Lay them out on the floor and arrange the pattern before mounting anything.
If you are using multiple baseplates, lightly sand the seams so the bricks transition smoothly across the joins. This is one detail that separates amateur installs from professional-looking ones.
Step 3: Build Your Design
Build your design on the baseplates while they are still on the floor. This is much easier than building on the wall and lets you step back to check the composition. For mosaics, work row by row, checking your color count against the plan every few rows.
Keep the design slightly inset from the edges of the baseplate. A half-inch border of empty studs around the artwork looks intentional, while bricks flush to the edge can look unfinished and are easier to knock loose.
Step 4: Mount the Baseplates to the Wall
Once your build is complete and you are happy with it, carefully remove the bricks in sections and number them with small stickers. Then attach your mounting solution to the back of each baseplate. Lift the baseplate to the wall, hold it against your level line, and press firmly for the adhesive cure time.
After the baseplate is secure, rebuild your design on the wall, section by section, using your numbered photos or notes as a guide.
Step 5: Add Finishing Touches
Step back and check the final result from across the room. Adjust any out-of-place bricks, add lighting if you planned for it, and seal the edges with a small bead of clear silicone if you want extra security against curious hands or pets.
Design Principles for LEGO Wall Art
Great LEGO wall art does not just sit on a wall. It interacts with the room. These are the design rules I follow every time.
The 2-3 Rule for Wall Art Placement
The 2-3 rule says that wall art should be hung so it occupies roughly two-thirds of the available wall space, or that grouped art should be arranged in odd numbers (2 or 3 pieces) for visual balance. For LEGO wall art specifically, this means your installation should cover about two-thirds of the wall width above the furniture it sits over, or be centered as a stand-alone piece at eye level (about 57-60 inches from the floor to the center).
Use a level, not your eye, to mark the center. Then measure down from the ceiling or up from the nearest furniture to find the right height.
The LEGO 5-2 Rule
The LEGO 5-2 rule is a color ratio guideline often used by builders to keep mosaics visually balanced. It suggests using one dominant color covering about 50% of the design, two supporting colors covering around 20% each, and small accent colors making up the remaining 10%. Following this ratio keeps a LEGO mosaic from looking noisy or chaotic and helps it feel intentional, even on a busy wall.
Pick your dominant color from the room’s existing palette. A muted wall, a sofa throw, or a piece of nearby art can all be the source.
Balance, Scale, and Focal Point
LEGO wall art is naturally eye-catching because of its texture. Use that to your advantage by treating the LEGO piece as the focal point and reducing visual noise around it. Avoid hanging busy framed art or busy wallpaper directly next to a textured LEGO piece, or the eye will not know where to rest.
Color Coordination Tips for LEGO Wall Decor
Color is the single biggest factor in whether your LEGO wall art looks custom-made for the room or just stuck on. Here is how to get it right.
- Sample your room’s existing colors. Photograph the wall, furniture, and any nearby art in natural daylight and pull a palette from the photo using a free tool like Coolors or Adobe Color.
- Match LEGO colors to within 80% of the room palette. Exact matches are rare in LEGO, but close tones read as “matching” to the eye.
- Use the 60-30-10 rule. Let the room’s dominant color take 60% of the visual space, a secondary color take 30%, and an accent (your LEGO art’s boldest color) take 10%.
- Consider the lighting. Warm LED bulbs shift LEGO colors warmer. If you have cool daylight bulbs, blue and gray bricks will look more vibrant.
- Test before mounting. Lay your assembled design on a table in the room and look at it at different times of day before you commit.
LEGO color psychology also matters. Bright primary colors energize playrooms. Earth tones and muted blues calm bedrooms. Monochrome builds in black, white, and gray suit modern and minimalist decor.
Room-by-Room LEGO Wall Art Guide
Different rooms have different needs. A LEGO art piece in a playroom should invite play, while a living room installation should complement, not compete with, the rest of the decor. Here is how I approach the main rooms.
Living Room
In the living room, treat LEGO wall art like a piece of fine art. Pick a single large mosaic, a framed 3D build, or a small cluster of three pieces arranged in a triangle. Stick to two or three colors that match your existing decor. Black, white, and a single accent color (mustard yellow, forest green, or burnt orange) work well in most modern living rooms.
Kids’ Bedroom and Playroom
This is the natural home of LEGO wall art. Use bright, saturated colors and interactive designs: a city skyline, a name spelled in bricks, a tic-tac-toe board, or a rotating “LEGO Wall of Fame” where you display your kid’s latest build. Baseplates mounted at child height let kids add and rearrange their own creations safely.
Home Office
In a home office, keep LEGO wall art subtle and personal. A small pixel-art logo, a favorite quote rendered in bricks, or a calm geometric pattern works well. Place it where you can see it from your main working position so it adds inspiration without distraction.
Gallery Wall
LEGO art mixes well with framed prints and photos if you keep the colors and frames consistent. Use thin black or natural wood frames around your LEGO baseplates to make them feel like part of the gallery rather than a different medium. Stick to odd-numbered groupings (3 or 5 pieces) for the most balanced layout.
Mounting and Installation Options
How you mount your LEGO wall art determines how secure it is, how easy it is to remove, and whether it damages your wall. Here are the three best options.
Adhesive Mounting Strips
3M Command Strips or similar heavy-duty strips are the most popular option for renters. They hold firmly but come off cleanly when heated with a hair dryer. Use the large picture-hanging variety, and follow the weight limits on the package. For a 32×32 baseplate fully built up, you will need at least four strips, one in each corner.
Screw Mount
Screws into studs are the most secure option. Use a stud finder to locate wall studs, then screw through the baseplate at the corners (bricks can be removed and replaced around the screw heads). This is the best choice for playrooms, kids’ rooms, or anywhere a piece might get pulled or bumped.
Wooden Backing Frame
For a polished, gallery-style look, mount your baseplates to a wooden backing board (plywood or MDF) and hang the whole panel like a heavy picture frame using a French cleat or D-ring hangers. This is the most secure method and the easiest to take down and relocate, but it is also the most work.
Advanced Techniques: 3D Effects and Lighting
Once you are comfortable with flat mosaics, you can add depth and drama to your LEGO wall art. Two techniques give the biggest impact.
3D Layering
Build part of your design on top of stacked bricks and plates so portions stand proud of the baseplate. This is how builders create waves crashing, clouds floating, or city skylines with depth. Keep the height variation under an inch so the wall art still reads as a flat artwork from a distance.
LED Lighting Integration
LED strip lights behind the baseplate create a soft halo effect that makes your LEGO art glow at night. LED dot lights placed inside transparent bricks can simulate stars, windows, or candles. A small battery pack or USB power supply hidden behind the design keeps the installation wireless.
Reddit’s r/LEGO community has plenty of examples of these techniques, and they are what separate a beginner build from a true conversation piece.
Maintenance and Care Tips
LEGO wall art is low-maintenance but not no-maintenance. A few small habits keep it looking sharp for years.
- Dust monthly with a soft brush, a can of compressed air, or a hairdryer on the cool setting. Avoid wet cleaning, which can damage stickers and discolor older bricks.
- Check adhesive annually, especially in humid rooms like bathrooms or kitchens. Press each baseplate back into place if you notice any movement.
- Update seasonally by swapping out one section of the design. This is the hidden joy of LEGO wall art: it can change with you.
- Store spare bricks in labeled bins by color so you can find replacements and refresh old sections without re-buying sets.
FAQ
How to decorate your room with LEGO?
Start with one accent wall and a single baseplate-mounted design that uses 2-3 colors already in your room. Add themed sections over time: a play zone at child height for kids’ rooms, a single statement mosaic for living rooms, and small framed builds for home offices. Stick to the 2-3 wall art placement rule and the LEGO 5-2 color ratio for the most cohesive look.
What is the LEGO 5 2 rule?
The LEGO 5-2 rule is a color balance guideline. Use one color for about 50% of the build, two supporting colors for roughly 20% each, and small accents for the remaining 10%. Following this ratio keeps a mosaic from looking busy and helps the artwork feel intentional in a room.
What is the 2 3 rule for wall art?
The 2-3 rule says wall art should fill about two-thirds of the available wall space above a piece of furniture, or be hung with the center at 57-60 inches from the floor as a stand-alone piece. Grouped art should be arranged in odd numbers like 2 or 3 pieces for visual balance. For LEGO wall art, this means leaving a small border of empty studs around the design rather than filling the entire baseplate.
How to coordinate art in a room?
Pull a 3-5 color palette from the room’s existing furniture, walls, and textiles. Match art colors to within 80% of those tones, and follow the 60-30-10 rule: 60% dominant, 30% secondary, 10% accent. For LEGO wall art, lay the finished design on a table in the room and look at it in different lighting before mounting.
How to display LEGO sets on a wall?
The cleanest method is to mount baseplates to the wall with strong adhesive strips or screws, then build the set directly on the baseplate. For a gallery look, attach the baseplate to a wooden backing board and hang it like a heavy picture frame. Floating shelves with a clear lip also work for displaying pre-built sets on a wall.
Which is the best LEGO art?
The best LEGO art is the one that fits the room it lives in. For modern living rooms, choose monochrome or two-tone mosaics. For playrooms and kids’ bedrooms, choose interactive designs in 4-6 bright colors. For home offices, pick a small, low-distraction piece. Official sets like the Milky Way, Hokusai Wave, and World Map are great starting points, but custom MOCs give the most personal result.
Conclusion
Learning how to build LEGO wall art that complements a room is really about learning to design with both bricks and interiors in mind. The bricks give you texture, color, and the freedom to change. The room gives you the palette, the focal point, and the rules of placement. Combine the two and you get a piece of art that is uniquely yours.
Start with a single small mosaic, follow the 2-3 and 5-2 rules, and let your first build teach you what you want from the next one. The Brick Fantastic is here to help with more guides, design inspiration, and step-by-step tutorials as you grow your collection.