
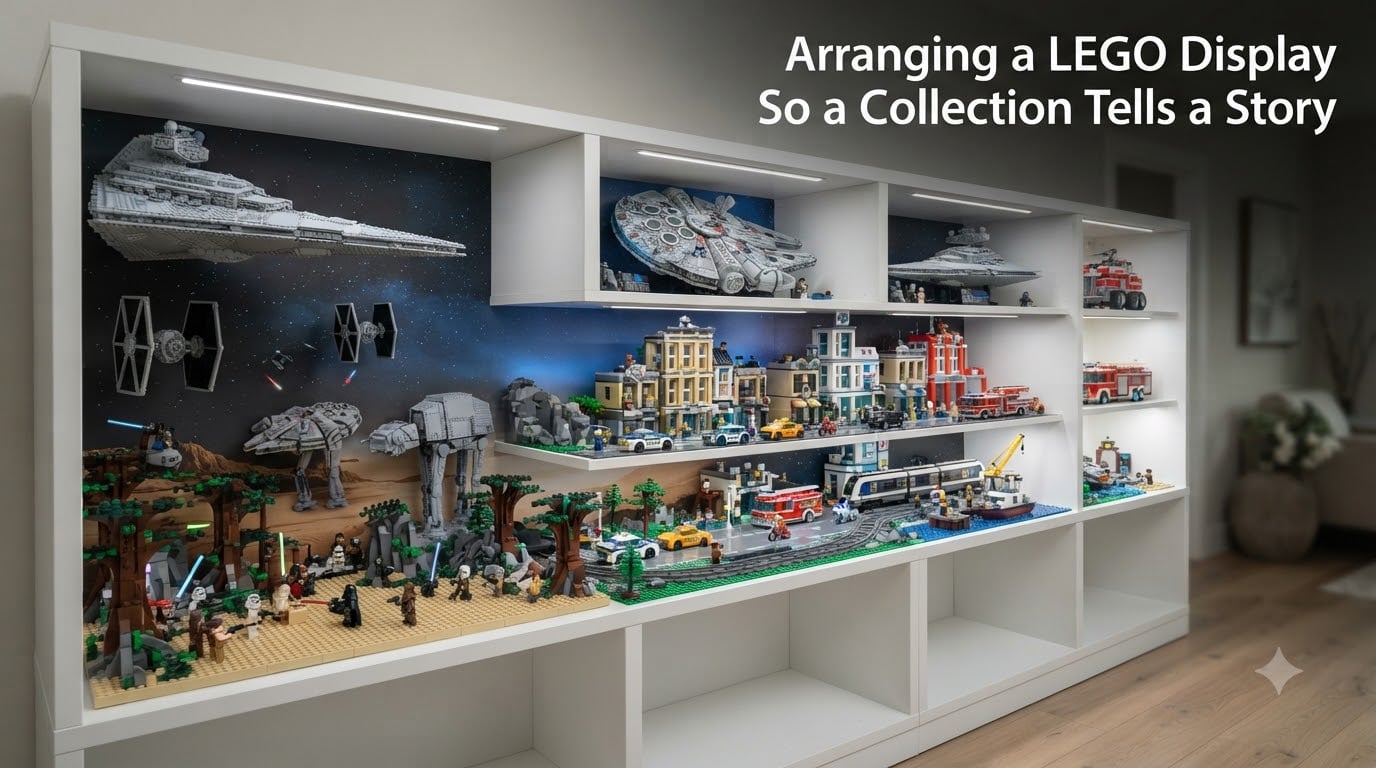
Most LEGO displays end up looking like a garage sale on a shelf. You build a set, place it somewhere, build another, squeeze it next to the first, and repeat until every surface in your home disappears under plastic. I know because I did exactly that for years. The sets I was proudest of got buried behind newer builds, and nobody including me could actually appreciate them.
Arranging a LEGO display so a collection tells a story changes that completely. Instead of storing sets, you curate them. You group builds so they connect visually, lead the eye from one scene to the next, and give anyone looking at your shelf a reason to linger. A wall of random sets says “I buy LEGO.” A story-driven display says something about who you are as a builder and what you love about the hobby.
I have spent the last several years rebuilding my own display multiple times, talking with collectors on r/LegoDisplay and r/lego, and learning what separates a shelf of sets from a display that actually communicates something. This guide walks through the full process, from assessing your collection to the finishing touches that make visitors stop and stare.
Table of Contents
Why Storytelling Matters in LEGO Display
Every great museum, art gallery, and retail window uses the same principle: arrangement creates meaning. A painting hung alone on a white wall feels different from the same painting grouped with two others from the same period. The artwork has not changed, but the story around it has.
Your LEGO collection works the same way. A Millennium Falcon sitting between a Friends set and a random City police station tells no story at all. That same Falcon placed beside a Death Star, an X-Wing, and a Tatooine build becomes the centerpiece of a Star Wars saga that unfolds across your shelf. The builds are identical, but the arrangement gives them purpose.
Most existing guides I have read focus almost entirely on storage and organization. They tell you how to sort bricks, which bins to buy, and how to keep dust off your sets. Those things matter, but they treat LEGO the way you would treat holiday decorations in an attic. This guide starts from a different place. Before we talk about shelves and lighting, we talk about what you want your collection to say.
That storytelling focus is what separates a collector from a curator. A collector accumulates. A curator arranges with intent. When you arrange a LEGO display to tell a story, every placement answers a question: why is this set here, next to that one, on this shelf?
Step 1: Assess Your Collection and Define Your Story
You cannot arrange a story if you do not know your cast of characters. The first step in arranging a LEGO display so a collection tells a story is taking honest stock of what you own.
Pull every set out and lay it on a large table or the floor. Group them loosely by theme as you go. You will quickly see which themes you have invested in heavily and which sets are one-offs. This matters because a strong story usually needs at least three to five sets in a grouping to feel intentional. Two Star Wars sets on a shelf of City builds look accidental. Eight Star Wars sets arranged across a dedicated shelf look deliberate.
Identify Your Strongest Narratives
After laying everything out, ask yourself which themes have enough sets to carry a full shelf or section. Maybe you have a deep Harry Potter collection that could fill a Hogwarts-themed display. Perhaps your Creator Expert modular buildings form a street scene that tells the story of a city growing over time. Your NASA and space sets might create a timeline of exploration from Apollo to Artemis.
Write down the top three to five narrative groupings your collection naturally supports. These become the backbone of your display. Sets that do not fit any strong narrative can go on a rotating “highlights” shelf or get swapped out seasonally.
Decide Who the Display Is For
A display built for your own daily enjoyment looks different from one designed to impress visitors. If you build primarily for yourself, you might prioritize your personal favorites in the best sightlines. If you want friends and family to engage with the collection, you might lead with recognizable sets and use simpler groupings that people can understand at a glance.
Families with kids face a different question entirely. Kids want to touch, play, and rebuild. A storytelling display in a shared family space needs to balance visual impact with accessibility. Consider keeping lower shelves for interactive builds and reserving higher shelves for display-only sets.
Step 2: Plan Your Display Space
The most common pain point I see in LEGO communities is running out of display space as a collection grows. Planning your space before you buy shelving prevents the cycle of cramming sets together until they look cluttered.
Walk through your home and identify candidate locations with an open mind. A dedicated LEGO room is ideal but rare. Most collectors work with a living room wall, a bedroom corner, a home office, or a hallway. Any of these can work if you plan deliberately.
Measure Everything Before You Buy Anything
This is the step collectors on forums repeat most often: measure twice, buy once. Measure the wall width, the depth available before walkways get blocked, and the ceiling height. Then measure your tallest and deepest sets. The IKEA Detolf cabinet, a community favorite, has interior shelf dimensions that will not fit some larger builds. Knowing this before you assemble furniture saves real money and frustration.
Consider traffic flow. A display shelf in a narrow hallway will get bumped. Glass-fronted cabinets in a high-traffic area invite accidents. The best display location balances visibility with protection.
Think About Sightlines
Where will people stand when they view your display? A shelf at eye level gets far more attention than one near the ceiling or floor. Reserve your prime eye-level space for the sets that tell your strongest story. Less prominent shelves work fine for secondary groupings or sets waiting to rotate in.
Lighting access matters here too. A wall near a window gives you natural light during the day but creates UV exposure concerns. An interior wall gives you full control over artificial lighting but needs power outlets nearby for LED strips.
Step 3: Choose the Right Shelving Foundation
Your shelving is the stage your story plays out on. The LEGO community has converged on a few reliable options over the years, each with distinct strengths for different types of displays.
IKEA Kallax: The Community Consensus
The IKEA Kallax is the most recommended shelving unit for LEGO display across r/LegoDisplay and collector forums. Its cube compartments naturally create separated display zones, which is perfect for storytelling. Each cube can hold a themed grouping, a single large set, or a small vignette. The cubes force you to edit rather than cram, which keeps displays looking intentional.
Kallax units come in multiple configurations, from 2×2 to 5×5 grids. You can stack them, mount them horizontally as room dividers, or wall-mount them vertically. Insert doors and drawers for sets you want to protect or for storing loose bricks and instructions out of sight.
IKEA Detolf: Glass-Front Museum Cases
The Detolf glass cabinet creates a true museum-case feel. Glass on all four sides means sets are visible from multiple angles, and the glass door keeps dust out. Collectors love Detolfs for prized builds that deserve a spotlight.
Detolfs have limitations. The shelves are relatively narrow, so large sets do not fit. Glass shelves have weight limits. And a row of Detolfs can look repetitive unless you vary what is inside each one. Use them for your hero sets, the ones that anchor each story chapter.
IKEA Billy with Oxberg Doors: Flexible Bookcase Display
The Billy bookcase with glass Oxberg doors offers more depth than a Detolf and more vertical flexibility than a Kallax. Adjustable shelves let you set heights based on your tallest builds, and the glass doors keep dust out while remaining see-through. Billy units are a strong middle-ground option for medium to large collections that want both flexibility and protection.
Floating Shelves: Minimalist and Modern
Floating shelves work well for smaller sets and minifigure displays where you want a clean, gallery-wall look. They keep the focus entirely on the builds themselves. The trade-off is zero dust protection and strict weight limits, so reserve floating shelves for lighter sets and use a quality stud finder during installation.
Many collectors combine multiple shelving types. Kallax for the main collection, a Detolf for the hero set, and floating shelves for minifigures create a layered display that looks designed rather than assembled.
Step 4: Group Sets to Create Narrative Chapters
This is the heart of arranging a LEGO display so a collection tells a story. Everything before this step is preparation. Now you decide what story each shelf tells.
Theme-Based Groupings
The simplest narrative approach groups sets by LEGO theme. All Star Wars builds on one shelf, Harry Potter on another, City on a third. This works and is easy for visitors to read. The risk is that it stops at categorization rather than telling a deeper story. To push further, arrange each themed shelf so sets relate to each other. On a Star Wars shelf, place a Tatooine build next to a cantina set next to a sandcrawler so the desert-planet story flows left to right.
Color Palette Groupings
One of the most visually striking approaches groups sets by dominant color rather than theme. LEGO Botanical Collection builds with their greens and pinks create a garden wall. White and light-gray Creator Expert builds form a minimalist architectural gallery. Color grouping is unexpected and makes even modest sets look intentional when placed alongside tonal neighbors.
Era and Timeline Arrangements
For collectors with long histories in the hobby, arranging sets chronologically tells the story of LEGO itself and your own journey through it. Castle sets from the 1980s next to modern Creator Castle sets show how design has evolved. Space sets progressing from classic Galaxy Explorer to modern City Space create a timeline of imagination.
Scale and Depth Groupings
Vary the scale within a grouping to create depth. Place a large modular building at the back of a shelf, medium builds in front of it, and small sets or minifigures at the very front. This layered approach draws the eye into the display and makes a flat shelf feel three-dimensional. Avoid lining up sets of identical size in a row, which looks like products on a store shelf rather than a curated display.
Narrative Vignettes
The most advanced storytelling technique builds small scenes that combine multiple sets into a single story moment. A fire station with a fire truck parked out front, a burning building across the shelf, and minifigure firefighters in action poses creates a diorama that tells a complete story. Vignettes take more effort but produce the most memorable displays.
Leave Breathing Room
One mistake I see repeatedly is filling every square inch of shelf space. Negative space is part of the story. A shelf with five well-spaced sets reads as deliberate curation. The same shelf packed with twelve sets reads as clutter. When in doubt, remove a set. Your display will look better and the remaining builds get the attention they deserve.
Step 5: Add Lighting to Set the Scene
Lighting is the single biggest upgrade you can make to a LEGO display. Collectors on forums consistently say the same thing: LED lighting makes a huge difference in visual impact. A well-lit shelf transforms from storage to showcase.
LED strip lights are the most popular option because they are inexpensive, easy to install, and produce even illumination. Warm white strips create a cozy, museum-case glow. Cool white reads more modern and clinical. Some collectors use RGB strips to change color for different themes or seasons.
Placement matters as much as the lights themselves. Light strips mounted under each shelf shining downward create even illumination across the row below. Backlighting sets against the wall creates dramatic silhouettes. Small spotlights aimed at hero sets draw the eye to your strongest pieces.
Power management is the practical challenge. Battery-powered strips are easy but require frequent changes. USB-powered strips connected to a wall adapter or power bank run reliably. For larger displays, plan cable routes along shelf backs and use cable clips to keep wiring invisible.
Step 6: Protect Your Story from Dust
Dust is the eternal enemy of LEGO display. Every collector fights it, and the communities I have followed share battle-tested strategies. The choice comes down to prevention versus maintenance.
Glass-fronted cabinets like the Detolf and Billy with Oxberg doors prevent most dust from reaching your sets. If your display uses open shelves, expect to clean regularly. A soft makeup brush or camera lens blower removes dust from crevices without disassembling builds. Compressed air works but can blow small pieces loose.
Acrylic display cases offer a middle ground for individual prized sets. They protect against both dust and accidental bumps while keeping the set fully visible. Many collectors buy or build custom acrylic cases for their most valuable builds.
Some collectors rotate their displayed sets partly as a dust management strategy. Sets spend a few months on display, then go into sealed storage while others take their place. This keeps the display fresh and limits how long any single set accumulates dust.
Small Space Solutions for LEGO Displays
Not everyone has a dedicated room or even a full wall. If you are working with a small apartment, a bedroom corner, or a shared family space, you can still create a story-driven display. It just takes creativity.
Think vertical. Wall-mounted shelves use zero floor space and can turn an empty wall into a full display. Corner shelving units make use of dead space that serves no other purpose. Over-door shelving and high-mounted ledges put displays above daily activity zones.
The one-in-one-out rule helps small-space collectors maintain quality. Every time a new set earns a spot on the display, an existing set rotates into storage. This forces you to make deliberate choices and keeps the display curated rather than cluttered.
Consider multi-functional furniture. A Kallax unit doubles as a room divider in a studio apartment while serving as display space. A glass-fronted cabinet in a dining room holds LEGO sets instead of china. Looking at furniture through a display lens opens up possibilities you might otherwise overlook.
For extremely tight spaces, focus on a single strong vignette rather than trying to display everything. One well-lit, carefully arranged shelf with three complementary sets tells a better story than five overcrowded shelves with no breathing room.
Finishing Touches That Make a Display Memorable
The difference between a good display and a great one lives in the details. Small additions take a shelf from organized to unforgettable.
Custom backdrop panels behind shelving add depth and context. A printed city skyline behind modular buildings, a starfield behind space sets, or a gradient color panel behind a color-grouped shelf creates a deliberate stage for your builds. Foam core board and printed images are inexpensive and replaceable when you change themes.
LEGO nameplates and signage identify sets and add a museum-label feel. Many AFOLs create small printed cards with the set name, number, and year displayed beside each build. This invites viewers to engage with the collection as something curated rather than casually arranged.
Minifigure staging adds life to static displays. A few well-placed minifigures in action poses tell micro-stories within each themed grouping. Display stands, small brick-built pedestals, and acrylic minifigure cases let you add character without clutter.
Finally, photograph your display and share it. Good photos of real displays perform exceptionally well in LEGO communities. They also document your arrangement so you can recreate or improve it later. Natural light from a window, a steady hand, and a clean background are all you need.
FAQs
What is the best way to display my LEGO collection?
The best way to display a LEGO collection is to group sets by theme, color, or narrative on purpose-built shelving like IKEA Kallax or Detolf cabinets, then add LED lighting for impact and use glass doors for dust protection. Arranging with intent rather than just placing sets randomly is what transforms storage into a display.
What is the 5/2 rule in LEGO?
The 5/2 rule in LEGO refers to a building guideline where you alternate stud directions every five plates or two bricks to create strong connections and hidden structural reinforcement. It is a technique used in advanced building to lock layers together perpendicular to each other for added stability.
How to organize a LEGO collection?
Organize a LEGO collection by first sorting built sets from loose bricks, then grouping built sets by theme, color, or era for display. Store loose bricks in labeled bins sorted by piece type or color, keep instruction manuals in binders or magazine files, and use a rotation system if your collection outgrows your display space.
Should I keep my LEGO boxes for display?
Keeping LEGO boxes is a personal choice. Boxes can add resale value and some collectors display empty boxes beside their builds for a retail-store look. If space is limited, flatten boxes and store them flat in a dry area, or recycle them if you do not plan to sell sets in the future.
Conclusion
Arranging a LEGO display so a collection tells a story is about intention. Every set you place, every grouping you create, and every light you add should answer one question: what story am I telling? When you approach your display as a curator rather than a collector, your builds stop being stored objects and start becoming an experience.
Start with the six steps in this guide. Assess your collection, plan your space, choose your shelving, group sets into narrative chapters, light them well, and protect them from dust. The storytelling techniques, themed groupings, color palettes, and era timelines give you the tools to create something personal and memorable.
Your next step is simple. Pull your sets out, lay them on the floor, and see what stories your collection already wants to tell. You might be surprised by what you find.