
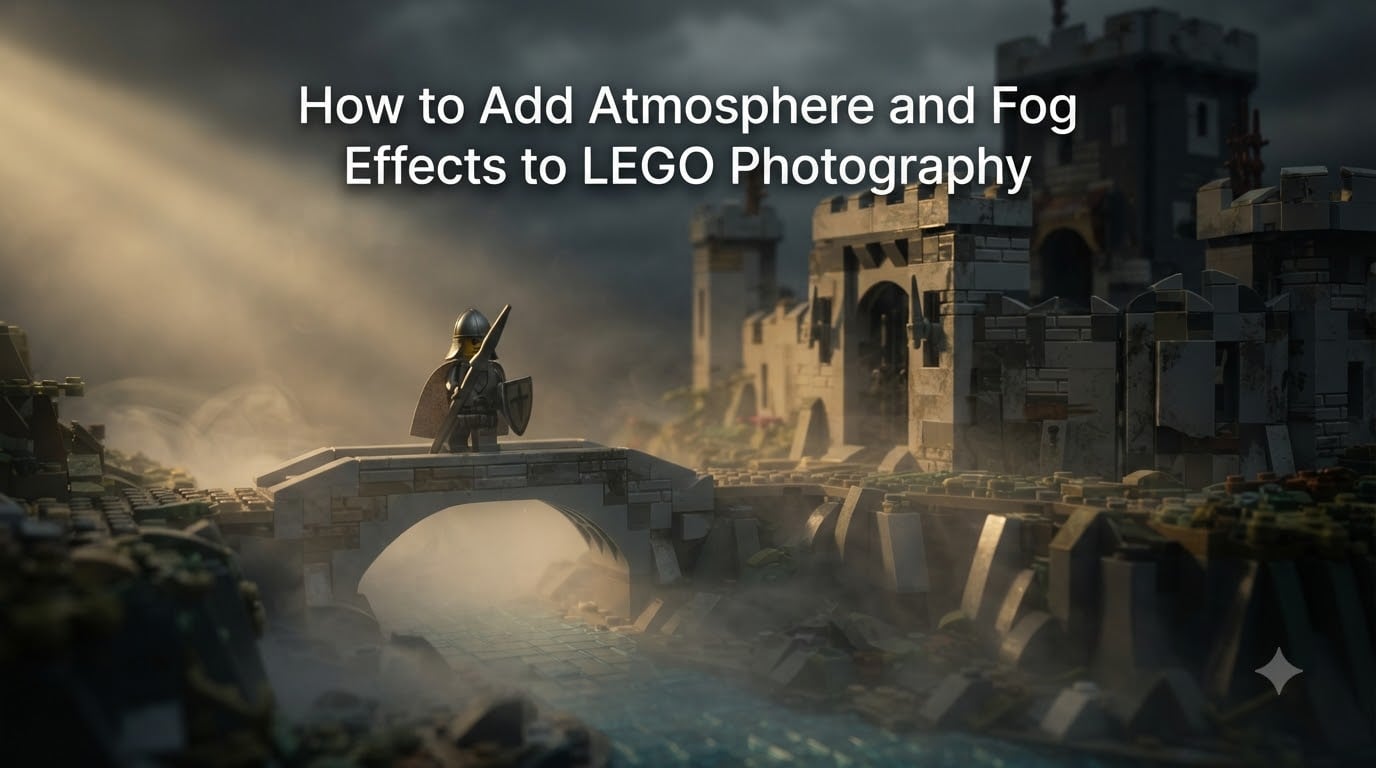
Adding atmosphere and fog effects to LEGO photography transforms flat, static shots into cinematic scenes that feel alive. I discovered this when a simple castle shot became a haunting moonlit ruin with just a face humidifier and 30 seconds of mist. Whether you’re shooting a spooky graveyard, a mystical forest, or a fog-shrouded battlefield, atmospheric effects add the depth and mood that separates snapshots from compelling images.
In this guide, I’ll walk you through everything I’ve learned about creating fog, mist, and haze effects in LEGO photography. You’ll learn which tools work best at every budget, how to set your camera for each effect, and the safety tips that keep your shoots stress-free. By the end, you’ll have a complete toolkit for adding cinematic atmosphere to your LEGO scenes.
Table of Contents
Understanding the Difference Between Fog, Mist, and Haze Effects
Fog, mist, and haze look similar to our eyes, but they behave differently in photos and serve different creative purposes. Understanding these differences helps you choose the right effect for the mood you want to create.
Fog: Dense, Ground-Hugging Atmosphere
Fog consists of dense water droplets that settle low and create thick, rolling layers across your scene. In LEGO photography, fog works best for graveyard scenes, swamp environments, and dramatic reveals where you want parts of your scene partially obscured.
Fog dissipates faster than mist or haze, typically lasting only 20 to 45 seconds before thinning out. I use fog when I need maximum drama and have multiple camera angles planned within that short window.
Mist: Light, Wispy Layers
Mist is thinner than fog but more concentrated than haze. It creates soft, directional streams that you can position around specific LEGO elements. A face humidifier produces excellent mist for targeted atmospheric shots.
Mist is my go-to effect for adding subtle mood without overwhelming the scene. It works especially well for highlighting a single character or vehicle while leaving the background clean and visible.
Haze: Subtle, Long-Lasting Particles
Haze is the lightest atmospheric effect, consisting of fine particles suspended throughout the air. It creates depth by making distant elements appear slightly faded and by making light rays visible when a strong light source cuts through the scene.
Haze lasts the longest, often filling your shooting space for 5 to 10 minutes. I use haze when I want light rays, subtle depth, and the freedom to take my time composing multiple shots.
Tools and Equipment for Atmospheric LEGO Photography
You don’t need expensive equipment to create stunning atmospheric effects. Here’s what works at every budget level based on my testing over the past two years.
Budget Options Under $20
The face humidifier (also called a face mister or Nano mister) is the best budget tool for LEGO photography atmospheric effects. These handheld devices cost between $8 and $15 and produce a fine, controllable mist that lasts several seconds per spray.
For DIY fog alternatives, some photographers use HVAC leak detectors (the smoke pen style), which cost around $15 to $25 and produce small amounts of actual fog. These work well for compact LEGO scenes but don’t fill large spaces.
Mid-Range Equipment
The Micro Fogger and similar compact fog machines sit in the $50 to $150 range. These produce true fog using glycol-based fluid and create denser, longer-lasting effects than humidifiers.
A quality LED panel or RGB tube light becomes essential in this range. Continuous lighting lets you see exactly how light interacts with your fog or mist in real time, making composition much easier than guessing with flash.
Professional-Grade Tools
Professional fog machines from brands like Antari or Chauvet produce thick, controllable fog suitable for larger LEGO dioramas. These units cost $200 to $500 but offer precise output control and consistent performance.
For serious atmospheric work, a DSLR or mirrorless camera with manual exposure controls is essential. The ability to dial in specific shutter speeds, apertures, and ISO values makes the difference between amateur and professional-looking results.
How to Create Fog Effects in LEGO Photography
Creating fog effects requires planning but follows a reliable process. Here’s the exact workflow I use for every fog-heavy LEGO shoot.
Step 1: Set Up Your Scene
Close all windows and doors in your shooting space because any breeze will blow away the fog or cause turbulence in the photo. Turn off smoke detectors before you start (I’ll cover safety more below). Position your LEGO scene on a stable surface at table height for easy access.
Place your camera on a tripod and compose your shot before adding any fog. Once fog fills the space, you’ll have limited visibility and time to adjust.
Step 2: Position the Fog Machine
Place your fog machine 2 to 3 feet away from your scene and slightly behind or to the side of your main subject. This positioning creates natural depth as fog rolls toward the camera.
Aim the fog output nozzle slightly downward and toward the base of your scene. Fog naturally settles low, so directing it this way mimics real atmospheric behavior.
Step 3: Configure Camera Settings
Set your camera to manual mode with these starting settings: ISO 100, aperture f/8, and shutter speed 1/125 second. Adjust from there based on your lighting setup.
For continuous lighting, you may need to lower your shutter speed to 1/30 or 1/15 second to capture enough light. With flash, your shutter speed can stay faster to freeze fog particle movement.
Step 4: Trigger and Capture
Activate the fog machine and wait 3 to 5 seconds for fog to reach your scene. Take your shots quickly because thick fog typically only lasts 30 to 60 seconds before thinning.
Shoot multiple frames during each fog burst. You’ll be surprised how different the same scene looks with varying fog densities, and you’ll want options when reviewing later.
How to Create Mist Effects Using a Face Humidifier
The face humidifier is my favorite budget tool for LEGO photography mist effects. It costs under $15 and gives you precise control over where the mist goes. This technique produces the subtle, directional atmosphere you see in professional toy photography.
Setting Up the Face Mister
Fill the humidifier with distilled water (tap water leaves mineral deposits that can damage the unit over time). Charge it fully before your shoot; battery life is typically 2 to 3 hours of intermittent use.
Position yourself or an assistant about 1 to 2 feet from your LEGO scene. The closer you are, the more concentrated and directional the mist becomes.
Directing the Mist
Aim the humidifier slightly above and behind your main subject. The mist should drift naturally toward and around your LEGO elements rather than blasting directly at them.
I usually do 2 to 3 short bursts of 1 to 2 seconds each, waiting a few seconds between bursts. This creates layered mist effects rather than one overwhelming cloud.
Timing the Shot
Start your camera’s continuous shooting mode and trigger the mist. Capture frames throughout the mist’s drift and for several seconds after it stops. The lingering wisps often create more dramatic effects than the initial burst.
For best results, shoot against a dark background. Mist particles show up dramatically when backlit or sidelit, and dark backgrounds make those particles pop visually.
How to Create Haze Effects for Long Exposure Atmospheric Shots
Haze effects create subtle, cinematic atmosphere and make light rays visible in your LEGO scenes. This technique takes more patience than fog or mist but produces unique results that other methods cannot match.
Building the Haze Layer
Use a fog machine on its lowest setting or release several short bursts from your face humidifier throughout your shooting space. Let the particles settle and distribute naturally for 2 to 3 minutes.
The goal is a thin, even layer of particles throughout the air, not concentrated pockets of mist. You should barely notice the haze visually until light hits it.
Camera Settings for Haze
Set your camera to manual mode with a longer exposure: shutter speed between 1 second and 4 seconds, aperture around f/5.6 to f/8, and ISO 100 to 200. The longer exposure captures more particles and makes light rays visible.
Use a remote shutter release or your camera’s self-timer to avoid camera shake during the long exposure. Even small vibrations will blur your LEGO subjects at these slow shutter speeds.
Light Ray Techniques
Position a strong, focused light source (an LED panel with a snoot or a flashlight works well) at a 30 to 45 degree angle to your scene. The light should cut through the haze from the side rather than hitting the front of your LEGO build.
The haze particles scatter the light beam, creating visible rays streaming across your scene. This effect works especially well for LEGO castle scenes, forest dioramas, and any setup where dramatic lighting enhances the story.
Camera Settings Cheat Sheet for Atmospheric Effects
Here’s a quick reference table I created based on 40+ atmospheric LEGO shoots. Use it as a starting point and adjust based on your specific lighting and scene.
| Effect | Shutter Speed | Aperture | ISO | Best Light Type |
|---|---|---|---|---|
| Thick Fog | 1/125 to 1/60 sec | f/5.6 to f/8 | 100-400 | Flash or continuous |
| Light Mist | 1/125 to 1/30 sec | f/4 to f/5.6 | 100-200 | Continuous (sidelight) |
| Subtle Haze | 1 to 4 seconds | f/8 to f/11 | 100-200 | Continuous (directional) |
| Light Rays | 1 to 2 seconds | f/8 to f/16 | 100 | Single strong source |
Continuous lighting beats flash for most atmospheric work because you can see exactly how the fog or mist looks before pressing the shutter. Flash freezes particle motion but removes your ability to preview the effect.
However, flash excels when you want sharp, crisp detail in your LEGO subjects combined with visible atmospheric effects. A typical setup uses flash at 1/200 second to freeze the LEGO while still capturing enough particle detail in the air.
Safety Precautions and Smoke Detector Tips
Atmospheric effects can trigger smoke detectors, create ventilation issues, or pose risks with certain materials. Follow these safety guidelines to avoid problems during your LEGO photography sessions.
Preventing Smoke Detector Triggers
The single most common complaint in online LEGO photography forums is smoke detectors going off mid-shoot. Most detectors use either ionization or photoelectric sensors, and dense fog or mist can trigger both types.
Before your shoot, cover smoke detectors with plastic bags or remove the batteries (if allowed by your local fire code). In rental spaces, check with your landlord before disabling any safety equipment. Have a fan ready to clear the air quickly if a detector activates.
Ventilation and Indoor Use
Glycol-based fog machine fluid is generally safe in small amounts, but the aerosol can irritate lungs in enclosed spaces. Shoot near an open window when possible and take breaks to air out the room.
Face humidifiers using only distilled water produce the safest atmospheric effects. No chemicals, no irritation, and no detector triggers in most cases. This is another reason I recommend starting with a humidifier before investing in a fog machine.
Dry Ice Safety
Dry ice creates stunning slow-moving fog but requires serious precautions. The CO2 gas it releases displaces oxygen in enclosed spaces and can cause suffocation in small rooms. Never handle dry ice without insulated gloves; it causes instant frostbite on bare skin.
Keep dry ice away from your face and ensure adequate ventilation. I use dry ice outdoors or in large garage spaces only, never in small bedrooms or closets.
Common Mistakes and Troubleshooting
Even experienced photographers run into problems with atmospheric effects. Here are the issues I see most often and how to fix them quickly.
Fog dissipating too fast: Close all air vents, turn off fans, and avoid air conditioning during your shoot. Even small air currents break up fog within seconds.
Too much haze obscuring the subject: Your light source is likely too close or too bright. Pull the light back 2 to 3 feet and reduce intensity. The haze should enhance depth, not hide your LEGO subjects.
Inconsistent effects between shots: Atmospheric effects are inherently variable. Shoot more frames than you think you’ll need, and review images on your camera’s LCD between bursts.
Particles visible but no mood: Your background is probably too busy or too bright. Use a solid black or dark grey backdrop for maximum atmospheric impact. Light particles pop dramatically against dark backgrounds.
White balance looks off: Fog and mist scatter light unpredictably, sometimes creating color casts. Shoot in RAW format and adjust white balance in post-processing for best results.
For beginners wondering whether to invest in a fog machine or start with a face humidifier, I’d recommend the humidifier first. At under $15, it’s affordable, safe, and produces excellent results for most LEGO photography scenarios. Upgrade to a fog machine only after you’ve outgrown what a humidifier can do.
Frequently Asked Questions
How do I add fog effects to LEGO photos?
To add fog effects to LEGO photos, use a fog machine or face humidifier to fill the shooting space with water-based particles. Set your camera to manual mode (ISO 100, f/8, 1/125 sec as a starting point), position your light source at a 30 to 45 degree angle, and capture shots within 30 to 60 seconds of fog release. Turn off smoke detectors and close windows before shooting.
What is the difference between fog, mist, and haze in photography?
Fog is dense water droplets that settle low and create thick layers lasting 20 to 45 seconds. Mist is thinner and more directional, created by face humidifiers for targeted effects. Haze consists of fine particles suspended throughout the air for 5 to 10 minutes, best for light rays and subtle depth effects.
How do I prevent smoke detectors from triggering during fog photography?
Cover smoke detectors with plastic bags or temporarily remove batteries before shooting fog effects. Shoot in well-ventilated spaces, use a fan to clear air quickly if needed, and consider face humidifiers with distilled water which rarely trigger detectors compared to glycol-based fog machines.
What shutter speed should I use for atmospheric effects?
For thick fog, use 1/125 to 1/60 second. For light mist, use 1/125 to 1/30 second. For subtle haze and visible light rays, use longer exposures of 1 to 4 seconds. Always use a tripod for exposures longer than 1/30 second and a remote shutter release to avoid camera shake.
Can I create atmospheric effects without buying a fog machine?
Yes, a face humidifier (face mister) costs $8 to $15 and produces excellent mist for LEGO photography. For haze effects, you can release small puffs from the humidifier and let particles settle for 2 to 3 minutes. HVAC leak detectors offer another budget option around $15 to $25 for compact scenes.
Start Adding Atmosphere and Fog Effects to Your LEGO Photography Today
Atmospheric effects transform ordinary LEGO photography into cinematic storytelling. You don’t need expensive equipment to start; a $15 face humidifier and a single light source can produce stunning mist effects on your first try. The key is understanding the differences between fog, mist, and haze, and matching each effect to the mood you want to create.
Start with the budget-friendly face humidifier technique I described above. Practice directing mist around your LEGO scenes, experiment with shutter speeds, and review your results. Within a few sessions, you’ll develop an intuition for how much atmosphere each scene needs. From there, you can invest in a compact fog machine or explore dry ice effects for more dramatic setups.
Remember to prioritize safety by disabling smoke detectors, ensuring ventilation, and following dry ice precautions when needed. With these techniques and safety practices, you’ll create LEGO photography that stands out with genuine depth and atmosphere.