
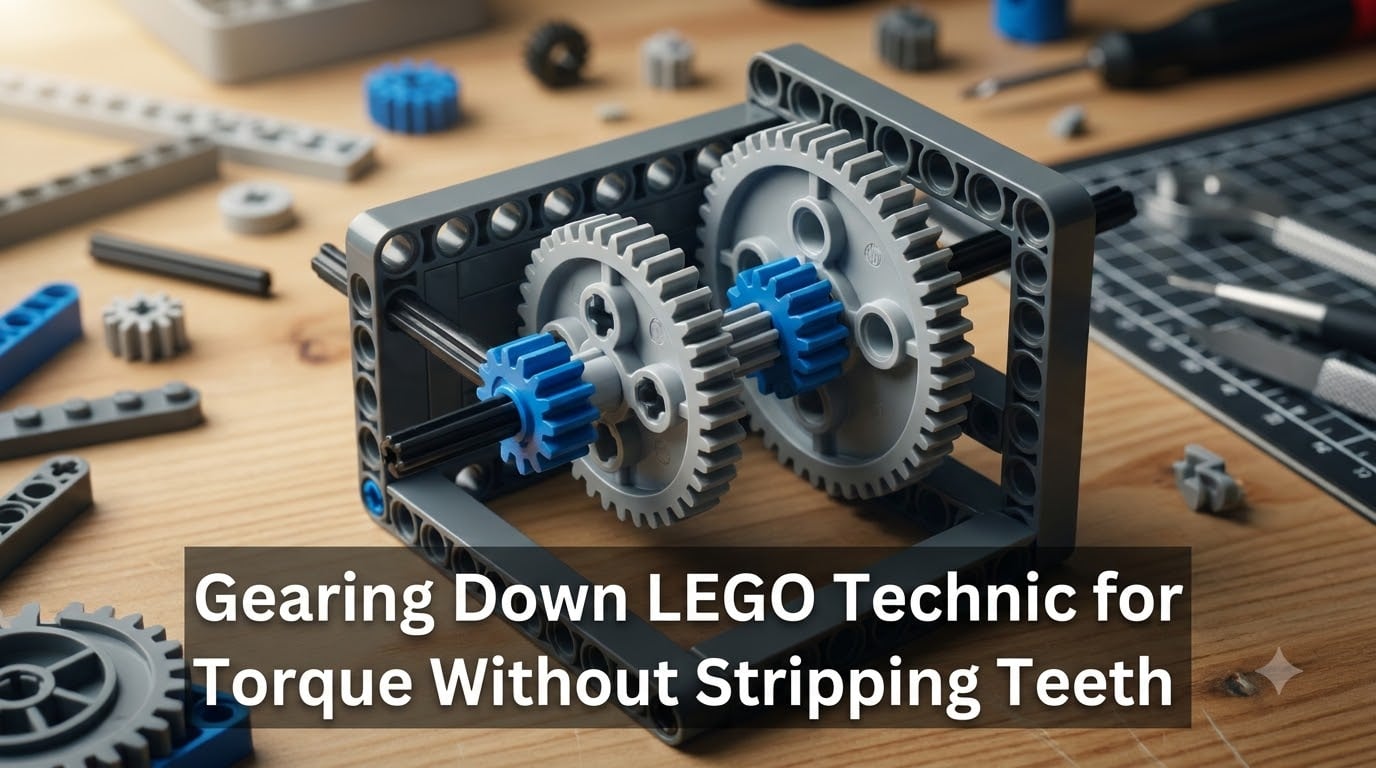
Every LEGO Technic builder hits the same wall eventually. You build a winch, a robotic arm, or a climbing vehicle, hook up a motor, and the gears start clicking, skipping, or stripping teeth under load. I have been there more times than I can count, and so have thousands of builders on r/legotechnic and Bricks StackExchange. The good news is that the problem is predictable, fixable, and entirely about understanding how gear ratios work.
This guide covers gearing down LEGO Technic for torque without stripping teeth. I will walk through gear ratio math, the best gear combinations for heavy lifting, compound gear train design, motor selection, and the specific techniques that prevent teeth from shearing off under stress.
Whether you are building a classroom winch with a small motor or a high-torque crane with a Power Functions XL, you will find practical combinations and real load limits here. Everything comes from builder-tested data, community-verified ratios, and the mechanical principles that govern every gear train.
Table of Contents
What Does Gearing Down Mean in LEGO Technic?
Gearing down means connecting a small driver gear to a larger driven gear so that the larger gear turns slower but with more rotational force. In a LEGO Technic build, this is how you take a fast-spinning motor and convert its speed into the raw power needed to lift heavy loads, climb steep angles, or drive a mechanical arm.
The trade-off is always speed for torque. When you gear down by a ratio of 3:1, the driven gear rotates once for every three rotations of the driver gear. That slower rotation comes with approximately three times the turning force, minus some efficiency loss from friction between meshing teeth.
Builders often confuse gearing down with simply adding more gears. More gears in a line do not automatically multiply torque. Only the ratio between the driver and driven gear sizes determines how much torque you gain and how much speed you lose.
Gear Ratio Basics: The Math Behind Torque Multiplication
A gear ratio compares the number of teeth on the driven gear to the number of teeth on the driver gear. If your driver gear has 8 teeth and your driven gear has 24 teeth, your ratio is 24 divided by 8, which gives you 3:1. The driven gear turns three times slower but delivers three times the torque.
The formula is straightforward. Divide the driven gear tooth count by the driver gear tooth count to get your gear ratio. That number tells you the torque multiplication factor and the speed reduction factor at the same time.
Mechanical advantage is the practical result of that ratio. A 3:1 gear train gives you three units of torque for every one unit the motor produces. The catch is that no gear train is 100 percent efficient. Friction between meshing teeth, axle drag in the bushings, and the weight of the gears themselves all eat into your final torque output.
Sariel’s gear tutorial, one of the most respected resources in the LEGO Technic community, estimates real-world efficiency losses of 5 to 10 percent per gear mesh stage. This means a theoretically perfect 9:1 ratio might deliver closer to 7.5:1 in actual output once you account for mechanical losses through the train.
The practical takeaway is simple. Always build in a margin of safety. If you calculate that you need a 5:1 ratio to lift your load, design for 7:1 or 8:1 to compensate for efficiency loss and to reduce the stress on individual teeth.
Types of LEGO Technic Gears and Their Torque Characteristics
LEGO Technic offers several gear types, and each one handles torque differently. Choosing the right gear for the right position in your train is half the battle in preventing stripped teeth.
Spur Gears
Spur gears are the flat, toothed wheels most builders reach for first. LEGO produces them in 8-tooth, 16-tooth, 20-tooth, and 24-tooth variants, plus the larger 36-tooth and 40-tooth sizes. The 8-tooth gear is the smallest standard driver and pairs with a 24-tooth gear for a clean 3:1 ratio.
Spur gears handle moderate torque well when properly braced. Their weakness is that they only mesh in a single plane, so any axial movement or flex in the supporting structure causes the teeth to disengage and skip.
Double Bevel Gears
Double bevel gears have angled teeth on both faces, allowing them to mesh at angles and transfer drive around corners. LEGO makes them in 12-tooth, 20-tooth, and 28-tooth sizes. They are stronger than standard spur gears under torque because the angled teeth provide more contact surface area per mesh.
For high-torque builds, double bevel gears are a solid choice. They resist skipping better than spur gears and handle the lateral forces that build up in complex gear trains. The trade-off is a slightly lower ratio per stage since the smallest double bevel gear has 12 teeth rather than 8.
Worm Gears
Worm gears are the torque multiplication champions of the LEGO Technic world. A single-start worm gear driving a 24-tooth spur gear produces a 24:1 ratio in a single stage. That is enormous reduction in a tiny space.
Worm gears also self-lock, meaning the driven gear cannot drive the worm backwards. This makes them perfect for winches and lifting mechanisms where you want the load to hold position when the motor stops.
The downside is significant. Forum users on r/legotechnic report that worm gears generate substantial friction heat under load and are prone to cracking or stripping if the output shaft is overloaded. Worm gears also introduce a large efficiency penalty, often losing 30 to 50 percent of input torque to friction.
Crown Gears
Crown gears have teeth that face perpendicular to the gear face, allowing them to mesh with a spur gear at a 90-degree angle. The classic 24-tooth crown gear is a staple of older Technic sets. They work for light to moderate torque applications but are more prone to tooth breakage than double bevel gears in high-stress positions.
Step-by-Step Guide to Designing a High-Torque Gear Train
Designing a gear train that delivers serious torque without self-destructing takes planning. I have broken the process into five steps that I follow on every high-load build.
Step 1: Determine Your Load Requirements
Start by figuring out what the gear train needs to move. Are you lifting a 200-gram load with a winch? Driving a 1-kilogram vehicle up a 30-degree incline? The load determines the minimum torque your output shaft needs to deliver.
A practical method is to test the load directly. Attach your motor to a simple drum or wheel and see if it can move the load without any gearing. If the motor stalls, you know you need gearing down. If it moves but sluggishly, a mild reduction will suffice.
Step 2: Calculate Your Required Gear Ratio
Once you know the motor stalls under direct drive, estimate how much multiplication you need. If the motor produces roughly 5 units of torque and your load requires 35 units, you need at least a 7:1 ratio. Add a safety margin of 20 to 30 percent, so design for roughly 9:1 or 10:1.
For quick reference, here are common single-stage ratios using standard LEGO spur gears. An 8-tooth driver with a 24-tooth driven gear gives 3:1. An 8-tooth with a 40-tooth gives 5:1. A 12-tooth with a 36-tooth gives 3:1. A 16-tooth with a 24-tooth gives 1.5:1.
Step 3: Choose Between Single-Stage and Compound Gearing
If your required ratio is 5:1 or less, a single-stage pair might work. For anything deeper, compound gearing is the better path. A compound train uses two or more stages, where the driven gear of stage one shares an axle with the driver gear of stage two.
Two stages of 3:1 each give you 9:1 total. Three stages of 3:1 give you 27:1. This modular approach spreads the torque load across multiple meshes rather than forcing one gear pair to handle everything.
Step 4: Brace Every Axle Rigidly
This is the step most builders skip, and it is the number one cause of stripped teeth. Every axle in your gear train must be rigidly braced on both sides using Technic liftarms, bushes, or frames. Any axial play allows gears to slide apart under load, reducing tooth contact and concentrating force on the tips of individual teeth.
I always build gear trains inside a box framework. Two parallel liftarms connected by cross-blocks or pins, with the axles passing through both, creates a rigid housing that keeps gears perfectly meshed regardless of the load direction.
Step 5: Test Under Load and Listen
Before finalizing your build, test the gear train under actual load. Listen for clicking, grinding, or popping sounds. Those noises indicate teeth are skipping or on the verge of stripping. If you hear them, stop immediately and either increase the gear ratio or reinforce the bracing.
A properly designed gear train should produce a smooth, continuous sound with no sharp clicks. The output should rotate steadily without jerking or hesitation.
Common Gear Combinations for Torque Multiplication
Here is a practical quick-reference guide for the most useful torque-multiplying combinations in LEGO Technic. These ratios are tested by builders across the community and represent the sweet spots between torque gain and reliability.
Single-stage ratios: An 8-tooth driver paired with a 24-tooth driven gear delivers a 3:1 ratio. This is the most reliable single-stage combination and handles moderate torque with ease. An 8-tooth paired with a 40-tooth gives 5:1 but puts more stress on the small driver gear.
Two-stage compound ratios: Two stages of 8-tooth to 24-tooth gearing produce 9:1 total reduction. This is the workhorse combination for medium-heavy builds like winches and crane mechanisms. For slightly more reduction, an 8-tooth to 24-tooth stage followed by an 8-tooth to 40-tooth stage gives 15:1.
Three-stage compound ratios: Three stages of 3:1 give 27:1 total, which is enough for heavy-duty lifting applications. At this level, bracing becomes critical and efficiency losses add up. Expect the actual output to be closer to 19:1 or 20:1 after mechanical losses.
Worm gear ratios: A single worm gear driving a 24-tooth spur gear gives 24:1 in one stage. This is the most compact high-ratio option, but the friction penalty is severe. Use worm gears when you need the self-locking feature and space is limited.
Reddit builders have documented extreme compound ratios reaching 1:127 and even 1:223 using multi-stage trains with 8-tooth drivers. These extreme ratios work for demonstration purposes but are impractical for real loads due to accumulated efficiency loss and the risk of stripping the smallest gears.
Compound Gearing: Achieving Extreme Ratios Safely
Compound gearing is the technique that lets you build extreme torque multiplication without destroying gears. The principle is simple but powerful: instead of asking one pair of gears to handle a massive ratio, you split the reduction across multiple stages.
In a compound train, the driven gear of the first stage is fixed to the same axle as the driver gear of the second stage. This means the second stage sees the already-reduced speed and already-increased torque from the first stage. Each stage multiplies the previous ratio.
The math works as pure multiplication. A first stage of 3:1 combined with a second stage of 5:1 gives a total ratio of 15:1. Add a third stage of 3:1 and you reach 45:1. The individual gears in each stage only need to handle the torque at their position in the train, not the full final output.
This is why compound gearing prevents tooth stripping. In a single-stage 15:1 setup, the small driver gear would need to survive the full torque load. In a two-stage compound setup achieving the same 15:1, each gear pair only deals with a fraction of the stress.
The critical rule for compound trains is to put the highest-torque stage closest to the output. The gears nearest the load bear the most force, so use the largest, strongest gears there. Keep the small 8-tooth drivers on the motor side where torque is lowest.
Community builders on r/lego have documented compound ratios from 1:19 up to 1:223. The sweet spot for real-world applications sits between 1:15 and 1:45. Beyond that range, efficiency losses compound to the point where the motor cannot overcome the friction of its own gear train.
Why LEGO Gear Teeth Strip and How to Prevent It
Stripped teeth are the single most common failure mode in high-torque LEGO Technic builds. Understanding why teeth strip is the key to preventing it, and the answer almost always comes down to one of four causes.
Cause 1: Insufficient Gear Ratio
The most common cause of stripped teeth is asking the motor to do too much work through too little reduction. When the load resistance exceeds the torque the gear train can deliver, the motor stalls and the gears bear the full force of that stalled torque. Plastic teeth flex, bend, and eventually shear off.
The fix is simple. If your gears are stripping, you need more reduction. Add another compound stage or switch to a higher-ratio combination. The motor should be able to spin the output freely under load without any sign of struggling.
Cause 2: Poor Bracing and Axle Support
Even with the right ratio, gears strip if they are not held in proper mesh. When an axle flexes under load, the gears on it slide apart. Instead of full tooth faces engaging, only the tips touch. Tip contact concentrates the entire force onto a tiny surface area, and the plastic fails almost instantly.
Every axle carrying torque should be supported on both sides by a rigid liftarm or frame. Never leave an axle cantilevered with a gear on the unsupported end. Bushes and half-bushes should hold the gears in position laterally with zero play.
Cause 3: Misaligned Gears
Gears must be at the correct spacing to mesh properly. LEGO geometry makes this relatively straightforward since studs provide fixed spacing, but errors happen when mixing gear sizes or building freeform structures. Too close and the gears bind and grind. Too far and the teeth barely touch and strip under load.
Standard LEGO gear spacing follows the half-stud system. Two spur gears mesh correctly when their axles are separated by the sum of their pitch radii. For an 8-tooth and 24-tooth pair, the correct axle spacing is 2 studs. Always verify mesh by feel: the gears should turn smoothly with slight resistance and no binding.
Cause 4: Overloaded Worm Gears
Worm gears are particularly prone to failure. The worm screw wedges against the spur gear teeth under load, creating high contact pressure. When the output shaft is blocked, the worm continues to push, and either the worm or the driven gear teeth crack under the concentrated force.
To prevent worm gear failures, use them only for self-locking applications where the load direction is consistent. Never use a worm gear as the final reduction stage in a high-impact application like a drive wheel hitting obstacles. The worm cannot absorb shock loads and will fracture.
Warning Signs of Gear Overload
Catching the problem early saves gears. Watch for these warning signs: a clicking or popping sound when the train is under load, visible gear wobble or axle bending, hesitation or jerky motion at the output, and a burning plastic smell after extended running. Any of these means you are on the edge of stripping teeth.
Stop and fix the issue immediately. Increase the ratio, reinforce the bracing, or reduce the load. A gear that is clicking is already flexing past its elastic limit and will fail soon.
Motor Selection for High-Torque Applications
The motor you choose sets the ceiling for how much torque your build can ultimately deliver. Pairing the right motor with the right gear ratio is what separates builds that work from builds that shred themselves.
LEGO produces several motors with different torque and speed characteristics. The Power Functions M motor is a mid-range option good for light to moderate loads. The Power Functions L motor delivers more torque at lower RPM, making it better suited for geared-down applications. The Power Functions XL motor provides the highest torque output and is the go-to choice for heavy lifting builds.
The newer Powered Up motors, including the Technic Large motor, offer similar torque profiles with the added benefit of integrated encoders for precise control. For pure torque applications, the XL remains the community favorite.
When selecting a motor, consider both stall torque and operating torque. Stall torque is the maximum force the motor can produce before stopping, but running at stall for more than a few seconds will overheat and damage the motor. Design your gear ratio so the motor operates comfortably below stall under normal load.
A practical rule from the builder community: if your motor stalls under load after gearing down, you either need more reduction or a stronger motor. Do not rely on the motor to power through, because the stalled torque transfers directly to your gear teeth.
Small DC motors, like the 1.5V types used in classroom winch projects discussed on Bricks StackExchange, have very limited torque output. These motors require deep gearing, often 15:1 or more, to handle even modest loads without stalling.
Troubleshooting Common Gear Train Problems
Even well-designed gear trains develop issues. Here are the most common problems and their fixes.
Problem: Gears skip under load. This means the teeth are momentarily disengaging. Check for axle flex and add bracing. If the gears are properly supported, the ratio may be too shallow for the load. Add another reduction stage.
Problem: Motor stalls when load is applied. The gear ratio is insufficient. Either increase the reduction or switch to a higher-torque motor. Also check for binding in the gear train itself: a misaligned gear can create so much friction that the motor stalls even without an external load.
Problem: Excessive backlash at the output. Backlash is the small amount of free rotation between meshing gears before the teeth engage. Every gear mesh adds backlash, so multi-stage trains accumulate it. Reduce backlash by minimizing the number of stages and using tighter-meshing gear types like double bevel gears.
Problem: Loud grinding noise. Gears are either too tightly meshed or misaligned. Loosen the mounting slightly and recheck the axle spacing. If the noise persists, a gear tooth may already be damaged and need replacement.
Problem: Output rotation is jerky or inconsistent. This typically indicates a partially stripped gear somewhere in the train. Inspect each gear under magnification for worn or bent teeth. Replace any damaged gear immediately, because a worn tooth accelerates wear on the meshing gear.
FAQs
Does gearing down increase torque?
Yes, gearing down increases torque proportionally to the gear ratio. A 3:1 gear reduction delivers approximately three times the torque at the output shaft compared to the motor input, minus a small efficiency loss from friction between meshing gear teeth.
How to increase torque with LEGO gears?
To increase torque with LEGO gears, connect a small driver gear to a larger driven gear. The ratio of their tooth counts determines the torque multiplication. For deeper torque gains, use compound gearing with multiple stages. Always brace axles rigidly and leave a 20 to 30 percent safety margin to prevent stripped teeth.
Why is LEGO Technic so hard to build?
LEGO Technic is challenging because it requires understanding mechanical principles like gear ratios, torque, structural bracing, and axle alignment. Unlike standard LEGO, Technic builds involve functional mechanisms where a single misaligned gear or unsupported axle can cause the entire system to fail under load.
How to reduce torque with gears?
To reduce torque, do the opposite of gearing down. Connect a large driver gear to a smaller driven gear. This is called gearing up and it increases output speed while reducing torque by the same ratio. This is useful when you need faster rotation but have a high-torque motor.
What is the maximum safe torque for LEGO gears?
There is no official torque rating for LEGO gears, but community testing suggests that standard spur gears handle ratios up to about 5:1 per stage reliably when properly braced. Beyond that, compound gearing distributes the load more safely than pushing a single stage harder.
What gear ratio is best for heavy lifting with LEGO Technic?
For heavy lifting applications like winches and cranes, a compound ratio between 9:1 and 27:1 is the sweet spot. Use a Power Functions XL motor and build the gear train inside a rigid box framework. Ratios above 45:1 work for demonstrations but lose significant torque to friction in real lifting tasks.
Conclusion
Gearing down LEGO Technic for torque without stripping teeth comes down to three things: getting the ratio right, bracing everything rigidly, and knowing the warning signs of gear overload. The math is straightforward, the gear combinations are well-documented by the builder community, and the prevention techniques are proven.
Start with compound gearing in the 9:1 to 27:1 range for most heavy-load applications. Brace every axle on both sides. Use the largest gears nearest the output. And always test under real load before finalizing your build. If you hear clicking, stop and add more reduction.
The difference between a gear train that lasts and one that shreds its teeth is not luck. It is planning. Take the time to calculate your ratio, build a rigid housing, and choose the right motor, and your LEGO Technic creations will handle serious torque without failing. Now grab your gears and start building.