
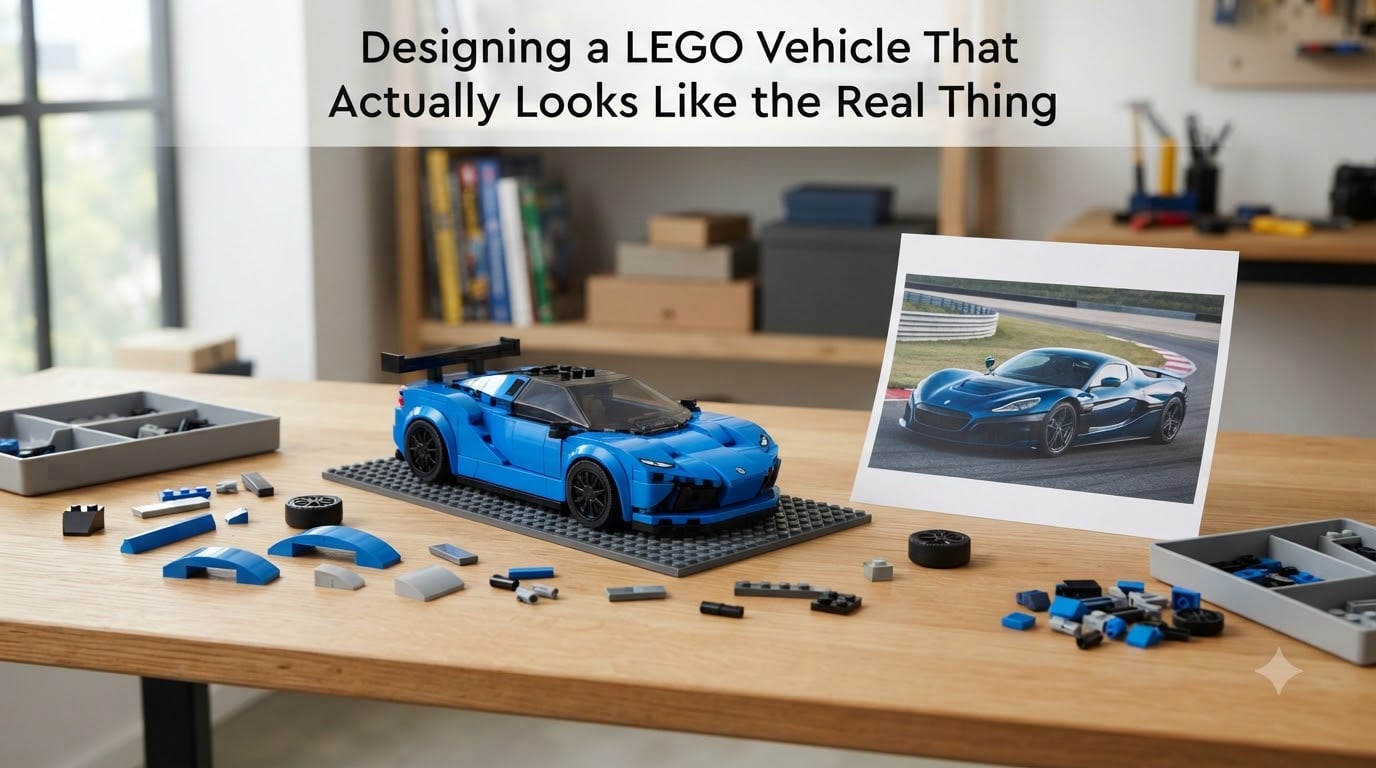
Our guide to designing a LEGO vehicle that actually looks like the real thing was last updated in 2026.
Designing a LEGO vehicle that actually looks like the real thing comes down to three habits: measuring the real car before you build, calculating your scale so the proportions are mathematically right, and using sideways-building techniques to capture curves that stacked bricks can’t. Do those three things and your model becomes recognizable at a glance. Skip them and you get the shapeless “brick with wheels” look that most first attempts suffer from.
I’ve been building custom LEGO cars for over a decade, and I still remember my first attempt at a Ford Mustang. It was the color yellow, it had four wheels, and not one person could tell what it was supposed to be. The problem wasn’t my parts collection. It was that I never measured anything, and I built the whole model studs-up like a basic house.
That’s why I put this guide together. It walks through the exact process I use now, the same five-step method that experienced builders in communities like r/LegoCars rely on when they recreate a real car from photos. One builder there famously spent weeks tweaking a single photo-accurate recreation until the proportions finally matched, and the community’s response made one thing clear: accuracy is what earns respect in this hobby.
Here’s the good news for 2026. You don’t need 3D printed parts, rare pieces, or a huge budget to get there. You need reference photos, a calculator, and a handful of specific techniques. Every one of those is covered below.
Table of Contents
Quick-Start Checklist for Your First Realistic Build
If you want a realistic LEGO car by this weekend, this shortlist covers everything that matters. Each item links to a full section below where I explain the how and the why.
- Pick a simple, boxy subject vehicle (a classic Volvo wagon beats a Ferrari).
- Collect at least 12 reference photos: front, rear, both sides, and wheel arches.
- Write down the real car’s length, width, height, and wheelbase from a spec site.
- Choose a scale where the car measures 14-24 studs long (roughly 1:25 to 1:40).
- Convert every real measurement to studs before touching a single brick.
- Design digitally in BrickLink Studio first, then order the parts you need.
- Build the chassis, then the greenhouse, then the bodywork, in that order.
- Compare your model to a photo from the same angle and fix the silhouette three times.
That loop at the end, build, photograph, compare, and fix, is the real secret. Everything else in this guide exists to make that loop produce results.
Why Most Custom LEGO Vehicles Look Wrong
Nine out of ten custom LEGO cars look wrong because the proportions are off, not because the builder lacked skill or parts. Our eyes are extremely good at detecting vehicle shapes. We recognize cars from blocks away in poor lighting, which means we also notice instantly when a shape is even slightly incorrect.
Four errors cause nearly all of these failures:
- Wheel size guesswork. Tires are the anchor of the whole model. If they’re too big, the body looks shrunken. If they’re too small, the car looks inflated and toy-like.
- Too tall, not wide enough. An unmodified stack of bricks is taller than it is wide, but a real car is wider than it is tall. A Honda Civic is about 70 inches long for every 22 inches of height, better than a 3:1 ratio. A stack of standard bricks is closer to 6:5, which is why stud-stacked bodies bulge upward.
- Greenhouse mistakes. Making the windows too big or placing the roof too high turns a sleek sedan into a greenhouse with wheels.
- Studs everywhere. Real cars don’t have rows of exposed dots down the hood. Exposed studs read as “LEGO house,” not “car.”
None of these are talent problems. They’re measurement problems, and measurements have straightforward fixes.
How to Design a LEGO Vehicle That Actually Looks Like the Real Thing
The full method for designing a LEGO vehicle that actually looks like the real thing is a five-step process: choose your subject and goals, gather reference photos and real measurements, calculate scale and convert dimensions to studs, construct the chassis and body in the right order, and refine until the silhouette matches. Here’s each step in the depth you’ll actually need.
Step 1: Choose Your Subject and Set Goals
Beginners should start with a boxy vehicle, because straight brick surfaces match it naturally. A first-gen Volvo 240 wagon, a classic Land Rover Defender, or a 1980s pickup truck will teach you more per hour than a Lamborghini Countach ever could.
A few terms you’ll see throughout the rest of this guide:
- MOC (My Own Creation): any LEGO model designed by you rather than copied from an official set.
- AFOL (Adult Fan of LEGO): the community of adult builders. Yes, that’s most of us now.
- Purist build: a model using only genuine, unmodified LEGO elements, no cutting, painting, or 3D printed parts. This guide is fully purist.
Now set concrete goals before building. Mine are usually three lines: “six studs wide, minifigure scale, working doors, recognizable as my own daily driver.” I learned the hard way that vague goals like “a cool sports car” produce a drawer of abandoned half-builds.
Step 1 checklist: subject chosen, goal written down, target width in studs decided.
Step 2: Gather Reference Photos and Real Measurements
You need at least 12 good reference photos before building, because the angles you skip are always the ones you end up guessing about. Guessing is where realism dies.
Here’s my standard shot list for any subject vehicle:
- Dead-on front and rear views (for width and light placement)
- Both full side profiles (for the silhouette and wheelbase)
- Three-quarter front and rear (for how surfaces wrap)
- Straight-down shots of the hood, roof, and trunk (for bodywork width)
- Close-ups of wheel arches, headlights, grille, and mirrors
For dimensions, pull the hard numbers from a manufacturer or enthusiast spec site: overall length, width, height, and wheelbase (the distance between the front and rear axle centers). Note them all down. A 2015 Honda Civic, for instance, runs about 179 inches long, 69 inches wide, and 57 inches tall, on a 106-inch wheelbase.
One habit I picked up from r/LegoCars: shoot your own photos if the car is physically nearby. Walk around it once with your camera at waist height. Those photos capture details that press shots smooth away, like how the rear bumper actually tucks under.
Step 2 checklist: 12+ photos saved, four real measurements written down, wheel and tire diameter noted.
Step 3: Calculate Scale and Convert Dimensions to Studs
Work out your scale by dividing the real car’s length by your target length in studs, then apply that same ratio to every other measurement. Consistency matters more than the specific ratio you pick. One measurement off-scale will stick out more than an entirely unusual scale.
The practical math uses two LEGO facts: one stud equals 0.8 cm, and a brick is 0.96 cm tall, a 6:5 ratio. Also, five plate heights stack to exactly two studs in width. These let you translate any real dimension into bricks-and-studs terms.
Here’s the worked example from my last build, a mid-size sedan measuring 190 inches long, 74 inches wide, and 58 inches tall:
- Target length: 22 studs wide across, roughly 44 cm in a 1:22 scale
- Real length: 190 inches, which at 1:22 scales to about 8.6 inches, or right around 22 studs
- Width: 74 inches at 1:22 is about 3.4 inches, roughly 8-9 studs, so I built 8 wide with fenders overhanging half a stud
- Height: 58 inches at 1:22 is about 2.6 inches, roughly 12 plates, so 4 bricks tall, split between body and greenhouse
- Wheelbase: 112 inches at 1:22 lands near 13 studs between axle centers
Since an inch works out to about 1.14 studs at that scale, I could eyeball the rest from there. Write the final numbers on paper and keep them next to you while building. Drifting half a stud on the greenhouse height is the single most common proportion error I see.
The scale you choose should also match how you’ll display the model:
- Roughly 1:42 (6 studs wide): the classic Speed Champions size. Snaps together quickly, but fine trim is tough at this size.
- Roughly 1:28 (8 studs wide): my favorite. Room for curves, opening doors, and a detailed interior.
- Roughly 1:18 (12 studs wide): display-grade detail with real panel shaping, at the cost of a much bigger parts order.
- Roughly 1:10 and up: Technic territory with working suspension and steering, a months-long project.
Step 3 checklist: one scale ratio chosen, all four dimensions converted to studs, wheelbase marked on paper.
Step 4: Construct the Chassis, Greenhouse, and Body
Build in three passes, chassis first, greenhouse second, bodywork last, because the chassis locks in the wheelbase and the greenhouse locks in the proportions everything else hangs on. Beginners who start with the pretty body panels have nothing solid to attach them to.
Pass one, the chassis. Lay a plate two studs wider than your track width, mount the wheel axles at your calculated wheelbase distance, and check that it rolls. Add a plate or technic frame crossmember every four to six studs. If the model is for display rather than play, stiffness still matters: it needs to survive being picked up by one end without the middle sagging.
Pass two, the greenhouse. Block out the cabin using your converted height numbers, typically four to five bricks total, with windows filling about 60 percent of it. Attach transparent parts so the smooth side faces out, with the clutch marks hidden inside. Before going further, photograph this skeleton from the side and lay it over a real photo of the car. It should look like a wireframe of the real thing.
Pass three, the bodywork. Fill in the hood, trunk, and sides, then handle the windshield. Windshield pieces are the least forgiving element in the system, so pick the windshield first and build the cowl around it. Search BrickLink by angle and length before you commit. When I built a fastback coupe around the wrong windshield, the rake was off by ten degrees and the whole car looked broken until I rebuilt the front third.
Step 4 checklist: rolling chassis, greenhouse proportioned against a photo, windshield secured.
Step 5: Refine Until the Silhouette Matches
Stop building and start comparing, because refinement is where a good model becomes a recognizable one. The trick is simple. Photograph your model from the exact angle of a reference photo, put both images side by side, and trace the roofline and body sides with your eyes.
Every bump or dip you notice is a fix. My last model went through three rounds: round one lowered the roof by a plate, round two pushed the rear wheels back a stud, and round three, the one that mattered most, moved the windshield forward half a stud.
Then comes the detail pass:
- Headlights and taillights, using translucent orange and red round tiles or side-marker parts
- Grille texture, using 1×1 tiles, grille tiles, or studs flipped sideways
- Side mirrors from clips and bar elements
- Exhaust tips from small round pieces
- Door seams by leaving a one-plate gap in the bodywork
Don’t aim for every detail on the first pass, or even the second. Realism comes from getting the big shape right, then letting small details land on top of it.
Step 5 checklist: silhouette verified against two reference angles, at least five fine details added.
Core Building Techniques: SNOT, Curves, and Hinges
SNOT, curves, and hinges are the three techniques that separate realistic vehicles from stacked-brick ones, because real car surfaces point in every direction while standard LEGO building points everything up. Here’s how each works in practice.
SNOT: Studs Not On Top
SNOT means turning bricks sideways so their smooth faces become the car’s outer surface, which instantly removes the exposed-stud look and lets parts point in any direction you need. The technique got its tongue-in-cheek name because the first step of building this way is placing no studs on top at all.
A few elements do most of the heavy lifting:
- Bricks with studs on their sides, the workhorse for vertical surfaces
- Headlight bricks, which have a hollow stud facing forward, perfect for grilles and badges
- Plates with bent or angled edges, for snapping panels on at odd angles
- Bracket plates, cheap and everywhere, for mounting panels sideways
SNOT also solves the geometry problem from earlier. Since five plate heights equal two studs, stacking plates sideways is a precise way to hit exact heights. I build nearly every hood and door panel sideways now.
Building Curves Without 3D Printing
You can get convincing curves from purist parts alone: wedge bricks and plates for sloped hoods, curved slopes for fenders and nose work, round 1×1 and 2×2 elements for arches, and 1x2x2 and 1x2x5 curved panels for smooth walls. Nearly every “how do I get smooth curves without printing” question in the car-building community traces back to one answer: layer curved slopes in steps, since small stair-steps at the right scale read as one smooth surface from viewing distance.
The wheel arch is the highest-value curve on any car. For a minifigure-scale model, mount a tire, then surround it with curved slopes stepped outward, one per layer. Check the gap between tire and arch on your reference photos. It should be tight. A loose arch ruins an otherwise perfect build.
Here’s a trick I use constantly: tiles and plates are thinner than bricks, so a curve made from stepped plates breaks the silhouette in smaller increments. Mixing a stepped-plate core under a curved-slope skin gives a smoother line than either technique alone.
Hinges, Clips, and Panel Gaps
Real cars have visible gaps around the doors, hood, and trunk, and recreating them is one of the cheapest realism upgrades available. Leave a half-plate to one-plate recess where panels meet instead of butting everything flush, and suddenly the body reads as assembled metal rather than carved wood.
Working doors need hinge plates or clip-and-bar assemblies mounted so the pivot sits at the front edge of the door. One bar in two clips gives a friction hold that survives opening. Functional hoods and trunks use the same approach with stronger parts, since those panels are heavier.
Common Mistakes That Break Realism
These are the errors I check for first when a build “looks off” but I can’t immediately say why. Each one has a quick fix.
- Wrong tire size. Fix it first, before any bodywork, since tire diameter drives the entire stance.
- Roof too high. Lower it one plate at a time. Real car greenhouses are lower than intuition suggests.
- Body too narrow. If the model looks pinched, go one stud wider and let fenders and mirrors overhang.
- Studs exposed on body surfaces. Flip those surfaces sideways with SNOT techniques or cap them with tiles.
- Windows too large. Real cars have more door than glass. Shrink the windows by a stud or two and the car instantly looks more grown-up.
- Skipping the reference check. Building for hours without comparing against a photo is how proportions drift. Compare every 15 minutes.
- Detailing too early. Details set in wet cement are hard to move. Big shapes first, small details last.
Digital Design Tools: Plan Before You Build
Build your model digitally before touching a single physical brick, because digital iteration is free while physical rebuilds cost hours. One competitor in this space covers this step; almost nobody else does, which is a shame, since it’s the biggest single upgrade to my workflow.
BrickLink Studio is the tool I recommend, and it’s free. It pairs a full parts catalog with a renderer good enough to check your model against reference photos before you spend a cent. The workflow: build the model, render it from the same angle as a reference photo, compare, fix, repeat. Then click through to the built-in parts order. Iteration that took me three evenings at the building table now takes 30 minutes on a laptop.
Mecabricks runs in the browser with no install, which makes it a solid pick for quick sketches or for builders on shared computers. LeoCAD is an open-source desktop alternative with a lighter footprint.
A word on the old guard: LEGO Digital Designer, the official app, was retired back in 2019, so steer clear of any tutorial that still starts there.
My favorite budget trick: design in whatever colors you like, then recolor the whole model at once based on cheap, plentiful parts. I usually design in white, check the shape, then recolor to match prices before ordering.
How to Source Parts Without Overspending
Realistic builds rarely need rare parts, but they do need the right parts in the right quantities, and sourcing those is its own skill. These are the four channels I use, in order of preference.
- BrickLink: the largest aftermarket marketplace for individual LEGO elements, with nearly every part ever made in every color. Design in Studio, upload the wish list, and buy from a handful of stores to minimize shipping. Compare the “part out” price against used sets, too.
- LEGO Pick a Brick (official): genuine parts straight from the source. Selection used to be limited, but it improved significantly once LEGO merged its standard and bestseller catalogs into one service in 2023. Best for common elements in bulk.
- BrickOwl: the other big marketplace, often cheaper for used lots and odd colors. I always price-check both sites before ordering.
- Your own bins: my favorite source. Old sets are full of hidden gems, and since 2015-2023-era speeder and car sets are packed with useful slopes and windshields, a single set you already own might cover half a build.
Two budget habits keep my costs down. Order a buffer of basic bricks and plates in your chosen color so mistakes don’t trigger a second shipping fee. And substitute shapes where the silhouette allows: a plain 2×2 curved slope in the right color beats a rare, pricey variant nobody can visually distinguish at display distance.
Color Matching for Authentic-Looking Models
The fastest approach is to pick the LEGO color closest to the real car rather than hunting for perfection, because near-enough color with the right shape always beats perfect color with the wrong shape. Modern LEGO offers 60-plus colors, but a dozen of them cover most real-world vehicles.
What trips people up is that LEGO color names rarely match paint names. A real “Nardo grey” is close to LEGO’s medium stone grey, and a real “Miami blue” is close to LEGO’s dark azure. Checking color comparison photos on community databases saves a lot of guesswork here.
Four color rules I follow on every build:
- Use tinted transparent parts, light blue or smoke, for windows rather than clear, since real glass is never invisible.
- Two-tone bodies, roof in a contrasting color, body in the main shade, add huge realism for only a few extra parts.
- Use black for tires, grilles, and window trim; dark bluish grey for mechanical bits and exhausts.
- Save stickers and printed tiles for trim like badges and stripes. Straight color blocking does the heavy lifting.
Practice Exercises to Level Up Fast
Finish quick practice builds rather than starting ambitious ones, since completion teaches lessons that abandoned projects never will. These four exercises build the specific skills from this guide in roughly ascending difficulty.
- The 20-minute wagon: build any boxy station wagon at 6 studs wide in a single sitting. Goal: correct proportions only, no details.
- The same car three times: build the identical subject at 6, 8, then 12 studs wide. You’ll discover which details survive at each scale, knowledge that transfers to every future build.
- The photo recreation: rebuild your own family car or daily driver strictly from your own photos. These builds make outstanding gifts, a point builders on r/LegoCars make constantly when they share parts lists and instructions so others can reproduce their models.
- The curve copy: photograph your model from the same angle as a reference photo, trace both silhouettes, and fix every mismatch. Do this three full rounds. The model at the end will barely resemble the one at the start.
Each exercise deliberately targets a weakness: proportions, scale awareness, reference discipline, and refinement. One weekend per exercise is enough to see real progress.
Frequently Asked Questions
How to design your own LEGO car?
Pick a boxy subject, gather at least 12 reference photos plus the real car’s length, width, height, and wheelbase, choose a scale where the model runs 14-24 studs long, convert every measurement to studs, design digitally in BrickLink Studio, then build chassis, greenhouse, and bodywork in that order and refine the silhouette against photos.
What is the best scale for realistic LEGO cars?
Around 1:28 (8 studs wide) hits the sweet spot for most builders: enough room for curves, opening doors, and an interior, without the parts cost of larger scales. Roughly 1:42 (6 studs wide) is faster and matches official speed-themed sets, while 1:10 and larger suits Technic-style working features.
How do you make curved surfaces in LEGO?
Step curved slopes and wedge bricks in small increments, use round elements for wheel arches, and build panels sideways so plate thickness creates finer steps than bricks. Layered stair-steps at the right scale read as one smooth surface from normal viewing distance, with no 3D printed parts needed.
What tools do I need for LEGO car building?
A brick separator, a ruler or calipers for checking stud dimensions, a camera for photographing your model against reference shots, and the free BrickLink Studio app for digital design, render checks, and parts ordering. No cutting, painting, or special equipment is required for a purist build.
Where can I get parts for custom LEGO cars?
BrickLink for nearly every part in every color, LEGO’s official Pick a Brick for common elements in bulk, BrickOwl for used lots and budget finds, and your own bins of old sets, which are often full of useful slopes and windshields.
How do you build a LEGO car from photos?
Collect front, rear, side, and top-down photos plus the car’s real dimensions, convert those dimensions to studs at your chosen scale, block out the chassis and greenhouse first, then photograph your model from the same angle as your reference and fix silhouette mismatches over several refinement rounds.
Is it illegal for a 100 year old to play with Legos?
No. There is no age restriction on LEGO ownership or use anywhere, and adults are one of the largest segments of the hobby. The AFOL (Adult Fan of LEGO) community includes builders of every age, and LEGO itself produces sets marketed specifically to adults.
What is the LEGO 5 2 rule?
It is a building geometry fact: five plates stacked flat equal two studs in width, and more broadly, brick height to stud width follows a 6:5 ratio. Knowing these ratios lets you convert real vehicle dimensions into precise combinations of bricks and plates.
Are there fake Legos that look real?
Yes, several brands produce construction bricks compatible with LEGO elements, and quality varies from convincing to clearly inferior. This guide covers purist builds using only genuine LEGO elements, which is also the standard most custom-car communities expect when builders share instructions and parts lists.
Final Thoughts: Your First Realistic LEGO Vehicle
Designing a LEGO vehicle that actually looks like the real thing isn’t a talent you’re born with. It’s the five-step loop we covered: pick a boxy subject, measure the real car, convert dimensions to studs, build chassis-greenhouse-bodywork in order, and refine the silhouette until it matches. Techniques like SNOT and stepped curves fill in the rest.
My advice for your first build: go small and boxy, finish it in one weekend, and photograph it next to a reference picture before you judge yourself. Then start the next one, because your second realistic vehicle is always twice as good as your first.