
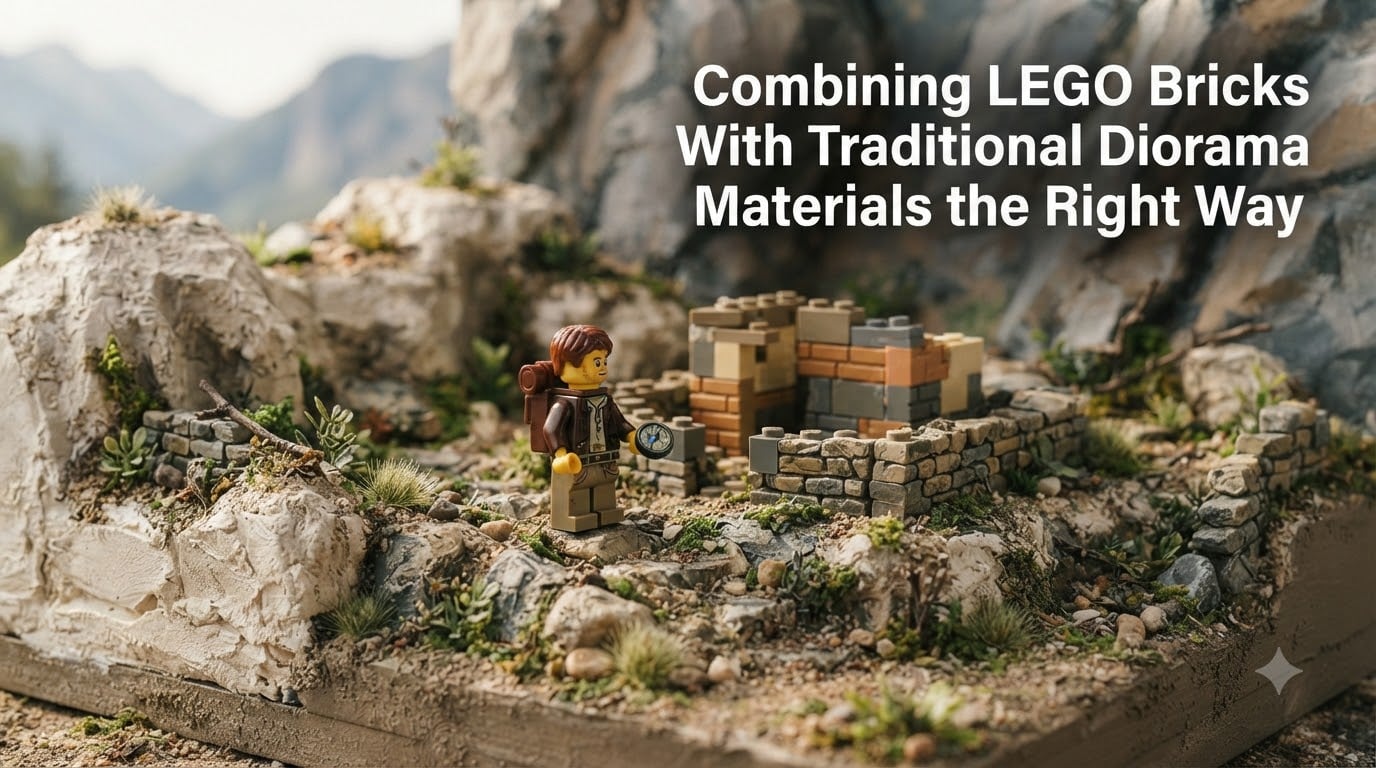
Building a LEGO diorama that stops people in their tracks takes more than just stacking bricks. The secret is combining LEGO bricks with traditional diorama materials the right way, blending the precision of plastic elements with the realism of foam, plaster, and paint to create scenes that look like they belong in a museum.
Our team has spent years building LEGO MOCs (My Own Creations) alongside foam terrain and plaster structures. Along the way, we learned what works, what falls apart after a month, and what techniques separate a flat-looking display from one that draws crowds at a convention.
This guide walks you through every step of the process. You will learn which materials pair best with LEGO, how to match scale, which adhesives actually bond plastic to foam, and how to paint and texture your scene so the bricks and the traditional materials look like they belong together.
Table of Contents
Why Combine LEGO With Traditional Diorama Materials?
LEGO bricks give you precision, modularity, and that signature minifigure scale. But on their own, they can look a bit clean and uniform, which works against you when you want a weathered battlefield or an ancient ruin.
Traditional diorama materials like extruded foam board, plaster of Paris, and acrylic paints fill in the gaps. They bring texture, irregularity, and the kind of weathered realism that plastic simply cannot match on its own. Hobbyists on r/dioramas and r/legostarwars regularly report that mixing these materials is what takes their builds from toy-like to display-worthy.
The combination also solves a cost problem. Covering a large display area entirely in LEGO gets expensive fast. Foam and plaster let you build sprawling terrain for a fraction of the price, reserving your brick stash for the hero structures where detail matters most.
Essential Materials for Combining LEGO with Traditional Diorama
The best material combination for a LEGO diorama is extruded polystyrene foam board (XPS) for the base and terrain, plaster of Paris for rock and concrete textures, acrylic paints for coloring, and white vinyl glue (PVA) as your primary adhesive. This combo gives you a lightweight, durable, paintable surface that integrates cleanly with LEGO elements.
Here is a practical checklist of what to gather before you start:
Extruded polystyrene foam board (XPS), 1 to 2 inches thick, available at most DIY stores
Plaster of Paris or joint compound for texture and rock formations
Acrylic craft paints in grey, brown, and green tones for base coats and dry brushing
White PVA glue (school glue) for bonding foam layers and sealing surfaces
Cyanoacrylate (super glue) gel for bonding non-LEGO elements to baseplates
A hot wire foam cutter or sharp craft knife for clean foam cuts
Sandpaper (medium and fine grit) for smoothing edges
Paintbrushes including a stiff-bristle brush for dry brushing
Your LEGO elements, baseplates, and minifigures
One note from experience: avoid expanded polystyrene (the beaded foam that comes in packaging). It tears easily and the beads create a mess when cut. Extruded foam board has a smooth surface that cuts cleanly and holds detail far better.
Understanding Scale: Matching LEGO Minifigure Scale
Scale is the single most overlooked factor when mixing LEGO with traditional materials. LEGO minifigures sit at roughly 1:48 scale (often called minifig scale), meaning a standard minifigure represents a 6-foot-tall person. If your foam terrain or plaster walls are out of proportion, the whole scene looks off even if the craftsmanship is perfect.
A standard LEGO brick is 5 studs wide on a 2-stud module, giving you about 8mm per stud. Doorways in LEGO sets typically stand 5 to 6 bricks tall, which translates to roughly 12 to 15 cm. When you build foam walls or plaster structures around your LEGO elements, match these dimensions so a minifigure can stand naturally beside or inside them.
A quick trick: build your LEGO structure first, then measure it. Use those measurements to cut your foam and shape your plaster so everything lines up. Building the traditional materials to fit the bricks, rather than the other way around, prevents frustrating mismatches.
Choosing the Right Base for Your LEGO Diorama
Your base is the foundation everything else sits on, so getting this right saves headaches later. The three most common options are LEGO baseplates, foam board, and wooden boards, and each has trade-offs.
LEGO baseplates are the simplest starting point. They give you an instant stud grid for attaching bricks, but they flex under weight and limit your terrain to flat or gently sloped surfaces. Foam board is the most popular choice among diorama builders because it is lightweight, easy to carve, and accepts paint and plaster well. Wooden boards offer the most rigidity for large or heavy displays but require more prep work.
For most mixed-material dioramas, we recommend a hybrid approach. Start with a rigid wooden or MDF panel for structural support. Glue a LEGO baseplate to the areas where you want direct brick attachment, and layer foam board over the rest for terrain. This gives you the best of all three worlds.
Working with Foam Board for LEGO Dioramas
Extruded polystyrene foam board is the workhorse material for mixed LEGO dioramas. It is dense enough to hold carved detail, light enough to keep your display portable, and smooth enough to accept plaster and paint without extensive priming.
The foam most diorama builders use is XPS foam board in either pink or blue sheets, typically 1 to 2 inches thick. These colored sheets are factory-coated with a thin plastic film that peels off easily, leaving a clean surface ready for carving and texturing. You can build up layers of foam to create hills, cliffs, and raised platforms, then carve them into natural-looking terrain shapes.
One important safety note: never use solvent-based adhesives or spray paints directly on polystyrene foam. Solvents melt the foam on contact. Stick with water-based PVA glue, acrylic paints, and plaster compounds, all of which are foam-safe.
How to Cut Foam Board for a Diorama
Cutting foam board cleanly requires patience and the right technique. Here is the step-by-step process that produces smooth, professional edges:
Mark your cut lines on the foam surface using a pencil and straightedge. Measure twice against your LEGO elements before cutting.
Score lightly along the line with a sharp craft knife, applying only enough pressure to break the surface film. Do not try to cut through in one pass.
Make 3 to 4 additional passes with the knife, each one slightly deeper, until you cut completely through the foam. Multiple shallow cuts produce cleaner edges than one deep cut.
Use a hot wire foam cutter for curved or irregular shapes. The wire melts through the foam, leaving a smooth edge that needs minimal sanding.
Sand the cut edges with medium-grit sandpaper to remove burrs and create a slightly roughened surface that paint and plaster will grip.
If you do not have a hot wire cutter, a serrated bread knife works surprisingly well for rough shaping. Just expect to do more sanding afterward.
Using Plaster and Compounds for Realistic Texture
Plaster is where your diorama goes from smooth foam to convincing rock, concrete, and stone. Plaster of Paris is the most common choice because it sets quickly, takes paint well, and can be applied in layers to build up organic textures.
Start by mixing plaster of Paris to a thick paste consistency, roughly the texture of peanut butter. Too watery and it will run off your foam; too dry and it will not adhere properly. Apply it with a putty knife or old paintbrush, pressing it into the foam surface and building up irregular layers that mimic natural rock formations.
Forum builders on r/dioramas have shared a technique worth borrowing: use your LEGO bricks as temporary formwork for plaster casting. Build a wall of bricks, pour plaster behind it, and once set, remove the bricks to reveal a textured cast surface. This produces detailed concrete wall effects that would be hard to carve by hand.
Let the plaster dry fully, typically 24 to 48 hours depending on thickness, before painting. Rushing this step leads to cracking and paint that peels away from damp plaster underneath.
Adhesives That Bond LEGO and Non-LEGO Materials
Finding the right adhesive is one of the biggest pain points builders face when mixing materials. The wrong glue either fails over time or damages the materials it touches. Here is what works based on our testing and community recommendations.
For bonding foam layers together or attaching foam to a wooden base, white PVA glue is the go-to. It is foam-safe, dries clear, and creates a strong flexible bond. Apply it generously and let it cure overnight for maximum strength. PVA also works well for sealing foam surfaces before painting.
For attaching non-LEGO elements (like resin terrain pieces, wooden details, or metal hardware) to a LEGO baseplate or directly to bricks, use cyanoacrylate gel super glue. The gel formula fills small gaps and sets in seconds. Be aware that super glue can fog clear LEGO elements and is very difficult to remove, so use it only on parts you do not plan to disassemble.
For temporary attachments, removable adhesive putty is your friend. It holds lightweight terrain pieces in place during photography or display but peels off cleanly when you want to reconfigure. Many LEGO photography dioramas rely on putty rather than permanent glue for exactly this reason.
Avoid hot glue on polystyrene foam. The heat melts the foam surface and creates a messy, weak bond. If you need a quick grab adhesive, use low-temp hot glue sparingly and only on non-foam surfaces.
Painting and Texturing Techniques
Painting is what ties your LEGO elements and traditional materials together visually. The goal is to make foam, plaster, and plastic read as part of the same world, not three separate things glued together.
Start with a dark base coat. Use a dark grey or brown acrylic paint thinned slightly with water and apply it across all your plaster and foam surfaces. This dark undercoat creates depth in the recesses and gives subsequent lighter layers something to build on. Let this dry completely.
Next comes the dry brush technique, which is the single most effective way to create realistic stone and concrete textures. Load a stiff-bristle brush with a lighter grey or tan paint, then wipe most of the paint off on a paper towel until the brush is nearly dry. Lightly sweep the brush across raised surfaces so paint catches only on the high points. This instantly creates a weathered, dimensional look.
To make styrofoam look like stone, apply a layer of plaster compound first for surface texture, then paint with a dark base coat followed by two dry-brushed layers in progressively lighter grey tones. Add a final wash of watered-down dark brown or black paint in the crevices to simulate grime and age.
For areas where LEGO bricks meet traditional materials, blend the transition with paint. A light dry-brush of matching colour over the lowest brick course and onto the adjacent plaster makes the seam between plastic and scenery far less visible.
Step-by-Step Integration: Combining LEGO Bricks With Traditional Diorama Materials the Right Way
Now that you understand each component, here is the full integration workflow from start to finish:
Plan your scene on paper, marking where LEGO structures go and where terrain will be.
Build and test-fit your LEGO elements first to establish exact dimensions.
Cut and layer your foam board base to create terrain contours around the brick footprint.
Attach a baseplate to the flat zones using double-sided tape or removable putty for flexibility.
Apply plaster compound over foam areas for rock and concrete texture, then let it cure fully.
Prime and paint all traditional material surfaces with base coat, dry brush, and wash layers.
Place your LEGO structures and minifigures, adjusting terrain paint as needed to blend transitions.
Add finishing details like static grass, rubble piles, and small debris to unify the scene.
Following this order prevents the most common mistakes, like painting yourself into a corner or plastering over areas where bricks need to attach.
Troubleshooting Common Problems
Even experienced builders run into issues when mixing materials. Here are solutions to the most frequent problems we see in forums and hear from fellow builders.
Plaster will not stick to foam: Rough up the foam surface with sandpaper first, then apply a thin sealing coat of watered-down PVA glue before the plaster. The PVA gives the plaster something to bond to beyond the smooth foam film.
Foam tears when cutting: Your knife is dull or you are pressing too hard. Use a fresh blade and make multiple light passes. A hot wire cutter eliminates this problem entirely for curved cuts.
Paint peels off plaster after a few weeks: The plaster was not fully dry when painted, or no base primer was used. Wait at least 24 hours for plaster to cure, and always apply a dark acrylic base coat before detail painting.
LEGO bricks do not sit flush against foam terrain: Carve a small recess in the foam so the baseplate or bricks can sit level. Never force bricks against uneven foam, as this stresses the connections and causes structures to wobble.
Mixed materials look like separate pieces: This is a painting problem, not a construction one. Blend transitions with matching dry-brush colours and add shared debris (gravel, foliage) across both zones to visually tie them together.
Frequently Asked Questions
What is the best material for a diorama?
The best material for a diorama is extruded polystyrene foam board (XPS) for terrain combined with plaster of Paris for texture and acrylic paints for finishing. This combination is lightweight, easy to shape, and produces realistic results that integrate well with LEGO elements.
What foam do you use for a diorama?
Use extruded polystyrene foam board, commonly sold as pink or blue insulation sheets at DIY stores. It comes in 1 to 2 inch thicknesses, cuts cleanly, holds carved detail, and accepts paint and plaster without melting. Avoid beaded expanded polystyrene (EPS) as it tears and crumbles.
How to cut foam board for diorama?
Mark your cut line, score it lightly with a sharp craft knife, then make 3 to 4 progressively deeper passes until you cut through. For curved shapes, use a hot wire foam cutter which melts through cleanly. Always sand cut edges afterward for a paint-ready surface.
What can I put on styrofoam to make it look like stone?
Apply a layer of plaster of Paris or joint compound over the foam for surface texture. Once dry, paint with a dark grey base coat, then dry brush two layers of progressively lighter grey. Finish with a watered-down dark wash in the crevices to simulate age and grime.
Can you mix LEGO with model kit parts?
Yes, you can mix LEGO with model kit parts as long as you match the scale (roughly 1:48 for minifig scale) and use the right adhesive. Cyanoacrylate gel bonds plastic model parts to LEGO securely, while removable putty works for temporary display setups.
Conclusion
Combining LEGO bricks with traditional diorama materials the right way opens up a whole new world of building possibilities. Foam board gives you lightweight terrain, plaster delivers realistic texture, and the right adhesives and painting techniques tie it all together with your bricks.
The key takeaways: start with extruded foam board as your base, match everything to minifig scale, use PVA glue for foam and super glue gel for permanent plastic bonds, and always paint with a dark base coat followed by dry brushing. Build your LEGO elements first, then shape traditional materials around them.
Your next step is simple. Grab a sheet of XPS foam, a tub of plaster of Paris, and that LEGO set you have been wanting to display. Start small with a single textured platform, and build from there. Once you see how well these materials work together, you will never look at a plain baseplate the same way again.