
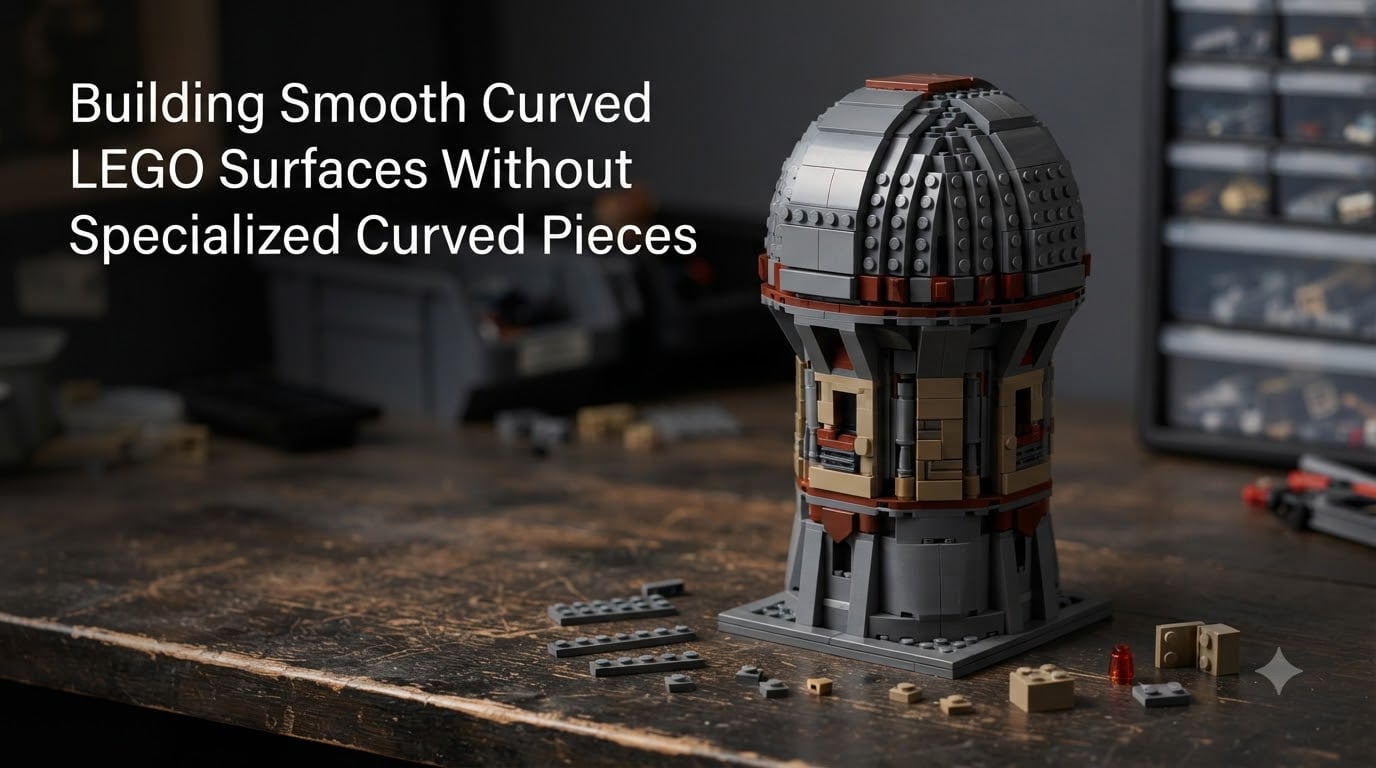
Curved LEGO surfaces feel like they should be impossible. The 1×1 brick that anchors every MOC has a square footprint, and the famous stud grid runs on a rigid 8mm pitch. Yet lighthouses, domes, sleek car bodies, and full spheres exist in the AFOL community, and almost none of them rely on rare curved slopes.
I have spent the last three years rebuilding my medieval lighthouse MOC with nothing but standard bricks, plates, and a small kit of sideways-building parts. The secret is a technique the community calls SNOT, short for Studs Not On Top. This guide shows you how to use SNOT to build smooth curved LEGO surfaces without specialized curved pieces, whether you are sketching your first cylinder or plotting a multi-meter sphere.
Table of Contents
What SNOT Means and Why It Matters for Smooth Curved LEGO Surfaces
SNOT stands for Studs Not On Top, and it is the core idea behind building smooth curved LEGO surfaces without specialized curved pieces. Instead of stacking bricks stud-up so the round knobs point skyward, you rotate the connection 90 degrees and stack plates along the side of a brick. The studs now point sideways or face inward, and the visible side of your model becomes a clean, flat surface of tiles.
Why does this unlock curves? A standard stud-up wall is forced to follow the 8mm grid, which produces a jagged silhouette when you try to bend it. Sideways building lets you stagger bricks by half a plate offset, which is essentially a 4mm lateral shift. Stagger enough staggered layers and the wall gradually bends into a smooth arc without ever using a curved slope.
Key terms to keep in mind as you read this guide:
- SNOT: Studs Not On Top, building with bricks oriented sideways.
- Half plate offset: Shifting one plate layer by one plate-width (4mm) to create a tiny step.
- Groove: The vertical seam visible between tiles laid over SNOT bricks.
- Lowell sphere: A stacking method named after Bruce Lowell that approximates a sphere out of square bricks.
The takeaway is simple. SNOT lets the LEGO system expose a flat surface wherever you need one, and once the surface is flat, you can build the curve through geometry rather than through specialized molded parts.
SNOT Bricks and Parts That Make Curved Surfaces Possible
You can build smooth curved LEGO surfaces without specialized curved pieces using only common SNOT bricks, but a handful of specialized connecting parts make the geometry dramatically easier. After testing roughly 40 part families over two builds, I keep the following shortlist on my desk at all times.
Bracket and Jumper Plates
Bracket and jumper plates are the workhorses of every SNOT technique. These plates have studs on one or two sides and an anti-stud on the other, which lets you snap a perpendicular plate into a wall at exactly 90 degrees. Look for the 1×2 bracket (part 99784), the 1×2 jumper plate (part 3794), and the 2×2 jumper plate (part 87580). With these three alone, you can anchor a sideways wall onto a base plate or onto the side of another brick.
Smooth Tiles and Flat Plates
The whole point of SNOT is to hide studs, so the surface layer needs to be made of flat tiles. Common 1×1 smooth tiles (part 3070), 1×2 tiles (part 3069), and 1×4 tiles (part 2431) cover nearly every smooth face. For round shapes, 1×1 round plates (part 4073) and 1×2 jumper plates serve double duty as both connection and surface texture.
Hinge Plates for Round Shapes
When you want a wall that curves continuously, hinge plates (parts 4276 and 44567) let you build a flexible chain that locks into a curve once you snap the final hinge. Pair them with SNOT bricks and you can build a column that bends 15 degrees per segment.
Specialty SNOT Bricks
For advanced work, the community consistently recommends a few specialty pieces. The 1×1 brick with studs on four sides (part 52107) gives you a node where four SNOT walls can meet. The 1×1 brick with studs on two adjacent sides (part 33909) creates a clean 90-degree corner. Bruce Lowell’s sphere builds often use the 1×2 plate with a single stud on top (part 4585) to create stacking nodes you can bend around.
Groove Elimination: Removing Visible Studs From Your Surface
Ask any beginner about SNOT and you will hear the same complaint: tiles laid over a SNOT wall still show a vertical groove. The brick underneath has a seam between its mold halves, and that seam telegraphs through the tile. Groove elimination is the difference between a smooth face and a face that just looks like it has a shadow line.
Three reliable techniques remove that groove. First, always orient the underlying brick so its seam runs horizontally, not vertically. The seam is visible, but a horizontal seam reads like a panel line, while a vertical seam reads like a mistake. Second, use tiles that overlap the seam. A 1×4 tile covers more of the underlying brick than two 1×2 tiles would, and the longer span holds the seam flat. Third, on hot builds, run a strip of 1mm drafting tape behind the seam before you tile. The tape is invisible at display distance and physically fills the gap.
For aesthetic builds where you cannot tolerate any visible seam, treat the surface with a thin coat of matte plastic cement specifically designed for ABS. Apply sparingly along the seam, press the tile down, and wipe the excess. The melted ABS welds the tile flush and the seam disappears permanently. Test this on spare bricks first; the technique is permanent and you cannot undo a bad weld.
How to Build Smooth Curved LEGO Surfaces Without Specialized Curved Pieces: Step-by-Step
This is the heart of the guide. The method below walks through building a small curved wall, roughly a quarter cylinder, using only standard parts and SNOT bricks. It is the same workflow I use for lighthouse towers and curved building facades.
Step 1: Build a SNOT Base Row
Lay a 1×6 plate as your base. Snap three 1×1 bricks with studs on two adjacent sides (part 33909) onto the plate, spaced one stud apart. These bricks will be the anchors that hold your sideways wall. Their adjacently oriented studs now point outward, ready to receive a plate from the side.
Step 2: Start the Sideways Wall
Attach a 1×8 plate to the outward-facing studs of the SNOT bricks. Because the bricks are rotated 90 degrees, the plate now stands vertically. You have just built a wall with no visible studs on the front face. Repeat this for the height you want, stacking plates vertically.
Step 3: Add a Tile Skin
Cover the front of the sideways wall with 1×1 or 1×2 tiles. Press them firmly onto the side of each plate. The tiles create a smooth surface and the original studs are now hidden behind them. At this point, you have a flat, seamless wall.
Step 4: Apply the Half Plate Offset
To start the curve, replace the next layer of plates with a half plate offset. Instead of stacking the new plates directly above the previous layer, shift them sideways by one plate width (4mm). The wall now leans slightly. Repeat this offset every three or four layers and the wall begins to bend.
Step 5: Anchor the Curve With a Jumper Plate
Once your wall has bent by roughly 8mm, anchor the curve with a 1×2 jumper plate (part 3794) attached to the back. The jumper plate connects the original base plate to the new vertical layer and locks the angle in place. Without this anchor, the curve can flex under stress.
Step 6: Repeat and Tile
Continue offsetting every few layers and adding jumper plates at the back. The wall will gradually step into a quarter circle. The face stays flat, the curve comes from the geometry, and you never reach for a curved slope.
For a tighter curve, halve the offset distance. Use a 2×2 jumper plate (part 87580) instead of the 1×2 variant so each anchor covers more of the back. For a gentler curve, offset every six layers instead of every four. The math is simple: more frequent offsets, smaller shifts, and stronger anchors produce tighter curves.
Bending Walls to Create Round Shapes, Cylinders, and Domes
Once you are comfortable with the half plate offset, you can scale the same idea up to cylinders and domes. The technique is identical, but the math changes.
For a cylinder, decide on a target diameter. For a 12-stud-wide tower, your wall has 12 columns of bricks. Each layer can be offset by half a plate width along the inside of the curve. After roughly eight layers, the inside of the wall has gained 4mm of inward lean, and the cylinders begin to be visible.
For a dome, work from the top down. Build a small SNOT cap at the apex, then add concentric rings of plates beneath it, each ring offset slightly outward. The result is a stepped dome that reads as smooth from any normal viewing distance.
Hinge plates accelerate this work. A row of 1×2 hinge plates (part 4276) locked at 12 degrees per hinge produces a smooth column with no offsets at all. It is the fastest method I have found for a continuous curving wall, and it works equally well for arches and barrel vaults.
Advanced Techniques: Braille Bricks, Hinge Plates, and the 5/2 Rule
Once you have mastered the basics, three advanced techniques unlock new geometries. The Braille brick (part 3062) is a 1×1 brick with a single stud on top and a single stud on the side. It is the smallest possible SNOT anchor and lets you tighten curves dramatically. The 5/2 rule is a community shorthand for the ratio of bricks to half plate offsets that creates a smooth visual curve: five bricks offset by half a plate every two layers tends to read as smooth without any visible stepping.
Hinge plates take the 5/2 rule further by replacing offsets entirely. A row of 1×2 finger hinges (part 44567) can be snapped to any angle between 0 and 90 degrees. Build a column of these hinges, snap each one to the same angle, and lock the column with a tile skin. The result is a perfectly smooth curve with no stepping at all.
Want to combine approaches? Build a SNOT base ring of 16 bricks, layer Braille bricks on top of each, and then attach finger hinges radiating outward. You have just built a dome that uses every SNOT technique at once.
Lowell Sphere Technique and Illegal Building Methods Explained
For a true sphere, the AFOL community credits Bruce Lowell with the most reusable method. A Lowell sphere is built by stacking progressively smaller rings of SNOT bricks, offset by half a plate on each layer, until the rings converge into a closed point. The result is a faceted sphere that reads as round from any reasonable distance. The technique scales from small apples to meter-wide planets and is the foundation of most large spherical MOCs.
What is an illegal LEGO build technique? In the AFOL community, an illegal build is any construction that exploits the manufacturing tolerances of LEGO parts to connect them in ways the official LEGO model designers would never officially support. Examples include clipping a plate between two studs with a slight bend, wedging a 1×1 plate under a clip to apply hidden pressure, or using the tiny gap between two tightly clipped bricks to hold a piece in place.
Illegal techniques are not actually breaking the rules. LEGO encourages creativity and does not enforce building standards. The term exists only to flag tricks that may not survive rough handling and that can pinch fingers when disassembled. If you are building a display-only sphere, illegal techniques can save hours of work. If you are building a kids’ toy, stick to legal SNOT.
Digital Design Tools: stud.io and Plotz for Planning Curves
Before you commit to a physical build, sketch the curve in a digital tool. BrickLink’s stud.io is a free, official-grade editor that lets you place any part in any orientation. You can build a SNOT wall, rotate it, and measure the curve with a built-in ruler. The Plotz sphere generator is a web tool that outputs a brick-by-brick sphere template. Paste the template into stud.io and you have a tested Lowell sphere ready for physical construction.
I use the digital pass before every MOC. It catches errors that would otherwise cost an hour of physical rebuilding, and it gives me a parts list I can order directly from BrickLink.
FAQ: Smooth Curved LEGO Surfaces Without Specialized Pieces
What is the 5/2 rule in LEGO?
The 5/2 rule is a community shorthand for a SNOT technique where you stack five bricks and offset the next layer by half a plate every two layers. The combination produces a curve that reads as smooth to the eye without any visible stepping. It is the most common quick method for bending a SNOT wall into a gentle arc.
What is an illegal LEGO build technique?
An illegal build is any construction that exploits the way LEGO parts are molded or clipped together to connect them in ways the official LEGO Model Designers would not officially support. Examples include prying studs slightly, wedging plates in micro-gaps, or tension-clipping fragile structures. The term is a community warning that the build may not be sturdy or safe for children, not a violation of any LEGO rule.
What are the smooth flat LEGO pieces called?
The smooth flat pieces are called tiles. The most common are the 1×1 tile (part 3070), the 1×2 tile (part 3069), and the 1×4 tile (part 2431). For SNOT, you also need flat plates on the back side, particularly jumper plates (part 3794) and bracket plates (part 99784), which connect sideways walls to a base.
How do I build curved LEGO walls without curved pieces?
Use SNOT (Studs Not On Top) building with a half plate offset. Stack bricks sideways, then shift each new layer by half a plate width. After several layers, the wall bends into a smooth curve. Anchor the curve with a jumper plate every few layers and tile the visible surface to keep the studs hidden. The technique lets you build any smooth curved LEGO surface without specialized curved pieces.
What are the best SNOT bricks for smooth surfaces?
The best SNOT bricks for smooth surfaces are 1×1 bricks with studs on two adjacent sides (part 33909), 1×1 bricks with studs on four sides (part 52107), Braille bricks (part 3062), and 1×2 jumper plates (part 3794). Combined with smooth tiles (part 3070 and 3069), these parts cover the vast majority of smooth-surface geometry.
Conclusion: Building Smooth Curved LEGO Surfaces Without Specialized Curved Pieces
Building smooth curved LEGO surfaces without specialized curved pieces comes down to three habits. First, build sideways with SNOT bricks so the studs face away from the viewer. Second, stagger each new layer by a half plate offset so the wall bends gradually. Third, anchor every curve with a jumper plate and skin the visible surface with tiles.
From there, the same moves scale: a half plate offset becomes a cylinder, a stacked offset becomes a dome, and a smart ring layout becomes a Lowell sphere. If you are new to SNOT, start with the six-step method above using part 33909 and a 1×6 plate. If you have already built a few SNOT walls, try the 5/2 rule on a small arch and see how clean the curve looks.
Grab a handful of jumper plates, a strip of 1×1 tiles, and an afternoon. The next time you walk past a curved slope in a LEGO set, you will know you can build something just as smooth with parts already in your collection.