
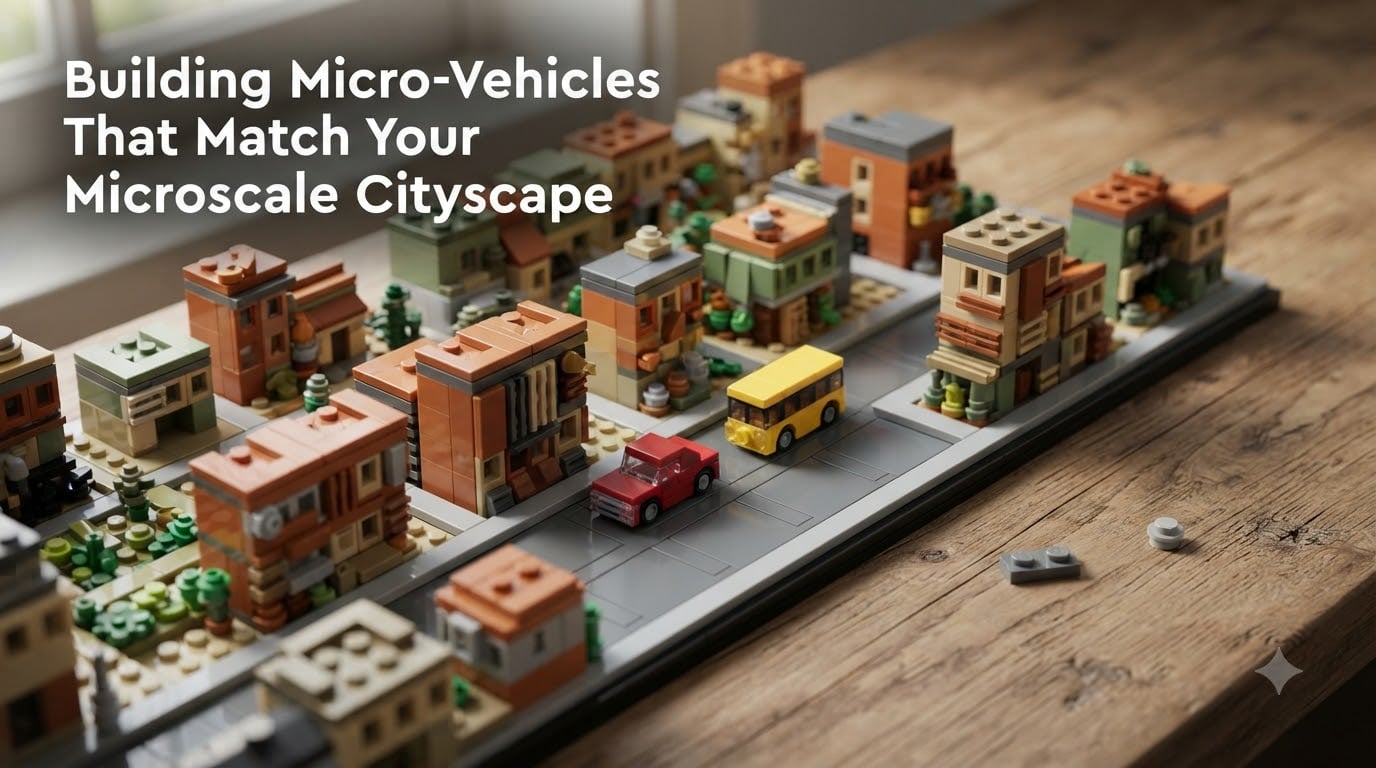
You have a microscale cityscape on your desk and it looks beautiful, but something is off. The buildings have detail, the streets have texture, and the skyline has personality. What is missing? Movement. A city without vehicles feels like a ghost town waiting for traffic that never comes. Building micro-vehicles that match your microscale cityscape is the skill that turns a diorama into a living world.
Most LEGO microscale guides focus on architecture and leave vehicle building as an afterthought. Our team spent weeks testing techniques with LEGO micro cars, buses, and trucks to find what actually works at this tiny scale. The good news is that you do not need a huge collection. Forum builders confirm that time and technique matter far more than piece count.
In this guide, we cover scale rules, seed-piece selection, essential piece vocabulary, vehicle types for each city zone, a full step-by-step car build, proportion guides, and the mistakes that trip up new builders. Whether you are filling in a 16×16 plate or populating a sprawling table layout, these techniques will make your vehicles earn their place in the scene.
Table of Contents
What Microscale LEGO Building Actually Means
Microscale LEGO building is creating models smaller than minifigure scale, where a minifigure would tower over the build like Godzilla over a city block. At this scale, a single 1×1 brick can represent a window, a rooftop, or even a person. The official LEGO Group calls this style “microscale” and it appears in sets like the Skyline Collection and the Architecture series.
Microscale vs Minifig Scale
Minifig scale, roughly 1:42, means a six-stud-wide car fits one or two minifigures comfortably. Micro scale shrinks the ratio dramatically. A typical microscale cityscape works around 1:150 to 1:200, where a four-stud-long vehicle represents a full-sized sedan. This compression is what allows an entire city block to fit on a single baseplate.
The key difference is detail density. At minifig scale, you build doors that open. At micro scale, you suggest a door with a 1×1 dark bluish-gray tile next to a light bluish-gray plate. You are capturing the silhouette and identity of a vehicle, not engineering its functions.
The 5/2 Rule and Why It Matters
The 5/2 rule in LEGO is a spacing guideline: studs should be spaced in a 5-to-2 ratio for clean plate-and-brick alignment on many official sets. In microscale city building, builders adapt this to plan street widths. A road plate that is 5 studs wide with 2-stud sidewalks on each side creates a believable lane configuration that micro vehicles can sit on without crowding. Think of it as the rhythm that keeps your city from feeling random.
This rule also helps when planning vehicle width. If your road is 5 studs wide, a micro car that is 2 studs wide leaves room for oncoming traffic. A bus at 3 studs wide fills most of the lane without spilling onto the curb. Consistency with these ratios across your layout is what makes everything look like it belongs to the same world.
Choosing Seed Pieces to Set Vehicle Scale
A seed piece is the single element that anchors your entire scale. Pick a 1×2 jumper plate to represent a car windshield and every other vehicle dimension flows from that decision. The seed piece method, popularized by BrickSet’s microscale guide, is the fastest way to keep vehicles, buildings, and streets in the same proportion.
How to Pick a Seed Piece
Start by looking at the smallest vehicle you want to build. If the smallest car in your city is a compact hatchback, a 1×2 tile might be your seed. That tile becomes the width of the car body. Everything else, the cabin, the wheels, the length, scales up or down from that reference point.
Write down the seed piece and its stud dimensions. Tape it to your build surface if you need to. Every time you reach for a new piece, ask whether it is consistent with that seed. This single habit eliminates the proportion drift that ruins most beginner micro layouts.
Comparing Seeds to Your Existing Buildings
If you already have microscale buildings on your layout, use them as the scale reference instead of inventing one. Measure the height of a standard one-story building in your city. If a ground floor is 3 plates tall, a car parked next to it should be about 2 plates tall at the roofline. That ratio, roughly two-thirds of a story, matches real-world sedans parked beside single-story structures.
Forum builders share a practical trick: use the interior dimensions of an official LEGO vehicle set as a cross-reference. If the interior of a City set car is 4 studs wide, your micro version at roughly one-quarter scale would be 1 stud wide. This gives you a repeatable formula instead of guessing each time.
Essential Pieces for Micro LEGO Vehicles
Building micro scale vehicles is less about specialty pieces and more about knowing a focused vocabulary of small parts. These are the pieces our team reaches for on every micro car, truck, or bus build. You likely already own most of them.
Bricks and Plates for the Body
The body of a micro vehicle starts with 1×2 and 1×3 plates stacked to create length and height. A 1×2 brick gives you the cabin block for a sedan. A 1×4 plate forms the chassis for a delivery van. Keep a supply of jumpers (modified tiles with one stud) because they let you stagger pieces by half-stud increments, which is essential for smooth microscale silhouettes.
Translucent 1×1 and 1×2 plates serve as windshields and windows. Light bluish-gray and dark bluish-gray are the most versatile body colors because they read as metal and glass at small scales. Black works well for taxis, limousines, and industrial vehicles.
Slopes, Tiles, and 1×1 Details
Slopes define the shape of a micro vehicle more than any other piece. A 1×2 cheese slope creates the angled windshield of a sports car. A 1×1 slope brick rounds off a truck cab. Tiles smooth out the surface so the vehicle does not look like a stack of studs. The goal is to suggest curves and edges that real vehicles have, even when you only have 3 or 4 studs to work with.
For fine detail, 1×1 round plates become headlights. A 1×1 modified plate with a clip can suggest a side mirror or an exhaust pipe. These tiny additions are what separate a generic brick blob from a recognizable car. Use them sparingly, one or two per vehicle, so the detail reads as intentional rather than cluttered.
Specialty Pieces for Wheels and Windows
Wheels are the trickiest part of micro vehicle building. At this scale, full LEGO wheel assemblies are too large. Instead, use 1×1 round bricks or 1×1 round plates in black or dark gray to suggest wheels tucked under the body. Some builders use tiny roller-skate pieces or minifigure accessories like lanterns for a more defined wheel look.
For windows, 1×1 transparent tiles or 1×2 translucent plates do the job. The trick is to use transparent light blue rather than clear, because at micro scale, clear pieces disappear and the vehicle looks like it has no glass at all. Transparent light blue reads instantly as a windshield from across the room.
Vehicle Types for Different City Zones
A believable microscale cityscape has different vehicles in different neighborhoods. Downtown streets look different from industrial back lots. Planning vehicle types by zone adds instant realism and gives you a building checklist for each section of your layout.
Downtown Cars and Buses
Downtown zones call for taxis, sedans, and buses. Taxis are the easiest micro vehicle to recognize: use a 1×3 yellow plate with a 1×1 black tile on top for the roof sign. Park them in a row along a 4-stud-wide street and the district reads as commercial instantly.
Buses at micro scale can be as simple as a 1×6 plate with a 1×2 window tile pattern repeated along the side. Use a distinct color like red or orange so they stand out against the smaller cars. One or two buses per downtown block is plenty. Too many and the street looks like a depot rather than a city.
Suburban Family Vehicles
Suburban neighborhoods need SUVs, minivans, and pickup trucks. These are slightly larger and boxier than downtown sedans. A 1×3 plate with a 1×2 brick on top captures the taller, bulkier shape of an SUV. Use earth tones, white, and silver, the colors that dominate real suburban driveways.
Pickup trucks add variety. Use a 1×2 plate for the cab and a separate 1×2 plate behind it for the bed, with a tiny gap between them. That gap alone communicates “truck” to the viewer, even at 4 studs total length. Park one in a driveway next to a micro house and the scene tells a story.
Industrial Trucks and Vans
Industrial zones need heavy vehicles: semi trucks, box vans, and construction equipment. A micro semi truck is a 1×2 cab in a dark color followed by a 1×6 or 1×8 trailer plate. The length contrast between cab and trailer is what makes it read as a rig rather than a long car.
Construction vehicles can be suggested with bright yellow pieces and a slightly asymmetrical shape. A 1×2 yellow brick with a 1×1 slope on one side looks like a bulldozer or loader from across the layout. You do not need working treads or moving parts. The color and the blocky silhouette do the work.
Commercial Delivery Vehicles
Commercial areas benefit from delivery vans and box trucks in branded colors. White 1×4 plates with a colored stripe, created by sandwiching a 1×1 colored tile between white plates, suggest branded fleet vehicles. Brown vans evoke delivery services. These small color cues trigger instant recognition without any logos or text.
Scatter delivery vehicles near storefronts and loading docks. One van parked at a 1×2 micro warehouse with its back end facing the loading bay tells a complete story about how that building functions. This is where micro vehicle building becomes world-building rather than just model-making.
Step-by-Step: Building a Micro Car That Matches Your Cityscape
Here is a complete build for a micro sedan that works at the scale most LEGO microscale cityscapes use. We tested this design against Skyline Collection sets and it fits naturally next to microscale buildings in the 3-to-5-plate-per-story range. The total piece count is under 10, and the build takes about 5 minutes once you have the parts ready.
Step 1: Lock In Your Seed Piece
Place a 1×2 jumper plate on your work surface. This is your car’s footprint width and the anchor for every dimension that follows. The jumper plate is 2 studs long and 1 stud wide, which at micro scale represents a compact sedan about 14 feet long and 6 feet wide. Keep this piece visible throughout the build.
Check it against your nearest building. If your building’s ground floor is 3 plates tall and your jumper plate sits about 1 plate high, the car is roughly one-third the height of a story. That is the correct ratio for a sedan parked next to a building. Adjust your building height or car height before moving on.
Step 2: Build the Chassis
Take a 1×3 dark bluish-gray plate and place it as the chassis. This is the base of the car body. The color should be dark enough to suggest the undercarriage and wheel wells of a real vehicle. If you only have light bluish-gray, that works too, but dark bluish-gray gives a more grounded look.
Center the 1×2 jumper plate on top of the 1×3 chassis, leaving half a stud overhang at each end. The overhang creates the subtle front and rear bumpers that real cars have. This is a small detail, but at micro scale, half-stud offsets are the difference between a car shape and a brick.
Step 3: Shape the Cabin
Place a 1×2 transparent light blue tile on top of the jumper plate to represent the windshield and cabin. This single piece does double duty: it suggests the greenhouse of glass that wraps around a modern sedan cabin, and the light blue color reads as tinted glass from any viewing angle.
Behind the cabin, add a 1×1 slope brick in your chosen body color. The slope creates the rear decklid angle that distinguishes a sedan from a hatchback or wagon. If you want a hatchback instead, swap the slope for a 1×1 brick of the same color. The body style changes with one piece.
Step 4: Add Wheels and Details
Slide two 1×1 round black plates under each side of the chassis, one near the front and one near the back. These represent the wheels tucked under the fenders. They do not need to roll. At micro scale, wheels are visual cues, not functional elements.
Finish with a 1×1 round transparent plate in clear or yellow on the front edge for headlights. One on each side, placed at the front corners, completes the car. Step back and look at it next to your buildings. If the proportions feel right, you have a template you can replicate in different colors and configurations for your entire city.
Proportion Rules for Matching Vehicles to Buildings
Proportion is the single biggest challenge builders report on forums. Getting vehicles to look like they belong next to specific buildings requires a few consistent ratios. Once you internalize these, you can scale any vehicle to any building without measuring.
Roof-to-Vehicle-Height Ratios
A standard sedan is about 4.5 feet tall at the roofline. A single-story building is about 12 feet tall at the roof. That means a car should be roughly 35 to 40 percent of the height of a single story. In LEGO plate terms, if your ground floor is 3 plates tall, your car roof should be about 1 plate high, possibly with a 1×1 tile on top to reach 1.5 plates.
SUVs and vans sit higher, around 50 percent of a story. Buses and box trucks can reach 60 to 70 percent. These ratios are not exact engineering, but they hold up visually. The eye accepts them as correct because they match the proportions we see every day in parking lots and on streets.
Street Width and Lane Spacing
Street width matters as much as vehicle size. A two-lane road at micro scale should be about 4 to 5 studs wide, enough for two vehicles side by side with a small gap. Add 1-stud sidewalks on each side for a total street section of 6 to 7 studs. This width feels natural next to buildings that are 4 to 6 studs wide.
If your streets are too wide, vehicles look lost and toylike. If they are too narrow, the city feels cramped and unrealistic. The 16×16 baseplate, a favorite among forum builders for micro layouts, fits two 6-stud street sections with buildings in between when you plan carefully. Test your street width with a single parked car before committing to a full road.
Common Microscale Vehicle Mistakes and How to Avoid Them
Forum discussions reveal the same mistakes over and over. Recognizing them early saves hours of rebuilding and keeps your cityscape consistent. Here are the top issues our team encountered and how to fix each one.
Over-Detailing
The most common mistake is cramming too many small details onto a 4-stud vehicle. Builders add side mirrors, door handles, license plates, roof racks, and exhaust pipes until the car looks like a porcupine. At micro scale, restraint is the skill that matters most. A vehicle with 3 well-chosen details reads as a car. A vehicle with 10 details reads as a mess.
Limit yourself to one detail per side of the vehicle. Windshield on top, headlights on front, wheels on the sides. That is usually enough. If the vehicle still needs more identity, change its color or shape rather than adding more pieces. A red 1×3 plate is instantly a sports car. Adding a spoiler, racing stripes, and a roll cage just makes it confusing.
Color and Proportion Drift
The second most common mistake is losing consistency across a fleet. One car is built at the right scale, the next is too big, and the third uses a slightly different gray. This drift happens gradually as you build more vehicles and forget your original reference points. The fix is simple: keep your seed piece on the desk at all times and check every new vehicle against it before placing it in the layout.
Color drift is subtler but just as damaging. If your city uses light bluish-gray as its primary building color, vehicles in the same gray will visually merge with the architecture. Use contrasting colors for vehicles, dark bluish-gray, black, red, yellow, or white, so they pop against the buildings. The contrast is what makes the vehicles look like they are driving through the city rather than growing out of it.
Inspiration and References for Microscale Vehicles
Good references make micro building dramatically easier. The LEGO Architecture Skyline Collection sets are the best starting point because they show how official designers compress real cities into microscale. Study how they suggest vehicles and street furniture with minimal pieces.
YouTube creators who specialize in LEGO MOC techniques offer walkthroughs of micro vehicle builds. Search for “microscale car LEGO” and you will find time-lapse builds that reveal the construction sequence. BrickLink’s Studio software lets you prototype vehicles digitally before committing physical pieces, which is especially useful if your collection is small. Forum builders on Eurobricks and r/lego regularly share parts inventories for their micro builds, so you can source exactly what you need.
Frequently Asked Questions
What is the 5/2 rule in LEGO?
The 5/2 rule is a spacing guideline where elements follow a 5-to-2 stud ratio for clean alignment. In microscale city building, it helps plan street widths: a 5-stud road with 2-stud sidewalks creates believable lane spacing that micro vehicles fit naturally.
What are the micro LEGOs called?
LEGO calls this style microscale. These are builds smaller than minifigure scale, where a single 1×1 brick can represent a window or a person. Official microscale sets include the Architecture Skyline Collection and various LEGO Ideas models.
How do you match a micro vehicle to a microscale building?
Use a seed piece to anchor your scale, then keep vehicle height at about 35 to 40 percent of a single building story. If your ground floor is 3 plates tall, a sedan roof should be roughly 1 plate high. Check every new vehicle against this ratio before placing it in your layout.
What pieces work best for micro LEGO cars?
The essentials are 1×2 and 1×3 plates for the body, 1×2 jumper plates for half-stud offsets, cheese slopes for windshields, 1×1 round plates for wheels, and 1×1 transparent light blue tiles for windows. You likely already own most of these in your collection.
How small is the smallest LEGO set?
The smallest commercially released LEGO sets are polybag and promotional sets with as few as 10 to 20 pieces, such as simple polybag vehicles and seasonal mini-builds. These small sets are excellent parts sources for microscale vehicle building.
Final Thoughts on Building Micro-Vehicles That Match Your Microscale Cityscape
Building micro-vehicles that match your microscale cityscape comes down to three things: a consistent seed piece, a focused piece vocabulary, and the discipline to resist over-detailing. Start with one sedan built to the ratios in this guide, then expand to buses, trucks, and vans as your confidence grows. Your city is waiting for traffic. Give it some.