
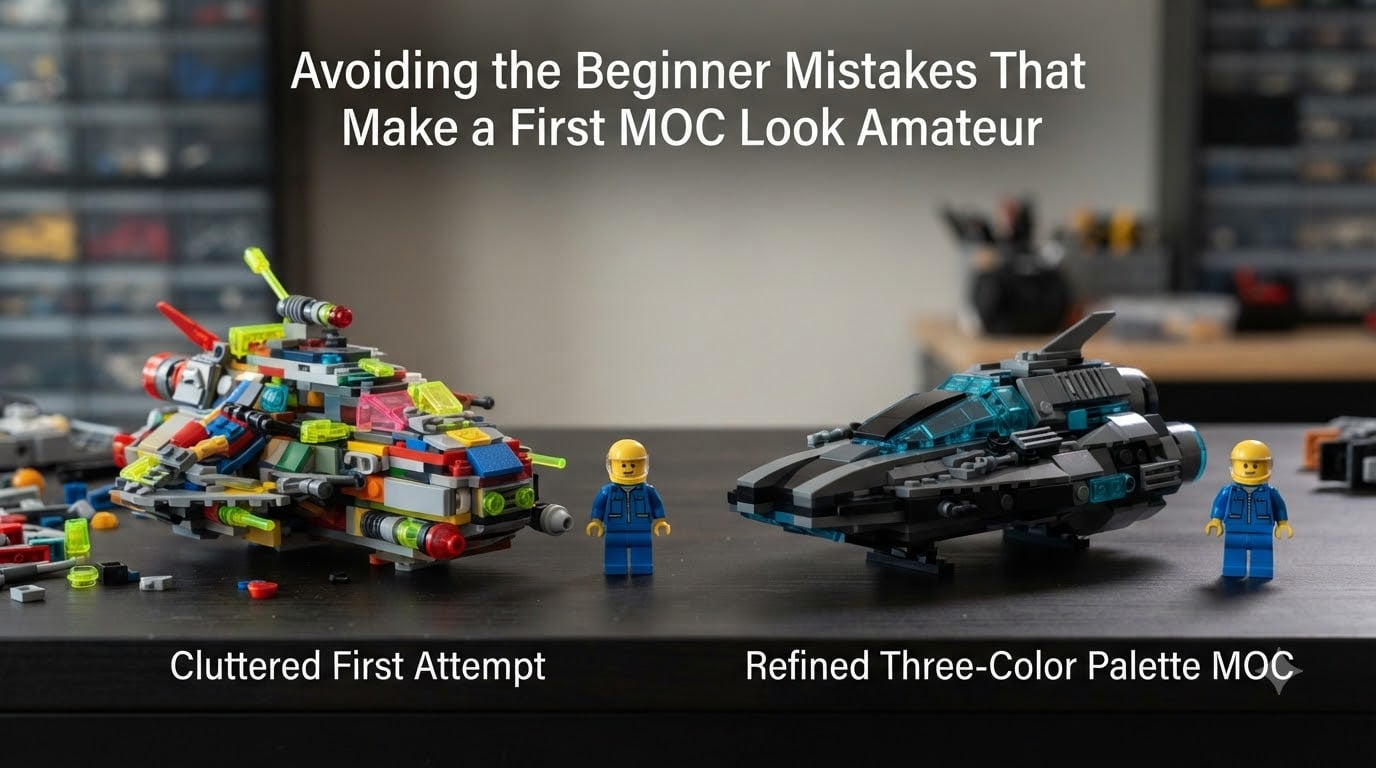
If you’ve finished your first LEGO set and thought “I want to build something of my own,” you are standing at the exact door where most amateur MOCs are born. The Brick Fantastic has been there, and so have thousands of other builders on Reddit, Eurobricks, and Discord. The good news: the beginner mistakes that make a first MOC look amateur are predictable, fixable, and worth learning before you spend a Saturday sorting bricks.
I’ve built my share of clumsy first MOCs. I’ve also torn them apart and rebuilt them. The six mistakes below are the ones I see over and over when beginners post their first creations, and they’re the ones I had to unlearn myself. If you can avoid them on your first try, your build will already look two years ahead of where mine started.
Here are the six most common beginner MOC mistakes, in order of how often they ruin a first build:
- Starting too big and too complex
- Ignoring scale and proportions
- Clashing colors and weak color schemes
- Skipping the planning and refinement phase
- Not studying official LEGO sets as learning tools
- Comparing yourself to veteran builders
I’ll walk through each one, show you why it makes a MOC look amateur, and give you a concrete fix you can use this weekend.
Table of Contents
Why Your First MOC Looks Amateur (And Why That’s Normal)
Almost every first MOC looks amateur. I mean that literally. In six years of running The Brick Fantastic and talking to new builders, I have not seen a first attempt that didn’t show at least one of the classic beginner mistakes. The reason is simple: building from instructions trains a completely different skill than designing from your own imagination.
When you follow an official LEGO set, an experienced designer has already done the hard work. They picked the scale, solved the structural problems, and chose the colors. The set is a finished recipe. A MOC is you writing the recipe. That jump is enormous, and most beginners underestimate it by about ten times.
According to the BrickNerd beginner guide, the learning curve is “steep but rewarding,” and the difficulty comes from three places at once: choosing a design, picking parts, and learning community jargon. Your brain is taking in more new information than during any set you’ve built. Of course the first attempt feels rough. It would feel rough for anyone.
So take a breath. Your first MOC is supposed to look amateur. The trick is to make it look amateur on purpose, in ways that teach you something, rather than amateur in ways that leave you frustrated and stuck.
Mistake #1: Starting Too Big and Too Complex
The single biggest mistake beginner MOC builders make is scope creep. You sit down with a vision of a full Modular Building, a ten-foot Star Wars cruiser, or a moving mech. Eight hours later, you have a half-built wall, a pile of orphaned parts, and a feeling that LEGO is broken.
It isn’t broken. You just picked a project that takes experienced builders 200 to 400 hours. A first MOC should take 5 to 15 hours total, including planning. If you can’t describe the project in one sentence, it’s too big for your first attempt.
Here’s the fix I recommend to every new builder I talk to. Build a micro-MOC first. Pick a single object: a coffee mug, a guitar, a small spaceship, a snowspeeder, a single room. Aim for 30 to 100 parts. The point isn’t to build something Instagram-worthy. The point is to get your first 50 design decisions behind you so the next build is easier.
Builders on r/legomoc call this the “ugly phase,” and the community consensus is to push through it. Three finished micro-MOCs will teach you more about scale, color, and structure than one abandoned Modular Building ever will.
Mistake #2: Ignoring Scale and Proportions
Scale is the silent killer of first MOCs. Beginners pick a subject and start building without ever deciding how big it should be compared to a minifigure, a standard car, or a building. The result is a starship bigger than a city, a car you can’t fit a driver in, or a building where the door is half the height of the wall.
Proportions are the next domino. Once the scale is wrong, every detail is wrong. Windows look too small or too large. The roof looks like a hat. The wheels look like tires on a toy shop ride. The whole creation reads as “off” even when you can’t say why.
The fix is to pick a scale before you build a single brick. The most beginner-friendly scale is minifig scale, where one brick equals one virtual unit and a minifigure is about four bricks tall. Most official LEGO sets use this scale, which means you can reference any City, Star Wars, or Creator set as a built-in ruler.
For vehicles, decide whether you’re building a “speed champions” small scale or a “Creator Expert” full scale. For buildings, decide whether you’re matching a Modular Building or a smaller corner shop. Write the scale down. Tape a minifigure next to your build site. Every dimension you create should be checked against that anchor.
Mistake #3: Clashing Colors and Weak Color Schemes
Color is the fastest way to make a MOC look professional, and also the fastest way to make it look amateur. When I look at beginner builds, the color choices are usually the first thing that tells me the builder is new. Bright lime next to bright orange, three different blues in the same wall, and a roof that fights with the walls.
LEGO gives you around 200 colors to choose from. That is too many. Beginners treat the color palette as a buffet. Experienced builders treat it as a tight, intentional set of three to five colors per build.
The fix is to pick a palette before you start building. Here’s a simple beginner palette system that works for almost any build:
- One dominant color (60 to 70 percent of the build)
- One secondary color (20 to 30 percent)
- One accent color (5 to 10 percent, for highlights)
- One neutral (black, dark gray, white, or tan) for structure and detail
Look at any official LEGO Modular Building. There is a dominant color, a secondary, and an accent, almost without exception. Your first MOC will look 50 percent more professional just by following this rule. Save the rainbow mashup for a future “carnival” build, not your first attempt.
Mistake #4: Skipping the Planning and Refinement Phase
Most beginners build a MOC the way they build a set: once, top to bottom, done. That works for instructions. It does not work for design. The “build once and stop” approach is the number one reason a MOC looks like a rough draft when you put it on the shelf.
Professional builders and serious hobbyists work in a loop: build, photograph, critique, rebuild. The first draft is supposed to be ugly. The second draft is where the proportions tighten. The third draft is where the details land. The BrickNerd guide calls this the “refinement phase,” and it is the single step beginners skip most often.
The fix is to plan a second pass before you even start. After you finish your first build, set it on a table and walk away for an hour. Photograph it. Look at the photo, not the build, because the camera shows you problems your eyes filter out. Ask yourself three questions:
- Are there any gaps, floating parts, or exposed studs that bug me?
- Is anything the wrong size compared to the rest of the build?
- Does the color scheme hold up at this distance, or does it look muddy?
Each “yes” is a refinement task. Spend 30 minutes fixing them. You will be shocked at how much the build improves, and how much you learn for the next one.
Mistake #5: Not Studying Official LEGO Sets as Learning Tools
Official LEGO sets are the best free MOC school you will ever find. They contain techniques, color choices, and structural solutions developed by professional designers. Beginners who ignore them are reinventing the wheel, badly, in their basement.
Pick three official sets in the theme you want to build. Build them. Then take them apart and study them. Look at how the roof is built. Look at how the SNOT technique (Studs Not On Top) creates smooth walls. Look at how wedges, slopes, and modified bricks break up the flat surfaces. Look at how the colors are restricted, even on big sets.
The fix is to treat every set you own as a textbook. When you see a detail you like, take a photo. Reverse-engineer it. Ask yourself which parts they used and why. This is the single most common piece of advice on r/lego and Eurobricks, and it works.
If you don’t have a set in your target theme, browse the official LEGO instructions library online, or use BrickLink Studio to load up published MOCs and dissect them. You are not copying. You are learning.
Mistake #6: Comparing Yourself to Veteran Builders
The mistake that hurts the most is the one that isn’t about LEGO at all. It’s about comparing your first MOC to a builder’s tenth-year MOC. You see a jaw-dropping Star Wars diorama on Instagram, Reddit, or a fan convention, and you decide your own build is terrible. It probably isn’t. You’re just measuring your day one against their day one thousand.
Every builder I respect has a graveyard of failed early MOCs. I have mine. The BrickNerd guide and the LEGO community at large are explicit about this: the bad feelings never truly go away, they just get quieter. The fix is to compare today’s build to yesterday’s build, not to someone else’s decade of practice.
Keep a photo of your first MOC. Build a second one three months later. Build a third one six months after that. The arc is what matters. Comparing yourself to a stranger online is the fastest way to stop building entirely, and stopping is the only real failure.
How to Plan Your First MOC Without Wasting Parts
Planning is the difference between a MOC that feels rushed and one that feels intentional. You don’t need a fancy software setup to start, but a 15-minute plan will save you hours of part hunting and rebuilding. Here’s the workflow I use for every new MOC, including the ones I now build for The Brick Fantastic.
Step 1: Pick a single subject and write it down. “A small red spaceship” works. “A Star Wars hangar with two ships, a ground crew, and lighting” does not. If you can’t describe it in one sentence, split it into multiple MOCs.
Step 2: Decide the scale. Minifig scale is the safest for beginners. Grab a minifigure and set it next to your reference images. Note the rough height of your subject in “bricks tall.”
Step 3: Pick a 3-to-5 color palette. Write down the LEGO color names (Dark Red, Nougat, Dark Bluish Gray) so you don’t accidentally mix Medium Blue and Bright Blue.
Step 4: Build it digitally in BrickLink Studio. Studio is free and lets you test designs before you spend any parts. You can check proportions, rotate the model, and catch mistakes before they become expensive. Most beginners skip this step because they think “real building” is the only kind that counts. It isn’t. Studio is a planning tool, and it works.
Step 5: Make a parts list. Export the parts list from Studio, then load it into Rebrickable or BrickLink to source what you don’t already own. This stops you from “wasting” parts on a failed build, which was the number one fear I heard from beginners in the forum discussions.
Step 6: Build, photograph, refine, repeat. Give yourself at least one refinement pass. The first draft is your sketch. The second draft is your painting.
Tips That Separate Amateur Builds From Professional-Looking MOCs
These are the small finishing moves that you only notice when they’re missing. Pick two or three to apply to your first MOC and you will see the difference immediately.
- Fill the gaps. Exposed studs and visible Technic holes are the universal sign of a beginner. Cover them with tiles, plates, or modified bricks.
- Use SNOT on key surfaces. Sideways-facing studs on walls, control panels, and ship hulls make a build look like a miniature, not a stack of bricks.
- Break up flat areas with texture. Add a slope, a wedge, a tile offset, or a small greeble. Flat 4×6 walls are an amateur giveaway.
- Angle and pose your subject. A starship looks better at 30 degrees than flat. A figure looks better with bent arms. Use base plates or stands to set the angle.
- Add one signature detail. A single antenna, a custom-printed windscreen, or a small decal gives the eye a place to land. Don’t overdo it. One signature, not five.
- Photograph with a clean background. A black sheet or a plain tabletop makes the build look professional for free. No fancy lighting required.
Combine those six with the six mistakes above, and your first MOC will look like a builder who has been doing this for a year, not a weekend.
FAQ
What are the most common beginner MOC mistakes?
The six most common beginner MOC mistakes are starting too big and complex, ignoring scale and proportions, using clashing colors, skipping the planning and refinement phase, not studying official LEGO sets, and comparing yourself to veteran builders. All of these are fixable with a small scope, a chosen scale, a tight color palette, and at least one refinement pass.
Why does my first MOC look amateur?
Almost every first MOC looks amateur because building from instructions trains a completely different skill than designing from your own imagination. Combined with too-large scope, random color choices, and no refinement pass, the result is a build that reads as a rough draft. The fix is to start small, plan a tight color palette, and budget time for a second draft.
How do I start making MOCs if I have only built sets?
Start with a micro-MOC of 30 to 100 parts based on a single object. Pick a minifig scale, choose three to five colors, and build it in BrickLink Studio first. Then build it physically, photograph it, and plan a refinement pass. Three small finished MOCs will teach you more than one abandoned large project.
How do I know when a MOC is finished?
A MOC is finished when the proportions feel right at a normal viewing distance, the gaps and exposed studs are covered, the color scheme holds up without muddiness, and you cannot find one polish detail that bothers you. Plan for at least one refinement pass so the build gets that final layer of attention.
Should I use BrickLink Studio before building a MOC?
Yes. BrickLink Studio is free, beginner-friendly, and lets you test proportions, color schemes, and structural choices before you spend any physical parts. Most experienced builders plan in Studio first, then build physically. It is the single tool that prevents the most wasted bricks.
Conclusion
Your first MOC is supposed to look amateur, but it doesn’t have to look careless. The beginner mistakes that make a first MOC look amateur are the same six every new builder makes, and each one is a single decision away from being fixed. Pick a small subject, choose a scale, lock in three to five colors, plan in BrickLink Studio, build, photograph, and refine.
Do that on your first MOC and you will not need luck. You will have a build that looks intentional, structural, and ready to show the community. Three micro-MOCs later, the question of how to avoid amateur-looking LEGO builds will already be answering itself. The Brick Fantastic will keep covering the techniques and tool walkthroughs that get you there faster. Start small, finish it, and post the photo. That is the whole game.