
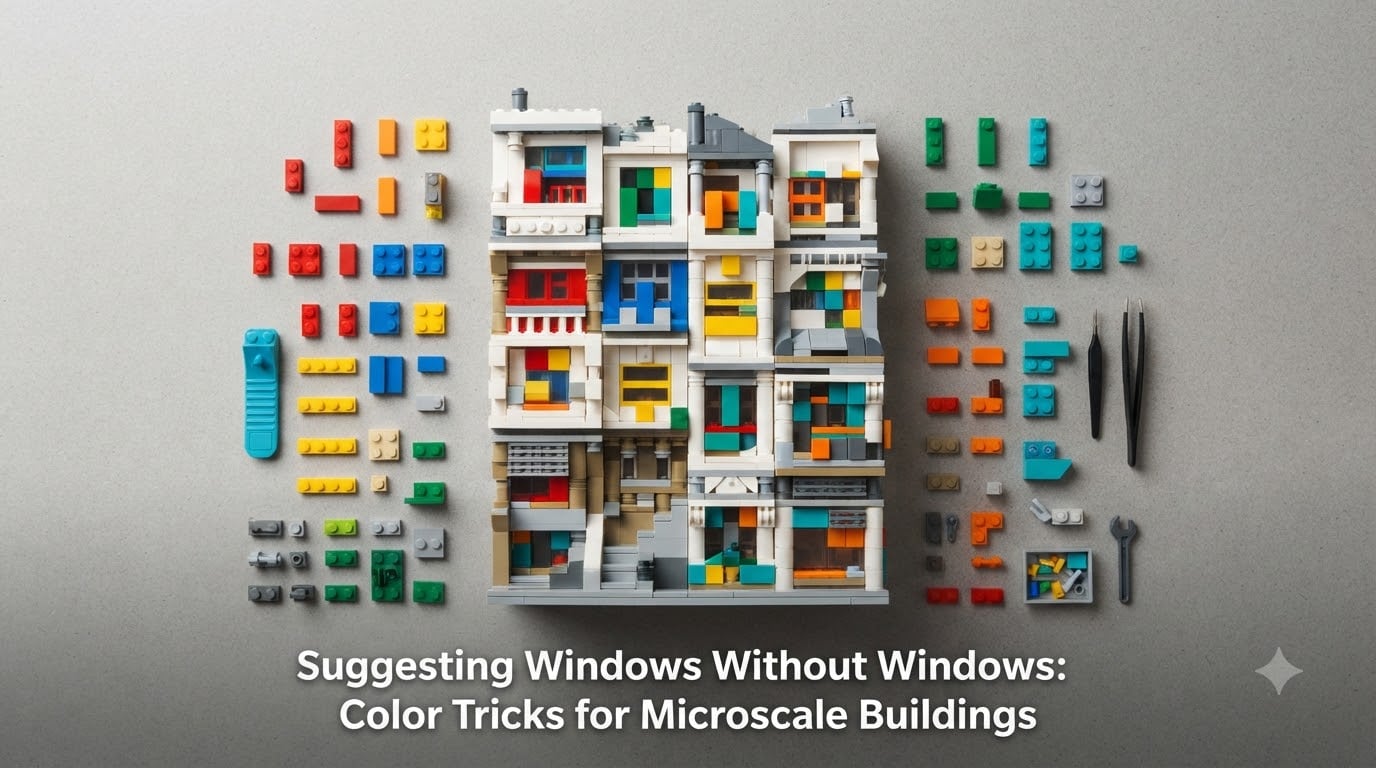
I have spent years building microscale LEGO cities, and the single biggest challenge I hit every time is windows. Standard window pieces tower over microscale buildings like billboards. They throw off proportions, overwhelm tiny facades, and make a carefully scaled skyscraper look like a dollhouse. That is where LEGO microscale windows color tricks come in, and once you learn them, your builds level up overnight.
The idea is simple: instead of using actual window elements, you use color, contrast, and clever piece placement to make the viewer’s brain fill in the blanks. A dark stripe on a light wall reads as a window. A headlight brick embedded in a facade suggests a lit opening. A grill tile at the right scale looks like a paneled window frame. Your eye does the work, not the piece.
In this guide I will walk you through every color trick I use to suggest windows in microscale buildings. We will cover headlight bricks, grill tiles, color blocking, sideways building, stained glass patterns, and how to match techniques to different architectural styles. Whether you are building a medieval village, a modern skyline, or a solo micro-MOC, these techniques will make your tiny structures look alive.
Table of Contents
Why Microscale Buildings Need Color Tricks for Windows
Microscale building means working at a fraction of minifigure scale, often 1:200 or smaller. At that size, even the smallest official LEGO window piece is too large for most facades. A standard 1×2 window brick would dominate a microscale wall the way a garage door dominates a real house. The proportions collapse, and the building stops looking realistic.
This is why experienced micro-builders almost never use dedicated window elements. Instead, they rely on what the LEGO community calls “implied detail,” where the suggestion of a feature is more effective than the feature itself. A window does not need glass or a frame at this scale. It needs to read as an opening, a shadow, or a light source against a wall.
Color tricks solve this problem beautifully because they cost almost nothing in terms of piece count. You are already placing bricks for the wall. Simply changing the color of one or two of those bricks, or rotating a plate to expose a different surface, can transform a flat wall into a building with dozens of windows. The trick is knowing which colors, which pieces, and which arrangements create the strongest illusion.
Forum builders I have followed over the years consistently echo this. The most common pain point in microscale is not having enough detail at the right scale. Color tricks address that directly, letting you pack implied architecture into spaces that are only a few studs wide.
The Headlight Brick: Your Go-To Microscale Window
If there is one piece that defines microscale window building, it is the headlight brick. Officially known as the Brick Modified with Headlights (Design ID 4081), this small 1×2 brick has two cylindrical studs on one side that create a natural recessed opening. At microscale, that recess reads instantly as a window or doorway.
The headlight brick works so well because it gives you depth. The cylinders sit inside the brick, creating a shadow line that mimics a window set back into a wall. When you place several headlight bricks in a row or grid pattern, the viewer sees rows of lit windows on a building facade. You are not building windows. You are building the impression of windows, and the headlight brick does that better than almost anything else.
Here is how I use headlight bricks for microscale windows step by step:
Choose your wall color first. Headlight bricks come in limited colors, so plan around what is available. Black, dark gray, and light bluish gray are the most common and read well as window openings on most facades.
Stack headlight bricks in columns. Place them vertically with the cylinder side facing out. A column of three or four creates a believable apartment building window line.
Stagger columns across the facade. Not every window lines up in real buildings. Offset columns by one plate height to create natural variation.
Use color contrast for depth. A dark headlight brick on a light wall creates maximum shadow contrast, making the recess read as a deep window opening.
Fill cylinders with trans-clear or colored studs. If you want to suggest lit windows, place a trans-neon or trans-blue round plate inside the cylinder. It catches light and glows like a real lit window.
The headlight brick is so essential to microscale that one Instagram post from a prominent builder simply asked, “Where would microscale architecture be without the headlight brick and grill tile?” The answer is: nowhere impressive. These two pieces carry the entire technique.
Grill Tiles as Window Substitutes
The grill tile, officially the Tile Modified with Grille (Design ID 30563), is the second pillar of microscale window building. This 1×2 tile has fine parallel bars across its surface that, at the right scale, look exactly like a louvered window, an air vent, or a modern glass panel with mullions. It is one of the most versatile pieces in micro-building.
What makes the grill tile special is its texture. The bars cast tiny shadows and create a ridged surface that reads as glass panes, industrial windows, or decorative screens depending on the context. On a modern building, a row of grill tiles looks like a curtain wall. On a factory, they read as ventilation louvers. On a medieval structure, they suggest arrow slits or barred windows.
To use grill tiles effectively at microscale, consider these approaches:
Rows for modern buildings: Place grill tiles side by side along a facade plate to simulate continuous glass curtain walls on skyscrapers and office towers.
Single tiles for residential windows: One grill tile on a 1×2 slot reads as a small window with panes, perfect for micro houses and shops.
Stacked vertically for tall windows: Two grill tiles stacked create a tall, narrow window that works on churches, towers, and Gothic-style structures.
Color matching for subtlety: Use grill tiles in the same color family as your wall for understated windows, or contrasting colors to make windows pop.
I always keep a healthy supply of grill tiles in my micro-building stock. They are inexpensive, come in useful colors like black, light bluish gray, and dark bluish gray, and solve window problems at almost every microscale. When headlight bricks are too bulky for the scale you are working at, grill tiles step in as the lighter, sleeker alternative.
Color Blocking and Contrast Techniques
Color blocking is the most fundamental color trick for suggesting windows, and it requires zero special pieces. The concept: use a different colored brick or plate within a wall to imply a window opening. The contrast between the wall color and the window color tells the viewer’s brain that something different is happening there, and the brain interprets it as a window.
This works because human perception is pattern-driven. We see a grid of dark rectangles on a light building and immediately read them as windows. We do not need glass, frames, or sills. The contrast alone triggers the interpretation. This is the most powerful tool in microscale building because it works at any scale, with any pieces, and costs nothing extra.
Here are the color blocking patterns I use most often for microscale windows:
Dark on light: Dark bluish gray or black plates set into white or tan walls. This is the classic office building look and the easiest contrast to achieve.
Trans-colored inserts: A 1×1 trans-blue or trans-dark-blue plate in a window slot glows under light and reads as a lit office window at night.
Complementary color contrast: A reddish brown plate on a sand green wall suggests a warm, residential window. The color clash is intentional and effective.
Monochrome depth: Two shades of gray side by side, like light bluish gray walls with dark bluish gray window plates, creates subtle windows that reward close looking.
The key to color blocking is consistency. If you establish a pattern of dark rectangles at regular intervals, the viewer sees organized windows. If the pattern is random or irregular, it reads as damage or decoration instead. Plan your window grid before you build the wall, and stick to it.
One mistake I see often is using too many colors. At microscale, less is more. Two colors, one for the wall and one for the windows, is usually enough. Three colors maximum if you want to suggest lit versus unlit windows. Beyond that, the facade gets noisy and the window illusion breaks down.
Suggesting Windows With Sideways Building and SNOT
Sideways building, and its more formal cousin the S.N.O.T. technique (Studs Not On Top), opens up a whole new dimension of window suggestion. By turning bricks on their sides or incorporating studs in unexpected orientations, you expose surfaces and edges that naturally look like window openings, ledges, or frames.
The SNOT technique is especially useful for microscale because it lets you use the thin edges of plates and tiles as window surfaces. A 1×4 plate placed sideways exposes a thin strip that reads as a long horizontal window. A cheese slope (the 1×1 curved slope) placed sideways creates an arched window effect at tiny scales. These are not window pieces, but oriented differently, they perform the job perfectly.
Practical SNOT applications for microscale windows include:
Sideways plates as window strips: A stack of 1×2 or 1×3 plates mounted sideways creates a banded window effect common in mid-century modern architecture.
Cheese slope arches: Two cheese slopes facing each other form a pointed arch that works for Gothic windows on churches and cathedrals.
Bracket pieces for recessed windows: Brackets and Erling (headlight) bricks turned sideways create natural recesses that shadow like real window alcoves.
Tiles on edge for mullions: Jumpers and tiles placed on their sides simulate the thin vertical bars between window panes on commercial buildings.
SNOT techniques require more planning than color blocking because the structural connections are different. You need brackets, jumpers, or hinge pieces to hold sideways elements in place. But the payoff is significant: windows that have real depth and architectural detail rather than just color contrast.
I recommend experimenting with SNOT on a small test build before committing to a full facade. The connections can be finicky at microscale, and you want to make sure your structure holds together before you build an entire wall this way.
Creating Stained Glass Effects in Microscale
Stained glass windows are one of the most striking features you can add to a microscale building, and you do not need any special pieces to achieve the effect. The trick is using small colored elements in tight arrangements to suggest the multi-colored, patterned look of real stained glass. At microscale, even two or three colored 1×1 round plates or tiles can read as a stained glass panel.
The approach mirrors real stained glass: a dark frame (leading) surrounding colorful panes. In LEGO terms, this means surrounding small colored plates or tiles with darker elements to create the frame, then arranging the colored pieces in a pattern that suggests a cross, a circle, or a geometric design.
Here is how I build microscale stained glass windows:
Start with a dark frame. Use black or dark gray 1×1 bricks or plates to create the window opening in your wall.
Fill with colored 1×1 elements. Trans-colored round plates, solid colored tiles, or even small cheese slopes in red, blue, yellow, and green suggest stained glass panes.
Create a simple pattern. A cross shape made of colored plates on a dark background is the most readable pattern at microscale. Circles and diamonds also work.
Keep it small. A 2×2 or 2×3 stud area is plenty for a microscale stained glass window. Anything larger overwhelms the building.
Use trans pieces for glow. Trans-colored elements catch and transmit light, making the stained glass effect more convincing under display lighting.
This technique shines on churches, cathedrals, and fantasy buildings. A single stained glass window can become the focal point of an entire microscale structure, drawing the eye and adding character that plain walls cannot match.
Techniques for Different Building Styles
Not every window trick works for every building style. The color and piece choices that make a modern skyscraper convincing will look wrong on a medieval castle. Matching your window technique to the architectural style of your build is what separates good micro-MOCs from great ones.
Here is how I approach windows across the most common microscale building styles:
Castle and Medieval Windows
Castle windows are small, narrow, and defensive. At microscale, they read as vertical slits in thick stone walls. I use 1×1 dark bluish gray bricks or even single stud columns to suggest arrow slits. For larger castle windows, a headlight brick in dark gray set into a light gray wall reads as a fortified opening. Grill tiles in dark colors work well for barred or arrow-loop windows on towers and keeps.
The key for medieval structures is irregularity. Castle windows were not evenly spaced or uniformly sized. Vary your window placement, use different techniques on the same building, and let some walls be blank. That randomness reads as authentic medieval architecture.
Modern and Architecture-Style Windows
Modern buildings are all about clean lines, repetition, and glass. For skyscrapers and office towers, rows of grill tiles or evenly spaced color-blocked dark plates create the curtain wall look. Trans-blue or trans-black 1×1 plates set into a grid pattern suggest reflective glass facades that real modern buildings have.
Repetition is critical for modern style. Establish a window grid and carry it across the entire facade with minor variations. The consistency is what makes the building read as a real commercial structure. I have found that even spacing of one stud between window elements creates the most convincing modern look.
Residential and Town Windows
For micro houses, shops, and town buildings, you want warmth and variety. Color blocking with warm colors like reddish brown, dark orange, or sand blue suggests lit windows with character. Headlight bricks work well here too, especially in light colors that suggest interiors visible through glass.
Residential buildings benefit from mixed window sizes and styles on the same facade. A large shop window on the ground floor, smaller windows above, and maybe a round or arched attic window create the visual variety that makes a micro town feel lived-in and real.
Churches and Special Structures
Churches and special buildings deserve special window treatment. This is where stained glass techniques, cheese slope arches, and tall grill tile arrangements come into play. A single tall, colored window on a microscale church reads instantly as the building’s most important feature, just as it does in real architecture.
Color Tricks vs Transparent Pieces: When to Use Each
One question I get constantly is whether to use transparent (trans-clear) pieces or color-only tricks for microscale windows. The answer is: both have their place, and the best builders mix them depending on the situation.
Transparent pieces, like trans-clear 1×1 plates or bricks, create a literal glass effect. Light passes through them, and they can make a building look like it has real windows. The downside is that trans-clear pieces can be hard to see, especially in photographs, and they sometimes do not provide enough contrast against the wall to register as windows at all.
Color-only tricks, on the other hand, always read as windows because the contrast is built in. A dark plate on a light wall is unambiguous. The tradeoff is that color-only windows lack the luminous quality of transparent pieces and can look flat in certain lighting conditions.
Here is my decision framework for choosing between the two:
Use color-only tricks when: You need strong contrast for photographs, the building will be displayed in variable lighting, or you want maximum window readability at very small scales.
Use transparent pieces when: You have good display lighting that will shine through the pieces, you want a glowing or lit-window effect, or the scale is large enough that trans pieces will be visible.
Mix both when: You want some windows to read as lit (trans pieces) and others as dark or empty (color contrast). This mixed approach creates the most realistic-looking buildings.
My personal preference leans toward color-only tricks for pure microscale work, with trans pieces reserved for accent windows or buildings I know will be displayed under direct lighting. But every builder develops their own style over time. Experiment with both and see what works for your builds.
FAQs
How do you make windows in LEGO microscale buildings?
You make microscale windows using color tricks, headlight bricks, grill tiles, and color blocking rather than standard window pieces. Place dark plates on light walls for contrast, use headlight bricks for recessed openings, or use grill tiles for paneled window effects. The goal is to suggest the window rather than build it literally.
What LEGO pieces look like windows at small scales?
The headlight brick (Design ID 4081) and the grill tile (Design ID 30563) are the two most essential pieces for microscale windows. Cheese slopes, 1×1 colored plates, and trans-clear round plates also work well. Sideways-mounted plates and tiles can simulate window strips and mullions.
What is the headlight brick and why is it used for microscale windows?
The headlight brick is a 1×2 modified brick with two cylindrical studs on one side that create a recessed opening. At microscale, this recess reads instantly as a window because the depth creates shadow lines similar to a real window set into a wall. It is one of the most important pieces in microscale building.
Can you suggest windows without any transparent pieces?
Yes. Color blocking with contrasting plates, grill tiles for texture, and headlight bricks for depth all suggest windows without any transparent elements. Dark colored plates on light walls create strong contrast that the eye interprets as window openings. This is often more effective than trans-clear pieces, which can be hard to see at microscale.
What is the 5/2 rule in LEGO building?
The 5/2 rule refers to a proportion guideline where five plates stacked vertically equal the height of two standard bricks. Since each brick is 1.2 studs tall and each plate is 0.4 studs tall, five plates (2.0 studs) match the height of two bricks (2.4 studs in theory, but the practical ratio works out in sideways building applications). This helps builders calculate vertical spacing for techniques like SNOT and sideways window construction.
Why are some LEGO building techniques considered illegal?
Illegal LEGO building techniques put stress on pieces in ways they were not designed for, such as forcing connections between elements at angles that stress the plastic or sandwiching elements between studs. The LEGO Group defines these as illegal because they can damage pieces over time. Many advanced microscale techniques push these boundaries, so builders should understand which stressed connections are safe versus which risk breaking elements.
Bringing It All Together
Mastering LEGO microscale windows color tricks transforms how your small builds look and feel. The headlight brick gives you depth and shadow. Grill tiles add texture and paneling. Color blocking creates instant readability. SNOT techniques open up architectural detail. Stained glass patterns add character and focus. Together, these techniques let you suggest windows without windows, which is the entire point of building at microscale.
Start with one technique at a time. Build a simple wall and try color blocking first, since it requires no special pieces. Then pick up some headlight bricks and grill tiles and experiment with those. Layer in SNOT and stained glass as you get more comfortable. Before long, suggesting windows without windows will become second nature, and your microscale buildings will never look flat again.