
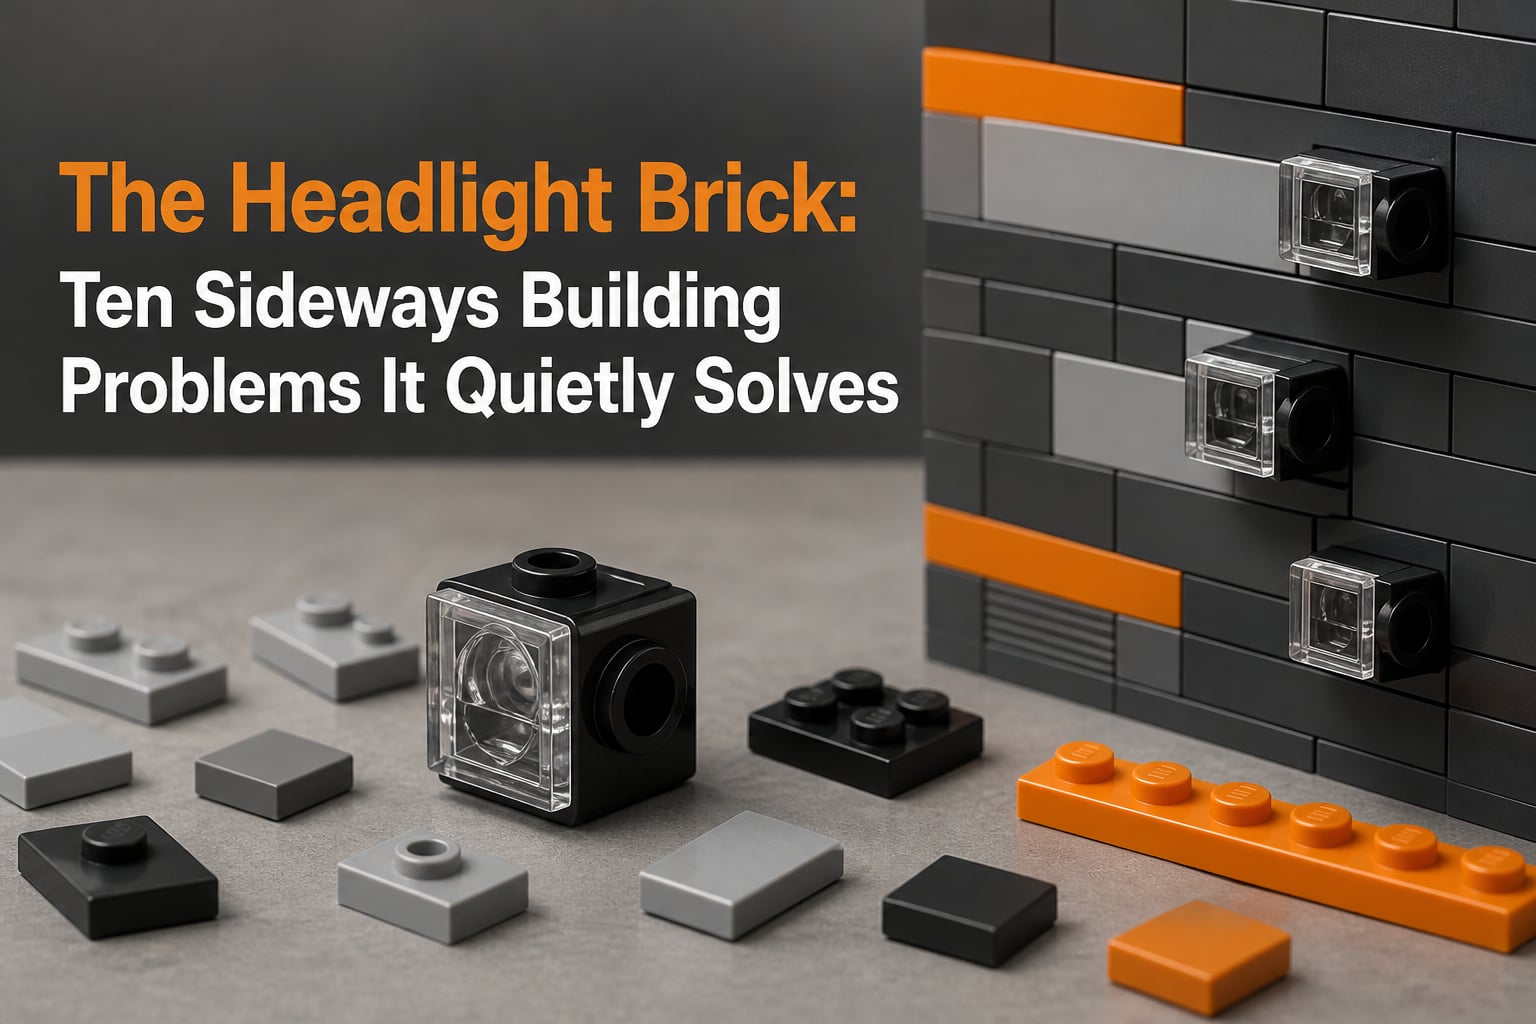
Every experienced LEGO builder has a handful of parts they reach for again and again. The headlight brick is one of them. This small, unassuming piece opened up sideways building techniques that changed what builders could create. Yet most people barely notice it sitting in their parts bin.
When I first encountered the headlight brick, I had no idea how much it could do. It looked like a standard 1×1 brick with a stud sticking out the side. After years of building MOCs, I now consider it one of the most problem-solving elements in the entire LEGO system.
The headlight brick solves building challenges that seem impossible with standard stacking. From recessed windows on architectural models to smooth curves on spaceships, this single element quietly handles connections that would otherwise require complex workarounds. Once you understand what it does, you start seeing it everywhere in official LEGO sets.
In this guide, I will walk you through exactly what the headlight brick is, the geometry that makes it work, and ten specific sideways building problems it solves. Whether you are an intermediate builder looking to level up your techniques or an advanced MOC designer chasing that perfect detail, this breakdown will give you practical knowledge you can apply immediately.
Table of Contents
What Is the Headlight Brick? (And Why It Changed LEGO Forever)
The headlight brick is a modified 1×1 LEGO brick with a single stud mounted on one of its side faces. Its official part number is 4070, and it carries the design ID 4070 across modern sets. Most builders know it by its nickname: the Erling Brick.
That nickname comes from Erling Dideriksen, the LEGO designer who invented the piece in 1980. At the time, LEGO designers faced a recurring problem with vehicle models. They needed to attach small details like headlights, grille pieces, and lamps to the fronts of cars and trucks. Standard bricks only let you stack upward. Attaching a transparent stud piece to the face of a vehicle required a solution that did not exist yet.
Dideriksen solved this by adding a stud to the side of a 1×1 brick. That single modification allowed builders to mount elements horizontally for the first time without brackets or plates. The piece debuted in LEGO vehicle sets and quickly spread to other themes.
What made the headlight brick so transformative was not just the side stud itself. It was the dimensional relationship between that side stud and the rest of the LEGO system. The brick is slightly taller than a standard 1×1 to accommodate the recessed stud socket on the back. That extra height creates a half plate offset that enables a wide range of techniques builders still use today.
If you look closely at the headlight brick, you will also notice small internal gaps. These are not molding defects. They exist to accommodate the tolerances of connecting other elements. Understanding these subtle features is the first step to using the piece correctly.
LEGO Geometry Basics: Understanding Stud Pitch and Plate Height
Before diving into specific problems the headlight brick solves, you need to understand the geometry that makes it all work. Sideways building relies on a simple but precise relationship between studs and plates.
In the LEGO system, the distance between the center of one stud and the center of the next is always 8mm. This measurement is called stud pitch. It is the fundamental unit that every LEGO element is built around. Every brick width, every plate width, every tile width is a multiple of this 8mm pitch.
Now here is where it gets interesting. The height of a standard brick is 9.6mm, which is 1.2 times the stud pitch. A plate is exactly one-third of a brick height, or 3.2mm. This means you can express the relationship between studs and plates as a ratio: 2 studs equals 5 plates in height. Builders call this the 5:2 rule, and it is the mathematical foundation of all sideways building.
The 5:2 rule matters because when you rotate a brick 90 degrees to build sideways, the studs on its side need to align with the studs on the top of your base structure. If the geometry did not work out, sideways building would be impossible without gaps.
LEGO engineers measure these tolerances in units called LDU, or LEGO Design Units. One stud equals 20 LDU, one brick height equals 24 LDU, and one plate height equals 8 LDU. The manufacturing tolerance of LEGO elements is approximately 0.1mm. That tight tolerance is what makes techniques like the headlight brick offset possible without stressing the parts.
When you combine the 5:2 rule with the headlight brick’s slightly different dimensions, you get a piece that bridges the gap between vertical and horizontal building with near-perfect alignment. That is the quiet genius behind its design.
The Headlight Brick: Ten Sideways Building Problems It Quietly Solves
Here is where things get practical. I have compiled ten specific building problems that the headlight brick solves. Each one represents a scenario where standard stacking fails and sideways building saves the day.
1. Attaching Headlights and Details to Vehicle Fronts
This is the problem the piece was literally invented to solve. When building cars, trucks, or spaceships, you need to attach small transparent elements to the front face of the model. Standard bricks offer no way to mount a stud-facing element on a vertical surface.
The headlight brick solves this by giving you a stud that points outward from the side of your model. You slot it into your wall structure, and the side stud becomes a mounting point for headlights, lamps, sensors, or any other 1×1 detail element. It is clean, compact, and structurally sound.
2. Creating Recessed Windows on Buildings
Architectural models demand depth. A window that sits flush with the wall looks flat and unrealistic. Real buildings have window frames set back from the exterior surface.
By placing headlight bricks inside a wall section, you create a recessed mounting point one stud deep. You can then attach a transparent element or window frame to the side stud, giving the window genuine depth. This technique appears constantly in LEGO Creator Expert modular buildings.
The recess created by the headlight brick is exactly one plate deep from the surface. That means it aligns perfectly with surrounding tiles and plates, creating a seamless inset detail.
3. Building Smooth Curved Surfaces and Rounds
Curved shapes are notoriously difficult with square bricks. The headlight brick lets you rotate the direction of your building by 90 degrees at any point in a wall.
By chaining multiple headlight bricks together, you can create curved or cylindrical structures where the surface studs all face outward. This technique is used to build round towers, exhaust pipes, and spaceship engine sections. Each headlight brick acts as a pivot point that redirects the building surface.
The key advantage over brackets is size. The headlight brick occupies only a 1×1 footprint, making it ideal for tight curves on small models.
4. Achieving Half Plate Offset Connections
One of the most powerful things the headlight brick does is create a half plate offset. Because the brick is slightly taller than a standard 1×1, the side stud sits at a different height than a normal stud would.
This offset lets you shift the position of sideways-mounted elements by half a plate thickness. That may sound small, but it means you can achieve precise alignment that is impossible with standard bricks. Half plate offsets are used to center tiles between studs, align cheese slopes for smooth surfaces, and create greebling patterns on spaceship models.
Without the headlight brick, achieving a half plate offset requires stacking plates in specific combinations. The headlight brick gives you that offset in a single compact piece.
5. Making Quarter Plate Micro-Adjustments
For even finer control, builders combine headlight bricks with plates and tiles to create quarter plate offsets. This is an advanced technique that allows micro-adjustments in element positioning.
Quarter plate offsets are used when you need elements to align to positions that fall between the standard stud grid. Examples include centering a 1×2 tile over two studs or aligning decorative slopes so their edges meet flush without gaps.
The tolerance of the LEGO system, at approximately 0.1mm, makes these micro-adjustments possible. The headlight brick provides the dimensional foundation that other offset techniques build upon.
6. Connecting Perpendicular Walls at Right Angles
When two walls meet at a corner, standard bricks handle the connection easily. But when you need a wall to extend sideways from the face of another wall mid-section, you need a sideways connection point.
The headlight brick provides this. You embed it in the primary wall with its side stud facing outward, then attach a plate or tile to that stud to start the perpendicular wall. This technique is used in architectural models for buttresses, chimneys, and decorative wall sections.
Because the headlight brick fits within a standard 1×1 slot, it does not disrupt the pattern of the surrounding wall. The connection point is invisible once covered.
7. Mounting Tiles, Slopes, and Cheese Elements Sideways
Greebling is the art of adding fine mechanical detail to model surfaces. Spaceships, mechs, and sci-fi structures rely heavily on sideways-mounted tiles, cheese slopes, and curved slope elements.
The headlight brick gives you a stud to mount these elements on the face of your model. You can create textured panels, ventilation grilles, and armor plating by attaching small elements to side-facing studs. This technique is what gives professional-looking MOCs their layered, detailed appearance.
Cheese slopes mounted on headlight bricks create angled armor plating and roof details. Tiles create flat recessed panels. Curved slopes create exhaust nozzles and mechanical joints.
8. Hidden Structural Reinforcement Inside Models
Sometimes the best use of a headlight brick is one you never see. Because the piece is compact and offers a strong sideways connection, builders use it internally to reinforce weak points in a model.
If a wall section feels loose or a large assembly needs internal support, embedding headlight bricks inside the structure adds connection points between layers. The side studs lock into plates above or below, creating a tie that holds the model together without being visible from the outside.
This is especially useful in large MOCs where weight and gravity stress connections over time. A few hidden headlight bricks can make the difference between a model that holds together and one that falls apart when you move it.
9. Column and Pillar Detailing
Architectural columns require texture on all sides. Standard bricks only give you studs on top, so adding detail to the sides of a column means building outward in every direction.
The headlight brick lets you add side detail to a column without increasing its footprint. You can mount decorative tiles, curves, or modified elements to the faces of a column while keeping the core structure compact. This technique appears in Greek temple builds, Gothic cathedral MOCs, and modern architectural models.
For round columns, builders chain headlight bricks in a circle and mount curved elements on each outward-facing stud. The result is a smooth column with consistent surface detail.
10. Compact SNOT in Tight Spaces Where Brackets Will Not Fit
Brackets are excellent SNOT tools, but they take up space. A bracket requires a 1×2 or larger footprint and adds visible bulk to a model. In tight spaces like the interior of a small vehicle or the gap between two wall sections, brackets simply do not fit.
The headlight brick occupies just a 1×1 space. That makes it the go-to solution for SNOT connections in confined areas. You can place it where no other sideways building element would fit, giving you a connection point in spaces that would otherwise be inaccessible.
This compact size is why the headlight brick remains relevant even as LEGO has introduced many newer SNOT elements. No other piece offers a sideways stud in such a small footprint.
Half Plate and Quarter Plate Offset Techniques Explained
Offset techniques are where the headlight brick truly shines. Let me break down how these work in practice.
A half plate offset shifts the position of elements by half the thickness of a standard plate, which is approximately 1.6mm. The headlight brick creates this offset naturally because its side stud is positioned at a height that does not align with standard plate stacking. When you attach a plate to the side stud of a headlight brick and compare it to plates stacked on top of a regular brick, you will see the half plate difference.
This offset is useful for centering elements. For example, if you want to place a row of 1×1 tiles between two rows of studs on a surface, the half plate offset puts them at exactly the right height. You can also use it to create staggered patterns in textured walls and greebled surfaces.
Quarter plate offsets go one step further. By combining headlight bricks with specific plate configurations, you can shift elements by a quarter plate thickness. This is approximately 0.8mm of adjustment. The technique requires careful counting of plate layers and precise placement, but the results enable alignment that looks factory-made.
Both offset techniques rely on the tight manufacturing tolerances of LEGO elements. At 0.1mm tolerance, the pieces fit together with just enough give to accommodate the offset without stressing the plastic. This is why forced connections that ignore these tolerances lead to splitting and breakage.
Common Pitfalls to Avoid When Using Headlight Bricks
For all its usefulness, the headlight brick has some real pitfalls. Forum users on r/lego report a 20 to 30 percent breakage rate when certain techniques are used incorrectly. Here is what to watch out for.
Never Put a Stud in the Back Socket
The headlight brick has a recessed socket on the back where the side stud mounts through the brick. This socket is designed to accommodate the stud of another headlight brick for chaining. It is not designed to accept a standard stud forcefully.
Builders who try to insert a regular stud into the back socket report cracking and splitting. The walls of the socket are thin, and the pressure of a forced stud will split the brick over time. If you need to chain headlight bricks, use the front side stud. If you need a connection at the back, use a different element.
Understand Legal vs Illegal Build Techniques
LEGO classifies certain connections as illegal build techniques. These are connections that stress elements beyond their design tolerances. The LEGO Model T controversy brought this topic into the spotlight when a popular MOC used connections that deformed elements.
With headlight bricks, the most common illegal technique is forcing elements together that create more than the 0.1mm tolerance allows. If you have to push hard to make a connection, you are probably using an illegal technique. The result is stressed plastic that will eventually crack or warp.
Legal techniques work with the geometry of the system. The 5:2 rule exists because it produces connections that fit without stress. When you build within these rules, your models hold together reliably and your parts last indefinitely.
Watch for Accumulated Tolerance Errors
Even legal connections can accumulate tolerance errors over long chains. If you connect 20 headlight bricks in sequence, the tiny 0.1mm variations in each piece add up. After 20 connections, you could be off by 2mm from where you expected.
In practice, this means long chains of headlight bricks may not align perfectly with a reference wall. Plan for this by building in small correction points using plates or tiles to absorb the accumulated offset.
The Small Gaps Are Intentional
Many builders notice small gaps inside headlight bricks and assume the piece is defective. These gaps exist by design. They provide the clearance needed for the side stud to connect without interference from the interior walls of the brick.
Do not try to fill these gaps or force elements into them. They are part of the engineering that makes the piece work. Understanding this helps you trust the design and use the brick as intended.
Headlight Brick vs Other SNOT Bricks
The headlight brick is not the only SNOT element available. LEGO has introduced many sideways building pieces over the years. Here is how the headlight brick compares to its alternatives.
Brackets offer a larger mounting surface than the headlight brick. A standard bracket provides a 1×2 or 2×2 sideways plate, giving you two or four studs facing outward. Use brackets when you need to mount larger elements sideways or when the extra surface area provides better structural support. Brackets are better for foundational SNOT structures, while headlight bricks are better for fine detail work.
Modified plates with side studs are thinner than headlight bricks. They occupy only one plate of vertical space instead of a full brick. Use these when height is constrained. However, they do not offer the same offset properties as the headlight brick, so they are not a direct replacement for offset techniques.
Cheese slopes are decorative elements rather than structural connectors. They are used in combination with headlight bricks to create textured surfaces, not as alternatives to them. A cheese slope mounts on the side stud of a headlight brick to create angled detail.
The bottom line: the headlight brick remains the best choice for compact, single-stud sideways connections that require the half plate offset. For larger surfaces, use brackets. For thin-profile connections, use modified plates. For detail work, combine headlight bricks with cheese slopes and tiles.
FAQs
What is the 5 by 2 rule in LEGO?
The 5:2 rule states that 2 studs equal 5 plates in height. Because one stud pitch is 8mm and one plate is 3.2mm, stacking 5 plates reaches exactly 16mm, which equals the width of 2 studs. This ratio is the mathematical foundation that makes sideways building possible.
What is the illegal build technique in LEGO?
An illegal build technique is any connection that stresses LEGO elements beyond their 0.1mm design tolerance. These techniques force pieces together in ways that deform, crack, or wear out the plastic. The LEGO Model T controversy popularized this concept when a widely shared MOC was found to use connections that damaged parts.
How do I build sideways with LEGO?
Sideways building, also called SNOT (Studs Not On Top), uses elements like the headlight brick, brackets, and modified plates with side studs to mount elements horizontally. Start by placing a headlight brick in your wall, then attach plates or tiles to its side stud. Use the 5:2 rule to ensure your sideways elements align with your vertical stacking.
Why do my headlight bricks split?
Headlight bricks typically split when a stud is forced into the back socket. The socket walls are thin and designed only for the front side stud of another headlight brick. Inserting a standard stud creates pressure that cracks the plastic. Avoid this by never forcing connections into the back socket.
Conclusion
The headlight brick quietly solves ten distinct sideways building problems that no other single LEGO element can handle as efficiently. From vehicle headlights to recessed windows, curved surfaces, half plate offsets, and compact SNOT connections, its versatility makes it indispensable for serious builders.
Now that you understand the geometry, the techniques, and the pitfalls, grab a handful of headlight bricks and start experimenting. Try incorporating half plate offsets into your next MOC and see how much cleaner your details become. The best way to master this piece is to build with it.