
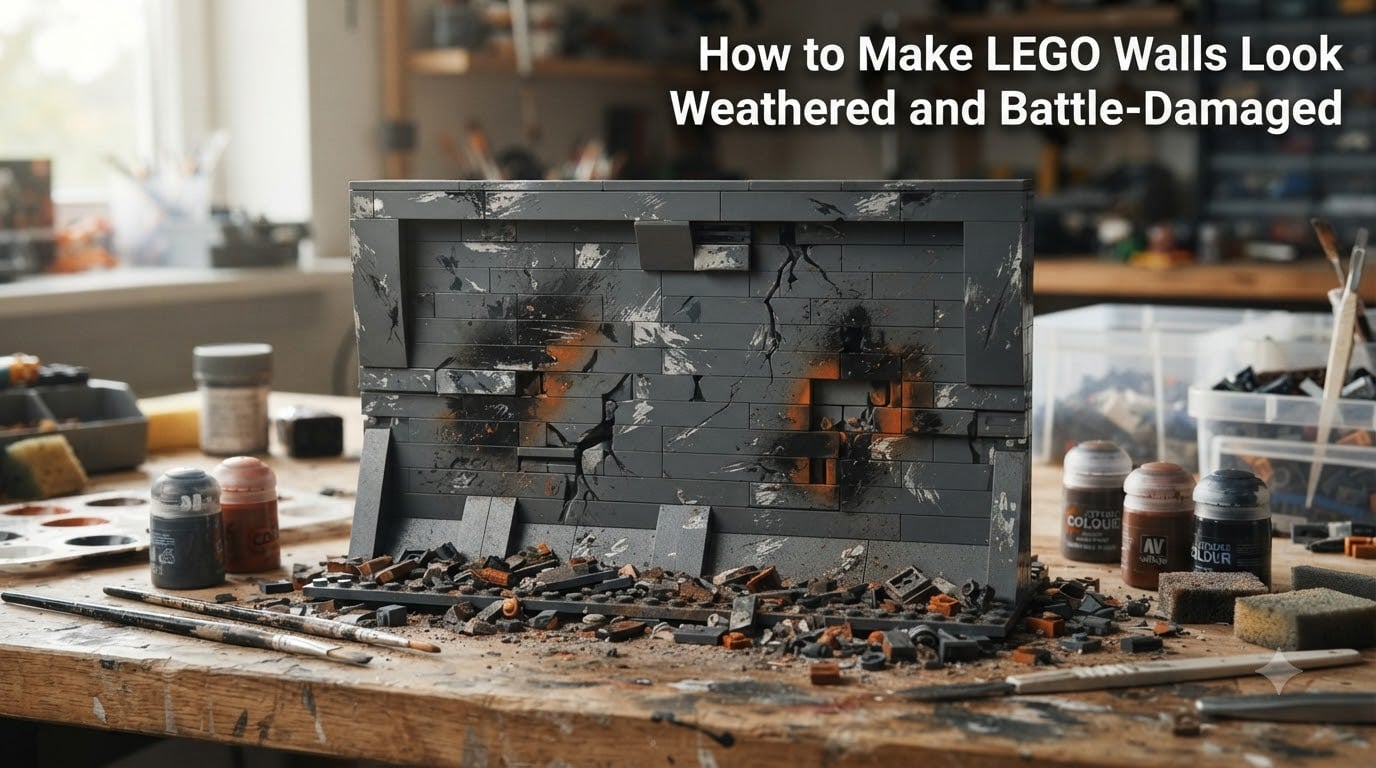
Building a pristine LEGO castle or modern city is satisfying, but nothing tells a story quite like a battle-scarred wall covered in grime, cracks, and scorch marks. When I first started building war-torn dioramas, my walls looked too clean, too perfect, and frankly too toy-like. That all changed once I learned how to make LEGO walls look weathered and battle-damaged using a mix of physical building tricks and paint techniques.
In this guide, I will walk you through every method I use to age, distress, and damage LEGO walls so they look like they belong in a war zone or ancient ruin. Whether you are building a medieval MOC, a post-apocalyptic scene, or a WWII diorama, these LEGO weathering techniques will transform flat, sterile bricks into walls with real history and texture.
We will cover physical modification methods (no paint required), paint-based weathering using acrylics and washes, advanced battle damage effects, and how to combine everything for maximum realism. I will also share the exact paint types, brushes, and safety steps that the LEGO customizing community on Reddit and YouTube has validated over years of trial and error. Let us get started.
Table of Contents
Materials and Tools You Need for LEGO Weathering
You do not need expensive gear to weather LEGO bricks, but having the right materials makes a massive difference in your results. After testing different paints and tools over dozens of builds, here is what I recommend for reliable, realistic weathering on LEGO walls.
Paints That Work on LEGO Plastic
Acrylic paint is the go-to choice for most LEGO builders because it adheres well to ABS plastic, dries fast, and cleans up with water. Citadel paints (like Rhinox Hide and Stormhost Silver) are favorites among the minipainting community for dry brushing and edge work on LEGO. Vallejo and Army Painter acrylics also perform well and come in weathering-specific shades like rust, soot, and dirt.
Spray paint can work for base coats but carries risks I will cover in the safety section. Ink washes and enamel washes (like Citadel Nuln Oil or Agrax Earthshade) flow into recessed areas of LEGO walls and create instant depth and grime. For a budget option, mixing brown or black acrylic paint with water produces a homemade wash that Reddit builders swear by.
Brushes and Application Tools
You need at least three brush types: a small detail brush for scratches, a flat brush for dry brushing edges, and a stippling brush or old rough brush for texture effects. Toothpicks and sponge fragments are excellent for creating irregular chipping patterns. Keep paper towels handy for wiping excess paint, which is a core step in both wash and dry brushing techniques.
Optional but Helpful Tools
An airbrush produces the smoothest gradients for soot and scorch marks, but you can achieve similar results with dry brushing and stippling without one. Tweezers help place tiny debris pieces. A craft knife lets you score brick surfaces for crack effects if you are willing to permanently modify parts. Sealant spray (matte varnish) locks in your weathering so it does not rub off during handling.
Physical LEGO Wall Weathering Techniques
Before opening a single paint bottle, you can create dramatic weathering effects purely through how you build. The top competitor content on LEGO wall texture focuses almost entirely on physical techniques, and for good reason. They are reversible, require no paint, and create structural depth that paint alone cannot match.
Mixed Piece Types for Irregular Surfaces
Standard LEGO walls use uniform bricks stacked in clean rows, which looks artificial. Mixing in plates, tiles, jumper plates, and cheese slopes at random intervals breaks up the pattern and simulates repaired or deteriorating masonry. Leave small gaps between bricks to suggest missing chunks or crumbling mortar. This technique alone gives walls an aged, weathered appearance with zero paint.
SNOT and Offset Techniques
SNOT (Studs Not On Top) building lets you mount bricks sideways, creating wall surfaces with exposed stud holes, grooves, and recesses that catch shadow naturally. Offset building using jumper plates creates half-stud offsets that simulate uneven stonework. Both techniques add physical depth and shadow that reads as texture even from a distance, making them perfect for ancient ruins and castle walls.
Modified and Broken Bricks
If you are willing to sacrifice parts, physically damaging bricks creates the most convincing battle damage. Use pliers to snap corners off tiles and plates, creating jagged broken edges along wall tops. Score brick surfaces with a craft knife to simulate cracks. Drill small holes for bullet impacts. This is permanent, so practice on cheap used parts first and never modify rare or valuable pieces.
One Reddit builder described a technique where they clip small plate fragments and wedge them into wall gaps to simulate debris-filled craters. The combination of broken edges and loose rubble looks incredibly convincing in close-up diorama photos.
Paint-Based LEGO Weathering Methods
Paint is where LEGO weathering goes from good to jaw-dropping. No competitor currently covers paint-based weathering specifically for LEGO walls, which makes this section the most valuable part of this guide. I will break down each technique step by step so you can follow along on your next build.
Dry Brushing for Edge Highlights and Scratches
Dry brushing is the single most effective paint technique for LEGO weathering. It highlights raised edges and creates the appearance of worn, chipped paint on wall surfaces. Here is the step-by-step method I use on every weathered build.
Step 1: Choose a metallic or light-colored paint (Stormhost Silver for battle damage, Buff or Skeleton Horde for sun-bleached stone). Step 2: Dip your flat brush into the paint, then wipe almost all of it off on a paper towel until the brush looks nearly dry. Step 3: Lightly sweep the brush across the raised edges and corners of your LEGO wall. The tiny amount of paint catches only on raised surfaces, creating natural-looking wear patterns.
Reddit builders confirm that combining light dry brushing passes works far better than one heavy application. Build up the effect gradually across multiple thin passes until the wall looks naturally worn. Focus on corners, edges near the ground, and areas around windows and doors where real buildings show the most wear.
Wash Technique for Grime and Depth
A wash is thinned paint that flows into recesses and creates instant shadows, grime, and depth. Apply a dark brown or black wash to your LEGO wall and it immediately looks dirty, aged, and weathered. For a quick homemade wash, mix brown or black acrylic paint with water at roughly a 1:4 paint-to-water ratio.
Apply the wash generously with a brush, let it flow into the gaps between bricks and into stud holes, then immediately wipe the excess off raised surfaces with a damp paper towel. The pigment stays in the recesses while the surface stays clean. This mimics how dirt and grime accumulate naturally in real masonry over years of exposure.
Stippling for Texture and Corrosion
Stippling uses a rough, old brush dabbed vertically onto the surface to create irregular texture spots. This technique is perfect for simulating rust patches, moss growth, and corrosion on metal LEGO elements. Dip a stippling brush lightly in orange or green-brown paint, dab off excess, then tap it against wall sections to build up textured patches. The Reddit community recommends Typhus Corrosion (a Citadel technical paint) stippled into recessed areas for a gritty, rusted look on battle-damaged walls.
Paint Chipping Effect
To simulate chipped paint on LEGO walls painted with a base color, use a sponge fragment dipped in a darker shade and dab it randomly along edges and corners. This creates irregular patches that look like paint flaking off over time. Follow up with a metallic dry brush on the chipped areas to show bare metal underneath the damaged paint.
How to Add Realistic Battle Damage to LEGO Walls
Battle damage is what separates a weathered building from a war zone diorama. These effects tell the story of conflict, from bullet holes to blast marks, and they are the techniques YouTube battle damage tutorials focus on most heavily.
Bullet Holes and Impact Craters
For small arms damage, use a heated needle or small drill bit to create conical holes in wall surfaces. Angle the hole slightly downward to suggest a projectile striking from above. Surround each impact point with a dark wash to simulate scorching, then dry brush the edges with silver to show exposed material. Cluster three or four holes in a tight group for machine gun damage, or space them randomly for scattered gunfire.
Scorch Marks and Blasts
Scorch marks from explosions are one of the easiest effects to create and one of the most visually striking. Use a charcoal or black paint applied with a dry brush in a radial pattern radiating outward from a central impact point. Fade the paint gradually so the darkest area is at the center. Add subtle brown or orange tones at the edges of the scorch for heat discoloration. For a blast hole, remove bricks entirely from the wall center and paint the exposed inner edges black and charred.
Rubble and Debris
No battle-damaged wall looks complete without rubble at its base. Scatter loose plates, tiles, and cheese slopes in earth tones around damaged wall sections to simulate fallen debris. Paint some pieces with the same wash you used on the walls so they blend naturally. Add dust effects by dry brushing a light tan or gray over the rubble pile and surrounding floor area.
Structural Cracks and Collapses
Create running cracks by painting thin, irregular dark lines across wall surfaces using a detail brush. Vary the thickness and add small branches splitting off the main crack. For partial collapses, build the wall with deliberate gaps where sections have fallen away, leaving jagged remnants. Support the broken edges with exposed internal structure (beams, rebar made from thin rods) for added realism.
Combining Physical and Paint Techniques for Maximum Effect
The most convincing weathered LEGO walls use both physical building and paint techniques together. No competitor guide covers this combination, which is where the real magic happens. The order of operations matters, so follow this layering approach for the best results.
Start with physical techniques first. Build your wall with mixed piece types, SNOT sections, and deliberate gaps or broken edges. This creates the structural foundation that paint will enhance. Once the physical structure is complete and assembled, move to paint application.
Apply paint in this order: base coat (if changing wall color entirely), then wash for depth and grime, then dry brushing for edge highlights, then stippling and specialized effects like scorch marks and rust. Sealing with matte varnish as the final step protects everything and unifies the finish. Multiple Reddit builders note that layering thin applications produces far more natural results than any single heavy technique applied alone.
One approach that works well is building intentional damage into the physical structure (broken corners, missing chunks) and then using paint to emphasize that damage. Paint the interior of broken sections darker to simulate shadow and depth, then dry brush the ragged edges with metallic tones. The physical damage gives paint something real to work with, and the paint makes the physical damage read as genuine destruction rather than just missing pieces.
Common LEGO Weathering Mistakes to Avoid
After making every mistake in the book, here are the pitfalls I see most often when builders try weathering for the first time. Avoiding these will save you time, frustration, and potentially ruined bricks.
Over-weathering is the number one mistake. It is easy to keep adding layers until the wall looks muddy and uniform rather than naturally aged. Less is almost always more. Step back frequently, view the wall from a distance, and stop before you think it looks finished. You can always add more later, but removing excess paint is difficult.
Using the wrong paint type can permanently damage LEGO bricks. Solvent-based paints and harsh spray paints can dissolve or warp ABS plastic. Stick with water-based acrylics and test any new paint on a sacrificial brick before applying it to your build. Never use acetone or alcohol-based products near LEGO plastic.
Skipping the sealant step means your weathering will rub off every time you handle the build. A light coat of matte varnish spray locks everything in place without adding an unwanted glossy finish. Avoid glossy sealants unless you specifically want a wet appearance.
Neglecting to thin your paint leads to thick, gloppy applications that obscure brick detail and look unnatural. Always thin washes significantly and wipe excess dry brush paint off your brush before touching the model. The Reddit painting community repeats this advice constantly because it is the foundation of every good weathering result.
Safety and Legal Considerations When Painting LEGO
Working with paint and modified plastic requires some basic safety awareness. A few simple precautions keep you healthy and your build environment safe.
Work in a well-ventilated area, especially when using spray paint, sealants, or any solvent-based products. Wear gloves to keep paint off your skin and a mask if spraying. These products contain fumes that can cause headaches and respiratory irritation in enclosed spaces.
Heating needles or using power tools to modify bricks creates plastic fumes. ABS plastic releases potentially harmful vapors when melted or heated excessively. Work in a ventilated space, use low heat, and avoid burning the plastic. If you smell acrid fumes, stop immediately and increase ventilation.
Keep all paints and tools away from children and pets. Secure loose blades and heated tools when not in use. Clean your brushes and tools promptly so dried paint does not ruin them for future projects.
FAQs
What is the 5/2 rule in LEGO?
The 5/2 rule in LEGO refers to the standard vertical spacing relationship where five plates stacked together equal the height of two standard bricks. This means 1 brick equals 2.5 plates in height. Builders use this ratio to create offset connections and SNOT techniques where sideways-mounted elements align perfectly with vertically stacked bricks, which is essential for textured and weathered wall construction.
Is it illegal to spray paint LEGO?
It is not illegal to spray paint LEGO bricks you own. LEGO Group does not prohibit painting genuine LEGO elements for personal custom builds, dioramas, or MOCs. However, spray painting LEGO can permanently alter or damage the plastic if you use solvent-based paints that react with ABS material. Always use plastic-safe spray paints, test on a spare brick first, and work in a ventilated area. If you plan to sell custom-painted pieces, be aware of trademark considerations regarding the LEGO brand name.
What is the best paint for painting LEGOs?
Water-based acrylic paint is the best choice for painting LEGO bricks because it adheres to ABS plastic, dries quickly, and does not damage the material. Citadel, Vallejo, and Army Painter acrylics are widely used and trusted by the LEGO customizing and miniature painting communities. For washes, Citadel shades like Nuln Oil and Agrax Earthshade flow into recesses beautifully. Avoid solvent-based enamels and harsh spray paints that can warp or dissolve LEGO plastic. Always seal finished work with a matte varnish to protect the paint.
How to make a brick wall look distressed?
To make a brick wall look distressed, combine physical and paint techniques. Start by mixing piece types and leaving small gaps to simulate crumbling mortar. Apply a dark brown or black wash to fill recesses with grime, then wipe off the excess. Dry brush raised edges with a lighter color or metallic silver to simulate worn and chipped surfaces. Use a sponge to dab irregular chipped paint patches along corners. Add scorch marks with charcoal-colored paint radiating from impact points. Finish with a matte sealant to lock in the effect.
How to make a brick wall look old?
To age a brick wall, focus on dirt accumulation, discoloration, and subtle wear. Apply a thinned brown wash over the entire wall to simulate years of grime settling into joints and recesses. Dry brush a pale tan or gray over raised surfaces to suggest sun-bleached and faded material. Stipple green or brown patches to simulate moss and organic growth. Add small cracks using a fine detail brush with dark paint. Keep the effect subtle and uneven, since real aging is random and never uniform across a surface.
Bring Your LEGO Builds to Life with Weathering
Learning how to make LEGO walls look weathered and battle-damaged transformed my dioramas from clean toy displays into scenes that tell real stories. The combination of physical building techniques, paint weathering, and layered battle damage effects gives you everything you need to create walls that look like they have survived centuries of conflict.
Start simple with dry brushing and a basic wash on your next build. As you get comfortable, layer in stippling, scorch marks, and structural damage. Before long you will develop your own weathering style that makes every MOC feel alive with history. Grab your brushes, pick out some sacrifice bricks to practice on, and start weathering.