
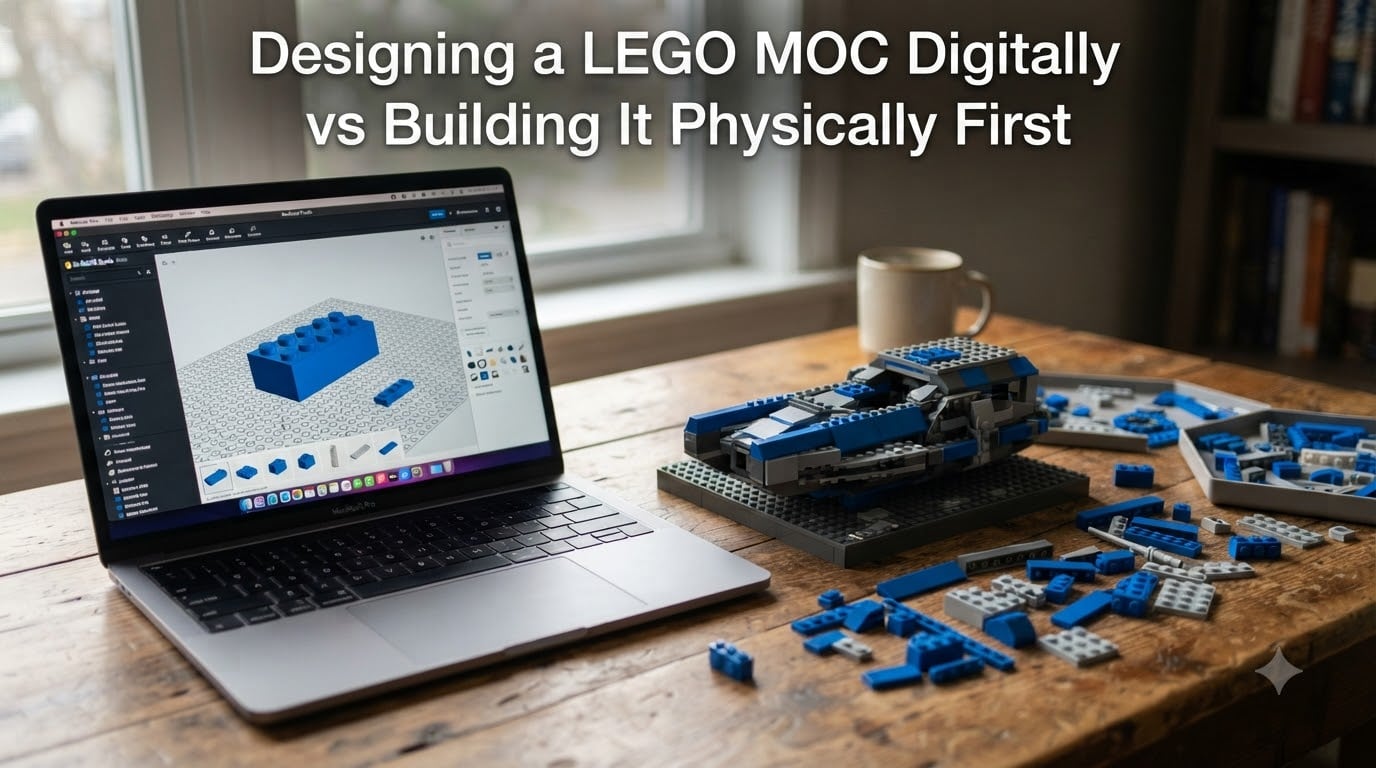
Every LEGO builder reaches a crossroads sooner or later. You have a brilliant idea for a custom build, and you need to decide: do you fire up digital design software, or do you dump out your brick bins and start snapping pieces together? The question of designing a LEGO MOC digitally vs building it physically first is one of the most debated topics in the AFOL community, and the answer shapes your entire creative process.
Our team has spent years watching the community split into camps. Some swear by BrickLink Studio and never touch real bricks until the final build. Others would never trade the tactile click of physical bricks for anything on a screen. After digging through hundreds of forum threads, builder interviews, and hands-on experience with both methods, we put together this guide to help you choose with confidence.
Here is what you will learn: the strengths and weaknesses of each approach, when to use digital tools versus physical bricks, how to combine both into a hybrid workflow, and the building techniques that matter regardless of which method you pick. Whether you are designing your first small MOC or planning a massive display piece, this comparison will point you in the right direction.
Table of Contents
What Is a LEGO MOC?
MOC stands for “My Own Creation.” It refers to any LEGO model that is not built from official set instructions. MOCs are the heart of the custom LEGO building community, where builders design original models ranging from tiny vignettes to sprawling city layouts.
There are three main types of MOCs to know about. A modification takes an existing official set and changes or expands it. An original design is built entirely from scratch using your own vision. An alternate build uses only the pieces from a specific set to create something completely different from the intended model.
No matter which type you pursue, the decision between digital design and physical building affects everything from your budget to your final presentation quality.
Designing a LEGO MOC Digitally vs Building It Physically First: The Core Difference
The fundamental difference comes down to this: digital design gives you unlimited freedom at zero material cost, while physical building gives you immediate real-world feedback that no software can replicate. Digital tools like BrickLink Studio let you place any part in any color without owning a single brick. Physical building forces you to confront gravity, structural limits, and parts availability from the very first connection.
Neither method is wrong. The best builders we have encountered understand both approaches and choose based on the project. A large-scale castle might start as a digital prototype to manage complexity, while a small experimental texture study might benefit from hands-on brick manipulation.
The key factors that separate the two methods are cost, parts access, structural feedback, learning curve, and final presentation. Let us break down what each approach actually looks like in practice.
Digital LEGO Building: Tools and Workflow
Digital LEGO building means using specialized software to assemble virtual bricks on a computer. You drag, rotate, and connect 3D parts in a workspace that simulates real LEGO geometry. The software tracks your parts list, lets you generate building instructions, and can even produce photorealistic renders of your finished model.
BrickLink Studio (Stud.io)
BrickLink Studio, commonly called Stud.io, is the dominant digital LEGO design tool as of 2026. It was acquired by BrickLink and integrates directly with the BrickLink marketplace, which means you can design a model and immediately generate a wanted list to buy every part you need. The software includes nearly every LEGO element ever produced in its parts database, supports color-accurate rendering, and features a built-in instruction generator.
Stud.io also supports custom parts created with external tools. Builders who want elements not in the official database can use PartDesigner to import custom 3D models and integrate them into their designs. This opens up possibilities that go beyond what physical builders can achieve with standard parts.
LEGO Digital Designer (LDD)
LEGO Digital Designer, or LDD, was the official LEGO Group digital building tool for years. However, LEGO officially discontinued LDD and it is no longer supported or updated. While some builders still use it out of habit, the community consensus is clear: LDD is deprecated, and anyone starting digital building today should use BrickLink Studio instead.
Other Tools: Sketchup and PartDesigner
For builders who need to create fully custom elements, Sketchup paired with PartDesigner is a popular combination. Sketchup handles the 3D modeling of a new part shape, and PartDesigner converts that model into a format Stud.io can use. Professional digital builder Sean Hakim, featured in BrickNerd’s deep dive on digital MOCs, uses exactly this workflow to create custom details that set his builds apart.
The digital workflow generally follows these steps: plan your concept, block out the basic shape in Stud.io, refine details and color choices, test structural connections virtually, generate a parts list, render the final model for presentation, and optionally export instructions for a physical build later.
Pros of Designing MOCs Digitally
Digital design offers advantages that are impossible to match with physical bricks. Here is what makes it so appealing to a growing segment of the LEGO community.
Unlimited parts access. You have every LEGO element ever produced available instantly. No searching through bins, no waiting for BrickLink orders, no compromising on a part you do not own. Want to test a build using a rare color you have never seen in person? One click.
Zero material cost. Designing digitally costs nothing beyond the software, which is free for BrickLink Studio. You can experiment with massive builds that would cost hundreds or thousands of dollars to build physically. This makes digital design especially attractive for builders on tight budgets.
Copy, paste, and undo. Building a symmetric structure? Copy one side and mirror it instantly. Made a mistake 200 steps ago? Undo with a single keystroke. These workflow features save enormous amounts of time compared to physical building, where reversing a deep structural mistake can mean dismantling hours of work.
Easy color experimentation. Trying different color schemes takes seconds. You can test a model in monochrome to evaluate its shape, then apply colors and see what works. Physical builders would need to own every color variant of every part to do the same thing.
Built-in parts lists and instructions. When your digital design is complete, the software generates a full parts inventory. You can export this directly to BrickLink as a wanted list and order everything you need. Some tools also produce step-by-step building instructions, making it easy to rebuild the model physically or share it with others.
Cons of Designing MOCs Digitally
Digital building is not without real drawbacks. Understanding these limitations helps you decide when to rely on software and when to reach for real bricks.
No tactile or structural feedback. This is the biggest weakness. Software cannot tell you whether a connection is too loose, whether a wall will sag under its own weight, or whether a Technic mechanism will actually function smoothly. Digital models that look perfect on screen can fail structurally when built in real life.
The learning curve is real. Becoming proficient in Stud.io takes time. Learning keyboard shortcuts, understanding the parts database, mastering the connection detection system, and figuring out rendering settings all require patience. Beginners may feel overwhelmed before they complete their first model.
Minifigure placement is awkward. Many digital builders report that positioning minifigures in software feels clunky compared to physically placing them. The limited poseability controls and the disconnect from real-world scale make minifig scenes harder to compose digitally.
Community stigma still lingers. Some traditional builders view digital-only MOCs as less authentic. The community debate over whether digital building is “real” LEGO building has diminished over the years, but the bias still exists in certain circles. Builders who only design digitally may face skepticism when sharing their work.
You miss the experience. Many AFOLs build LEGO precisely for the tactile satisfaction of snapping bricks together. Digital building removes that physical pleasure entirely. For builders who find stress relief and joy in the hands-on process, software will never replace the feeling of real bricks.
Pros of Building MOCs Physically First
Physical building remains the foundation of the LEGO hobby, and it offers advantages that digital tools simply cannot replicate.
Immediate structural feedback. The moment you connect two bricks, you feel whether the joint is solid or wobbly. Physical building exposes structural flaws instantly. A wall that looks stable on screen might reveal a weak connection the second you pick up the actual model. As one Reddit builder put it, physical building “exposes flaws and structural issues real quick.”
The tactile experience. There is nothing like the click of a well-fitted connection. The physical sensation of building, the weight of the model growing in your hands, and the satisfaction of placing the final piece are core to why people love LEGO. This experience cannot be simulated by any software.
Real-world problem solving. When a physical build does not work, you have to solve the problem with the pieces in front of you. This constraint breeds creativity. Builders discover unexpected techniques when forced to work around limitations with specific parts, leading to solutions they might never have explored in software with unlimited options.
Authenticity and community respect. A physically built MOC carries an inherent authenticity that some community members value. When people see a physical model at a convention or in photos, they know it actually works in the real world. There is no question about whether it would hold together or whether the connections are legal.
Direct presentation. A finished physical model can be photographed, displayed, and shared in ways that digital renders cannot fully match. Real lighting, real textures, and real scale give physical builds a presence that even high-quality renders struggle to replicate.
Cons of Building MOCs Physically First
Physical building comes with significant practical constraints that can limit what you create and how quickly you iterate.
Cost adds up fast. Building large MOCs physically requires buying parts, often from BrickLink, BrickOwl, or Pick a Brick. A single large model can cost hundreds of dollars in parts alone. If you make a design mistake and need different parts, you place another order and wait for shipping.
Space requirements are serious.
Large physical builds need room for construction, storage, and display. Many builders simply do not have the space for a sprawling MOC project. Digital building takes up zero physical space beyond your computer.
Parts are limited to what you own or can buy. If you do not have a specific part in a specific color, you cannot use it until you order it. This slows iteration significantly compared to digital design, where every part is instantly available. Physical builders often compromise on their vision because of parts limitations.
No undo button. Realized 500 steps back that you made a fundamental structural error? You have to physically dismantle the model to fix it. Digital undo takes one second. Physical undo can take hours of careful deconstruction.
Difficult to document and replicate. If you want to share your physical MOC design with others or rebuild it later, you need to manually photograph and document every step. Digital tools generate instructions automatically, making sharing and rebuilding trivial.
Side-by-Side Comparison Table
Here is a quick reference to help you compare the two methods at a glance. This summarizes the key trade-offs we have covered in detail above.
| Factor | Digital Design | Physical Building |
|---|---|---|
| Parts Access | Unlimited, instant | Limited to owned or ordered parts |
| Cost | Free (software) | Parts cost adds up |
| Structural Feedback | None — virtual only | Immediate, real-world |
| Tactile Experience | None | Full hands-on satisfaction |
| Iteration Speed | Fast (undo, copy, paste) | Slow (manual changes) |
| Space Needed | Computer only | Build and display space |
| Instruction Generation | Automatic | Manual documentation |
| Color Experimentation | Instant switching | Requires owning each color |
| Community Perception | Some lingering stigma | Universally accepted |
| Final Presentation | Renders (high quality possible) | Physical display and photos |
The Hybrid Workflow: Best of Both Worlds
The most effective builders rarely commit to just one method. A hybrid workflow that combines digital and physical building gives you the strengths of both while minimizing the weaknesses of each. This approach is gaining popularity, and in our experience, it produces the best results for serious MOC projects.
Here is how a typical hybrid workflow looks in practice.
Step 1: Digital prototyping. Start in BrickLink Studio to block out your concept, test proportions, and experiment with layouts. Use the unlimited parts library to try ideas you could not test physically without buying parts. This is where digital design shines: rapid exploration with zero cost.
Step 2: Structural testing with physical bricks. Once your digital prototype has a solid design direction, build key sections physically to test structural integrity. Focus on load-bearing walls, complex Technic mechanisms, and any connections that seem questionable. This catches the problems that software cannot detect.
Step 3: Refine the digital model. Take what you learned from physical testing and update your digital design. Fix structural weak points, adjust connections, and finalize your parts list. Your digital model should now reflect a design that you know works in the real world.
Step 4: Source all parts. Export your parts list from Stud.io directly to BrickLink. Order everything you need in one batch. This is far more efficient than ordering parts incrementally as you discover what you need during physical building.
Step 5: Final physical build. Build the complete model using your digital design as a guide. You already know the structure works because you tested it. You have all the parts because you ordered from an accurate list. The final build goes smoothly because you did the hard work upfront.
Step 6: Render for presentation. Use Stud.io’s rendering engine to create polished images of your model for online sharing. Pair these renders with photos of your physical build to show both the design vision and the real-world result.
This hybrid approach takes discipline, but it eliminates most of the frustration that comes with committing to a single method. You get the creative freedom of digital design, the structural confidence of physical testing, and the efficiency of a planned parts order.
When to Use Each Approach
Not every project needs the same approach. Here is a practical framework for choosing between digital, physical, and hybrid methods based on your specific situation.
Choose digital design when: you have a limited budget, you are planning a large or complex build, you want to experiment freely with colors and parts, you need to generate building instructions, or you have limited physical space. Digital is also ideal for collaborative projects where multiple builders need to work on the same model remotely.
Choose physical building when: your project is small enough to prototype quickly, structural integrity is the top priority, you are exploring new building techniques through hands-on experimentation, or the tactile experience is a primary reason you build. Physical building is also better for models with complex mechanical functions that must work in reality.
Choose the hybrid workflow when: you are building a medium to large MOC that you intend to keep or display, you want the best possible result without wasting money on wrong parts, or you are creating a design you plan to share or sell as instructions. The hybrid method is our recommended default for most serious builders.
For beginners just starting out, we recommend beginning with physical building to develop a feel for how bricks connect and how structures behave. Once you understand real-world building, adding digital tools to your toolkit becomes much more powerful because you understand the limitations that software cannot show you.
Essential Building Techniques Every MOC Designer Should Know
Regardless of whether you build digitally or physically, certain techniques form the foundation of advanced MOC design. Here are two that every builder should understand.
SNOT (Studs Not On Top)
SNOT is a technique where bricks are oriented so that the studs face sideways, backwards, or even upside down rather than pointing upward. This allows for smoother surfaces, more compact connections, and detail work that would be impossible with standard stud-up orientation. SNOT is used in nearly every professional-level MOC and is essential for achieving clean, seamless surfaces.
The 5/2 Rule
The 5/2 rule is a fundamental LEGO building principle that every MOC designer should know. It refers to the fact that five plates stacked vertically equal the height of two studs placed sideways, which equals the width of one standard brick. This 5:2 ratio means you can create perfectly aligned connections between sideways and upright elements, enabling SNOT techniques to work with precision. Understanding this ratio unlocks a huge range of building possibilities that would otherwise result in misaligned connections.
Community Perspectives: What Real Builders Say
The debate between digital and physical building is alive and well across LEGO forums, Reddit, and social media. Here is what real builders are saying about their experiences with both methods.
On Reddit’s r/lego community, a popular thread asked MOC makers whether they design with physical bricks or digitally first. The responses were revealing. Physical builders consistently emphasized that working with real bricks “exposes flaws and structural issues real quick.” They value the immediate, honest feedback that physical building provides.
Digital builders, on the other hand, praised the freedom of unlimited parts and the ability to experiment without financial risk. Many noted that BrickLink Studio has become the standard tool, with LEGO Digital Designer now considered obsolete by the community. One common theme: digital builders who also build physically report the best outcomes because they validate their digital designs with real bricks.
The community stigma around digital-only building still exists but is clearly diminishing. As more professional builders share high-quality digital work alongside physical builds, the perception that digital design is “cheating” or “not real LEGO building” continues to fade. The consensus that emerges across forums is that the tool matters less than the creativity, originality, and technical skill behind the build.
For builders concerned about community reception, the quality of your final presentation matters enormously. Whether you share a polished digital render or a well-lit photograph of a physical build, presentation quality strongly affects how your work is perceived across Flickr, Reddit, Instagram, and LEGO conventions.
Frequently Asked Questions
What is the 5/2 rule in LEGO?
The 5/2 rule states that five stacked plates equal the height of two studs on their side, which also equals the width of one standard brick. This 5:2 ratio lets builders align sideways and upright elements perfectly, making SNOT (Studs Not On Top) techniques possible with precise measurements.
Is it legal to sell LEGO MOCs?
Yes, it is legal to sell original LEGO MOC designs and instructions, but you cannot use the LEGO trademark or copyrighted material in your marketing. You can sell building instructions, custom kits using genuine LEGO parts, and digital files. Many designers sell MOC instructions through platforms like Rebrickable. You cannot mass-produce and sell copies of official LEGO sets or use licensed intellectual property (Star Wars, Marvel, etc.) without permission.
What software is used to design LEGO MOCs?
The most popular software for designing LEGO MOCs is BrickLink Studio (also called Stud.io), which is free and integrates directly with the BrickLink parts marketplace. Other tools include PartDesigner for creating custom elements and Sketchup for 3D modeling custom parts. LEGO Digital Designer (LDD) was the official tool but is now discontinued and no longer recommended.
What are the hardest LEGO MOCs to build?
The hardest LEGO MOCs typically involve complex Technic mechanisms, large-scale sculptures requiring precise structural engineering, and models with intricate custom detailing using SNOT and SNIR techniques. Spherical shapes, working transmissions, and large architectural models with seamless surfaces are considered among the most challenging builds for both digital and physical builders.
Conclusion
When it comes to designing a LEGO MOC digitally vs building it physically first, there is no single right answer. Digital design offers unlimited parts, zero cost, and powerful iteration tools. Physical building delivers real structural feedback, tactile satisfaction, and authentic results. The hybrid workflow combining both methods gives you the best of each while sidestepping their individual weaknesses.
Our recommendation for most builders: start physical to learn how bricks actually behave, then add digital tools to expand what you can design. For your next MOC project, prototype digitally in BrickLink Studio, test key structural sections with real bricks, and build the final model from a verified parts list. This approach saves money, catches structural problems early, and produces better results than either method alone.
Pick the approach that fits your project, your budget, and your building style. The only wrong choice is not building at all.