
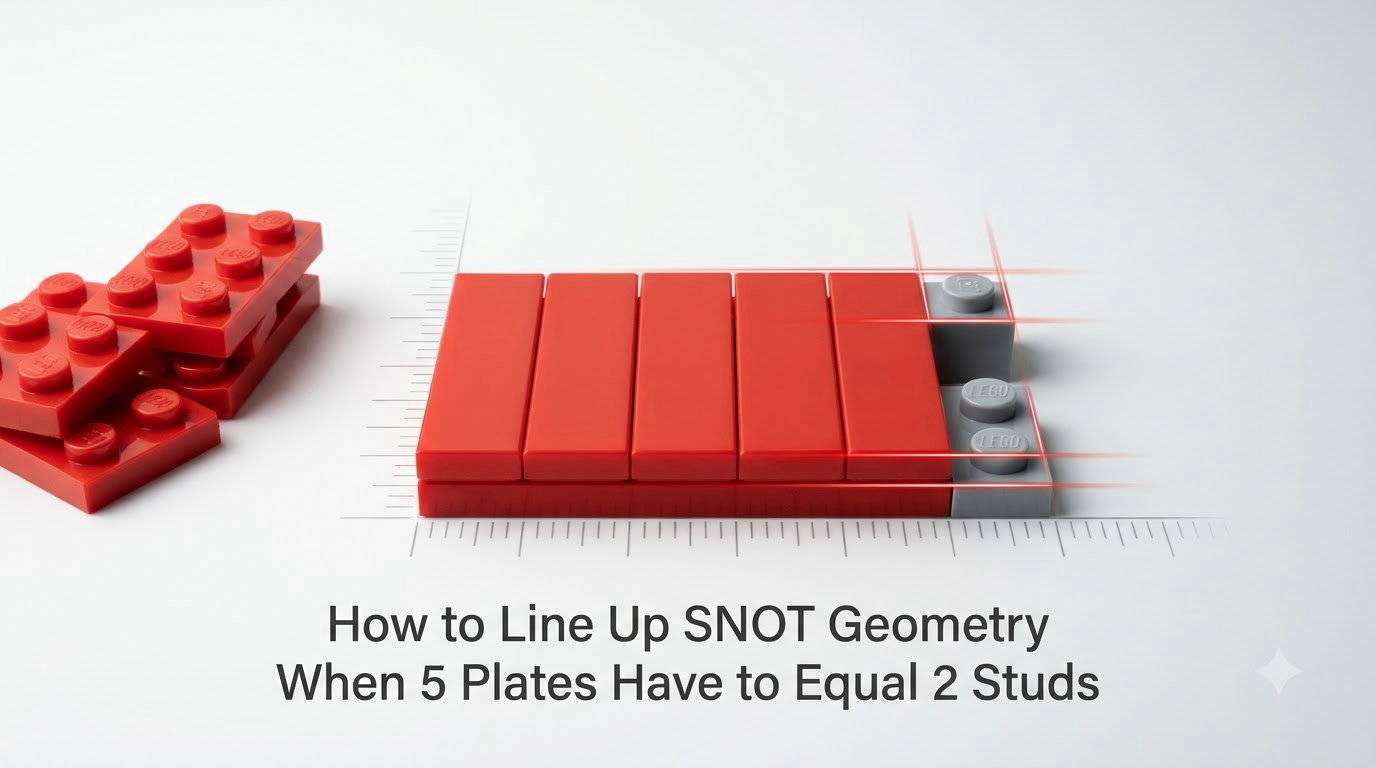
I still remember the first time I tried to attach a sideways brick to a wall and have its top studs line up with the regular studs above it. I stacked five plates onto the sideways section, lined everything up by eye, and ended up with a gap so wide I could slip a fingernail between the two halves. That moment sent me down the rabbit hole of SNOT geometry, and the answer turned out to be simpler than I expected: 5 plates really do equal 2 studs in height, down to roughly 0.1 millimeters. This guide explains exactly how that works, why it works, and the step-by-step way I line up SNOT geometry when 5 plates have to equal 2 studs in my own MOCs.
Table of Contents
What Is SNOT (Studs Not On Top)?
SNOT stands for Studs Not On Top. It is a LEGO building technique where you rotate bricks so their studs face sideways, upward, or even downward, rather than only pointing up the way the stud and tube principle traditionally requires. The goal is to expose attachment points on surfaces that would otherwise be blank and flat.
This style of sideways building unlocks smooth exterior walls with no visible studs, complex angles in MOCs, and clean attachment points for tiles, printed slopes, and small detail elements. You see it everywhere in serious LEGO creations: architecture replicas, detailed microscale vehicles, and anywhere a builder wants to break out of the standard top-stud-only grid.
The stud and tube principle is the basic rule that makes LEGO click together. Each brick has a tube on the bottom and round studs on top. When you press a brick onto another, the studs slip into the tubes. SNOT works because special pieces have additional studs or tubes on their sides, so the same stud-and-tube connection can happen in directions other than straight up.
I started paying attention to SNOT after disassembling a friend’s modular building. Every window, every sign, every layer of brick on the facade was rotated in some clever way. It was the first time I realized LEGO was not just a stacking toy but a complete three-dimensional construction system.
The 5:2 Golden Ratio: Why 5 Plates Equal 2 Studs
The 5:2 golden ratio is the single most important number in SNOT geometry. It tells you that the height of five stacked regular plates is exactly the same as the horizontal distance covered by two studs placed side by side. If you build a sideways section five plates tall and try to continue a wall above it using standard brick stacking, the studs will line up perfectly without any gap.
Here are the exact LEGO measurements that make this work:
- One stud width = 8.0 mm
- Two stud widths = 16.0 mm
- One plate height = 3.2 mm
- Five plate heights = 16.0 mm
Two stud widths (16.0 mm) equals five plate heights (16.0 mm). The math lines up almost perfectly. I say “almost” because LEGO manufacturing has a tiny tolerance of about 0.1 mm on each part, so a stacked assembly can drift by a hair over long runs. That drift is the source of those mysterious gaps builders keep asking about on forums.
The same principle extends to bricks. One brick height equals three plates (3 x 3.2 mm = 9.6 mm, the height of one brick). That means 1 brick + 2 plates = 5 plates = 2 stud widths. You can swap bricks for plates in any combination as long as the total plate height equals the stud width you need to clear.
How to Line Up SNOT Geometry When 5 Plates Have to Equal 2 Studs
This is the core technique I use on almost every SNOT build. The goal is to start a sideways stack and have it finish flush with a regular vertical stack above or beside it. I follow the same five steps every time.
Step 1: Lock down an even number of studs. The 5:2 rule works because 2 is even. If your sideways section needs to cover an odd number of studs, the math will not perfectly close. Plan your SNOT zone to span an even number of studs (2, 4, 6, 8) for clean alignment.
Step 2: Choose your SNOT brick carefully. The most common choice is a headlight brick (part 4070) for 1×1 sideways connections, or a 1×1 brick with a single side stud (part 87087). Brackets and Travis bricks (part 4733) work for offset angles. Pick the part that gives you the stud direction you need.
Step 3: Stack five plates where the SNOT bricks end. Counting from the top of the SNOT brick upward, place 1 plate, then 2, then 3, then 4, then 5. The fifth plate’s top surface should sit exactly at the height where the next standard stud row above needs to land.
Step 4: Verify against a known reference. Place two standard bricks flat on the table, side by side, measuring 16.0 mm across. Set your stacked plates next to them. If your eyeball says they match, your build will hold alignment under normal handling.
Step 5: Continue the wall with normal studs up. Once the five plates bring you flush to the 2-stud plane, resume standard top-stud stacking. The transition becomes invisible because all the math lines up.
On my last modular building, I used this exact routine to attach a tiled roof section that ran sideways off the back of the second floor. Five plates, eight times across the wall, every plate stack sitting exactly two studs above the previous. No gaps, no stress on any piece.
Essential SNOT Parts and Their Uses
You cannot do SNOT without the right parts. These are the pieces I keep within arm’s reach whenever I sit down to design a sideways assembly.
- Headlight brick (4070). A 1×1 round brick with a stud on one side. The classic starter SNOT piece, perfect for simple sideways attachments and small detail work.
- 1×1 brick with side stud (87087). The same idea as the headlight brick but in square form. Lays flat for tight grids where round profiles would clash.
- Travis brick (4733). A 1×1 brick with a stud on one side and a stud on the bottom. Lets you build outward and upward from the same anchor point.
- Brackets (1×1, 1×2, 2×2). Right-angle pieces that create sideways faces anywhere on a model. Use a 1×2 bracket (part 44728) for attaching a 1- stud-wide sideways extension.
- Jumper plates (offset). Plates with an off-center stud placement (such as the 1×2 jumper, part 15573) that shift connections by a half stud. Critical when you need a half-plate offset.
- Erling brick / antistud. Parts with recessed antistuds on the sides that grip standard studs, allowing you to “snap” sideways without modifying your brick library.
I stock 30 or 40 headlight bricks in my main parts bin because they get used in nearly every MOC. Without them, sideways building is essentially impossible.
Half-Plate Offsets: When the Math Gets Tricky
Not every alignment lands on a clean 5:2. Many real builds need an offset of half a stud, and that is where the 6:5 ratio comes in. Six plates equal the horizontal distance of five studs, which means you can shift connections by exactly one fifth of a stud if you use a clever combination.
In practice, half-plate offsets are easier. You take the assembly that needs to shift half a stud over and place a jumper plate between it and the rest of the build. Jumper plates have their stud off-center by one stud width, so adding one jumper gives you a clean half-stud shift without bending any rules.
Bracket stacks let you create stepped offsets when the half-stud shift has to happen more than once in a row. Each bracket adds another half-stud to the cumulative offset. The 5:2 rule still applies vertically, but horizontally you are now working in half-stud increments.
You have probably seen stepped castle walls in MOCs, where bricks recede in tiny ledges. That visual effect comes from stacking brackets and offset plates, not from cutting bricks at strange angles.
Tolerance Issues and Why Your SNOT Build Has Gaps
The most common builder complaint I see on Reddit and Facebook groups is some version of “I built a SNOT section and now there is a gap between it and the regular wall.” Almost every gap comes down to tolerance, not bad math.
LEGO parts vary by about 0.1 mm from their nominal dimension to account for plastic shrinkage and mold wear. That is invisible in a standard build because tolerances cancel each other out. But in SNOT, where five plates need to match two studs within 0.1 mm, small variations add up.
Technic SNOT compounds the problem. Technic bricks have a 0.1 mm offset on their stud placement compared to System bricks, so a Technic pin hole ends up slightly off-center from where a System stud would sit. Mixing the two systems inside the same SNOT zone is the most common cause of those impossible-to-debug gaps.
Do not panic if a five-plate stack measures 16.05 mm instead of 16.0 mm. That is normal. It only matters when you stack tolerances three or four times in a row. One deviation is fine. Four is a gap.
Troubleshooting Common SNOT Alignment Problems
These are the problems I have personally hit and the ones I see posted most often in builder communities.
Problem: A visible gap between SNOT bricks and the regular wall above.
Swap one of your five plates for a 1×2 jumper plate. The off-center stud on the jumper pulls the connection over by exactly half a stud and often absorbs the tolerance drift. If the gap is on a vertical seam rather than a horizontal one, you probably have a half-stud offset you did not account for, and a bracket is the cleaner fix.
Problem: Stress on elements when forcing a connection.
If you have to push hard to seat a SNOT brick, stop. You are out of tolerance, and forcing it will either stress-crack the part or bow the wall. Take the section apart, recount your plates (one brick = three plates), and rebuild. Five plates really does equal two studs, so the connection should drop into place with finger pressure only.
Problem: Headlight brick and 1×1 SNOT brick do not line up with each other.
These two pieces look interchangeable but have slightly different side-stud positions. The 1×1 SNOT brick (87087) centers its stud on the brick’s face, while the headlight brick (4070) puts it slightly off-center. Pick one family per section and stick with it.
Problem: Bracket configurations will not snap together the way the instructions show.
You are likely mixing a 1×1 bracket with a 2×2 bracket or trying to attach a bracket upside down. Brackets have a specific stud orientation. Turn the piece so the flat plate surface faces away from the wall, then try again.
Advanced SNOT Combinations for MOC Builders
Once you are comfortable lining up the basic 5:2 ratio, combinations open up. Two 1×1 SNOT bricks placed perpendicular to each other let you build an L-shaped wall that runs sideways in both directions from a single anchor. A Travis brick combined with two brackets creates an outward-facing step that perfectly tiles smooth and never reveals its stud geometry.
Technic SNOT deserves its own paragraph. Because of the 0.1 mm offset mentioned earlier, you should build an entire Technic SNOT section using only Technic parts to avoid mixing tolerances. A Technic 1×1 beam with a side stud (part 87080) and a 1×1 smooth Technic brick (part 6541) form the foundation of any Technic SNOT zone.
In real builds, the cleanest SNOT applications are smooth walls that hide the existence of sideways stacking. Look at LEGO Architecture sets like the Solomon R. Guggenheim Museum or the Fallingwater set. Every horizontal and vertical surface is a SNOT achievement that you, the viewer, never notice because the studs are all hidden.
FAQ
What is the LEGO 5 2 rule?
The LEGO 5:2 rule states that five stacked plates have the same height as the width of two studs placed side by side, both measuring 16.0 millimeters. It is the foundation of SNOT geometry and lets builders align sideways sections flush with regular brick walls.
What is an illegal LEGO build technique?
An illegal LEGO build technique is one that requires modifying, gluing, or cutting parts to fit together. SNOT uses only standard elements like headlight bricks, brackets, and jumper plates and is fully legal under LEGO building rules.
What is the stud and tube principle in LEGO?
The stud and tube principle is the basic joining rule: every brick has round studs on top and a hollow tube on the bottom. Pressing a brick onto another locks the studs into the tubes, creating the iconic clutch power that makes LEGO connections reliable.
What is the standard distance between LEGO studs?
The standard distance between LEGO studs is exactly 8.0 millimeters from center to center in every direction. This exact spacing is what makes the system modular and is the unit every other SNOT measurement is built from.
Conclusion
Once you accept that five plates really do equal two studs, the rest of SNOT geometry falls into place. The 5:2 golden ratio, the half-plate offsets, the jumper plates, and even the tolerance issues all trace back to that single 16.0 mm relationship. Pick a few headlight bricks, stack five plates next to a two-stud reference, and watch the alignment click into place. That is how I line up SNOT geometry when 5 plates have to equal 2 studs in my own builds, and it is the technique that took my MOCs from gappy experiments to clean, smooth-sided creations.