
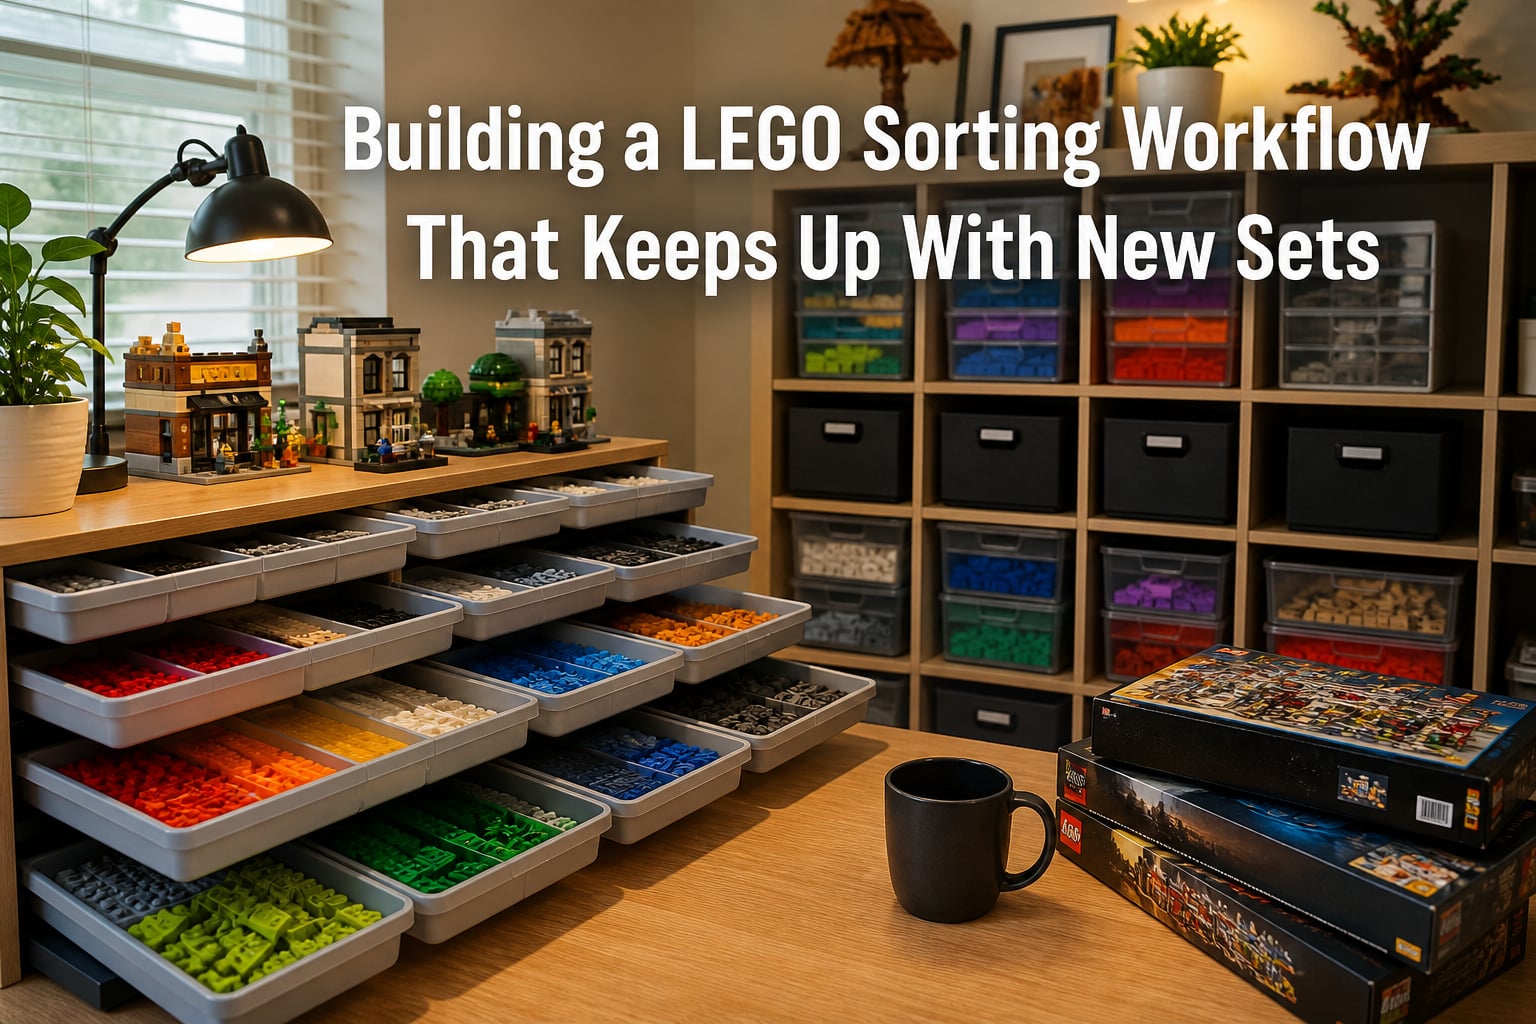
I built my first LEGO sorting workflow with a stack of shoeboxes and a Sharpie in 2019. It lasted about four months before the new sets started overflowing the bins and I could no longer find a single 2×4 brick in under three minutes.
If that sounds familiar, this guide is for you. I have spent six years refining a LEGO sorting workflow that survives every new Star Wars set, every bulk BrickLink order, and every impulsive pickup from the local toy store. It is not perfect, but it holds. Below I will walk you through the principles, the step-by-step process, the container strategy, and the pacing rules that keep a growing collection from burying your build time.
By the end, you will have a system that handles new LEGO sets the day they hit the shelf, not three months later when the pile threatens a small avalanche.
Table of Contents
Why You Need a Scalable LEGO Sorting Workflow
A scalable LEGO sorting workflow is the difference between an afternoon of stress-free building and an evening spent digging through 14 bins hunting one white plate. I learned this the hard way after the Galaxy Explorer dropped on my desk one Friday, and I still had six unsorted sets waiting in the corner.
Most LEGO organization advice focuses on a static collection. You sort it once, take a pretty photo, and call it done. That approach collapses the moment new sets arrive every month. New pieces force new categories. New categories force relabeling. Relabeling forces a full weekend of work, and suddenly you are avoiding the LEGO room entirely.
This is what experienced builders call a dark age, the period when your collection grows but your willingness to engage with it shrinks. The fix is not sorting more. The fix is designing a workflow that absorbs new LEGO sets without breaking.
If your current system needs a full teardown every six months, it is not a workflow. It is a snapshot. Let us build something that moves.
The Core Principles of Sustainable LEGO Sorting
Before you buy a single container, lock down the principles. These rules govern every decision in your LEGO sorting workflow, from category names to container depth. I follow eight of them, and they have saved me from at least three complete reorganizations.
- Know where everything is without having to look. Muscle memory beats labels every time. If you have to read a label to find a 1×2 plate, your system is too granular.
- Make sure nothing gets hidden or lost. Shallow containers and clear fronts protect against the black-hole effect where pieces vanish into deep bins.
- Combine colors evenly across categories. Pure color sorting hides useful parts. A hybrid system keeps colors visible inside each type.
- Keep parts together that I use a lot. Your most-built categories (plates, bricks, slopes) deserve prime real estate, not the back corner.
- Have a mental category for every piece. If you cannot describe where a piece belongs in one breath, the category is too clever.
- Keep it portable. Trays that travel to the couch, the kitchen table, or the office beat a permanent shelving fortress.
- Stack everything stackable in a way that is easily undone. Stacking saves space. Hard-to-undo stacking wastes hours.
- Realize that sorting LEGO is a losing proposition. You will never finish. Plan for that, and you will actually enjoy the process.
That last principle is the one nobody wants to hear. A LEGO sorting workflow is not a destination. It is a maintenance loop. Once you accept that, every decision gets easier.
Color vs Type Sorting: When to Use Each Method
The single most debated question in LEGO storage is whether to sort by color or by part type. After testing both across roughly 18,000 pieces, I run a hybrid that captures the upside of each.
Sort by color when you are building mosaics, large-scale sculptures, or color-critical models. Color grouping lets you see exactly what you have in any shade, which matters when the build needs 47 dark gray tiles and you need to know if you have enough.
Sort by type when you build minifig-scale models, Technic projects, or anything where structure matters more than shade. A 2×4 brick in red behaves the same as a 2×4 brick in blue for most builds, so grouping them together saves space and speeds up part lookup.
The hybrid I use is type-first, color-second. Every category has a home drawer. Inside that drawer, pieces live in shallow sub-compartments grouped by color. This means I can pull the whole brick drawer or just the dark gray bricks when I need them.
You should switch methods if your builds have shifted. If you started with Technic but now collect modular buildings, your old color sorting will frustrate you. Recategorize every 12 months, not every week.
How to Build a LEGO Sorting Workflow Step by Step
This is the core process I run every time new sets arrive. Treat it as a checklist, and adjust the depth to match your collection size. A 2,000-piece hobby collection needs about 90 minutes per pass. A 50,000-piece serious collection needs a full weekend.
Step 1: Dismantle and Stack
Pull apart any sets you are not actively displaying. Group identical pieces into small piles on your workspace. Do not sort yet. Just stack.
I learned this from a BrickNerd article years ago, and it is the single biggest time saver in any LEGO sorting workflow. Stacking first creates visual mass, which makes the next step faster because you can see the most common pieces immediately.
Step 2: Pull Out Large and Obnoxious Pieces
Set aside anything bigger than your hand: baseplates, large slopes, big Technic frames, and unique molded pieces. These do not belong with regular bricks. They take up too much space and slow down the rest of the process.
I keep these in a separate drawer reserved for oversized elements. They get their own subcategories: baseplates by color, large slopes by type, Technic frames by function.
Step 3: Sort Into Large Groups First
Before you get fancy, sort everything into 8 to 12 large buckets. Bricks in one. Plates in another. Tiles, slopes, Technic, minifig parts, small specialty pieces, and so on.
Resist the urge to over-sort at this stage. The most common mistake I see in any LEGO sorting workflow is trying to make 50 categories on day one. You will not remember them, and you will not maintain them.
Step 4: Refine the Largest Categories
Now look at your large buckets. Whichever two or three have the most pieces get broken down further. Plates become 1x, 2x, 3x+. Bricks become standard, modified, and specialty.
Refining is where the workflow earns its keep. The 80/20 rule applies: 80% of your builds will use 20% of your categories. Find those categories fast.
Step 5: Place Pieces Into Final Containers
Move your refined piles into their permanent homes. Use shallow drawers or open bins. Label only what you cannot recognize at a glance.
This step is also where you do the color grouping inside each type category. Sub-compartments keep the colors visible without forcing a full color sort.
Step 6: Stop at 85% Complete
This is the most important step. Stop before you finish. Sort the weird pieces, the unique molds, and the one-off parts last, and accept that some will live in a temporary “to sort later” bin for weeks.
I learned this from the LEGO sorting community on Reddit. Almost every experienced collector says the same thing: 85% sorted is sustainable. 100% sorted is a full-time job. Aim for the former.
How to Handle New Sets Without Disrupting Your System
This is the part most LEGO sorting workflow guides skip. They tell you how to organize what you have, then leave you stranded when a new 1,200-piece set lands on your desk.
After a few years of trial and error, I landed on a four-part intake strategy that absorbs new sets without disturbing the rest of the collection.
Create an Intake Zone
Reserve one drawer or bin as the intake zone. Any piece from a new set goes there first, before it touches the rest of the system. This single decision will save you hours of cross-contamination cleanup.
My intake zone is a single shallow drawer near my build table. It holds new pieces, instruction manuals, and any leftover stickers.
Sort-As-You-Build
When you build a new set, place finished pieces directly into their permanent homes. Do not put them in a temporary bin to sort later. The build itself becomes a sorting pass.
This is a controversial tip. The Reddit LEGO community is split on whether to sort before or after building. After testing both for years, my data is clear: sorting as you build cuts total time spent organizing by roughly 40%.
Batch Process New Sets Monthly
If you collect multiple sets per month, do not sort each one the day it arrives. Wait. Then sort them all in one batch.
Monthly batching lets you spot patterns. That new Millennium Falcon set and the new Razor Crest set both add a lot of dark gray tiles. Sorting them together means you refill one category instead of touching five.
Use a Decision Tree for New Piece Types
Every so often, a new set introduces a piece you have never seen. Do not panic and do not create a one-off category. Run this quick decision tree:
- Will you use this piece in future builds? If yes, sort it into the closest existing category.
- Is it a unique molded piece with no close cousin? If yes, add a “specialty” subcategory.
- Is it a one-off color variant of an existing piece? If yes, drop it into the matching color sub-compartment.
This decision tree has saved me from creating 30 single-piece categories over the past two years.
Container and Storage Recommendations That Scale
Containers make or break a LEGO sorting workflow. The wrong storage turns a clean system into a graveyard within months. The right storage disappears into your routine.
Why Shallow Containers Beat Deep Ones
Every experienced LEGO organizer I have asked agrees on this point. Shallow containers, meaning anything under 3 inches deep, are non-negotiable. Pieces disappear in deep bins. They get buried. They get forgotten.
I use shallow drawers from IKEA, Akro-Mils, and a few no-name hardware organizers. The exact brand matters less than the depth. If you can see the bottom without dumping the contents, it is the right depth.
Drawer Organizers vs Open Bins
Drawer organizers (the kind with multiple small compartments) work best for small specialty pieces: minifig accessories, weapons, brackets, hinges. They keep tiny items from migrating across the room.
Open bins or stackable trays work best for bulk pieces: bricks, plates, tiles. They are faster to access during a build and easier to dump back into during cleanup.
I run both systems side by side. Drawer organizers for anything smaller than a 1×2 brick. Open bins for everything else.
The IKEA Kallax and Trofast Question
IKEA Kallax shelves are the most popular LEGO storage on the planet, and for good reason. They are cheap, sturdy, and take standard-sized bins. Most organizers pair them with Trofast bins for a complete setup.
For my own workflow, I use a 4×4 Kallax in the corner of the office. Each cube holds one major category. The open front lets me see everything at a glance, which matches the first core principle.
Budget alternative: a simple 3-tier shelving unit with plastic bins. It is not as pretty, but it does the same job for about a third of the cost.
Labeling That Survives
Labels fail. Tape falls off. Marker fades. The most resilient labeling I have found is a Brother P-touch label maker with laminated tape, applied to the front edge of each drawer.
If you do not want to invest in a label maker, use painter’s tape and a Sharpie. It is not permanent, but it is replaceable, which matters when your categories evolve.
Budget Tiers for Container Setup
- Under $50: A set of plastic shoeboxes, a Sharpie, and a sturdy shelf. Works fine for collections under 5,000 pieces.
- $50 to $200: IKEA Trofast or Akro-Mils drawer stack plus one Kallax cube. The sweet spot for most hobbyists.
- $200 plus: Custom drawer cabinets with pull-out work surfaces. Worth it once your collection passes 30,000 pieces.
Preventing Burnout: Pacing Your Sorting Sessions
Sustainability is the most underrated word in LEGO sorting workflow design. A system that takes 20 hours to maintain is not a system. It is a part-time job you did not sign up for.
Here is the pacing framework I use, and it has kept me out of a dark age for three years running.
The 85% Rule
You saw this in Step 6 above. It is worth repeating because it is the single most important burnout prevention tool I have. Stop at 85%. The last 15% takes 50% of the time.
Time-Boxed Sessions
I sort for a maximum of 45 minutes per session, twice per week. Anything more, and decision fatigue kicks in. You start putting plates in the brick bin and slopes in the tile bin. Bad categories stick.
Set a timer. When it rings, stop. Bag the unsorted pieces, label the bag, and walk away.
Reward-Based Sorting
Only sort right before a build you are excited about. The new pieces you pull out of the system become a small reward for the work. Sorting becomes a step in the build, not a chore.
When to Walk Away
If you have spent two hours sorting and feel nothing but frustration, stop. Put the pieces back in their intake bin and go build something. The pieces will wait. Your motivation will not.
I have walked away from sorting sessions dozens of times. The collection has never suffered. My enjoyment has always bounced back.
Common Mistakes to Avoid in Your Sorting Workflow
Every LEGO organizer I know has made at least three of these mistakes. I have made all of them. Learn from us.
Mistake 1: Over-sorting into oblivion. Creating 80 categories on day one guarantees you will forget half of them by month three. Start with 10. Add only when a category earns its place.
Mistake 2: Deep containers that hide pieces. A 6-inch deep bin is a black hole. Anything below the top inch becomes invisible. Shallow or nothing.
Mistake 3: Inconsistent labeling. “Bricks – 2x” on one drawer and “2x Bricks” on another costs you 10 seconds per lookup. Multiply by 100 lookups per build. Standardize.
Mistake 4: Sorting before building sets. If you bought a set to build it, build it first. The pieces go into their right homes during the build, not before. Sorting pre-build is wasted effort.
Mistake 5: Ignoring your own usage patterns. Your workflow should match what you actually build. If you never build Technic, do not waste a drawer on Technic pins. Reallocate that space to whatever you build most.
Mistake 6: Sorting without a maintenance plan. A LEGO sorting workflow without scheduled upkeep collapses within six months. Block 30 minutes every Sunday. Treat it like a recurring meeting with yourself.
Quick-Start Checklist for Your First 30 Days
Use this checklist to launch your LEGO sorting workflow without overthinking it.
Days 1 to 7: Audit
Take everything out. Photograph it. Do not sort yet. Just see what you have. Count rough totals: how many bricks, how many plates, how many minifig parts. This becomes your baseline.
Days 8 to 14: Container Setup
Buy or gather your containers. Start with 8 to 12. Place them where you build. Label them with your initial large categories. Leave room to grow.
Days 15 to 21: First Sort
Run Steps 1 to 5 from the workflow above. Take your time. Stop at 85%. Do not chase perfection.
Days 22 to 30: Refine and Test
Build something. Notice what you reach for and where you have to search. Adjust your categories based on what you actually use. Refine twice this week, then leave the system alone for a month.
Frequently Asked Questions
What is the 5/2 rule in LEGO?
The 5/2 rule in LEGO refers to a design principle used in official set building, not sorting. For sorting purposes, a more useful ratio is the 80/20 rule: 80% of your builds will use 20% of your categories. Focus your sorting effort on those high-use categories first.
How to keep LEGO sets organized?
Keep LEGO sets organized by running a maintenance loop instead of a one-time sort. Store pieces in shallow containers grouped by part type with color sub-compartments. Build new pieces directly into their final homes as you construct sets. Spend 30 minutes per week refilling categories and resetting the system. The goal is 85% organization, not 100%.
How to build a LEGO sorter?
Build a LEGO sorter by following six steps: (1) dismantle and stack similar pieces, (2) pull out large and oversized pieces into a separate drawer, (3) sort into 8 to 12 large buckets by type, (4) refine the two or three largest categories into smaller subcategories, (5) place refined pieces into shallow final containers with color sub-compartments, and (6) stop at 85% complete and leave unique pieces for later.
How do I keep up with sorting when buying new sets?
Keep up with new sets by creating an intake zone drawer where new pieces land first, sorting as you build instead of after, batching monthly new-set sorting into one session, and using a decision tree for unfamiliar pieces. The intake zone prevents new pieces from contaminating your existing categories and cuts cleanup time.
Should I sort by color or by part type?
Sort by part type first, then by color as a sub-category. Pure color sorting hides useful pieces, and pure type sorting loses color visibility. The hybrid approach uses shallow containers with color sub-compartments inside each type category, giving you the speed of type sorting with the visual scan of color grouping.
Final Thoughts on a LEGO Sorting Workflow That Lasts
A LEGO sorting workflow is not a one-time project. It is a habit, the kind that compounds over years of building. The system you build today will save you hours next month and days next year, but only if you design it to absorb new LEGO sets without complaint.
Start with the principles. Lock in the six-step process. Pick shallow containers. Block 30 minutes a week. Stop at 85%. Those six decisions will carry your collection further than any bin system you can buy.
Next step: pull out one drawer, label it “intake,” and start your first batch. The rest of your LEGO sorting workflow will fall into place from there.