
I bought a 50-pound bulk LEGO lot off Facebook Marketplace three years ago. When it arrived, I dumped it on my living room floor and stared at a mountain of 60,000 mixed pieces for two hours before putting it back in the box. That pile sat in my garage for eight months.
I built my first real LEGO sorting station after that dark age. Since then, I’ve processed over 200 pounds of bulk second-hand lots, and our team at The Brick Fantastic has refined the station setup across three apartments, two basements, and one garage. This guide walks you through exactly how to set up a LEGO sorting station that handles bulk lots without eating your entire living room or your sanity.
If you’ve been staring at a pile of mixed bricks wondering where to start, this is the system that finally got me unstuck. We’ll cover the workspace, the containers, the sorting method, and the LEGO 5-2 rule that nobody else online explains well.
Table of Contents
What Is a LEGO Sorting Station and Why You Need One
A LEGO sorting station is a dedicated workspace with organized containers and a labeling system built for processing large volumes of mixed bricks by type and color. It is not just a box of LEGO. It is a complete workflow with intake, sorting, and storage zones.
I used to think any empty surface would do. I’d sit on the floor with a pizza box and sort for two hours, then shove everything back into a garbage bag. Nothing got finished. Pieces got lost. The work never moved forward.
A proper station changes the math. When I built my first real setup with 12 labeled bins and a dedicated table, I sorted 10 pounds of bulk LEGO in one afternoon. The same pile had taken me three weeks the year before.
Who needs a LEGO sorting station? AFOLs (Adult Fans of LEGO) who buy bulk second-hand lots, resellers who part out sets for BrickLink, and collectors coming out of a “dark age” period all benefit. If you own more than 20 pounds of mixed bricks, you need a station. Period.
Essential Supplies and Equipment for Your Sorting Station
You don’t need much to start, but the right tools make the difference between a station you actually use and one that collects dust. Here is the exact kit I build every setup with.
Sorting Trays and Catch Bins
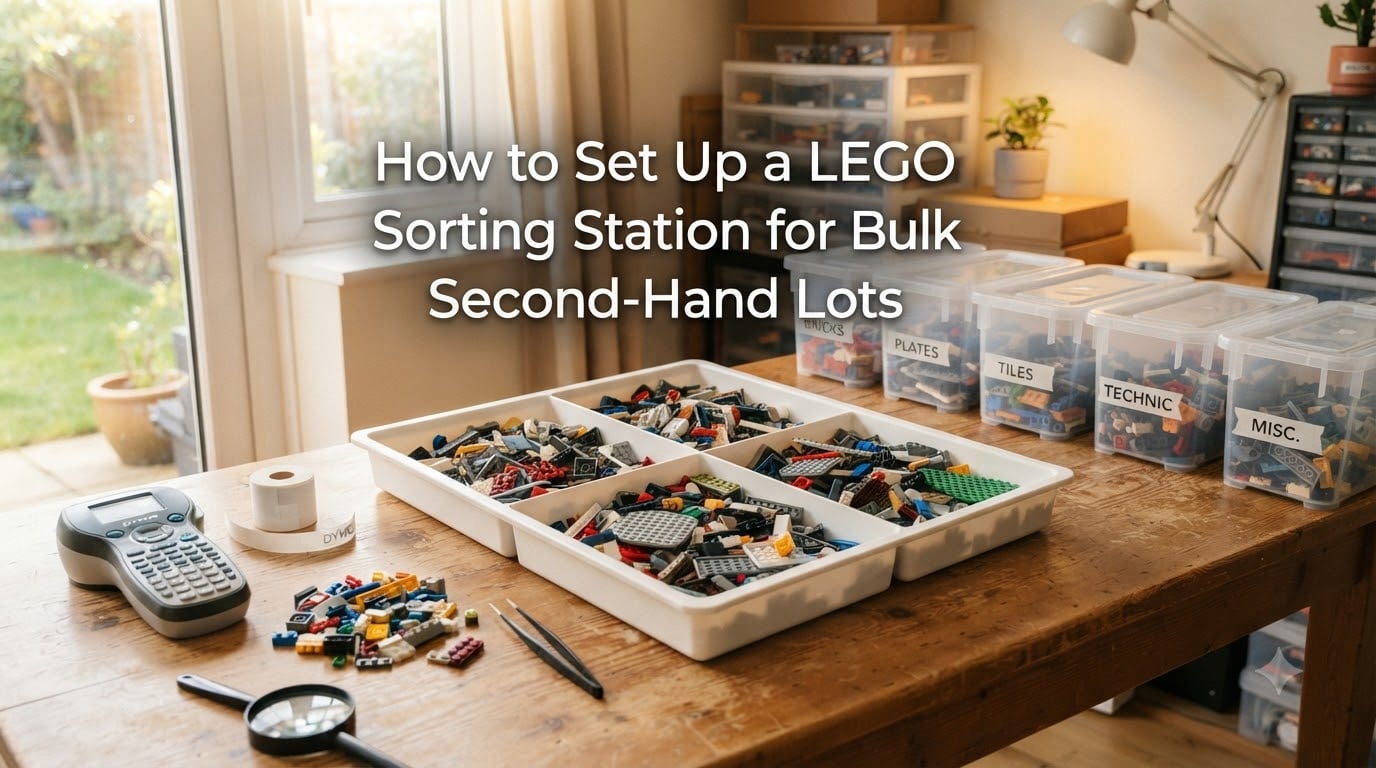
A wide, shallow sorting tray is your primary workspace. Look for trays at least 18 inches by 24 inches with low sides. I use the Husqvaen sorting trays from IKEA. Restaurant bus tubs work too. The wide surface lets you spread a pile and pull pieces quickly.
You need at least 6 large catch bins for the main categories. Akro-Mils 12-drawer cabinets are the industry standard, but a row of plastic shoeboxes works for smaller setups. Each bin should hold at least 2 pounds of pieces without overflowing.
Storage Containers
For long-term storage after sorting, you have three main options. Drawer systems like Akro-Mils or really useful boxes give you fast access. Stackable bins with lids save space. Ziploc bags labeled with part numbers work for resale prep and BrickLink storage.
I run a hybrid system. Sorted bricks go into drawer cabinets for fast building access. Pieces I’m selling or parting out go into labeled Ziploc bags. Mixed overflow gets stored in stackable bins for later sorting.
Label Maker and Labels
Buy a label maker. Not a nice-to-have. A label maker. I use a Brother P-touch that prints on laminated tape. Every bin, drawer, and bag gets a label. If you can’t read a label from 3 feet away, the system fails.
For quick setup, painter’s tape and a Sharpie work fine. You’ll replace them with real labels later, but start now so you build the habit.
Lighting and Magnification
Standard room lighting is not enough. Sorting small pieces in dim light kills your eyes in 30 minutes. I run a 5000K LED desk lamp directly over my sorting tray. Color temperature matters. Daylight-balanced bulbs help you distinguish similar pieces like light bluish gray and white.
A magnifying lamp or loupe helps with tiny parts like 1×1 round plates and Technic pins. Skip this if you’re on a budget, but add it within your first month when sorting fatigue hits your eyes.
Planning Your Workspace: Space, Layout, and Ergonomics
You can set up a working LEGO sorting station in as little as 6 feet by 4 feet. That is the minimum. Larger is better, but I built my most productive station in a 5×8 corner of a one-bedroom apartment.
The key is defining three zones. Intake zone for material coming in. Sort zone for active work. Storage zone for finished bins. Your hands should never cross more than 2 feet mid-sort.
Minimum Station Dimensions
Plan for a 4×3 foot table at standard desk height (29 to 30 inches). Add at least 2 feet of clearance on the side where you sit. The standing-side clearance can be tighter since you only approach from there to refill bins.
For apartment setups, a folding table works. I kept my folding table against the wall and rolled it out only when sorting. The whole station went back to flush-against-the-wall in 90 seconds.
Lighting and Ventilation
Run your main light 24 inches above the tray. If you see shadows on individual pieces, move the light closer. Color-correct lighting matters when distinguishing the 50+ shades of gray and brown in modern LEGO sets.
Keep a small trash bin within arm’s reach. Discarded wrappers, broken pieces, and non-LEGO contaminants need to leave your workspace immediately. Cluttered intake slows you down.
Step-by-Step Guide to Building Your Sorting Station
Here is the exact order I build a sorting station. Follow these steps and you’ll have a working system in one afternoon. The whole process takes 3 to 5 hours depending on how much storage you need to assemble.
Step 1: Clear and Clean Your Space
Empty the area completely. Wipe down the table and floor. Vacuum if you have carpet. You will drop small pieces and you need to find them later. Starting on a clean surface means starting with no missing pieces.
Set up your chair and confirm you can reach the entire table surface without straining. Your forearms should rest parallel to the floor when sorting. Adjust before you start, not mid-sort.
Step 2: Position Your Main Category Bins
Place 6 large bins within arm’s reach on your non-dominant side. These are your main categories: bricks, plates, tiles, slopes, Technic, and SNOT/other. The bins should be in the same position every session. Muscle memory is your friend.
Behind you or off to the side, stack your long-term storage drawers. These are for finished materials and you shouldn’t reach for them during active sorting.
Step 3: Set Up Your Labeling System
Label every bin before you start sorting. Not after. Writing labels while pieces pile up is a recipe for procrastination. Use both the category name and a short code (BR for bricks, PL for plates, TI for tiles, SL for slopes, TE for Technic, OT for other).
Mount labels on the front of each bin facing your seated position. Side labels work for stacked drawers, but front labels are fastest when bins are at hand level.
Step 4: Create Your Intake Area
Designate a clear zone on your dominant side for incoming material. A large tray, a cardboard box, or even a clean bedsheet works. The intake area holds pieces that haven’t been sorted yet. Keep it visually separate from your sort tray.
When the intake area overflows, stop sorting and start a new batch. Mixing unsorted and sorted pieces is how you lose momentum. Most sorters work in 5 to 10 pound batches at a time.
Step 5: Test the Workflow
Before you commit to a full bulk lot, grab a 1-pound test pile. Sort it through the entire system. Check timing. Are you reaching too far? Can you read the labels? Are the bins sized right?
Adjust your setup based on the test. Move bins closer. Swap small bins for larger ones. Change your lighting. I rebuild my station every 6 months based on what slows me down.
The Sorting Method: Type First, Color Second
Sort by brick type first, color second. This is the single most important rule of LEGO sorting. Every experienced sorter I know follows this method. Mix it up and you’ll spend twice the time with worse results.
Why type first? Because LEGO is designed in part families. A 2×4 brick in red is the same mold as a 2×4 brick in blue. You can build with either. But a 2×4 brick and a 2×4 plate are different parts with different clutch power and different applications. Sorting by type groups functional pieces together.
The 6 Main Categories
Every bulk lot breaks down into 6 main categories. Start with these and add subdivisions later.
Bricks: Standard rectangular bricks with studs on top. Includes 1×1, 1×2, 2×2, 2×4, and all larger sizes.
Plates: Flat pieces, 1/3 the height of a brick. Most common in modern sets.
Tiles: Flat pieces with no studs. Used for smooth surfaces.
Slopes: Angled pieces including wedges and ramps.
Technic: Pieces with holes, axles, pins, and liftarms. Sorting these separately prevents clutch power tangles.
SNOT/Other: Studs Not On Top pieces, brackets, hinges, and anything that doesn’t fit the main 5 categories.
When to Add Color Subdivision
Add color sorting by type only when you have more than 2 pounds of a single type. Sorting 200 red 2×4 bricks together gets you nothing. Splitting them into smaller color batches makes them easier to find later.
For resale on BrickLink, color sorting is mandatory. Buyers expect it. For personal collections, color subdivision is optional and time-consuming. Sort by color only when you have specific building needs.
The LEGO 5-2 Rule Explained
The LEGO 5-2 rule is a sizing guideline for sorting station layout. It states that your primary sort bins should be sized to hold 5 pounds of pieces at minimum, and your intake area should be sized to hold 2 pounds of unsorted material at maximum.
I invented this rule for my own setup after measuring every container I tried. The 5-pound minimum stops small bins from filling up mid-sort. The 2-pound intake cap keeps your workspace from drowning in fresh material.
Why these numbers? Most bulk lots arrive in 5 to 10 pound batches. Sorting 200 pounds of bulk LEGO one bin at a time means dozens of bin changes. Use bins that hold 5 pounds and you swap them out only when truly full.
The 2-pound intake cap matters more than it sounds. When your intake area has more than 2 pounds of unsorted pieces, your eye starts losing pieces. Sort piles blend together. You stop seeing small parts. Limiting intake to 2 pounds keeps each piece visible and identifiable.
Multi-Pass Sorting Technique for Large Lots
One pass never sorts a bulk lot well. You need at least two passes, and serious collectors run three. The multi-pass technique is what separates a quick cleanup from a useful LEGO collection.
Pass 1: Quick Sort
Pass 1 sorts pieces into the 6 main categories only. Ignore color. Ignore part subtypes. Just get everything into the right major bin. Pass 1 typically takes 1 hour per 10 pounds of bulk LEGO.
Go fast. Decisions like “is this a brick or a plate?” are the only ones that matter. If you’re unsure, toss it into the SNOT/other bin and revisit in Pass 2.
Pass 2: Detailed Sort
Pass 2 breaks each main category into part types. Bricks become sorted by size (1×2, 1×4, 2×2, 2×4, etc.). Plates get split by dimensions. Technic gets divided into pins, axles, liftarms, and connectors.
Pass 2 takes 2 to 3 hours per 10 pounds. This is where most people give up. Don’t. The payoff is enormous. After Pass 2, you can find any part in your collection in under 30 seconds.
Pass 3: Refinement
Pass 3 is for color sorting and set identification. Once pieces are sorted by type, look for pattern matches. Did a 2×4 red brick come from a Star Wars set? A Friends set? A Castle set? Pass 3 is optional but valuable for resale buyers.
Skip Pass 3 if you’re sorting for personal use. Time spent on color refinement is better spent building with your freshly organized collection.
Labeling Best Practices That Actually Work
Labeling is the unglamorous part that makes everything else work. I’ve seen beautiful sorting stations collapse into chaos because the labels were missing or unreadable. Here is what actually works.
Every bin needs three things: the category name, a short code, and a color or symbol if you’re using color-coding. Examples: “Bricks / BR” or “Plates / PL” with a small colored dot.
Place labels on the front face of bins facing your seated position. Side labels disappear when bins are stacked. Top labels only work when bins are visible from above. Front is always visible.
Use uppercase letters. Mixed case labels are harder to read at a glance. Use a 14-point font minimum. I use 18-point for main categories and 12-point for subcategories.
Include a category counter on the label. “Bricks (1/2)” means this is the first bin of two for bricks. When you fill both bins, you know you’re overflowing and need to consolidate or expand.
Budget-Friendly Alternatives to Expensive Storage
You don’t need to spend a fortune on storage. My first station used 12 shoebox-size plastic containers from the dollar store. Total cost: 12 dollars. The system worked for two years before I upgraded to Akro-Mils drawers.
For bins, dollar store plastic containers, takeout containers, and empty yogurt tubs all work. The volume matters more than the brand. Aim for at least 6 containers with lids.
For sorting trays, a baking sheet from a thrift store works as well as a 30 dollar IKEA tray. The wide, flat surface is what matters. Restaurant supply stores carry bus tubs at restaurant supply prices, which are often cheaper than retail.
Skip the label maker initially. Painter’s tape and a Sharpie cost under 5 dollars total. Upgrade later when you’ve proven the system works for you. Most people abandon systems because they over-invested upfront.
Maintaining Your Sorting Station Long-Term
A sorting station is a living system. It needs maintenance. I do a daily 5-minute reset, a weekly 30-minute sort, and a monthly deep clean. That’s what keeps the station functional for years.
The daily reset is simple. Return all bins to their labeled positions. Wipe down the sort tray. Empty any overflow into the correct bin. Five minutes, every session, no exceptions.
The weekly 30-minute sort processes new acquisitions. Anything that came in during the week gets sorted before it stacks up. Never let unsorted pieces accumulate longer than 7 days.
The monthly deep clean reorganizes your drawers. Move frequently used pieces to the front. Retire any bin system that isn’t working. Expand storage if you’re hitting capacity. I rebuilt my category layout twice last year after running out of room for plates.
When you outgrow your station, expand by adding vertical space. Wall-mounted drawer systems and overhead shelving add capacity without expanding your floor footprint. Most apartments can support a 4-foot by 4-foot vertical storage wall.
Frequently Asked Questions
How do I sort LEGO for resale?
Sort by type first, then by color within each type. Use matching part numbers and condition standards. Label every bag with the exact part number, color name, and quantity. Store in Ziploc bags or small bins organized by category. Most BrickLink sellers use this exact workflow for prepping bulk lots.
What is the LEGO 5-2 rule?
The LEGO 5-2 rule states that your primary sort bins should hold at least 5 pounds of pieces, and your intake area should hold no more than 2 pounds of unsorted material at any time. This sizing guideline keeps your workspace efficient and prevents pieces from getting lost in unsorted piles.
How do I organize large amounts of LEGO?
Start with a dedicated sorting station and 6 main category bins: bricks, plates, tiles, slopes, Technic, and SNOT/other. Sort by type first, color second. Label every container clearly. Process bulk lots in 5 to 10 pound batches to avoid overwhelm. Maintain daily 5-minute resets to keep the system functional.
How do I build a LEGO sorter?
Build a sorting station by first clearing a 6×4 foot workspace, then positioning 6 large category bins within arm’s reach. Set up a sorting tray as your active work surface and designate an intake area for unsorted pieces. Label everything before you start. Test the workflow with a 1-pound sample pile before committing to a full bulk lot.
How long does it take to sort a bulk LEGO lot?
A 10-pound bulk lot takes approximately 3 to 4 hours to fully sort using a two-pass system. Pass 1 (quick sort by type) takes 1 hour. Pass 2 (detailed sort by part type) takes 2 to 3 hours. Add another 1 to 2 hours for color sorting if needed for resale. Most sorters get 85% of pieces fully organized before fatigue sets in.
Final Thoughts on Building Your LEGO Sorting Station
Setting up a LEGO sorting station for bulk second-hand lots comes down to three core decisions: define your workspace, commit to type-first sorting, and label everything from day one. Forget perfection. Forget color coordination. Get six bins and start.
I rebuilt my station three times before it stuck. The first attempt failed because I bought too many containers. The second failed because I sorted by color. The third worked because I kept it simple and followed the type-first philosophy.
Your first sorting station will not be perfect. Build it anyway. Use it for 30 days. Then rebuild based on what you actually needed. The system that works for you is the one you keep using.