
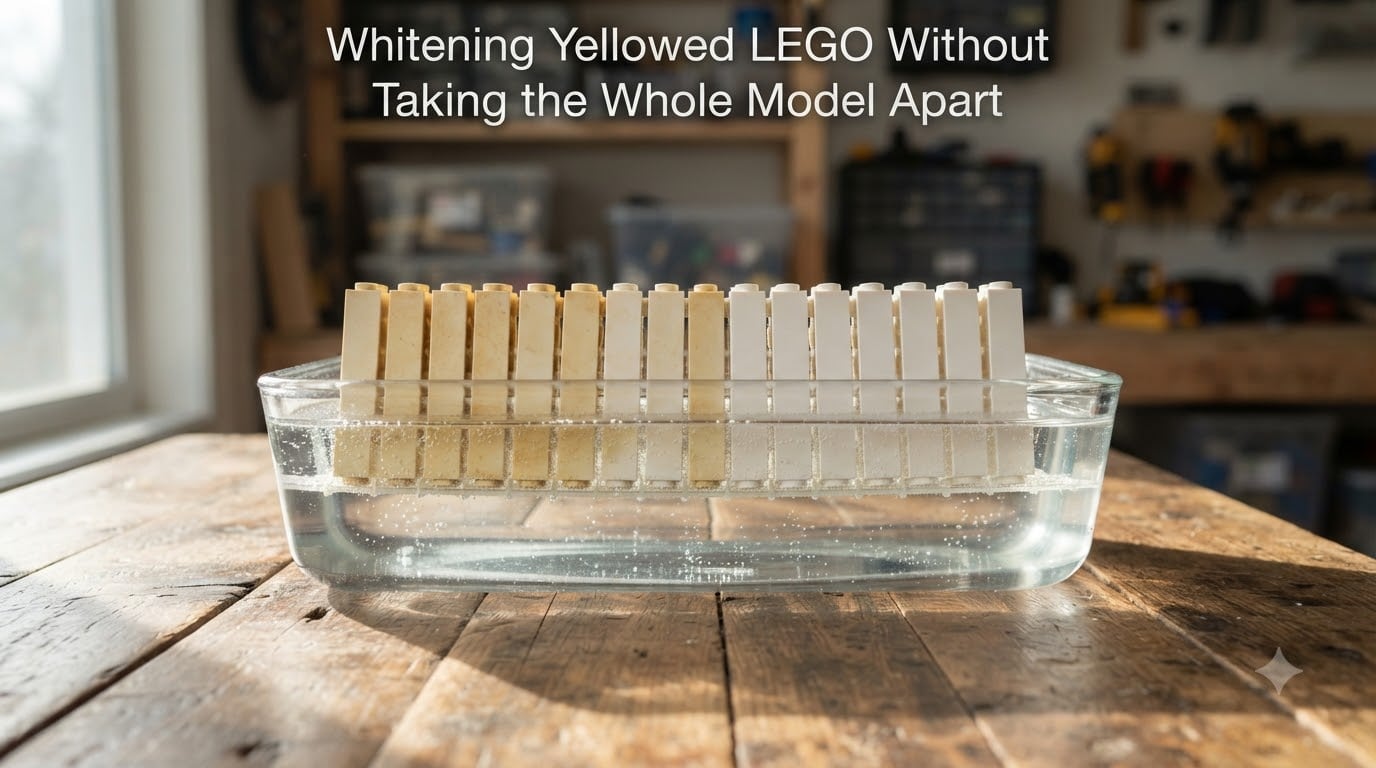
If you have ever pulled a favorite LEGO set out of storage and noticed the once-white bricks now look like old newspaper, you are not alone. Whitening yellowed LEGO without taking the whole model apart is something thousands of collectors ask about every year. The good news is that there is a proven, accessible method using hydrogen peroxide and sunlight that can reverse the yellowing process. Even better, with a little planning, you can treat fully assembled models without prying every brick apart.
In this guide, I will walk you through exactly why LEGO bricks yellow in the first place, the supplies you need, and a step-by-step process for treating assembled displays. I will also cover safety precautions, alternative methods using UV lamps, realistic expectations for how long the results last, and how to prevent future yellowing. By the end, you will have everything you need to bring your faded collection back to life.
Table of Contents
Why LEGO Bricks Yellow
White LEGO bricks turn yellow because of a chemical reaction inside the plastic itself, not because of surface dirt or grime. LEGO bricks are made from ABS (acrylonitrile butadiene styrene) plastic, which contains flame-retardant additives and stabilizing agents. When these additives are exposed to ultraviolet light from the sun or fluorescent bulbs, they break down and release free radicals.
Those free radicals cause a process called photo-oxidation. The bonds in the plastic shift, and the result is a visible yellow or brownish tint that penetrates below the surface. This is why scrubbing or washing yellowed bricks does nothing — the discoloration is baked into the molecular structure of the plastic.
Heat and humidity speed up the reaction. A model displayed on a sunny windowsill can show noticeable yellowing in just a few months, while the same set stored in a cool, dark closet may stay bright for years. Light gray, white, and light blue pieces yellow the fastest because the discoloration is most visible against those lighter base colors.
One important detail: this yellowing is reversible. The same UV light that caused the damage can, when paired with hydrogen peroxide, trigger a reverse reaction that breaks the yellow compounds back down. That is the core idea behind the method below.
What You Need to Whiten Yellowed LEGO
The supply list is short and affordable. Here is what I recommend gathering before you start:
Hydrogen peroxide (3% or stronger): Standard 3% pharmacy hydrogen peroxide works for light yellowing. For heavy, years-old discoloration, many collectors use 12% liquid developer (sold at beauty supply stores) or higher concentrations. Stronger peroxide works faster but requires more careful handling.
A clear container: A glass jar, clear plastic tub, or ziplock bag large enough to hold your model or the yellowed sections. The container must be transparent so UV light passes through.
Direct sunlight or a UV lamp: Sunlight is free and reliable. A UV LED lamp (365nm to 395nm) works as an alternative for cloudy days or indoor setups.
Gloves and eye protection: Nitrile gloves and safety glasses are non-negotiable when handling peroxide above 3%.
A soft brush and clean water: For pre-cleaning any dirt or oils off the bricks before treatment.
Optional — a UV-filtering clear coat or display case: For the prevention step covered later in this guide.
Whitening Yellowed LEGO Without Taking the Whole Model Apart: Step-by-Step
This is the core of what most collectors struggle with. Traditional guides tell you to soak individual bricks, but that means dismantling your build. Here is how I approach whitening yellowed LEGO without taking the whole model apart.
Step 1: Clean the Model First
Dust, fingerprints, and oils create a barrier between the peroxide and the plastic. Use a soft brush and a small amount of mild soapy water to gently clean the yellowed surfaces. Let the model dry completely before moving on.
Step 2: Choose Your Peroxide Concentration
For light yellowing, standard 3% hydrogen peroxide is enough. For moderate to severe discoloration, 6% to 12% gives noticeably better results in a single session. Forum users who have treated large collections consistently report that 3% works but takes longer, often requiring multiple sessions for stubborn areas.
Step 3: Submerge or Apply the Peroxide
If your assembled model is small enough, submerge the entire yellowed section in peroxide inside a clear container. For larger models that will not fit in a tub, soak strips of paper towel or a clean cloth in peroxide and drape them over the yellowed areas. Keep the surface wet by reapplying every 30 to 60 minutes.
Step 4: Expose to Sunlight or UV
Place the container or model in direct sunlight. The UV triggers the chemical reaction between the peroxide and the discolored plastic. Most treatments need 2 to 6 hours of direct sun exposure. Forum experiences suggest that 4 to 6 hours produces better, more consistent results than the commonly recommended 2-hour minimum.
Step 5: Check Progress Every Hour
Lift the model out or peel back the cloth and check the color. White bricks should gradually return to their original bright shade. Check especially carefully if you are treating printed pieces or stickers, since prolonged exposure can occasionally fade certain inks.
Step 6: Rinse and Dry
Once the yellowing has faded to your satisfaction, rinse the model thoroughly with clean water to remove all peroxide residue. Let it air dry completely before displaying it again. Residual peroxide left on the plastic can cause uneven re-yellowing later.
Treating Fully Assembled Models Without Disassembly
The assembled-model approach is the angle most guides skip entirely, and it is the reason you are probably reading this. The key challenge is getting peroxide to stay in contact with the plastic surfaces of a model you cannot submerge.
For small to medium assembled models, the drape method works well. Soak paper towels in peroxide and lay them over the yellowed sections, then place the whole model in a clear tub or under a UV lamp. Keep a spray bottle of peroxide handy to mist the towels every 30 minutes so they never dry out.
For large models like the Millennium Falcon or a full Winter Village layout, work in sections. Treat one side at a time using the drape method, rotating the model every few hours. This prevents the peroxide from pooling in internal cavities where it cannot evaporate properly.
Avoid submerging models that contain electronic components, stickers you want to preserve, or rubber tires. If your model has stickers, test a small hidden area first. Most printed LEGO designs survive peroxide treatment well, but adhesive-backed decals can occasionally lift at the edges after extended soaking.
One tip from collectors who have done this dozens of times: prop the model at an angle so excess peroxide drains away from internal gaps. Standing water inside a sealed assembly can take days to fully dry and may cause the peroxide to weaken internal clutch adhesion over time.
Safety Precautions
Hydrogen peroxide at 3% is mild, but concentrations above that warrant real caution. Always wear nitrile gloves when handling 6% peroxide or stronger. Eye protection is essential because splashes from stronger concentrations can cause irritation and corneal damage.
Work in a ventilated area. Concentrated peroxide releases oxygen aggressively when exposed to light, and the fumes can irritate your throat and lungs in enclosed spaces. An outdoor table or a garage with the door open is ideal.
Keep peroxide away from children and pets. Even 3% solution can cause gastrointestinal issues if swallowed, and stronger concentrations are corrosive to skin.
Watch for over-bleaching. Forum users consistently warn that leaving white plates in peroxide for days (rather than hours) can turn them a chalky, unnatural white that looks worse than the original yellowing. Set a timer and check progress regularly rather than leaving the model out overnight.
Alternative Methods to Sunlight
Sunlight is the classic catalyst, but it is not your only option. A UV LED lamp in the 365nm to 395nm range can drive the same reaction indoors. This is especially useful during winter months or in cloudy climates where reliable direct sun is hard to get.
UV lamps give you more control over exposure intensity and duration, which helps avoid over-bleaching. The tradeoff is that most consumer UV lamps cover a smaller area than the sun, so treating large models takes longer or requires repositioning the lamp multiple times.
Some collectors use UV nail curing lamps for small pieces, with good results. For larger models, clamp-style UV work lights positioned 12 to 18 inches from the surface work well. Expect treatment times of 4 to 8 hours under artificial UV, comparable to sun exposure.
Avoid chlorine bleach entirely. Bleach does not reverse the oxidation the way peroxide does, and it can permanently damage and weaken ABS plastic. The hydrogen peroxide method works specifically because the peroxide-UV reaction targets the yellow compounds without breaking down the structural bonds in the plastic.
How to Prevent Future Yellowing
This is the section most guides leave out, and it is the one collectors ask about most. The reality is that treated bricks will eventually re-yellow, so prevention matters as much as the treatment itself.
Display cases with UV-filtering acrylic are the single most effective preventive measure. These cases block the UV wavelengths that trigger the oxidation reaction, letting you display models in bright rooms without degradation. They are an investment, but they protect both treated and untreated bricks.
If full display cases are not in your budget, apply a UV-filtering window film to nearby windows. This costs a fraction of custom cases and cuts the UV reaching your display by over 95%.
Store unused sets and spare bricks in opaque bins away from light. Even indirect sunlight through a window causes slow yellowing over months and years. Cool, dark storage is the gold standard for long-term preservation.
Avoid fluorescent lighting near your displays. Fluorescent tubes emit UV, and models displayed under office-style fluorescent fixtures yellow almost as fast as those in direct sun. LED bulbs emit negligible UV and are the safer choice for display lighting.
Realistic Expectations: How Long Do Results Last?
This is where I have to be honest with you based on what collectors report in forums. The treatment is not permanent. Multiple users with large collections report that yellowing returns within months, sometimes worse than before. One collector who treated over 100 kilograms of bricks noted that discoloration came back even in dark storage, suggesting the underlying plastic degradation continues regardless of light exposure.
Treat the peroxide method as maintenance rather than a one-time fix. Most collectors find that annual or semi-annual touch-ups keep white pieces looking bright. Combining treatment with UV-filtering display cases significantly extends the time between sessions.
How to remove yellowish from LEGO?
Submerge the yellowed pieces in hydrogen peroxide (3% or stronger) and place them in direct sunlight for 2 to 6 hours. The UV light triggers a reaction that breaks down the yellow compounds in the plastic. Rinse with clean water afterward. For assembled models, soak paper towels in peroxide and drape them over yellowed sections, keeping the surface wet.
Does hydrogen peroxide damage LEGO?
At 3% concentration, hydrogen peroxide is safe for LEGO bricks and does not damage the plastic when used for a few hours. Higher concentrations (6% to 12%) work faster but require gloves and eye protection. Over-bleaching by leaving pieces in peroxide for days can cause a chalky, unnatural white appearance. Most printed designs and stickers survive treatment, but test a hidden area first.
Why do white legos turn yellow?
White LEGO bricks turn yellow due to photo-oxidation. UV light from the sun or fluorescent bulbs breaks down flame-retardant additives in the ABS plastic, releasing free radicals that cause a yellow discoloration below the surface. Heat and humidity accelerate the process. The yellowing penetrates the molecular structure, which is why washing alone cannot remove it.
How long does retrobright last on LEGO?
Results are temporary. Forum collectors report that yellowing typically returns within a few months to a year after treatment, sometimes worse than before. Storing treated bricks in UV-filtering display cases or dark, cool storage extends the results. Most collectors treat the method as ongoing maintenance rather than a permanent fix.
Conclusion
Whitening yellowed LEGO without taking the whole model apart is absolutely possible with the hydrogen peroxide and UV method. The drape technique lets you treat assembled displays in sections, so you can restore a faded collection without dismantling your favorite builds. Combine the treatment with UV-filtering display cases and proper storage to keep results looking fresh for as long as possible.
Remember that this is an ongoing process, not a permanent cure. Set realistic expectations, check progress hourly to avoid over-bleaching, and always use gloves with stronger peroxide concentrations. Your collection deserves to look its best, and now you have the knowledge to make that happen.