
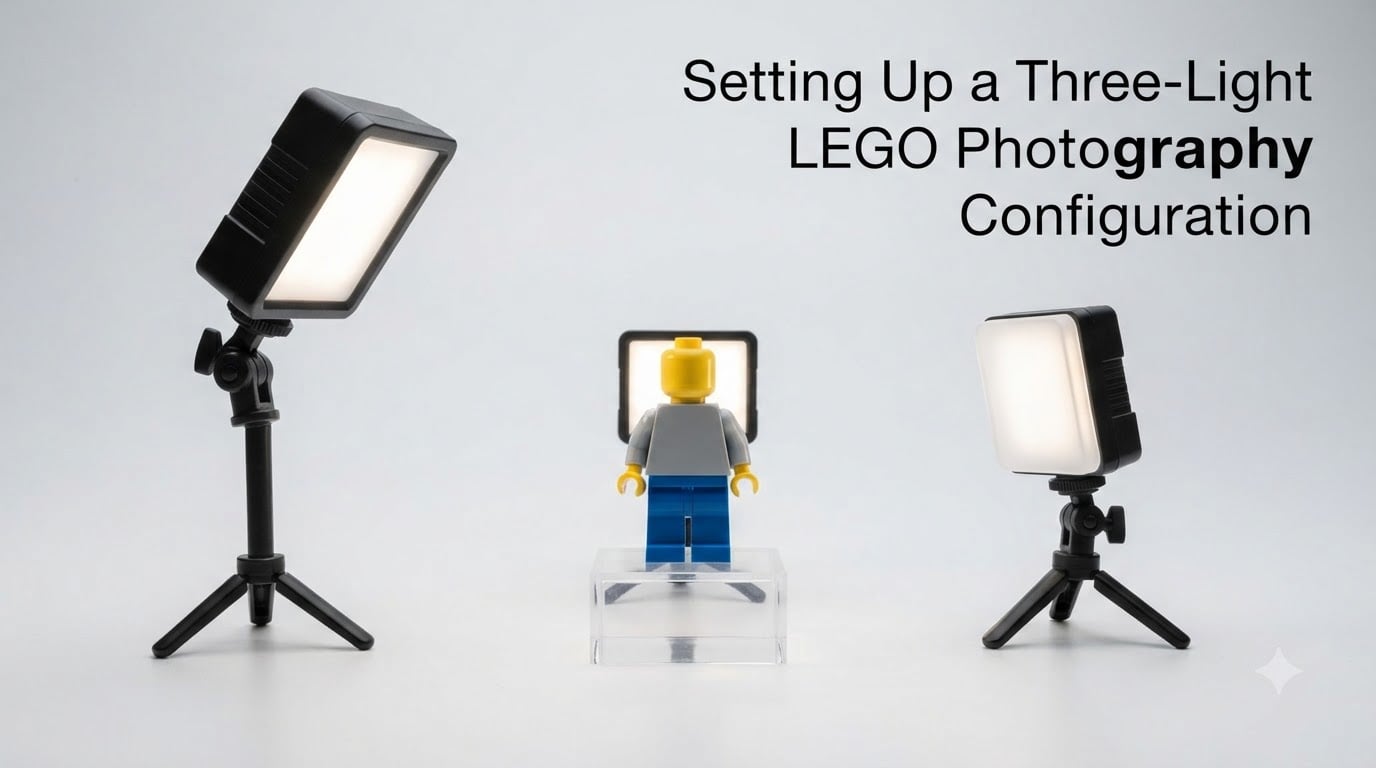
A three-light LEGO photography configuration is one of the fastest ways I know to turn a snapshot of a minifigure into a portrait that actually looks like art. After six months of trial and error shooting my own castle MOCs, I landed on a repeatable three-light setup that I now use for nearly every LEGO photo I publish.
In this guide, I will walk you through the exact three-light LEGO photography configuration I teach to newcomers in our community. You will learn what each light does, where to place it, how to tune the ratios, and which camera settings give you the cleanest results. I have included forum-tested tips from the r/lego and r/AFOL communities, so you skip the painful parts of the learning curve.
Table of Contents
What Is a Three-Light LEGO Photography Configuration
A three-light LEGO photography configuration uses three separate light sources placed around your subject to shape the photo on purpose. The setup borrows from classic cinematography: a key light, a fill light, and a backlight (also called a rim or hair light).
Each light has a single job. The key light is the brightest and establishes the direction of the light, the way the sun does on a sunny day. The fill light softens the shadows the key light casts on the opposite side. The backlight creates separation between the LEGO model and the background, giving the eye a reason to lock onto the subject.
LEGO plastic is glossy, geometric, and often colorful. That is why the three-light approach works so well. A single overhead bulb creates harsh reflections and hard shadows across the studs. A controlled three-light LEGO photography configuration gives you smooth gradients, controlled highlights, and just enough separation to make the model look like it is sitting inside the scene instead of glued to a flat background.
Why Three Lights Beat a Single Light for LEGO Photos
When I started photographing LEGO sets in 2026, I used one desk lamp and one piece of white cardboard. The results looked flat. Every stud on a brick caught the same harsh highlight, and minifigures had dead black shadows under their noses.
The biggest complaint I see in the r/legocastles and r/lego forums is photos that look too dark indoors. Members report that electric overhead lights produce “black shadows” across minifigures, and that no single source gives them enough control. That feedback pushed me toward a three-light LEGO photography configuration because it directly addresses both problems.
Three lights give you three independent dials to turn. You can raise the key light, lower the fill light, and slide the backlight behind the subject without touching anything else. A single light forces every adjustment to fight the last one, which is why single-light photos often look either blown out or muddy.
Gear You Need for a Three-Light LEGO Setup
You do not need a studio budget for a working three-light LEGO photography configuration. Here is the gear I currently use and recommend for beginners.
Three LED panels. Two daylight-balanced panels around 12 watts each handle key and fill. A smaller, dimmable panel works as the backlight. Continuous LEDs let you see the lighting effect in real time, which is critical when you are still learning ratios.
Three light stands or clamps. Mini desk clamps work for tabletop shots of minifigures. Full-size stands are better once you start photographing sets with multiple vehicles or buildings.
A backdrop. A roll of white, gray, or black posterboard from a craft store is enough. Vinyl backdrop rolls are easier to clean and last longer if you photograph LEGO frequently.
A tripod. You will be stopping the lens down and lowering the ISO to keep noise off the brick. A tripod locks your composition so you can tweak the lights between shots.
Diffusion material. A roll of white trace paper, a sheet of frosted acrylic, or a small tabletop softbox. Diffusion is what turns hard LEDs into the soft wraparound light that makes LEGO look premium.
Step-by-Step Three-Light LEGO Photography Configuration
This is the exact sequence I follow whenever I set up a three-light LEGO photography configuration. Each step builds on the previous one, so resist the urge to skip ahead.
Step 1: Position the Key Light
Place the key light about 45 degrees to the left or right of your LEGO model and roughly 30 degrees above it. The exact angle depends on the scene. For dramatic minifigure shots I push the key light closer to 30 degrees. For wider castle shots I bring it closer to 45 degrees to spread the highlights.
The key light should be the brightest of the three. I usually set mine to 100 percent power and treat every other light as a fraction of that. If your panels do not have adjustable power, move the light closer or farther from the subject instead.
Step 2: Add the Fill Light
Put the fill light on the opposite side of your LEGO model at the same height as the key light. The fill light’s job is to lift the shadows without killing the shape the key light is creating.
A good starting ratio is 2:1, meaning the fill light is half as bright as the key. So if the key is at 100 percent power, drop the fill to 50 percent. This keeps a clean shadow side on the model without crushing detail into pure black.
Step 3: Place the Backlight
Slide the backlight behind the LEGO model and aim it toward the back of the subject, not into the camera lens. The backlight should graze the shoulders, helmet, or hair of the minifigure to create a thin rim of brightness along the edge.
A common mistake is to point the backlight straight at the rear of the model. Instead, angle it so the beam spills around the silhouette. For LEGO minifigures, I aim the backlight slightly higher than the figure’s head so it catches the top of the helmet or hat.
Step 4: Tweak the Ratios
Take a test shot and study the histogram on your camera. If the shadow side of the model is too dark, raise the fill light. If the rim is too hot, lower the backlight or move it further behind the subject.
Most three-light LEGO photography configurations benefit from a key-to-fill ratio between 2:1 and 4:1, and a backlight at roughly half the power of the fill. These are not hard rules. Treat them as a starting point and adjust to taste.
Diffusion Techniques That Make LEGO Photos Pop
Diffusion is the secret weapon of any three-light LEGO photography configuration. Bare LEDs produce harsh hotspots on glossy LEGO elements, especially transparent pieces, headlamps, and chrome accessories.
For small subjects, a tabletop softbox or a sheet of white trace paper taped in front of the panel is enough. I prefer trace paper because it is cheap, easy to replace, and produces beautifully soft light. Softboxes are sturdier and give you more control over spill, but they cost more.
If you want to take things further, slip a layer of white fabric or parchment paper between the LED and the subject. This converts a sharp point source into a broad source, which wraps around the LEGO model and reduces visible seams on each brick. Diffused light also cuts down on the colored fringes you sometimes see when light hits transparent LEGO elements at the wrong angle.
Camera Settings for Three-Light LEGO Photography
Once your three-light LEGO photography configuration is dialed in, the camera settings become easier. I start with these baselines and adjust based on the subject.
Aperture: f/8 for full LEGO sets and f/5.6 for minifigures. Stopping down keeps the front and back of the model acceptably sharp. For interior shots of LEGO buildings where you want every room in focus, try f/11.
ISO: 100 or 200. Because you control the lights, you do not need a high ISO. Keep it low to keep the brick textures clean and noise-free.
Shutter speed: 1/125 second or longer. Since you are using continuous LEDs and a tripod, you do not need fast shutter speeds. Anything from 1/30 to 1/125 works fine.
White balance: Set it manually to around 5500K if your LEDs are daylight balanced. Auto white balance tends to drift as you change the light ratios, which can tint your LEGO photos green or orange.
Lens: A macro lens is helpful for close-ups of minifigures and LEGO interiors. A 50mm or 35mm prime works well for wider shots of full sets. Telephoto lenses flatten the perspective, which can actually help when you want a clean, portrait-style look.
Common Mistakes to Avoid in a Three-Light LEGO Setup
Even with a solid three-light LEGO photography configuration, a few small mistakes can ruin an otherwise great shot. Watch out for these issues I see most often.
Letting the backlight hit the lens. If you see a green or red haze in your photo, the backlight is leaking into the lens. Move the light slightly off-axis or add a flag (a piece of black cardboard) to block the spill.
Ignoring reflections. Glossy and transparent LEGO pieces act like mirrors. Walk around the model before shooting and look for stray reflections on each face. Adjust the light angles until the reflections fall in a pleasing direction, usually toward the front of the model.
Skipping white balance calibration. Mixing three LEDs that look identical to the eye can produce odd color casts. Shoot a gray card once at the start of every session and lock the white balance from that reference.
Overpowering the backlight. A rim light that is too bright turns the back of the model into a glowing outline. If you cannot see facial details on a minifigure because the rim is too strong, dial it back to roughly a quarter of the key light’s power.
Shooting too high. Most beginners shoot LEGO from above, which makes minifigures look like dolls from a bird’s-eye view. Drop the camera to the minifigure’s eye level and your three-light LEGO photography configuration will look instantly more cinematic.
Frequently Asked Questions
How to setup three-point lighting?
Place the key light 45 degrees to one side and 30 degrees above the LEGO subject. Add the fill light on the opposite side at the same height but at half the brightness. Finish with the backlight behind the subject, angled to graze the edges without spilling into the lens.
What are the 3 photo settings?
The three camera settings that matter most in LEGO photography are aperture, ISO, and shutter speed. Start with f/8, ISO 100, and 1/125 second, then adjust based on the size of your subject and the brightness of your three lights.
What is the 3 lighting rule?
The three lighting rule states that every well-lit scene needs a key light for primary illumination, a fill light to soften shadows, and a backlight to separate the subject from the background. Using all three creates depth, dimension, and visual interest.
What are the three light settings?
The three light settings in a standard configuration are key, fill, and backlight. The key light is the brightest and sets the direction. The fill light softens the shadows. The backlight adds a rim of brightness around the subject to create separation.
Final Thoughts on Your Three-Light LEGO Photography Configuration
A reliable three-light LEGO photography configuration is less about expensive gear and more about understanding what each light is supposed to do. Once you lock in the key, fill, and backlight positions and learn to tune their ratios, your LEGO photos will look noticeably more professional with every shoot.
Start with one subject, repeat the steps above, and adjust the ratios until the photo feels right. Share your results, learn from each shot, and keep refining the setup as you move from minifigures to full MOCs.