
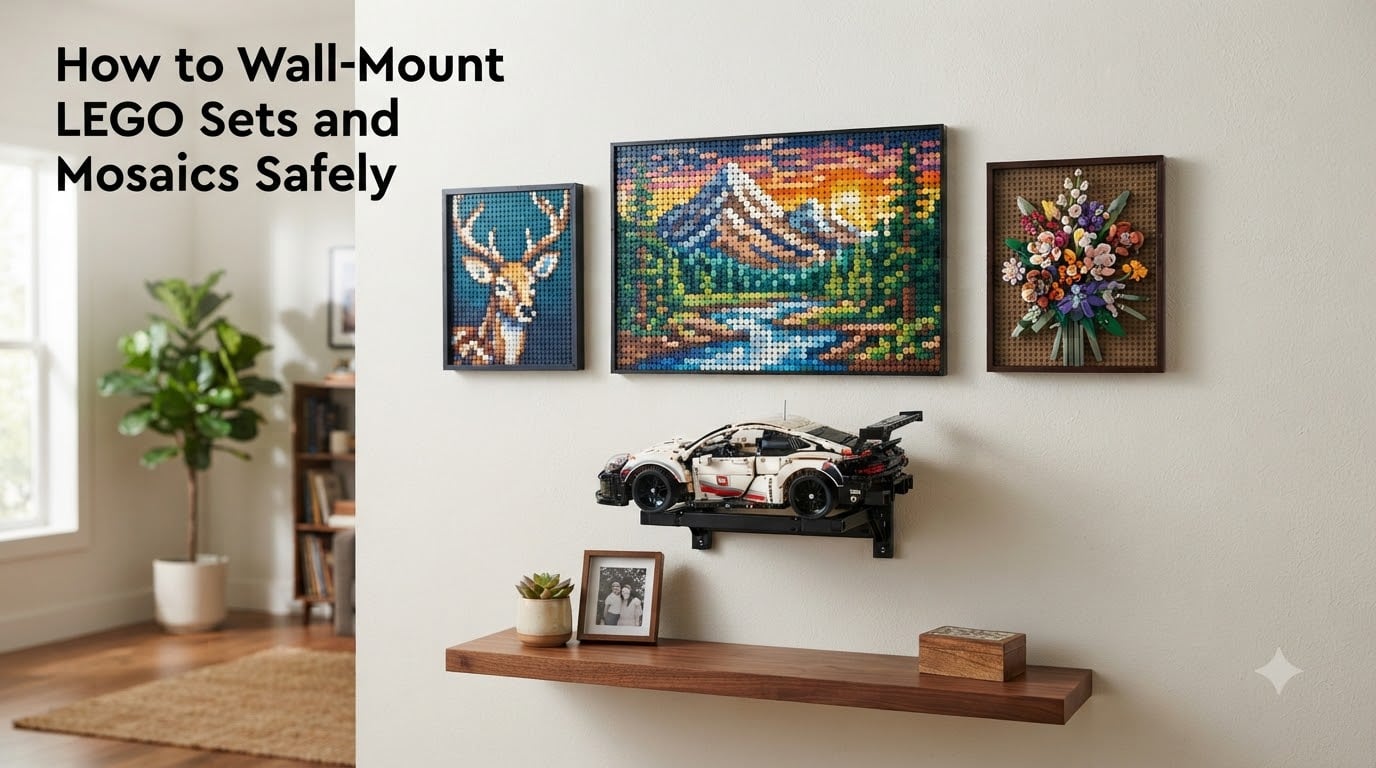
Learning how to wall-mount LEGO sets and mosaics safely changed how I display my entire collection. Instead of cramming builds onto crowded shelves, I turned my favorite LEGO Art pieces and Technic models into actual wall decor. The trick is matching the right mounting method to the weight of your set and the type of wall you have.
In this guide, I will walk you through three proven methods: adhesive strips for renters, screw-in brackets for heavy builds, and shadow box frames for mosaics. Each one solves a different problem, and by the end you will know exactly which approach fits your setup. I have tested these techniques on drywall, plaster, and brick, so the advice comes from real experience, not theory.
Whether you just finished the LEGO Art Milky Way set or want to showcase a mosaic you built yourself, getting the mount right protects your investment. A single dropped build can mean hours of rebuilding. Done correctly, your LEGO displays stay level, secure, and damage-free for years.
Table of Contents
Why Wall-Mount Your LEGO Sets and Mosaics
Wall-mounting frees up valuable shelf space. A single wall can hold five or six display builds that would otherwise eat an entire bookcase, which matters when your collection keeps growing.
It also elevates LEGO from a toy to legitimate art. A framed Great Wave mosaic or a backlit Star Wars ship on the wall reads completely differently than the same set sitting on a desk. Your builds become conversation pieces and centerpieces, not clutter.
Finally, wall displays protect your sets. Anything mounted securely on a wall cannot be knocked off a shelf, bumped by a pet, or grabbed by curious kids. For expensive or hard-to-rebuild sets, that peace of mind is worth the effort of mounting them properly.
Which LEGO Sets Can You Wall-Mount?
Almost any LEGO set can be wall-mounted, but the method you choose depends heavily on weight and shape. Flat, lightweight pieces like LEGO Art mosaics are the easiest candidates because they distribute weight evenly and have a flat back to work with.
LEGO Art sets, including the Milky Way, Great Wave, Hokusai, and Mosaic Maker outputs, are designed with built-in hanging points on the back of their tile base. These typically weigh under 5 pounds and work beautifully with adhesive strips or simple picture hooks.
Three-dimensional builds like Technic cars, Star Wars ships, and architecture models require brackets or shelves because their weight is unevenly distributed. A UCS Millennium Falcon, for example, needs serious structural support, not a Command strip. For these heavier builds, expect to use screw-in brackets rated for at least double the set’s weight.
As a quick reference for weight categories: flat mosaics under 5 pounds can use adhesive strips. Sets between 5 and 10 pounds need wall hooks or brackets anchored into studs. Anything over 10 pounds demands heavy-duty brackets screwed directly into wall studs or masonry anchors.
Three Methods to Wall-Mount LEGO Sets and Mosaics Safely
I have used all three of these methods in my own home, and each has a clear best-use scenario. Here is the quick breakdown before we get into step-by-step instructions.
Adhesive strips (Command Velcro strips, damage-free hooks) are renter-friendly and require zero tools. They work best for flat mosaics and lighter LEGO Art sets under 5 pounds.
Wall brackets and screws are permanent and can hold serious weight. Use these for Technic models, large ships, and any build over 5 pounds that needs mechanical support underneath.
Shadow box frames combine protection with display. They are ideal for mosaics you want to preserve long-term, since the acrylic or glass cover keeps dust and fingerprints off the studs.
There is no single best method. The right choice depends on your wall type, your set’s weight, and whether you rent or own. The sections below cover each method in detail.
Method 1: Command Strips and Adhesive Hooks (No-Drill, Renter-Friendly)
This is the method I recommend most often for LEGO Art sets and mosaics. It requires no drilling, leaves no holes, and comes off cleanly when you move. Reddit users in r/lego consistently report success with Command Velcro strips on LEGO Art pieces.
Step 1: Weigh your set. A standard LEGO Art mosaic weighs around 4 to 5 pounds. Command Velcro strips are rated for about 4 pounds per pair, so plan to use strips on all four corners, not just the top two.
Step 2: Clean the wall and the back of your set. Wipe both surfaces with rubbing alcohol and let them dry completely. Adhesive bonds fail on dusty or oily walls, so do not skip this step.
Step 3: Apply strips to all four corners. Press the hooked sides together, peel the liner, and press firmly against the back of the set. Hold for 30 seconds per strip.
Step 4: Mount to the wall. Peel the wall-side liners, position your set, and press hard against the wall for 30 seconds. Remove the set, wait one hour for the adhesive to cure, then reattach.
Step 5: Wait 24 hours before trusting the bond fully. The adhesive reaches full strength after a day. I learned this the hard way when an early mount slipped because I hung a piece immediately.
One note from my testing: avoid the smaller Command picture-hanging strips for LEGO Art. They are rated for only half a pound each. Stick with the larger Velcro strips, which hold significantly more and grip better on textured surfaces.
Method 2: Wall Brackets and Screws (Permanent, Secure)
For heavier builds like Technic cars, Star Wars ships, and large architecture models, brackets are the only safe option. These screw directly into wall studs or use drywall anchors to provide mechanical support that adhesive cannot match.
Step 1: Find your wall studs. Use a stud finder to locate the wooden framing behind your drywall. Brackets anchored only into drywall will pull out under weight, so hitting at least one stud is non-negotiable for sets over 5 pounds.
Step 2: Mark your bracket positions. Hold the bracket against the wall at your desired height and mark the screw holes with a pencil. Use a level to ensure multiple brackets sit perfectly horizontal.
Step 3: Drill pilot holes. Drill into the marked spots, going slightly smaller than your screw diameter. If you hit a stud, drill about an inch deep. If you are using drywall anchors, drill to the anchor’s specified depth.
Step 4: Install anchors if needed. Tap plastic or metal anchors into the holes for any screws not hitting a stud. Toggle bolts work well for heavier loads in hollow drywall.
Step 5: Screw in the brackets. Drive the screws through the bracket holes and into the wall. Test the bracket by pushing down firmly before placing your LEGO set on it.
Step 6: Place your set and secure it. Set your build on the bracket. For extra security, use a small piece of adhesive putty or a Velcro strip between the set and the bracket to prevent shifting from vibrations or accidental bumps.
Drywall screws give noticeably better grip than nails, as several LEGO enthusiasts on forums have pointed out. I use coarse-thread drywall screws that are 1.5 to 2 inches long for stud-mounted brackets.
Method 3: Shadow Box Framing (Protective Display)
Shadow box framing is the premium option for LEGO mosaics. A deep frame with a glass or acrylic cover turns your mosaic into a genuine art piece while protecting the studs from dust, sunlight, and curious fingers.
Step 1: Choose the right frame depth. LEGO mosaics with standard tile bases need a frame at least 1.25 inches deep. Measure your build including any baseplate or backing before buying.
Step 2: Build a backing board. Cut a piece of MDF or sturdy foam core to fit the frame snugly. This gives your mosaic a solid surface to attach to and keeps it from shifting inside the frame.
Step 3: Attach the mosaic to the backing. Use strong double-sided adhesive or carefully screw the mosaic’s hanging points to the board. The goal is a flush, secure mount with no movement.
Step 4: Add a protective cover. Acrylic is lighter and safer than glass, and it does not shatter if the frame falls. The trade-off is that acrylic scratches more easily, so clean it with microfiber only. Non-reflective glass is another option if glare bothers you, as Eurobricks forum users have discussed.
Step 5: Mount the frame to the wall. Use standard picture-hanging hardware rated for the total weight of frame plus mosaic. Heavy shadow boxes should hang from two points spread across at least one stud.
I framed my Great Wave mosaic this way and the difference is striking. The cover keeps the studs pristine, and the frame makes it read like a real piece of art rather than a plastic panel on the wall.
How to Wall-Mount LEGO Sets and Mosaics Safely: Universal Checklist
Regardless of which method you choose, follow this checklist every time you mount a LEGO build.
1. Weigh your set. Use a kitchen or luggage scale. Knowing the exact weight determines which method is even an option.
2. Identify your wall type. Drywall, plaster, brick, and concrete all need different hardware. Drywall is most common in newer homes. Plaster is common in older homes and is harder to drill but holds anchors well.
3. Find studs for anything heavy. A stud finder is a cheap tool that prevents expensive mistakes. Mark stud locations with painter’s tape before you start drilling.
4. Use the right hardware. Match your screws, anchors, or strips to your wall type and set weight. When in doubt, overbuild. A bracket rated for twice your set’s weight adds negligible cost.
5. Check level before finalizing. A crooked LEGO display drives you crazy every time you look at it. Use a small bubble level on the set itself, not just the bracket.
6. Test the mount before walking away. Press down on the mounted set gently. If anything flexes, shifts, or feels loose, redo it now rather than after a fall.
Safety Considerations: Weight, Wall Type, and Load Capacity
Weight is the single biggest factor in choosing a safe mounting method. LEGO Art mosaics average 4 to 5 pounds. Mid-size builds like the Millennium Falcon or large architecture models can hit 10 to 15 pounds. Massive sets like the UCS Star Destroyer weigh over 30 pounds and should only go on dedicated wall shelves anchored into multiple studs.
Your wall type changes everything about installation. Drywall is soft and easy to drill but holds almost no weight without anchors or studs. Plaster is brittle and prone to cracking, so drill slowly and use anchors designed for plaster. Brick and concrete need masonry bits and expansion anchors.
Adhesive strength matters for the no-drill route. Command strips list weight ratings on the package, and those ratings assume ideal conditions: clean, smooth, room-temperature surfaces. Textured walls, humidity, and extreme temperatures all reduce holding power. If your wall is rough or painted with a satin finish, plan to use more strips than the minimum.
One more safety tip from my own experience: never mount directly above a bed, crib, or seating area. Even a secure mount can fail eventually, and a 5-pound LEGO mosaic falling on someone is a real hazard. Choose display walls in hallways, stairwells, and areas where nobody sits underneath.
Common Mistakes to Avoid
Using too few adhesive strips. Two strips on the top corners of a 5-pound mosaic is asking for trouble. Use four corners minimum, and add more for heavier pieces.
Skipping the stud finder. Drywall alone cannot hold significant weight. Brackets anchored only into drywall will pull out, sometimes taking a chunk of wall with them.
Not letting adhesive cure. Hanging a piece immediately after applying strips is the most common cause of failures. Wait at least an hour, ideally 24 hours.
Ignoring weight ratings. Every strip, hook, and bracket has a published weight limit. Treat those limits as ceilings, not targets.
Mounting on freshly painted walls. Paint needs 7 to 14 days to fully cure before adhesives will bond properly. Mounting on tacky paint leads to peeling and failed mounts.
Display Ideas and Inspiration
A gallery wall of LEGO Art mosaics makes a stunning centerpiece. I arranged four mosaics in a grid with consistent spacing, and the effect transforms an empty hallway into a dedicated art space. Use painter’s tape to map out positions on the wall before committing to any holes.
LED lighting takes wall displays to another level. Low-heat LED strip lights mounted above or behind your builds add depth and make the colors pop. Avoid halogen or incandescent lights, which generate heat that can warp bricks over time.
For collectors who like to rotate displays, consider swappable mounts. Brackets with quick-release mechanisms let you swap builds seasonally without redrilling. This works especially well for Speed Champions cars and smaller display pieces.
Some builders take framing further by constructing actual LEGO brick frames around their mosaics. This creates a seamless all-LEGO display that looks incredible and needs no separate picture frame. It takes planning and extra bricks, but the results are unique.
How to Remove LEGO Mounts Without Wall Damage
Removing Command strips without damage is straightforward. Pull the tab straight down, slowly and parallel to the wall, until the entire strip releases. Never pull toward you, which tears the paint. If a strip resists, warm it with a hairdryer for 30 seconds to soften the adhesive.
For screw-mounted brackets, removing the hardware is easy but leaves small holes. Fill them with spackle, smooth with a putty knife, let dry, and touch up with matching paint. Most holes from anchor screws disappear completely after a proper patch job.
FAQs
How do you display LEGO mosaics?
The best ways to display LEGO mosaics are wall-mounting with Command Velcro strips for a renter-friendly option, screwing into wall studs with brackets for heavier pieces, or framing in a shadow box with an acrylic cover for long-term protection. LEGO Art sets have built-in hanging points on the back designed specifically for wall display.
How to hang LEGO art on a wall without nails?
Use Command Velcro strips on all four corners of your LEGO Art set. Clean the wall and set back with rubbing alcohol, apply strips to each corner, press firmly for 30 seconds, mount to the wall, then wait 24 hours for full adhesive strength. Each pair of large Velcro strips holds about 4 pounds, so a typical LEGO Art mosaic needs strips on all four corners.
How to hang LEGO paintings on the wall?
LEGO Art paintings and mosaics have built-in hanging points molded into the back panel. For lightweight sets, use two Ooks picture hooks spaced to match the hangers and use a level to position them. For heavier builds, locate wall studs with a stud finder and screw brackets directly into the studs for maximum support.
What is the 5/2 rule in LEGO?
The 5/2 rule in LEGO refers to a building technique for SNOT (Studs Not On Top) construction, where a brick and two plates stacked together equal the height of two bricks laid sideways. This ratio lets builders create seamless sideways connections and is unrelated to wall mounting.
Is it safe to wall mount LEGO sets?
Yes, wall-mounting LEGO sets is safe when you match the mounting method to the set weight and wall type. Mosaics under 5 pounds work with adhesive strips. Heavier builds need brackets screwed into wall studs. Always use hardware rated for at least double your set’s weight and never mount directly above beds or seating areas.
Conclusion
Knowing how to wall-mount LEGO sets and mosaics safely comes down to three things: matching your method to the weight, understanding your wall type, and using hardware rated well above what you actually need. Adhesive strips handle light mosaics beautifully. Brackets into studs are the answer for heavier builds. Shadow boxes protect mosaics for the long haul.
Start by weighing your set and identifying your wall type, then pick the method that fits both. Take your time with prep, let adhesives cure, and always use a level. A well-mounted LEGO display looks intentional and stays secure for years, turning your builds into the art pieces they deserve to be.