
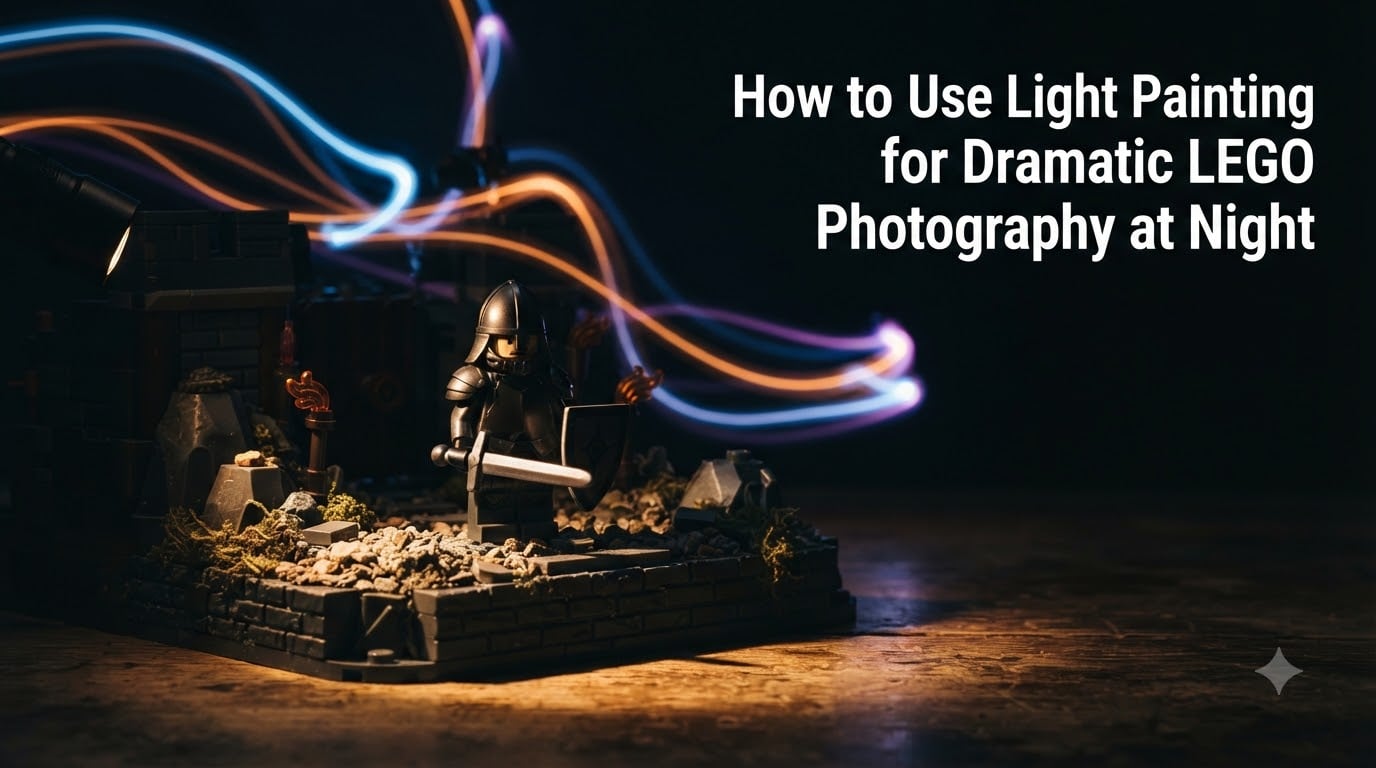
I took my first light-painted LEGO photo three years ago in a dark hallway with a single flashlight and a stack of bricks. The result was a blurry mess, but the streak of light cutting across a minifigure’s face told me everything I needed to know: this technique could turn a plastic toy into a cinematic hero. After hundreds of late-night sessions since, I have learned what works, what fails, and exactly which settings I trust. This guide shares my complete workflow for dramatic LEGO photography light painting at night.
In this article, I will walk you through what light painting is, the gear you actually need, the camera settings that work at minifigure scale, and the step-by-step technique I use on every shoot. I will also cover the LEGO-specific challenges most general tutorials skip, plus colour painting, dramatic effects, and common mistakes. By the end, you will have everything you need to start painting light across your own builds tonight.
Table of Contents
What Is Light Painting and Why It Works for LEGO Photography
Light painting is a long-exposure photography technique where you move a handheld light source across a scene while the camera shutter stays open. The camera records the path of every light beam, letting you draw, illuminate, or beam energy into objects that are otherwise sitting in darkness. At LEGO scale, this technique is exceptionally effective because minifigures and small dioramas react beautifully to short bursts of focused light, and the surrounding dark frame makes the painted beams look almost magical.
LEGO photography light painting works for three reasons only, in my experience. First, plastic bricks and minifigures are small, so even a basic flashlight can fully illuminate an entire scene from one side. Second, the smooth ABS plastic of LEGO pieces reflects light cleanly, producing crisp highlights and saturated colour. Third, complete darkness eats backgrounds, so a single beam of light on a minifigure feels like a spotlight in a blockbuster scene.
What makes LEGO photography light painting different from regular light painting is the scale. A full-size light painter working on a landscape uses floods of light. We work on tiny scenes where every inch of light spread matters. The same principles apply, but the precision is much higher, and the difference between a five-inch flashlight beam and a one-inch flashlight beam becomes the difference between a poster and a pixel.
Essential Gear Checklist for Light Painting LEGO Scenes
You can start LEGO photography light painting with surprisingly little gear. I built my first setup using a phone tripod I borrowed from a friend, a mini LED flashlight from a hardware store, and a $20 remote shutter release. Within a year I had upgraded, but the core kit stayed the same. Here is the gear I actually use on every session.
- Tripod: A stable tripod is non-negotiable. Any tripod that holds your camera still for 30 seconds will work. I prefer a short tabletop tripod because most LEGO scenes sit on a desk, not a mountaintop.
- Camera with manual mode: You need full control over ISO, aperture, and shutter speed. A DSLR, mirrorless, or even a smartphone with a manual camera app will work.
- Remote shutter release or self-timer: Pressing the shutter button by hand introduces shake. A remote or a 2-second self-timer eliminates it. Wired remotes cost under $10 and never need charging.
- Small flashlight or LED: The single most important tool. I carry three flashlights: a tight-beam LED for sharp highlights, a wide-angle LED for soft fills, and a UV light for glowing effects on transparent bricks.
- ND filter (optional but powerful): Neutral density filters cut the light entering the lens, allowing much longer exposures in brighter conditions. They are essential for outdoor daytime light painting with LEGO models.
- Colour gels: A cheap pack of theatrical gels costs a few dollars and unlocks every colour in the rainbow. Tape a gel over your flashlight and you instantly have a coloured light source.
- Dark clothing: Wear black long sleeves and dark gloves. Any bright fabric caught in the frame creates a ghosted silhouette during long exposures.
Total entry cost: about $80 if you already own a camera. I have spent more on LEGO sets than on my entire light painting setup, which says a lot about the accessibility of this technique.
Camera Settings for LEGO Photography Light Painting
Camera settings are where most people get stuck. The good news: I have done the trial and error for you, and there are only a handful of settings that matter. Lock these in and you can adjust from there based on your own scene.
Set your camera to Manual Mode first. Auto modes will not work because the camera needs to keep the shutter open for 10 to 30 seconds, and no automatic program will ever let it happen. Manual mode gives you complete control.
Start with these baseline settings for indoor night shots:
- ISO: 100 to 400. ISO 100 is cleanest. Bump to 400 if your scene is too dark or your exposure is too short.
- Aperture: f/8 to f/11. These mid-range apertures give you enough depth of field to keep the whole LEGO scene sharp while avoiding optical softness at the extreme ends.
- Shutter speed: 10 to 30 seconds. Use Bulb mode for anything longer than 30 seconds. Bulb mode holds the shutter open as long as you keep the button pressed or the remote locked.
- Focus: Manual focus. Autofocus hunts in the dark and will fail. Use a flashlight to focus on the minifigure face, then switch to manual focus.
- White balance: Daylight or Tungsten. Daylight is safer if you are mixing flashlights and gels. Shoot RAW for full control later.
- Format: RAW, always. JPEG loses the highlight recovery needed when you mix painted light with ambient dark.
The 500 rule is a useful sanity check for night photography. Divide 500 by your lens focal length to get the maximum shutter speed before stars visibly trail. For a 50mm lens on a full-frame camera, that is 10 seconds. For a 24mm lens, that is roughly 20 seconds. For LEGO scenes, these numbers are usually irrelevant because we are not photographing stars, but the rule reminds you that longer shutter speeds introduce motion blur to anything that moves, including your own hand creeping into frame.
Quick Reference Settings Chart: Indoor vs Outdoor LEGO Scenes
I keep a small reference card in my camera bag for the most common setups. Below is the version I use. Treat these as starting points, then adjust based on your test shot.
| Scene Type | ISO | Aperture | Shutter Speed | ND Filter | Light Source |
|---|---|---|---|---|---|
| Indoor pitch black | 100 | f/8 | 15-30 sec | None | Single LED flashlight |
| Indoor dim room | 200-400 | f/11 | 10-20 sec | None | LED with gel |
| Outdoor dusk | 100 | f/11 | 30 sec – 2 min | ND8 or ND64 | LED with gel |
| Outdoor daylight | 100 | f/16 | 1-4 min | ND1000 | High-power LED |
| Spell/sci-fi effect | 100 | f/8 | 20-30 sec | None | LED chain with gel |
| Lightning effect | 100 | f/8 | 15-25 sec | None | Quick LED flick |
I never use the same exact settings twice. Every scene is different, and the only way to know your exposure is right is to take a test shot, look at the histogram, and adjust. The chart above just saves you from starting cold.
Step-by-Step Light Painting Technique for LEGO Minifigures
Below is the exact workflow I use on every LEGO photography light painting session. I have followed these steps for hundreds of shots, and they work whether I am shooting a single minifigure or a full castle diorama.
- Set up your scene in complete darkness. Choose a room you can black out. Cover windows, turn off all lights, and let your eyes adjust for 30 seconds. The darker the room, the more control you have over the painted light.
- Mount the camera on the tripod and frame the shot. Use a low-power flashlight at this stage to help you compose. The light will not record at your chosen exposure, so do not worry about stray beams during setup.
- Focus manually on the minifigure face. Shine a flashlight directly on the face, half-press the shutter to focus, then switch to manual focus. This locks the focus distance for the rest of the shoot.
- Set your baseline exposure. Use the chart above or start with ISO 100, f/8, 20 seconds. Take a dark test shot and check the histogram. If the image is too dark, lengthen the shutter. If too bright, reduce ISO or shorten the shutter.
- Trigger the shutter with your remote or self-timer. Step away from the camera. Wear dark clothing and dark gloves. Anything bright or reflective will appear in the frame.
- Paint light across the scene. Sweep your flashlight across the LEGO model from different angles. Spend more time on the side you want lit, and finish by raking light across the background bricks for depth.
- Close the shutter. Return to the camera, lock the remote off, and check the result on the LCD. Review the histogram, not just the screen, because the screen lies in the dark.
- Adjust and repeat. Tweak one variable per shot. ISO up for a brighter scene, aperture down for more depth, shutter length for more paint time. After three or four shots you will know exactly what to change.
The first time I ran this sequence, I produced 47 unusable shots and three I was proud of. The ratio has improved dramatically since. The point is that LEGO photography light painting is a numbers game, and the only way to win is to practice.
LEGO-Specific Scale Challenges and How to Solve Them
Generic light painting tutorials assume you are lighting a full room or a landscape. Working at minifigure scale introduces problems that simply do not exist in larger-scale photography. I have hit every one of these, and here is how I solve each.
Light spill is uncontrollable. A flashlight beam aimed at a minifigure also hits the table, the wall, and the camera operator’s hands. The fix is to control the beam. I taped a small cardboard tube over my flashlight to narrow the spread to about one inch. That single change transformed my shots.
Autofocus hunts and fails. Camera autofocus systems need contrast and light to lock on. In a dark LEGO scene, neither exists. Always switch to manual focus after lighting your subject briefly during setup.
Hot pixels appear with ND filters. Long exposures on dark LEGO pieces amplify sensor noise, and tiny bright dots appear in the image. I see this most on black bricks with ND filters pushed past 30 seconds. The fix is to enable in-camera long-exposure noise reduction, or stack and average frames in post-processing.
Your hands enter the frame. This is the most common mistake. You are leaning in to paint light, and suddenly your sleeve is visible in the shot. Wear black, keep your arms away from the camera, and review each shot before moving the setup.
Light painting is inconsistent across multiple shots. Each repaint of a scene produces a slightly different result. Solve this by locking down your tripod, marking your flashlight starting positions, and saving the exposure settings as a custom preset on your camera. Consistency comes from repetition, not from uniqueness.
Colour Painting Techniques with Gels for Dramatic LEGO Shots
Once you have mastered single-colour light painting, colour is the next skill. Coloured gels are translucent coloured films that you tape over your flashlight to change the colour of the beam. A pack of 12 gels costs less than a LEGO minifigure and unlocks thousands of mood combinations.
My favourite colour painting technique is layered light. I paint the main scene with a warm white flashlight for two seconds, then return with a deep blue gel for another two seconds aimed only at the background. The result is a warm foreground minifigure with a cool blue backdrop, similar to a Hollywood colour grade. This single trick separates beginners from intermediate light painters.
For moody scenes, I use red and orange gels to simulate fire, and a cool blue gel for moonlight. Combining red gel on a foreground minifigure with a blue gel on a background castle creates cinematic tension in a single frame. The key is to keep the gel away from the bulb so it does not melt, and use a low-power LED to avoid burning the colour.
When layering multiple colours, underexpose each layer. Two properly lit colour layers will blend into muddy white in the final image. Each layer should contribute only 30-40 percent of the total light, with the final composite built up in post-processing.
Creating Dramatic Effects: Lightning, Spells, and Sci-Fi Blasts
Light painting is the best way to add supernatural effects to LEGO photography. Lightning, magic spells, blaster fire, and explosions are all created by moving a small light source in the right pattern during the exposure. Here is how I create the most common effects.
Lightning effect: Use a small LED flashlight and flick it on and off for half a second, aimed at the side of a castle or building. The result is a sharp, electric crackle of light. Combine two or three flicks at different angles for a more chaotic bolt.
Spell or magic effect: Tape a small piece of cotton wool over the LED to diffuse it into a soft glow. Sweep the light in a circular pattern above a minifigure’s wand. The result looks like a magical aura or spell being cast.
Sci-fi blaster blast: Use a focused LED with a red or blue gel held close to the minifigure’s hand. Move the light in a straight line away from the figure toward the target. The result is a coloured beam of energy that looks like a blaster shot.
Explosion: Rapidly wave a flashlight with a warm orange gel in a starburst pattern around a single point. The motion blur creates a glowing orb of light that mimics fire or an impact.
The trick to all these effects is to keep the painted light in scale. A lightning bolt on a minifigure should be smaller than the lightning bolt on a castle. Use the size of nearby LEGO elements as your reference for the size of the light effect.
Light Modifiers Using Transparent LEGO Parts
One of the most powerful tricks in LEGO photography light painting is using transparent LEGO bricks as light modifiers. Translucent plates, windows, and windscreens can diffuse, colour, and shape light in ways that would normally require expensive studio gear.
Hold a transparent LEGO plate between your flashlight and the minifigure to create a soft, diffused glow. The plastic softens the beam edges and reduces harsh shadows. Stack two or three transparent bricks for stronger diffusion.
Transparent coloured bricks work as built-in gels. A transparent red brick over a white LED produces a saturated red beam. A transparent blue brick creates a cool blue glow. Any LEGO element in your collection can become a colour modifier.
For a softbox alternative, build a small frame of transparent bricks around your scene. Place a wide-angle LED behind the frame and let the plastic diffuse the light across the entire scene. This produces soft, even lighting similar to a professional softbox, but built from bricks you already own.
Common Mistakes in Light Painting and How to Avoid Them
After hundreds of shoots, I have made every mistake possible. Here are the most common ones to watch for.
- Painting from too far away. A distant flashlight produces flat lighting. Move closer to the scene, within a foot if possible, and use the edge of the beam for softer falloff.
- Standing in the same spot for the entire shot. Move around the scene. Side lighting, top lighting, and back lighting all create different moods. Mix them within one exposure for richer results.
- Painting for too long in one spot. This causes blown-out highlights. Sweep the light continuously, never letting it sit on one brick for more than a second.
- Forgetting to clean the bricks. Dust and fingerprints on glossy LEGO surfaces catch light and ruin shots. Wipe your scene with a microfiber cloth before every shoot.
- Ignoring the background. A pure black background is tempting, but a sliver of light on the background bricks adds depth. Always rake a little light across the back of the scene.
- Shooting JPEG. JPEG compression kills the highlight and shadow recovery you need for light painting. Always shoot RAW.
Post-Processing Tips for Light Painted LEGO Photos
Post-processing is where light painted LEGO photos become final images. I do the minimum work needed in camera, then finish the file in software. Here is the workflow I use for every shot.
Open the RAW file in Lightroom, Photoshop, or your editor of choice. The first step is to set the white balance. Mix light sources almost always leave a colour cast, so I use the white balance eyedropper on a neutral grey or white brick. If the scene contains no neutrals, dial the temperature and tint manually until the minifigure’s skin looks natural.
Recover highlights next. Light painted beams are often overexposed in the centre. Pull the highlight slider down to recover detail. Then lift shadows to bring back the dark areas of the scene. The contrast between the recovered highlights and lifted shadows is what creates the dramatic, cinematic look.
For composite shots with multiple painted layers, I use Photoshop to mask and blend exposures. Each layer is masked to its painted region, then the layer blend mode is set to Screen. This combines the light without doubling the exposure.
Final step is sharpening and a small amount of clarity. Aggressive editing destroys the natural look of LEGO photography light painting. I aim for a final image that looks like a real, lit scene, not a digitally painted one.
FAQ: Light Painting for LEGO Photography
How do I paint with light in night photography?
Set your camera to manual mode with a long exposure (10-30 seconds), mount it on a tripod, then paint light across your LEGO scene with a flashlight or LED while the shutter is open. Move the light continuously and avoid leaving the beam in one spot for more than a second.
What is the 500 rule for night photography?
The 500 rule is a guideline for the maximum shutter speed before stars visibly trail. Divide 500 by your lens focal length to get the shutter speed in seconds. For a 50mm lens on a full-frame camera, the limit is 10 seconds. For LEGO scenes, the rule is mostly a reminder that longer exposures introduce unwanted motion blur.
What are common mistakes in light painting?
The most common mistakes are painting from too far away, standing in the same spot for the entire shot, painting one spot for too long, forgetting to clean the bricks, ignoring the background, and shooting JPEG instead of RAW. Each of these can be fixed with a small change to your setup or workflow.
What to use for light painting photography?
You need a tripod, a camera with manual mode, a remote shutter release or self-timer, and a small flashlight or LED. Optional but powerful additions include ND filters for long exposures, colour gels for coloured light, and transparent LEGO parts for diffusion and colour modification.
Conclusion: Master the Night With Light Painting
LEGO photography light painting turns a small plastic world into a cinematic scene, and the only barrier to entry is practice. Start with the gear list, dial in the camera settings from the chart, and run the eight-step workflow I shared above. Your first shots will not be perfect, and that is fine. Mine were not either.
The real magic happens once you start layering effects, gels, and transparent LEGO modifiers. Pick one scene, shoot it five times in one night, and compare the results. You will see exactly what each variable controls. After a few sessions, light painting will feel as natural as building a set, and your night photos will look like nothing your audience has seen before.