
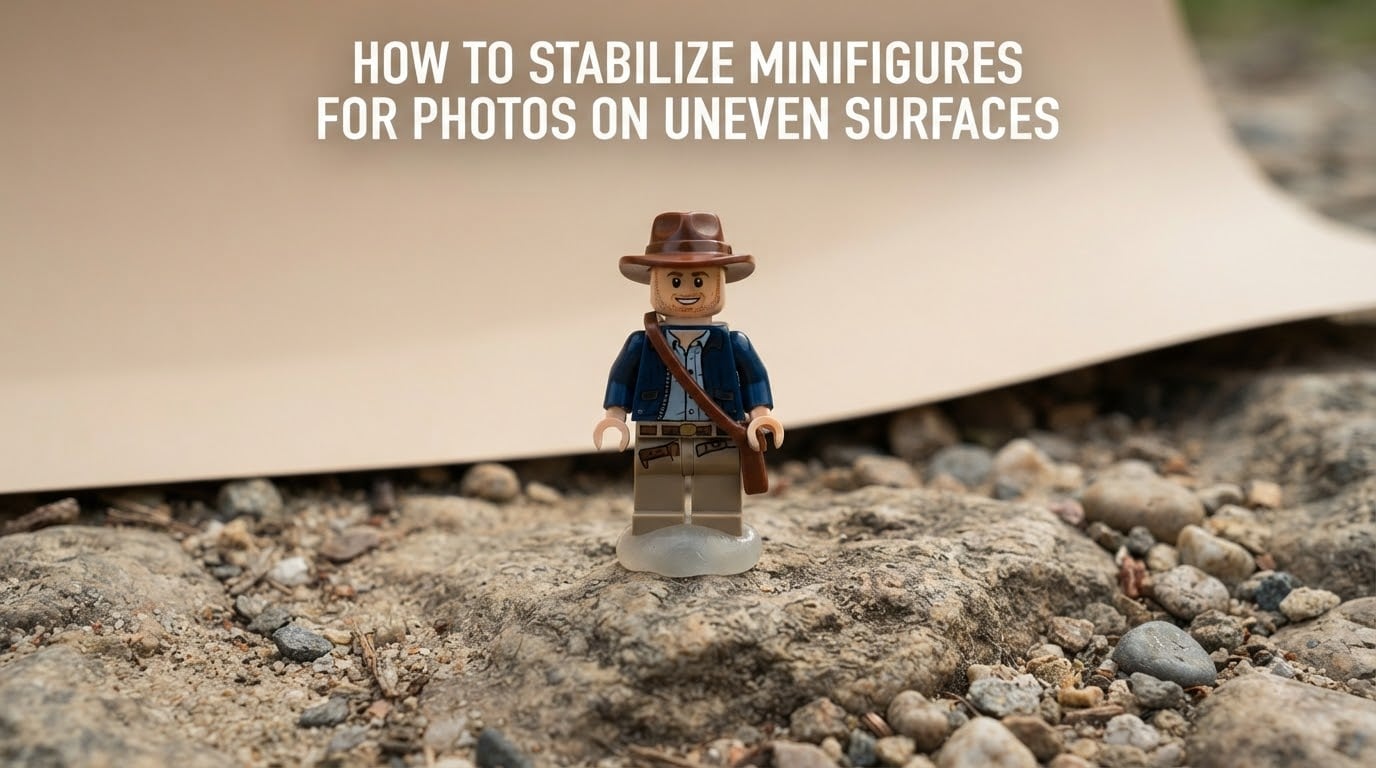
Every LEGO photographer has been there. You find the perfect backdrop, set your minifigure down on what looks like a flat patch of dirt, and frame your shot. The instant you press the shutter, the figure topples forward. Again. Learning how to stabilize minifigures for photos on uneven surfaces is the skill that separates frustrating shoots from gallery-worthy shots.
I have spent years photographing minifigs on beaches, mountain trails, garden beds, and rocky creek beds. Along the way I have tried just about every stabilization trick in the toy photography community. Some methods work brilliantly, and others will leave you picking sand out of your figure’s helmet for days.
This guide walks through four proven methods for keeping minifigures standing tall on any terrain. You will learn which adhesive putties actually work, how to use the curved paper trick, when to modify the figure itself, and how to choose the right approach for sand versus grass versus rocks.
Table of Contents
Why Minifigures Fall Over on Uneven Surfaces
Minifigures topple because they have tiny feet, smooth plastic soles, and a high center of gravity. A standard minifig foot measures roughly 6mm by 7mm, which means even a slight tilt in the ground underneath is enough to pull the whole figure down.
On uneven terrain, you are fighting three forces at once: gravity pulling the figure downhill, loose particles shifting under the feet, and wind or vibration nudging the figure during exposure. Loose leg joints make things worse because they allow the figure to lean and settle over time.
The good news is that every one of these problems has a simple fix. You just need the right method for the surface you are shooting on.
Method 1: Adhesive Putty for Instant Stability
Adhesive putty is the single most effective tool for stabilizing minifigures on uneven surfaces. A small ball of putty pressed between the figure’s feet and the ground creates an instant bond that holds through wind, vibration, and minor ground shifts.
What to Use
Not all putties are created equal. I have tested several types, and here is what I recommend:
Blu-Tack is the classic choice among toy photographers. It is reusable, leaves minimal residue on smooth LEGO plastic, and grips well on dry surfaces. A pea-sized piece split between both feet is usually enough for a standing pose.
Museum putty (like QuakeHold) is designed for securing fragile objects on display shelves, and it works beautifully on rocky surfaces. It grips better than Blu-Tack on textured terrain and cleans up cleanly. The downside is that it tends to be softer, so it can let the figure slowly sink if the surface is very uneven.
Loctite Fun-Tak is another solid option that performs almost identically to Blu-Tack. It tends to be slightly firmer, which I prefer for heavy or top-heavy figures like those wearing capes or carrying large accessories.
How to Apply Putty Without Damaging the Figure
Roll a small piece of putty between your fingers until it is soft and warm. Flatten it into a disc about the size of a pencil eraser and press it onto the bottom of each foot. Set the figure on your surface and press down gently but firmly for a few seconds.
Never smear putty up the sides of the feet or push it into the ankle joint. Removing putty from inside the leg cavity is tedious, and you risk stressing the plastic. Keep it on the sole only.
When you are done shooting, peel the putty off slowly. If it leaves a faint residue, roll a clean ball of putty over the spot to lift it away.
When Putty Works and When It Fails
Putty excels on dry, solid surfaces like rocks, wood, and packed dirt. It struggles on wet sand, where moisture prevents adhesion, and on extremely loose surfaces like dry powder, where there is nothing for the putty to grip against.
For wet or loose surfaces, pair putty with another method from this guide. A strip of putty underneath a small flat LEGO tile, buried just below the sand’s surface, gives you the grip of putty with the footprint of a base plate.
Method 2: The Curved Paper Stand Trick
This is one of the oldest minifigure photography tricks, and it remains one of the most reliable for slopes and sand. The idea is beautifully simple: a piece of paper or thin card acts as a flat bridge over uneven terrain, and the figure stands on the paper instead of the ground.
What You Need
A sheet of white or colored paper, or thin card stock. The color should match your surface. For sand shoots, use tan or beige paper. For grass, green works well. For dark rocks, use gray or brown card stock.
Step-by-Step Setup
Step 1: Cut a strip of paper about 4 inches wide and 8 inches long.
Step 2: Lay one end of the strip flat on a relatively stable part of your surface. This is where the figure will stand.
Step 3: Hold up or prop the other end of the strip so it curves upward behind the figure. The curve serves double duty: it stabilizes the standing area and creates a seamless backdrop that hides the transition between ground and sky.
Step 4: Place your minifigure on the flat portion of the paper. Add a tiny dot of putty under each foot for extra security.
Step 5: Shoot from a low angle so the paper edge closest to the camera disappears beneath the figure’s feet. The curve behind the figure should blend into the natural background.
Why This Works on Sand and Slopes
The paper eliminates the uneven surface entirely. Instead of trying to balance a figure on shifting grains of sand or a tilted slope, you are giving the figure a perfectly flat platform. The curve creates a clean, professional backdrop that makes the photo look intentional rather than improvised.
I have used this method on beach shoots where the sand was so soft that every step left a deep footprint. The paper trick let me place figures anywhere, including spots that would have been impossible without it.
Method 3: Modify the Figure With LEGO Pieces
Sometimes the best stabilization tool is another LEGO piece. By attaching small elements to the figure’s feet or base, you can anchor it to almost any surface without adhesives or external supports.
Planting Lightsaber Hilts in Sand
This is a community favorite from the LEGO photography forums, and for good reason. A chrome or metallic lightsaber hilt pressed into the sand acts like a tent stake. The figure grips the hilt, and the hilt grips the sand.
To do this, attach a lightsaber hilt (without the blade) to the figure’s hand, then press the bottom of the hilt deep into the sand. Position it so the hilt is angled slightly toward the camera, creating the illusion that the figure is leaning on a walking stick or planting a flag.
You can also press a hilt directly into the sand behind the figure’s feet to act as an invisible brace. From the front, it looks like the figure is standing naturally. From behind, the hilt is doing all the work.
Using Clip Pieces on Rocks and Bark
Clip pieces are small LEGO elements with a C-shaped grip that can clamp onto thin edges. Attach a clip to the bottom of a figure’s foot using a 1×1 bracket, then clip it over a rock edge or tree bark ridge. This works especially well for action poses where the figure appears to be climbing or hanging.
For a subtler approach, attach a 1×2 plate with a clip to the back of the figure’s legs, then clip a rigid piece of foliage or wire that runs down to the ground. The figure looks like it is standing in tall grass, but the hidden support is doing the heavy lifting.
Wide Base Plates for Grass and Soil
For grass surfaces, a small base plate buried just below the surface gives the figure a stable foundation that still looks natural. Dig a shallow divot in the soil, place a 2×2 or 2×4 plate in it, and press the figure onto the studs. Arrange grass blades over the exposed edges of the plate so it disappears into the terrain.
This method takes more setup time but produces the most natural-looking results. The figure stands on real LEGO studs, which means no adhesives and no risk of residue.
Method 4: External Support Props
When nothing else works, external supports can save your shoot. These methods are slightly more involved but they handle the most extreme stabilization challenges, from dynamic action poses to high winds.
Hidden Stands and Armature Wire
A small piece of armature wire (available at any craft store) bent into an L-shape makes an excellent hidden stand. Press the vertical end into the ground behind the figure and attach the horizontal end to the figure’s back using a strip of putty. The wire is thin enough to be invisible from the front, and it holds the figure steady even in moderate wind.
You can also use a clear acrylic stand, the kind sold for displaying collectible figures. Position it behind the minifig and angle the camera so the stand is outside the frame.
Fishing Line for Levitation Effects
For jump or flight poses, tie a loop of clear fishing line around the figure’s torso and suspend it from an overhead branch or a simple frame made of sticks. The line is nearly invisible in photos, especially when shot at a shallow depth of field.
Use 4-pound or 6-pound test monofilament. Thinner line is harder to see but more likely to snap under the weight of a minifig with accessories. Gently rotate the figure on the line until it hangs in your desired pose, then hold it still while you shoot.
When to Choose Props Over DIY Fixes
I reach for external props when the figure needs to be in a pose that defies gravity, or when the surface is so unstable that putty and paper cannot create a reliable platform. Props are also the best choice for outdoor shoots where wind is a factor.
For most everyday shoots, though, putty and the paper trick will get the job done faster and with less gear to carry.
Surface-Specific Stabilization Tips
Different surfaces demand different approaches. Here is what works best for each type of terrain you are likely to encounter.
Sand: Bury the Feet and Use Putty Underneath
Sand is the trickiest surface because it shifts constantly. The most reliable technique I have found is to dig a small flat depression in the sand, place a thin LEGO tile or piece of card in the depression, and press the figure onto it with putty. Sweep a thin layer of sand over the edges of the tile so it blends in.
For figures that need to stand in deeper sand, the lightsaber hilt trick works best. Press the hilt in deep, at least an inch, and let the sand settle around it naturally.
Avoid using putty directly on sand without a solid base underneath. Moist sand will stick to the putty and ruin both the surface and the figure’s feet.
Grass: Trim a Flat Spot and Use a Small Base
Grass blades are surprisingly strong and they will push a minifigure off balance if they press against the legs. Trim a small circle of grass down to soil level with scissors, creating a flat patch just large enough for the figure to stand on. Place a 2×2 plate on the trimmed spot and attach the figure.
If you cannot trim the grass (public parks, for example), use the buried base plate method described in Method 3. Surround the plate with grass blades that you gently bend outward so they frame the figure rather than pushing against it.
Rocks and Bark: Clip or Wedge
Rock surfaces offer excellent grip if you find the right spot. Look for natural crevices or flat ledges where a minifigure foot can rest securely. A small ball of museum putty on each foot will hold the figure steady on most rock textures.
For tree bark, use clip pieces to grip the ridges. Bark is irregular enough that you can almost always find a spot where a clip locks in place naturally. This is perfect for scenes where your figure is exploring a forest or climbing a tree.
Snow and Powder: Toothpicks Through the Base
Snow and fine powders behave like sand but colder. The best approach is to push thin toothpicks or wooden skewers vertically into the powder, then rest the figure’s feet on the exposed ends of the picks. The picks act like tiny stilts that hold the figure above the shifting surface.
For shallow snow, use the curved paper trick with white paper. The paper creates a flat surface on top of the snow, and the white color blends seamlessly with the wintery scene.
Photography Angle Tips That Help Stability
The angle you shoot from does more than improve composition. It can also hide stabilization tools and make an unsteady figure look rock-solid.
Low Angle Shooting Hides Props
Shooting from a low, upward angle is the most flattering perspective for minifigure photography, and it also conceals putty, paper edges, and support wires. When the camera is below the figure’s eye level, viewers see the figure from the front and the sky or background behind it. Anything at ground level is outside the frame.
I shoot almost all my outdoor minifig photos from ground level or below. It makes the figure look heroic and larger than life, and it means I can use visible stabilization tools without worrying about them appearing in the final image.
Tilt the Figure, Not the Camera
If the ground is sloped, resist the urge to tilt your camera to compensate. Instead, angle the figure slightly forward or backward so it looks upright relative to the slope. Use putty to hold the tilted position, then shoot with a level camera.
This produces a much more natural-looking photo than a tilted camera, which makes the entire horizon look crooked.
Use Burst Mode for Movement Shots
When photographing figures in dynamic poses, the slightest vibration can cause blur or a topple. Set your camera or phone to burst mode and fire off five to ten frames in quick succession. Even if the figure shifts slightly between frames, you are almost guaranteed to capture at least one sharp, stable shot.
For phone photographers, most modern phones have a burst mode triggered by holding the shutter button. Pair burst mode with a mini tripod or by resting the phone on a stable surface to eliminate hand shake.
Common Mistakes to Avoid
Over-tightening leg joints. Some photographers try to stiffen loose legs by cranking the hip joint until it clicks. This stresses the plastic and leads to cracked legs, a well-known problem with newer minifigures. Instead, use putty or external supports to compensate for loose joints.
Using superglue on the figure. Superglue will bond LEGO plastic permanently and destroy the figure’s articulation. If you absolutely must stiffen a joint, use a tiny dab of clear nail polish on the hip peg, let it dry completely, and test the tension before reassembling. Even this should be a last resort.
Forgetting to remove putty residue. Putty left on feet for extended periods can leave an oily mark on glossy plastic. Always clean the figure’s feet after a shoot by rolling a fresh ball of putty over the area to lift any residue. Store your figures without putty attached.
Shooting in wind without backup support. Even the best putty will fail in a strong gust. If you are shooting outdoors and the wind picks up, switch to an external support or move to a sheltered spot. Do not risk losing a rare figure to a gust of wind.
FAQs
How do you keep minifigs standing on uneven terrain?
The most reliable method is adhesive putty like Blu-Tack or museum putty pressed between the figure’s feet and the ground. For extreme terrain, combine putty with a small flat LEGO tile as a buried base, or use the curved paper trick to create a level platform over the uneven surface.
Why do minifigs fall over in sand?
Sand shifts under the small, smooth feet of a minifigure, creating an unstable foundation. The weight of the figure pushes grains aside, causing it to sink and tilt. To fix this, press a lightsaber hilt deep into the sand as an anchor, or bury a thin LEGO tile with putty underneath the surface.
What can I use to stick a minifigure to a surface?
Blu-Tack, museum putty (QuakeHold), and Loctite Fun-Tak all work well for sticking minifigures to surfaces. Roll a pea-sized piece into a disc, press it onto the sole of each foot, and set the figure down firmly. Avoid double-sided tape and superglue, which can damage LEGO plastic.
How do I fix a loose minifigure without damaging it?
Do not over-tighten the hip joint, as this can crack the legs. Instead, stabilize the figure externally using putty, a hidden stand, or armature wire behind the figure. For a semi-permanent fix, apply a tiny dab of clear nail polish to the hip peg and let it dry before reassembling.
Can I photograph minifigs on uneven surfaces with a phone?
Yes. Use burst mode by holding the shutter button to capture multiple frames and pick the sharpest one. Rest the phone on a stable surface or mini tripod to eliminate hand shake. Shoot from a low angle to hide stabilization tools, and use the same putty and paper techniques you would with a dedicated camera.
Wrapping Up: Build Your Stabilization Kit
Learning how to stabilize minifigures for photos on uneven surfaces comes down to matching the right method to the right terrain. Adhesive putty handles most situations. The curved paper trick saves you on slopes and sand. LEGO piece modifications anchor figures in loose terrain. And external props bail you out when nothing else works.
My advice is to build a small stabilization kit and keep it in your camera bag. A pack of Blu-Tack, a few sheets of colored card stock, a small bag of lightsaber hilts and clip pieces, and a spool of thin armature wire will cover virtually every scenario you encounter.
Start simple with putty on a rock or piece of wood in your backyard. Once you get comfortable with the basics, experiment with combining methods. A putty-stabilized figure on a buried base plate, shot from a low angle with burst mode, will give you results that look like they came from a professional studio.
The best minifigure photographers are not the ones with the most expensive gear. They are the ones who know how to make a 1.5-inch plastic figure stand tall on a mountainside. Now you have the toolkit to do exactly that.