
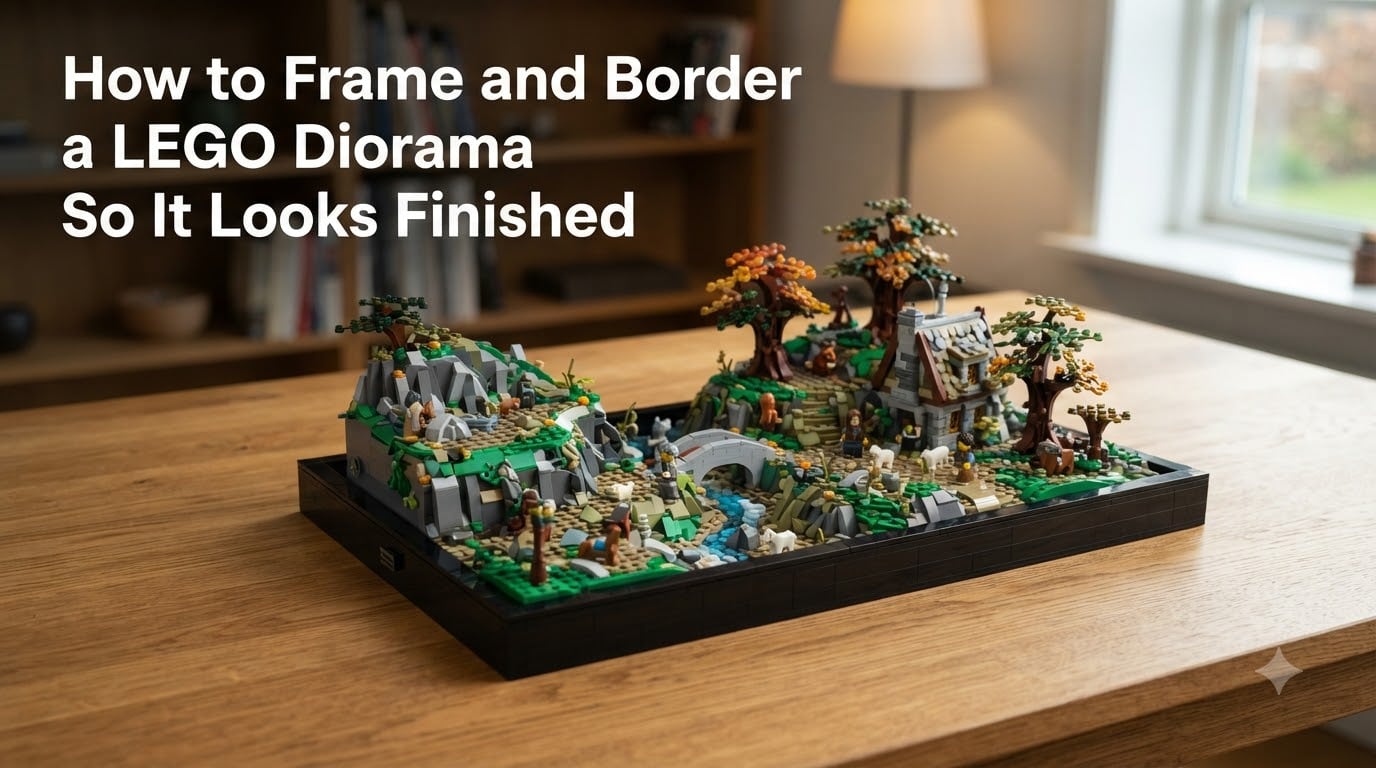
A diorama with a bare edge is half a build. I learned that the hard way after spending three weeks on a desert outpost MOC, only for the first visitor to ask whether it was finished.
This guide walks through how to frame and border a LEGO diorama so it looks finished, covering frame selection, baseplate mounting, brick-built borders, and the finishing touches that make a scene read as display-ready. It pulls from builds our team has framed over the past two years, plus the fixes that come up again and again from builders on the r/legodiorama subreddit and the Eurobricks forum.
By the end you will have a full materials checklist, a six-step framing process, the 5:2 rule for diagonal builds, and a short list of the mistakes that make a diorama look unfinished no matter how good the scene is.
Table of Contents
What Is a LEGO Diorama Frame?
A LEGO diorama frame is a solid border running around all four edges of your build, giving the scene a clean boundary, a stable base, and a deliberate end point for the eye. It is the difference between bricks on a table and a piece on display.
Builders use three terms interchangeably, but they mean different things. The base is what the build sits on, the border is the edge treatment around that base, and the frame is the external picture frame or box that surrounds the whole assembly.
That black edge you see around most convention displays is usually a tiled or SNOT-built border in black bricks, sometimes paired with a painted mat. It works because black recedes, which pushes the colors of your scene forward.
Materials and Tools You Will Need
You only need four core items: a deep frame, a baseplate, border bricks, and an adhesive plan. Everything else is optional polish.
- A deep picture frame or box frame — the IKEA RIBBA box frame is the community favorite because its depth handles most builds
- One or more baseplates sized to your footprint, cuttable with a craft knife
- Bricks, plates, and tiles for the border — black is the classic choice
- Spray paint in matte black for the frame, plus painter’s tape
- Background card, printed backdrop, or decorative paper
- Removable mounting strips, hot glue, or epoxy depending on how permanent the mount should be
- A steel ruler, craft knife, and cutting mat
None of this is specialty gear. If you already build MOCs, you probably own everything except the frame.
How to Choose the Right Frame for Your Build
Match the frame to your baseplate footprint first, then check interior depth against the tallest point of your build. Get either of those wrong and the project fights you the whole way.
Know your stud-to-size conversions. A 16×16-stud baseplate measures about 12.8 cm (roughly 5 inches) square and drops into an 8×8 shadowbox frame with room for a border. A 32×32 baseplate runs 25.6 cm (about 10 inches), which suits a 12×12 frame. A 48×48 baseplate at 38.4 cm usually needs a larger-format or custom frame.
Depth is where most framers slip up. A scene with hills, buildings, or a Star Wars skiff needs 5 to 8 cm of interior depth, and standard flat frames offer almost none. Box frames, sold as shadowbox frames, are the fix, which is why display threads in 2026 keep coming back to the same handful of deep-frame models.
Charity shop and thrift store frames are worth a look if you want character — that upcycle route produced one of the most-shared minifigure frame tutorials ever written. A battered wooden frame sands down and sprays up in under an hour, and older frames often have deeper rabbets than new budget ones. I have paid pocket change for frames that outperformed new ones.
How to Frame and Border a LEGO Diorama Step by Step
Here is the full process from loose build to wall-ready display. Work through it in order, because each step assumes the one before it.
Step 1: Measure the Build and Lock the Footprint
Measure the widest and tallest points of your diorama, including overhangs. Note the baseplate size it sits on, then decide how many studs of border you want beyond the scene — two to four studs reads as generous without eating your display area.
Step 2: Prep and Paint the Frame
Remove the glass or acrylic and set it aside. Lightly sand the frame, wipe it down, then spray two thin coats of matte black, letting each dry fully. Thin coats prevent the drips that look terrible up close.
Step 3: Install the Background
Cut your background card or paper to the backing size and fix it with spray adhesive or double-sided tape. Keep it smooth, because wrinkles catch shadows and read as sloppy once the build is in place.
Step 4: Mount the Baseplate
Attach the baseplate to the frame backing using removable mounting strips if you ever want to rebuild, or a thin glue layer for a permanent display. Test the fit inside the frame before the adhesive sets, then press firmly and let it cure before adding weight.
Step 5: Build the Border
Lay border bricks around the perimeter of the baseplate, working from the corners inward so any cut tiles land mid-run rather than at a corner. Keep the border one consistent height all the way around for that gallery look.
Step 6: Final Assembly and Hanging
Transfer your scene onto the mounted baseplate, seat the backing into the frame, and secure it. If you kept the glass, check clearance at the tallest point before closing it up, then fit hanging hardware rated above the total weight.
Border Techniques That Make a Diorama Look Finished
Three border styles consistently read as finished: a tiled stud-top border, a smooth SNOT border, and a painted mat border. Pick one and commit, because mixing styles around the same edge looks accidental.
A tiled border is plates and tiles laid flat around the perimeter, leaving a mostly smooth top surface. It is the fastest technique and hides uneven baseplate edges well. Black tiles are the standard; dark brown or dark gray suit natural scenes better.
A SNOT border (studs not on top) turns bricks sideways so the smooth side faces out, giving you a clean vertical wall with no visible studs. It takes more planning and a stock of brackets, but the result looks molded rather than built.
A mat border skips bricks entirely and uses a cut mat or painted edge inside a traditional frame. This suits minifigure displays and shallow scenes, and it is the approach most minifigure-in-a-frame projects use.
The LEGO 5:2 Rule for Diagonal Builds
The LEGO 5:2 rule states that for every five studs you build outward on a slope, you go up two plates. Following it keeps diagonal builds — cliffs, hills, crater rims — stable and geometry-clean instead of gappy.
The rule matters most at your diorama edges, where a diagonal meets the border. A slope that breaks the 5:2 rhythm leaves jagged stepping that no border can hide, so build the diagonal first and frame it after. Builders still lean on it in every 2026 diorama thread for good reason.
Backgrounds and Mounting Options
Use card, decorative paper, or a printed backdrop behind the build, and mount the baseplate with removable strips unless the framed piece will hang permanently or travel.
Background options in order of effort: plain colored card, patterned decorative paper (the kind used in the classic minifigure-frame projects), printed sky or space backdrops, and hand-painted scenes. Match the background to the mood of your scene — pale backdrops recede, dark ones add drama.
On adhesives, the community has never settled a winner, and honesty serves you better here than a fake rule. Removable poster strips protect future rebuilds, hot glue grips fast but fights you on removal, and two-part epoxy is forever. For a wall-hung frame I lean toward the stronger hold, because vibration works strips loose over time.
Common Mistakes to Avoid
Most unfinished-looking dioramas trace back to the same handful of errors. I have made at least four of these myself.
- Buying a frame before measuring the build, which forces the scene into the wrong footprint.
- Ignoring interior depth, then finding the tallest spire presses against the glass.
- Leaving raw baseplate edges exposed instead of carrying a border all the way around.
- Mounting with weak adhesive, then watching the scene shift every time a door slams.
- Hanging the frame in direct sun, which fades bricks unevenly within months.
- Skipping the background so the wall behind the frame shows through the scene.
Display and Protection Tips
Hang or shelve your framed diorama out of direct sunlight, and add acrylic or glass over the front if dust is a problem in your space. Framing already does half the protection work by sealing three sides.
The AFOL community leans toward enclosed acrylic cases over open frames for long-term protection, and a box frame with its front pane is the budget version of the same idea. Either way, you stop dusting individual studs, which is the real win.
Lighting sells the finish. A small LED strip along the top inside edge of the frame, or a picture light mounted above it, adds depth that flat room lighting cannot. Battery puck lights keep the install clean with no visible wiring.
For wall mounting, use hardware rated for at least double the framed weight, because brick is heavier than it looks once a scene is attached. Anchored into a stud, a framed 32×32 diorama stays put for years.
Frequently Asked Questions
How do you frame a LEGO picture?
Remove the glass from a deep frame, mount a baseplate on the backing with removable strips, build a border around the edge, then arrange your bricks or minifigures on the studs. Reassemble the frame and check clearance at the tallest point before hanging it.
What is the LEGO 5:2 rule?
The LEGO 5:2 rule says that for every five studs you build outward on a diagonal slope, you go up two plates. It keeps cliffs, hills, and crater rims stable and clean, and it matters most where a diagonal meets your diorama border.
How do you make a LEGO display frame?
Start with a box or shadowbox frame with at least 5 cm of interior depth. Spray the frame matte black, add background card to the backing, mount a baseplate with adhesive, lay a tiled or SNOT border around the edge, then set your build inside and close it up.
What can I use as a base for a diorama?
A standard LEGO baseplate is the simplest base and can be cut to size with a craft knife. Wood panels, rigid foam board, and picture frame backing all work as foundations. Just glue or mount a baseplate on top so the build stays secure and removable.
What is a LEGO diorama?
A LEGO diorama is a scene built on a bounded base, such as a battle, a street, or a natural scene in miniature, presented as a single display piece rather than an open-ended set. The border or frame is what marks it as a diorama instead of a loose build.
How do you display a LEGO diorama on the wall?
Frame the diorama in a deep box frame, fit hanging hardware rated for at least double its weight, and anchor into a wall stud. Keep it out of direct sunlight and choose a spot where the front pane is easy to dust occasionally.
What can I use for dirt in a LEGO diorama?
Most builders stay in-brick with reddish-brown and dark-tan plates and round 1×1 pieces for texture. For real texture, fine sand or coffee grounds fixed with clear glue works, though loose material mixes badly with framed displays. Use sealed texture only inside a frame.
Final Thoughts
Framing is the step most builders skip, and it is the one that changes how a build is perceived. A measured frame, a secure baseplate mount, and a border carried all the way around are what make a scene read as finished.
Start small if this is your first framed build. My first was a 16×16 scene in a thrifted frame, and it taught me every step in a single afternoon. Once you know how to frame and border a LEGO diorama, everything you build afterward gets the display it deserves.