
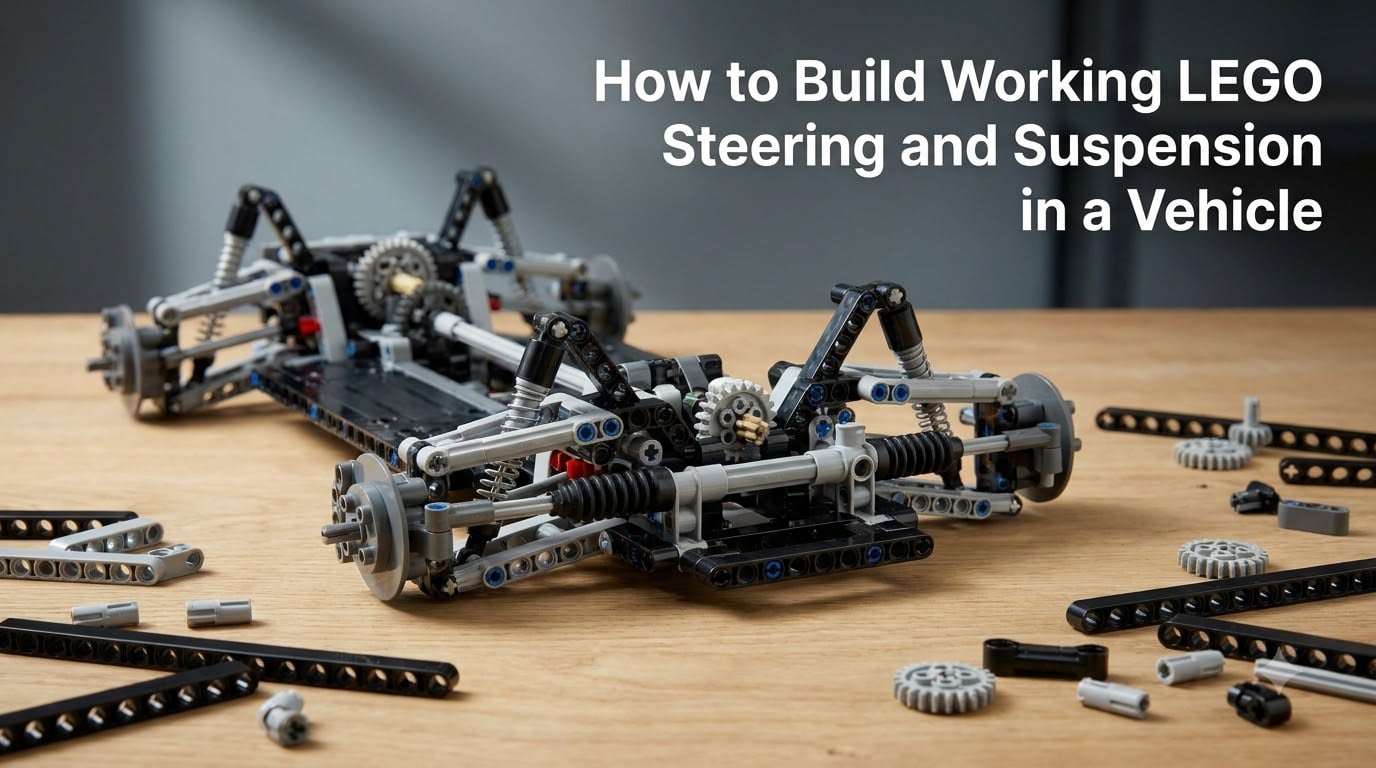
Working LEGO steering and suspension transforms a static brick model into something that actually drives, turns, and absorbs bumps. After rebuilding three Technic cars over the past year, I can tell you the difference between a shelf model and a real driver comes down to these two systems working together.
This guide walks you through everything I learned building and troubleshooting functional steering and suspension in LEGO Technic vehicles. You will understand the geometry, the parts, the step-by-step assembly, and the fixes for the problems every builder runs into. Whether you are working on a rally car, a 4WD truck, or a compact city build, the same principles apply.
Table of Contents
What Is LEGO Steering and Suspension and Why Does It Matter?
LEGO steering and suspension is a mechanical system that allows a Technic vehicle to turn its wheels and absorb road bumps using gears, linkages, and springs made from LEGO pieces. Steering controls direction through pivoting linkages, while suspension uses springs or shock absorbers to let wheels move up and down independently from the chassis.
Both systems matter because without them, your LEGO car looks like a toy and drives like one. Add working suspension and steering, and suddenly the model handles uneven surfaces, takes corners smoothly, and feels mechanically real. Builders on Eurobricks and r/legotechnic consistently rank these two systems as the most important upgrades for any Technic vehicle.
Real-world vehicles use both systems for the same reasons. Steering lets you control direction. Suspension keeps the wheels in contact with the ground when surfaces change. In LEGO, you replicate these functions using beams, pins, gears, worm screws, and shock absorbers like the long-known 64mm Technic shock cylinder.
Understanding Ackermann Steering Geometry in LEGO
Ackermann steering geometry is a design principle that ensures the inner wheel turns at a sharper angle than the outer wheel during a corner. This prevents tire scrub and makes turns feel natural rather than dragging the front end across the ground.
The principle comes from real automotive engineering. When a car turns, both front wheels rotate around a common center point. Because the inner wheel travels a shorter radius, it needs to turn more sharply. Ackermann geometry angles the steering arms so this happens automatically.
To apply this in LEGO, position your steering pivot points behind the wheels rather than directly on the axle centerline. Place a steering arm on each wheel hub angled inward toward the rear of the car. When you push the steering rack left, the angled arms translate that motion into wheels that turn at the correct differential angles. Builders often use a 7L steering rack paired with 12-tooth gears for accurate Ackermann geometry.
For a simple test, mark the centerline of each tire with tape, turn the steering through a full lock, and check that both tires still point toward a common point roughly 6 stud-widths ahead of the front axle. If they converge properly, your geometry works.
Types of LEGO Steering Systems You Can Build
Three main steering approaches work in Technic builds, each with different strengths depending on your model size and complexity.
Rack and pinion steering uses a toothed rack sliding horizontally, driven by a pinion gear on the steering column. This is the most realistic approach and works well for medium to large vehicles. The 7L and 9L steering racks are the standard pieces.
Direct link steering uses a simple beam linkage connecting the steering wheel directly to the wheel hubs. It is lighter, easier to build, and ideal for compact models or beginner builds. The trade-off is less precise Ackermann geometry.
Worm gear steering uses a worm gear on the steering column driving a higher-ratio gear for slower, more controlled steering input. This works well for large models and motor-powered builds because the gear reduction gives you finer control. Some Technic builders use a 24:1 reduction for racing models.
Types of LEGO Suspension Systems Explained
Suspension design choice affects everything from ride height to handling on uneven surfaces. Here are the four main types you will encounter in Technic building.
Double wishbone suspension uses two control arms per wheel, allowing independent movement with excellent camber control. This is the most realistic design and what most high-end Technic cars use. It requires more parts but delivers the best performance.
Pendular suspension uses a single pivoting arm per wheel, allowing the whole wheel assembly to swing up and down. It is simpler to build and very compact, which is why builders use it for narrow chassis like Sariel’s 9-stud wide designs.
Live axle suspension connects both wheels with a rigid beam that pivots in the center. This is the simplest suspension type and works well for trucks and off-road models. The drawback is that hitting a bump on one side affects the other wheel.
MacPherson suspension combines a spring/shock absorber with the steering axis, saving space and weight. It is common in real cars and translates well to medium-sized LEGO models where space is tight.
| Suspension Type | Best For | Complexity |
|---|---|---|
| Double Wishbone | Racing, realistic cars | High |
| Pendular | Compact builds | Low |
| Live Axle | Trucks, off-road | Very Low |
| MacPherson | Mid-size vehicles | Medium |
Parts and Tools You Need Before You Start
Before you start building, gather the essential Technic pieces. You will need beams in multiple lengths (7L, 9L, 11L, 13L), connector pins, axle pins, a 7L steering rack, 12-tooth and 20-tooth gears, worm gears, universal joints, and at least two shock absorbers (the 64mm type works for most medium builds).
For the steering linkage, you need angled connectors (Technic angle connector 3L with 4L or similar), ball joints, and enough axle pieces to span the front of your chassis. A 4L axle or two shorter axles joined by a universal joint work for the steering column.
For suspension, the key pieces are the shock absorbers, springs, control arm beams, and ball joint connectors. Keep some friction pins and half pins on hand because they tend to disappear during builds.
How to Build Working LEGO Steering and Suspension in a Vehicle: Step-by-Step
Follow these steps in order. Each phase builds on the previous one, and skipping ahead usually leads to alignment problems that are hard to fix later.
Step 1: Build the Chassis Frame
Start with a rigid rectangular frame using Technic beams. Make sure the front section has mounting points for both the suspension arms and the steering rack. The frame width determines your suspension geometry, so build wider for stability or narrower for compact cars.
Step 2: Add the Steering Column and Linkage
Mount a vertical axle at the rear of the cabin area to act as your steering column. Connect it through universal joints if you need to angle it toward a steering wheel. Add a 12-tooth gear or worm gear at the base where the linkage will meet the steering rack.
Step 3: Install the Steering Rack and Knuckles
Mount the 7L steering rack horizontally across the front of the chassis, level with the wheel hubs. Attach steering arms to each wheel hub, angled inward toward the rear for proper Ackermann geometry. Connect each arm to the steering rack using connector pins or ball joints.
Step 4: Mount the Suspension Arms and Springs
Attach lower control arms to each side of the chassis using pins at fixed pivot points. Mount the shock absorbers between the chassis and the control arms. For double wishbone, add upper control arms as well. Compress the springs enough to support the vehicle weight without bottoming out.
Step 5: Connect Steering to Suspension
This is the most critical step. The steering rack must move freely even when the suspension is fully compressed or extended. Test by pressing down on each wheel and turning the steering through full lock. If the steering binds, adjust the linkage length or reposition the steering rack height.
Step 6: Test and Tune
Roll the vehicle on a flat surface and check that both wheels respond to steering input. Push down on each corner to test suspension travel. Look for binding, play, or loose connections. Most issues at this stage come from misaligned steering arms or over-compressed springs.
Tip: Build the steering and suspension as one subassembly first, then attach it to the chassis. This makes alignment much easier than trying to build everything in place.
Warning: Do not motorize the steering until you have tested manual operation. Adding a motor to a binding system amplifies every problem and risks stripping gears.
Motorizing Your LEGO Steering Without Breaking the Suspension
Adding a Power Functions or Technic motor to your steering works well once manual operation is smooth. Mount the motor near the steering column and connect it through a worm gear for slow, controlled steering. The gear reduction prevents the suspension movement from transferring back into the steering mechanism.
The key is decoupling. Use a clutch gear or weak motor so that if the suspension hits a hard bump, the motor can slip rather than transferring force back through the steering. Many builders add a slip clutch between the motor and steering column for this exact reason.
For suspension, you typically do not need a motor because passive springs work well. If you want active suspension for a specialized model, use a separate linear actuator on each wheel controlled by a programmable hub.
Common Problems and How to Fix Them
Every Technic builder runs into the same handful of issues. Here are the ones I have hit personally and the fixes that work.
Steering axle coming loose when suspension moves: This is the most common problem on Reddit and Eurobricks. The fix is to use a longer steering column with universal joints at both ends. The joints absorb suspension movement without pulling the axle out of position.
Play in the steering mechanism: Excessive slop means your gears or rack have worn out, or you have too many connection points in the linkage. Reduce the number of joints between the steering wheel and wheels. Use a double rack system if play remains, with two racks pulling against each other to remove slack.
Suspension too weak for steering forces: The shock absorbers compress under steering load, which changes wheel alignment. Use stiffer springs or limit steering angle until you find a balance. Do not increase spring strength beyond what the chassis can support.
Steering calibration issues: If the wheels turn at different angles, your steering arms are not symmetric. Measure the arm length on both sides and make sure they angle inward at the same degree.
Gear alignment in steering rack: The rack teeth and pinion gear must mesh perfectly. If they bind, the pinion will skip teeth under load. Test the rack by sliding it back and forth before connecting the steering column.
Frequently Asked Questions
How do you make steering suspension in LEGO Technic?
To make steering and suspension in LEGO Technic, build a rigid chassis frame first, then add a steering rack connected to wheel hubs through angled steering arms for Ackermann geometry. Mount control arms with shock absorbers to the chassis for suspension. Connect the steering column to the rack through a 12-tooth gear or worm gear. Test manually before adding any motor to ensure the steering moves freely through full suspension travel.
What are the different types of LEGO steering systems?
The three main LEGO steering systems are rack and pinion (most realistic, uses a 7L or 9L steering rack), direct link (simplest, uses beams connecting the steering column to wheel hubs directly), and worm gear (uses a worm screw for high gear reduction and fine control). Rack and pinion works best for medium to large vehicles, direct link suits compact beginner builds, and worm gear is ideal for large motor-powered models.
How does Ackermann steering work in LEGO?
Ackermann steering works in LEGO by angling the steering arms on each wheel hub inward toward the rear of the car. When you turn the steering rack, the inner wheel rotates more sharply than the outer wheel, just like real vehicles. Position the steering pivot points behind the axle centerline rather than directly on the hubs. Test by turning through full lock and confirming both tire centerlines converge on a single point ahead of the front axle.
What LEGO pieces do I need for suspension?
You need shock absorbers (64mm size works for most medium builds), springs, control arm beams in various lengths (7L to 13L), connector pins and axle pins, ball joints for pivot points, and frame mounting brackets. For double wishbone suspension, add upper control arms as well. A minimum of two shocks (one per wheel) handles basic setups, while four shocks provide independent suspension on each corner.
How to make a compact steering and suspension unit?
To make a compact steering and suspension unit, use pendular suspension with a single pivoting arm per wheel instead of double wishbones. Mount a small steering rack (7L) directly above or below the suspension pivot. Use worm gears for steering to reduce the space needed for the steering column. Sariel’s 9-stud wide builds show how narrow you can go while keeping both systems fully functional.
Final Thoughts on Building LEGO Steering and Suspension
Learning how to build working LEGO steering and suspension in a vehicle takes patience, but the result is worth it. Start with a simple rack-and-pinion design, test it manually until everything moves smoothly, then add motors once the mechanical basics work. Every model you build will teach you something new about geometry, weight distribution, and how LEGO pieces interact under load.
Pick your next project based on what you want to learn. A compact city car teaches space-saving design. A 4WD off-road truck teaches live axle suspension and durability. A racing model teaches Ackermann geometry and fine motor control. Whatever you choose, the skills carry over to every Technic build you tackle from here.