
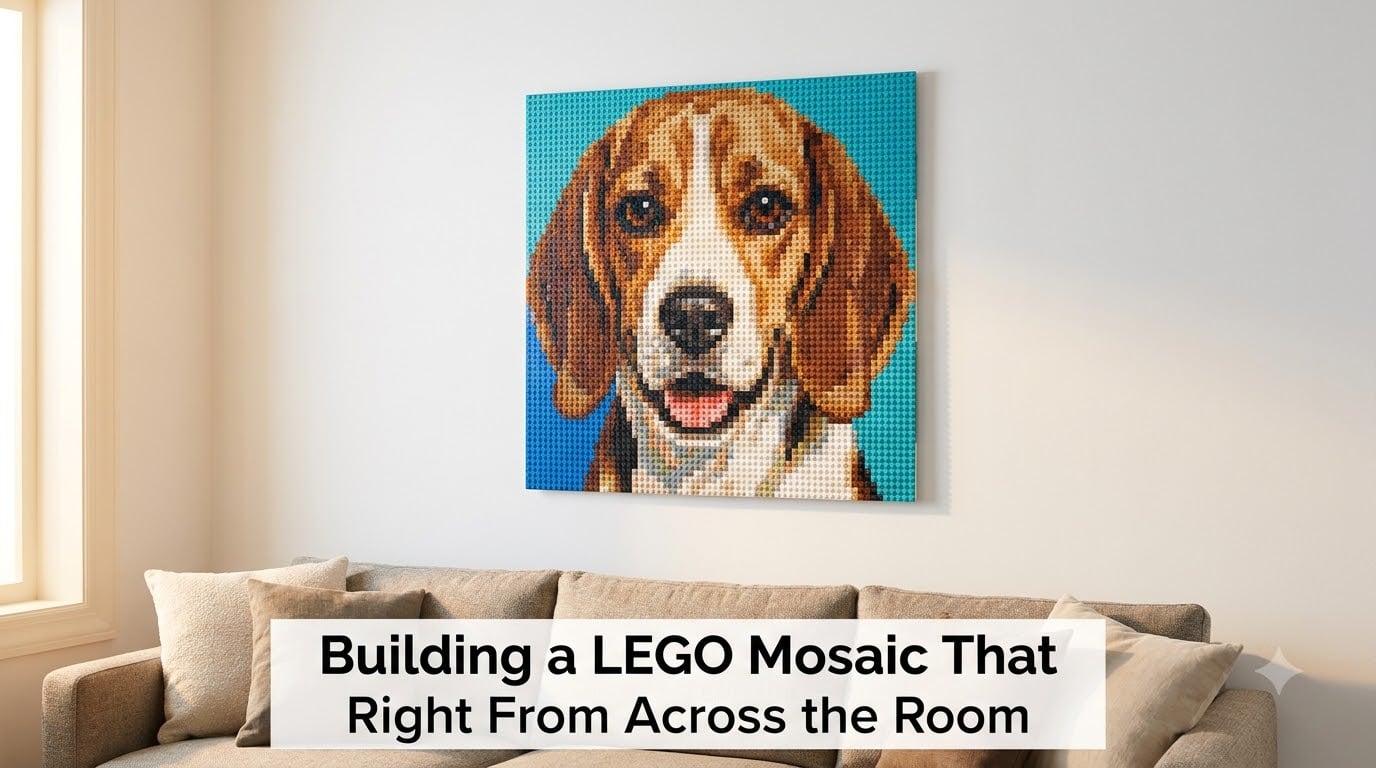
I have built more LEGO mosaics than I can count, and the same mistake keeps showing up in builders’ first attempts: they design for the person standing two feet away instead of the person across the room. Building a LEGO mosaic that looks right from across the room is a different skill than making one that looks good up close. The tricks that work for a desk display fail completely when the mosaic hangs on a wall.
This guide walks through every decision that affects distance viewing, from picking the right image to choosing stud size and color zones. By the end you will know exactly how to plan a LEGO mosaic that resolves into a clear picture from across the room, the way a painting does, rather than dissolving into noise.
Table of Contents
What Is a LEGO Mosaic and Why Distance Viewing Matters
A LEGO mosaic is a 2D image built by arranging bricks, plates, tiles, or studs in a grid where each cell represents a single pixel. Think of it as pixel art made out of plastic. The medium is constrained: you have a fixed number of colors, a fixed pixel density, and a fixed grid size, so every design decision is a tradeoff.
The thing most builders miss is that the viewer matters more than the build. A mosaic that hangs on a wall is rarely viewed from inches away. People walk into a room, glance at it from eight to twelve feet, and form an opinion in two seconds. If the image does not read at that distance, the hundred hours you spent placing tiles do not register.
Distance viewing changes everything about how you should design. Up close, fine detail and color accuracy are impressive. From across the room, those details vanish, and only three things remain: contrast, silhouette, and color zones. A great distance mosaic is built for those three properties first, with detail as a bonus.
I think of it like impressionist painting. Step right up to a Monet and you see disconnected dabs of color. Walk back ten feet and the lily pond materializes. A LEGO mosaic works the same way, except the dabs are studs and the pond is your dog’s face.
Choosing an Image That Reads From Across the Room
Not every photo survives conversion to a LEGO mosaic, and even fewer survive distance viewing. The image you start with matters more than any technique you apply later. I have watched builders spend weeks on a portrait that was doomed from the photo selection onward.
Pick High-Contrast, Low-Detail Subjects
The best distance mosaics come from images with bold contrast and clean silhouettes. A face lit from one side, a dog sitting in profile against a plain wall, a single flower on a dark backdrop. These images have large blocks of light and dark that map cleanly to LEGO color zones.
Avoid busy backgrounds and complex scenes. A family photo with trees, sky, and patterned clothing behind the subject will turn into mud from across the room because the background competes with the subject for every pixel.
Strong Silhouettes Beat Fine Features
If you squint at your chosen image and the subject disappears into the background, it will fail as a distance mosaic. Test every candidate image by squinting hard or stepping back from your monitor until the details blur. If the outline still reads, you have a winner.
Portraits work well when the face takes up at least half the frame. A tiny face lost in a wide shot becomes an unrecognizable smudge at mosaic resolution. Crop aggressively so the subject fills the grid.
Limit Your Color Zones to Three or Four
Distance mosaics rely on color zones, which are the major blocks of tone that define the image. A good candidate image has three or four clear zones: dark, mid, light, and maybe an accent. A photo with a hundred subtle gradations will lose all of them at distance.
I once converted a sunset beach photo that looked gorgeous on screen. At 48×48 studs it became an orange rectangle. The waves, the sand gradient, the sun’s reflection, all collapsed into one warm blur. The image had too many zones competing at the same brightness.
Picking the Right Resolution and Stud Size
Resolution is the single biggest factor in whether your LEGO mosaic reads from across the room, and it is the variable most builders get wrong. Resolution here means two things: how many studs make up the grid, and how big each stud is.
Match Grid Size to Viewing Distance
Here is a rough guide I use, based on builds I have tested in my own living room. A 32×32 stud grid reads clearly from about 5 feet away. A 48×48 grid reads from about 8 feet. A 64×64 or larger grid starts reading from 12 feet and beyond.
For a wall piece meant to be viewed from across the room, aim for at least 48×48 studs. If your wall is large and viewers will stand 12 or more feet back, go for 64×64 or build from multiple baseplates joined together.
Use Plates and Tiles for Tighter Pixels
Standard 1×1 bricks on a baseplate give you one color per stud position. That works, but plates and tiles let you pack more visual information into the same space. A 1×1 tile sits flush and creates a smooth surface, which helps the eye blend colors at distance.
Stud mosaics, where you use 1×1 round plates or tiles standing on their studs, create a denser pixel grid. Each stud becomes a single dot of color, and you can fit far more pixels into the same baseplate footprint. This is the technique behind the official LEGO Art sets, and it is the best choice for distance viewing on a fixed baseplate size.
Bigger Pixels Are Easier, Sharper Is Harder
There is a temptation to cram as many pixels as possible into a mosaic. More pixels should mean more detail, right? At distance, it often means the opposite. Below a certain pixel size, individual studs stop resolving and start blending into noise.
I find that 1×1 round plates on a 48×48 baseplate, the standard LEGO Art format, hit a sweet spot. The pixels are large enough to read individually from a few feet away but dense enough to form a coherent image from across the room.
Working With Limited Color Palettes
LEGO produces around 60 active colors, but only about 40 of those are practical for mosaics. The rest are too rare, too expensive on BrickLink, or too close to another shade to be distinguishable at distance. Working within this palette is the core challenge of distance mosaic design.
Prioritize Contrast Over Accuracy
If your reference image has a soft gradient from medium gray to dark gray, you might only have two or three LEGO grays to represent it. Do not try to match every shade. Instead, push the contrast so the two zones separate cleanly. A distance mosaic with bold, slightly inaccurate colors reads better than one with subtle, accurate colors that blur together.
I built a black-and-white cat mosaic once where I replaced the subtle gray shadows with flat medium gray. Up close it looked cartoonish. From the couch, ten feet away, it looked like a real cat, because the simplified zones gave my eye clear boundaries to lock onto.
Use Dithering Sparingly
Dithering is the technique of alternating two colors in a checkerboard pattern to suggest a third tone that does not exist in your palette. It works beautifully on screen and up close. From across the room, heavy dithering turns into a muddy gray that reads as neither color.
Use dithering only in transition zones where you want to soften a hard edge. Keep large color areas flat and clean. If your conversion tool outputs heavy dithering by default, reduce the dithering percentage until large zones read as solid colors.
Stick to a Core Palette of 12 to 16 Colors
For a 48×48 portrait mosaic, I typically use 12 to 16 colors. More than that and the cost balloons on BrickLink while the distance quality barely improves. Fewer than 8 and the image starts looking like a paint-by-numbers rather than a portrait.
Pick your palette based on the dominant tones in your reference image. If the subject is a person, you need a skin tone range, a shadow tone, a hair color, and a background color. Map every pixel to the nearest available LEGO color and accept the simplification.
Tools and Software for Converting Photos to LEGO Mosaics
You do not have to convert a photo to a stud grid by hand. Several free and paid tools do the heavy lifting, and each has strengths depending on whether you want speed, control, or a parts list you can order immediately.
LEGO Art Remix (Free, Web-Based)
LEGO Art Remix is the tool I recommend most for beginners. You upload a photo, pick a grid size that matches an existing LEGO Art set, and it generates a stud-by-stud build plan plus a BrickLink-compatible parts list. It handles color conversion automatically and supports several palette sizes.
The limitation is that it is built around the dimensions of official LEGO Art sets, so if you want a custom baseplate size you may need a different tool.
PicToBrick (Free, Desktop)
PicToBrick is a desktop application that gives you deep control over color mapping, dithering, and grid dimensions. You can define your own color palette, which is useful if you already own a specific batch of bricks and want the design to match what you have on hand.
The learning curve is steeper, and the interface is utilitarian, but for builders who want full control it is hard to beat.
BrickLink Studio (Free, Desktop)
Studio is primarily a 3D LEGO modeling tool, but it includes a photo-to-mosaic feature and integrates directly with BrickLink for ordering parts. If you already use Studio for other builds, the mosaic feature is a convenient add-on, though it is less specialized than LEGO Art Remix or PicToBrick.
I use Studio to visualize the finished mosaic in 3D before I order parts, which helps me catch color mistakes before they cost me money.
Quick Tool Comparison
LEGO Art Remix is fastest for set-based builds. PicToBrick is best for custom palettes and full control. Studio is best if you want to model the finished piece and order parts in one workflow. Start with LEGO Art Remix for your first mosaic, then branch out as your needs get more specific.
Step-by-Step Process for Building a LEGO Mosaic
Here is the process I follow for every distance-viewing mosaic. It works for any grid size and any image type, and it is the same workflow recommended across the LEGO mosaic community on Reddit and BrickLink forums.
Step 1: Prepare and Crop Your Image
Start by cropping your photo to the same aspect ratio as your baseplate grid. A 48×48 baseplate is square, so crop your image to a square. If your subject does not fit a square crop, plan to use a rectangular grid made from multiple baseplates.
Boost the contrast and simplify the color range in any photo editor before you run the conversion tool. The better the input image, the better the output mosaic.
Step 2: Convert the Image to a Stud Grid
Load your prepared image into LEGO Art Remix, PicToBrick, or your preferred tool. Set the grid size to match your baseplate, choose a color palette size, and generate the build plan. Review the output at full size on your screen.
Step back from your monitor or squint at the preview. If the image does not read at that distance, increase contrast, reduce the palette, or choose a different source photo. Do not start building until the preview reads clearly from a distance.
Step 3: Generate a Parts List and Source Bricks
Export the parts list from your conversion tool, ideally as a BrickLink XML file. Upload it to BrickLink and use the Want List feature to find sellers. Sorting by part and color rather than buying from a single seller usually saves money, though it takes longer.
Order roughly 5 percent more of each part than the plan calls for. Tiles get dropped, colors sometimes arrive in the wrong shade, and having spares prevents a stalled build.
Step 4: Sort Your Bricks Before Building
Sort every part by color into separate containers or baggies before you place a single stud. This sounds tedious, but it is the single biggest time-saver in the build process. Hunting for one specific 1×1 tile in a mixed pile can double your build time.
I use a cheap bead organizer with compartments labeled by LEGO color name. When I sit down to build, every color is within arm’s reach.
Step 5: Build the Grid Row by Row
Start at one corner of the baseplate and work in rows, following your generated build plan one row at a time. Place each stud, press it down firmly, and check against the plan every few studs. It is easy to drift one column over and not notice for twenty rows.
Some builders prefer to work in color blocks rather than rows, filling all the dark areas first, then the mid-tones, then the lights. Try both and see which feels faster for you.
Step 6: Check Coverage and Fix Gaps
Once every stud is placed, hold the baseplate at arm’s length and scan for empty spots, misaligned colors, or areas that look wrong. Fix issues one at a time. Then carry the mosaic to the far side of the room and look at it from your intended viewing distance.
This is the moment of truth. If a color zone reads muddy, swap it for a higher-contrast shade. If a feature like an eye or a nose looks off, adjust a few studs. Small tweaks at this stage make a big difference in the final read.
The 5:2 Rule and Other Stability Tips for Wall-Ready Mosaics
A baseplate full of studs is heavy and flexible, and gravity is not kind to it. If you plan to hang your mosaic on a wall, you need to think about stability before you start placing parts.
What the 5:2 Rule Means
The 5:2 rule in LEGO is a guideline for structural stability: for every 5 studs of horizontal span, you need at least 2 studs of vertical connection to prevent sagging or separation. In practice, this means a large baseplate mosaic should be backed by a rigid frame or mounted on a solid surface that supports it across its full span.
For a 48×48 baseplate, the plate alone flexes too much to hang safely. You need to mount it on a board, MDF panel, or framed backing that holds the baseplate flat. Warped baseplates cause studs to pop off over time, especially on a wall where vibration and temperature changes stress the connections.
When You Need Glue
Glue is not required for LEGO mosaics if the piece will sit on a shelf or lie flat. For wall-mounted mosaics, especially in high-traffic areas or homes with kids and pets, a small amount of adhesive on the back of the baseplate to secure it to the backing board is wise.
I do not glue individual studs to the baseplate. The stud-to-plate connection is strong enough for display, and gluing every stud makes future repairs impossible. Glue the baseplate to its backing, not the bricks to the baseplate.
Mount Without Warping
Use a backing board cut to the exact size of your baseplate or mosaic assembly. Attach the baseplate using double-sided mounting tape rated for the weight, or drill small holes and use screws with washers at the corners. Never hang a mosaic by a single point, as the baseplate will bow and studs will detach.
For multi-baseplate mosaics, join the baseplates on a single continuous backing board so the seams stay aligned. Tile spackle or LEGO jumper plates can hide the seam between two baseplates on the front face.
Display and Framing Your LEGO Mosaic
How you display the mosaic affects how well it reads from across the room almost as much as the build itself. Lighting, frame depth, and hanging height all change the perceived quality.
Light From Above or the Side, Never Behind
Studs and tiles catch light unevenly, which is both a problem and an opportunity. Overhead lighting creates tiny shadows in every stud gap, which adds texture but can reduce contrast. Side lighting creates long shadows that exaggerate the pixel grid.
I prefer soft, diffuse overhead lighting from a ceiling fixture or track light aimed at the wall. Avoid direct sunlight, which fades LEGO colors over time and creates harsh reflections on glossy tiles.
Use a Shadow Box Frame for Depth
A shadow box frame with an inch or more of depth between the mosaic surface and the glass protects against dust and gives the piece a gallery look. Standard flat frames press the glass against the studs, which can scratch tiles and trap condensation.
If you skip the glass, plan to dust the mosaic regularly. A soft brush or compressed air works without dislodging studs.
Hang at Eye Level From the Viewing Distance
The center of your mosaic should sit at about 57 to 60 inches from the floor for average eye level. If your mosaic will be viewed primarily from a seated position, like over a couch, lower the center to about 50 inches so the angle works from the seating area.
Test the height by walking to your intended viewing spot and checking whether the full mosaic is visible without craning your neck. Adjust before you commit to hardware.
FAQs
What is the 5/2 rule in LEGO?
The 5:2 rule is a stability guideline stating that for every 5 studs of horizontal span, you need at least 2 studs of vertical connection to prevent sagging. For large baseplate mosaics, this means backing the plate with a rigid board or frame so it does not flex and shed studs when mounted on a wall.
How to create a LEGO mosaic?
Start by cropping your photo to match your baseplate’s aspect ratio and boosting contrast. Run the image through a conversion tool like LEGO Art Remix or PicToBrick to generate a stud-by-stud build plan and a BrickLink parts list. Source the bricks, sort by color, then build row by row on a baseplate. Check the result from your intended viewing distance and adjust color zones before framing.
Is glue required for LEGO mosaics?
Glue is not required for LEGO mosaics that sit on a shelf or lie flat, because the stud-to-plate connection is strong enough for display. For wall-mounted pieces, you can secure the baseplate to a backing board with adhesive, but you should avoid gluing individual studs so future repairs stay possible.
How long does it take to build a LEGO mosaic?
A 48×48 stud mosaic typically takes 8 to 15 hours of active building time, depending on experience. Add 1 to 2 hours for image prep and conversion, plus wait time for parts to arrive from BrickLink. First-time builders should budget closer to 15 to 20 hours, while experienced builders can finish a standard set-sized mosaic in a weekend.
Final Thoughts on Distance-First Mosaic Design
Building a LEGO mosaic that looks right from across the room comes down to designing for the distant viewer first. Pick a high-contrast image with a strong silhouette, choose a grid size that matches your wall distance, simplify your color zones, and test the preview from across the room before you place a single stud.
The satisfaction of watching a visitor walk in and instantly recognize the image is worth the extra planning. Start with a 32×32 portrait of a pet or a loved one, follow the steps above, and you will have a piece that reads from anywhere in the room.