
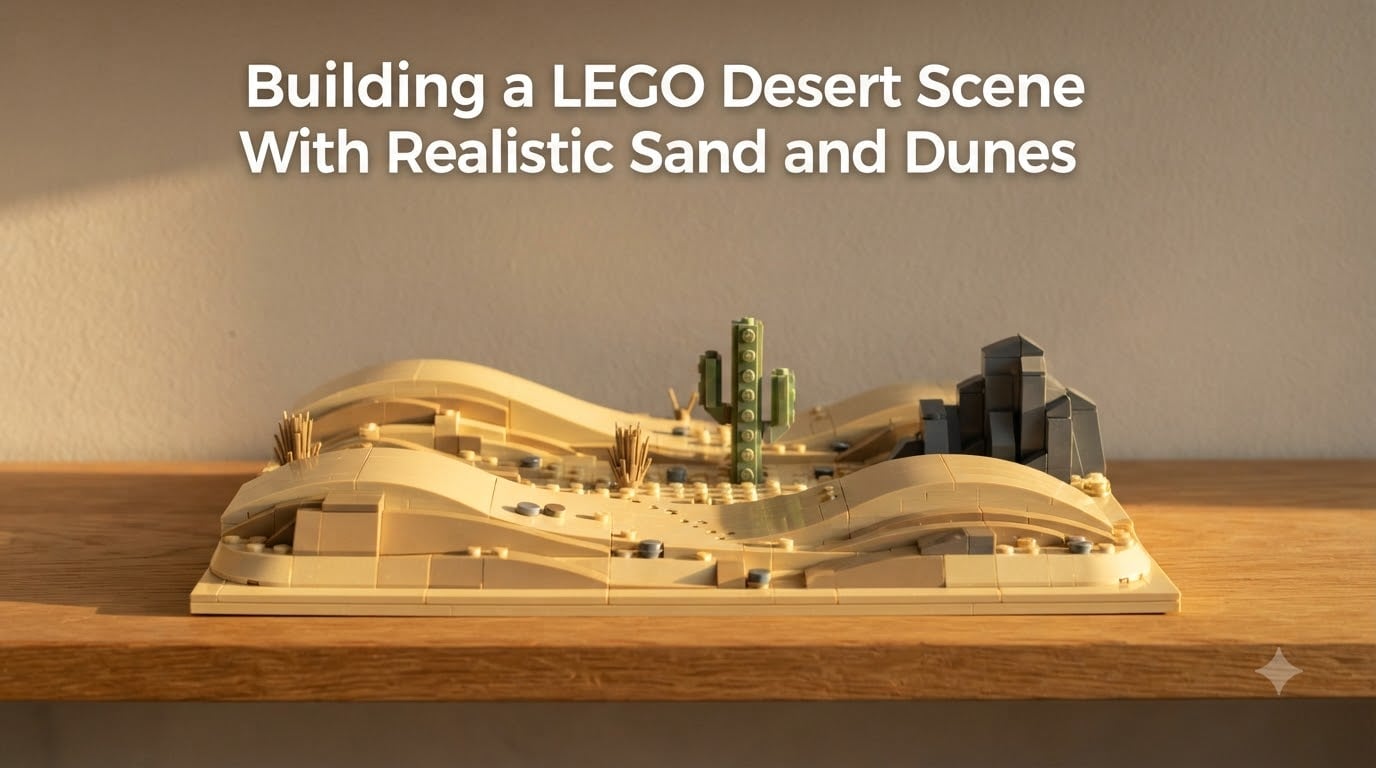
Building a LEGO desert scene with realistic sand and dunes is one of the most satisfying challenges in the hobby. I built my first Tatooine diorama back in 2026 and watched the whole thing fall flat. The dunes looked like cardboard ramps, and the sand looked like a single tan blanket. After months of testing slopes, plates, and color combinations, I finally cracked it. This guide shares every technique I wish I had known from day one.
If you have ever stared at a dune in your collection and thought “this looks like a parking lot,” you are in the right place. We will cover slope construction, the SNOT technique, color mixing, vegetation, and lighting. By the end, you will have a clear path to a desert scene that actually feels like a desert.
Table of Contents
What Makes a LEGO Desert Scene Look Real
A realistic LEGO desert scene depends on three things working together. Height variation, layered color, and natural asymmetry. Without all three, your dunes will read as artificial, no matter how many slopes you stack.
Height variation is the easiest principle to understand. Real dunes have crests, troughs, and gentle slopes that never line up evenly. I aim for at least three distinct elevation changes in any desert base larger than 32×32 studs. When I broke that rule early on, my scenes looked like a giant ramp.
Color layering means mixing tan, dark tan, light brown, and a few warm accents. A single shade of tan looks like a parking lot, not a desert. I usually pull from four to six earth-tone colors per build, and I never let one color cover more than half the surface.
Asymmetry is the secret weapon. Sand dunes in the real world are almost never symmetrical. I rotate slope directions, vary peak heights, and offset each dune from its neighbor by at least a few studs. This single habit transformed my builds overnight.
Essential LEGO Bricks and Pieces for Desert Terrain
The right pieces matter more than the number of pieces. I keep a small desert kit on hand at all times, and it covers about 90 percent of the terrain I build.
Here are the parts I reach for first:
Wedge slopes in 33-degree, 45-degree, and 65-degree angles. These are the backbone of any dune shape.
Curved slopes for dune crests and the leading edge of windblown sand.
Inverted slopes for adding detail to the underside of overhangs and ridges.
Wedge plates for low-profile elevation changes and gentle dune bases.
Round bricks and tiles for scattered pebbles, small rocks, and texture.
Tan and dark tan plates for the flat ground between dunes.
Baseplates in tan, dark tan, or light gray as the foundation of the scene.
For SNOT work, I also keep a stash of headlight bricks, 1×1 plates with clips, and a few SNOT bricks. These let me build sideways and upside down, which opens up textures you cannot get with studs-up construction.
Slope-Based Dune Construction Techniques
Slopes are the foundation of LEGO sand dune building. Almost every realistic dune I have ever seen started with slope bricks stacked in layers. The trick is choosing the right angles and varying them.
For large background dunes, I use 33-degree slopes. They create long, gentle inclines that read as natural from a distance. For closer dunes and crests, I mix in 45-degree slopes to add sharper transitions. I save 65-degree slopes for the very tip of a crest or the lip of an overhang.
Stacking slopes for height is where most builders hit a wall. You cannot simply stack 1×2 slopes on top of each other forever. The shape will collapse inward and the dune will look unstable. I always offset each layer backward by half a stud. This creates a natural lean and gives the dune a wind-shaped profile.
Creating dune crests and troughs comes down to alternating direction. I build one dune, then turn 90 degrees and build another. The trough between them is just empty space, and that emptiness sells the shape. A desert with no flat spots between dunes looks like a pile of ramps.
SNOT Technique for Realistic Sand Textures
SNOT stands for Studs Not On Top. It is a building approach where the studs face sideways instead of up. For desert scenes, this technique lets me add texture that stud-up construction simply cannot match.
I use SNOT sparingly in desert builds. It shines for the edges of dunes, the line where sand meets rock, and small detail areas like footprints or animal tracks. For the broad face of a dune, plain slopes look better and are faster to build.
Here is how I decide between SNOT and plates. If I want smooth, large dune faces, I use plates and slopes. If I want rocky detail, footprints, or a visible texture transition, I switch to SNOT. The two methods blend well when I use plates as the underlayer and SNOT for the visible surface detail.
A simple SNOT pattern I love is stacking 1×1 plates on their sides along the leading edge of a dune. It creates a subtle ridgeline that catches light and makes the dune feel windswept. I learned this trick from a builder on Eurobricks and now use it on almost every desert MOC.
Color Mixing for a Natural Desert Look
Color is where most builders get stuck. I spent two years using only one shade of tan, and every scene looked like a beach. The fix is simpler than you think.
My core palette includes six colors. Tan, dark tan, light brown, medium nougat, warm yellow, and a touch of reddish brown. I buy parts in these colors from BrickLink whenever I see them on sale. A single bulk order of mixed tan parts gave me more visual range than three years of buying single-color sets.
Adding warm brown and orange highlights makes a huge difference. Real sand has iron, mineral deposits, and shadows that shift the color toward warmer tones. I sprinkle reddish brown and warm yellow pieces at the base of dunes and along the windward side. It mimics the way real sand catches light.
Avoiding one-note sand is a discipline. I never let a single color cover more than 40 percent of any desert surface. If tan is winning, I add dark tan. If dark tan is winning, I add light brown. This is also where I layer plates of different colors instead of stacking one color on top of itself.
Step-by-Step Guide: Building a LEGO Sand Dune
This is the exact process I use when I sit down to build a new dune. Follow these steps in order and you will end up with a realistic shape every time.
Step 1: Plan the dune layout on paper. I sketch a top-down view with crests, troughs, and the wind direction. Even a rough sketch prevents the build from looking like a stack of random slopes.
Step 2: Lay your baseplates or base. For a 32×32 scene, I use one tan baseplate or a stack of plates. Make sure the base is wider than the dunes you plan to build, or the dunes will look like they are sliding off a shelf.
Step 3: Mark the dune footprints. I use dark tan plates to lay out the rough footprint of each dune. This gives me a visual guide before I start adding slopes and prevents me from building dunes that overlap in awkward ways.
Step 4: Build the core with wedge plates. Wedge plates add gentle elevation without committing to a full slope. I use these to create the broad shape of each dune before going vertical.
Step 5: Stack slopes at varied angles. I alternate 33-degree and 45-degree slopes as I build up. I also rotate slope directions so the windward and leeward sides look different.
Step 6: Add the crest with a curved slope. The top of every dune gets a curved slope brick. It softens the edge and makes the dune feel windswept instead of chopped off.
Step 7: Scatter detail pieces and textures. This is where color variation, small tiles, and SNOT elements go in. I add round 1×1 pieces as pebbles, and I drop a few dark tan plates into lighter areas for shadow.
Adding Cacti, Rocks, and Desert Vegetation
A dune without anything on it looks empty. Vegetation breaks up the sand and gives the eye a place to rest. I keep my desert plants simple because complex builds get lost against a busy dune.
For cacti, I stack 1×1 round bricks in dark green with a few 1×1 plates sticking out as arms. A 4-stud tall cactus with two arms looks great at minifigure scale. For variety, I add small green plant pieces and a few dark green plates as scrub brush.
Dead trees and driftwood shapes are easier than they look. I use a brown flower stem piece or a stack of brown bars leaning at an angle. A single dead tree in the foreground of a dune scene adds a lot of storytelling.
Rocks and boulders with slopes are the perfect partner for sand. I build small rock clusters using 33-degree slopes in dark gray and light gray. Place a few rocks at the base of a dune and the whole scene feels more grounded.
Common Mistakes When Building LEGO Dunes
Every LEGO builder I know has made these mistakes. I have made all of them myself, more than once. Avoiding them will save you hours of rebuilding.
The most common mistake is repetitive slope angles. If every dune in your scene uses the same slope at the same angle, the scene reads as artificial. I rotate angles and directions between every dune I build.
The second mistake is flat or uniform color. A scene that is all one shade of tan looks like a tan carpet, not a desert. Mix at least three shades of tan and brown, and place the darkest pieces in shadow areas.
The third mistake is wrong scale for the desert. Minifigures next to tiny dunes feel lost. I aim for dunes that rise at least 8 to 12 bricks above the baseplate at their tallest point. Anything shorter gets swallowed by the figures and props.
The fourth mistake is ignoring the empty space. Real deserts are mostly flat with a few dunes. Beginners tend to cover every inch of base with slopes. Leave breathing room. The flat areas are what make the dunes feel tall.
Lighting and Display Tips for Desert Dioramas
Lighting can make or break a desert scene. I learned this the hard way after photographing a Tatooine MOC under harsh white LEDs. It looked like a parking garage.
Warm LED lighting is the answer. I use 2700K to 3000K bulbs for any desert display. The warm tone matches the color of real sand and flatters every tan piece on the base. Cool white light washes out the brown tones and makes the scene feel sterile.
Shadows on dune sides add depth without any extra pieces. I position my display so the light comes from one side, ideally the same direction as the wind in the scene. The windward side of each dune will catch light, and the leeward side will sit in soft shadow. This single trick makes dunes look three-dimensional in photos.
Background and base styling matter more than people think. A plain white wall behind a desert scene makes the sand look pale. A warm beige or wooden background pulls the whole image together. For shelf displays, I add a piece of printed desert tile or a real photograph of sand as a backdrop.
Building a LEGO desert scene with realistic sand and dunes takes patience, but every technique in this guide compounds. Start with one dune, mix at least three tan shades, vary your slope angles, and add a single cactus. You will see the difference on the first build. Once you nail the basics, the harder techniques like SNOT textures and warm lighting take your scenes from good to unforgettable.
Frequently Asked Questions
How do you make LEGO sand dunes look realistic?
Mix at least three shades of tan and brown, vary your slope angles between dunes, and offset each dune by a few studs so they never line up. Height variation, color layering, and asymmetry are the three ingredients every realistic LEGO dune needs.
What is the SNOT technique in LEGO building?
SNOT stands for Studs Not On Top. It means building with the studs facing sideways or downward instead of upward. This lets you add surface details and textures that are impossible with traditional stud-up construction.
What colors work best for LEGO desert scenes?
A natural desert palette mixes tan, dark tan, light brown, medium nougat, warm yellow, and reddish brown. No single color should cover more than 40 percent of the surface, and warm accents at the base of dunes add realism.
Can you use plates instead of slopes for LEGO sand?
Yes. Wedge plates work well for gentle elevation changes and broad dune bases. Combine plates with slopes for the steep sections. Plates alone will not give you a tall dune shape, but they are perfect for the foundation layer.
How do you build a LEGO cactus?
Stack 1×1 round bricks in dark green to form the trunk, then add 1×1 plates sticking out as arms. A 4-stud tall cactus with two short arms works well at minifigure scale and stays simple enough to read against a busy dune.
What is the 5 by 2 rule in LEGO?
The 5 by 2 rule is a community technique for reinforcing large builds. You place bricks in a 5-stud by 2-stud pattern so every brick is connected to at least four neighbors. It strengthens large dioramas and reduces the risk of pieces popping off during transport.
Building a LEGO desert scene with realistic sand and dunes is one of those builds that rewards patience. I have spent 2026 exploring slope angles, color palettes, and SNOT techniques, and the scenes that look the best always follow the same three rules. Vary your heights, mix your colors, and let the empty space breathe. Start with one dune tonight and you will see the difference before you finish the second.