
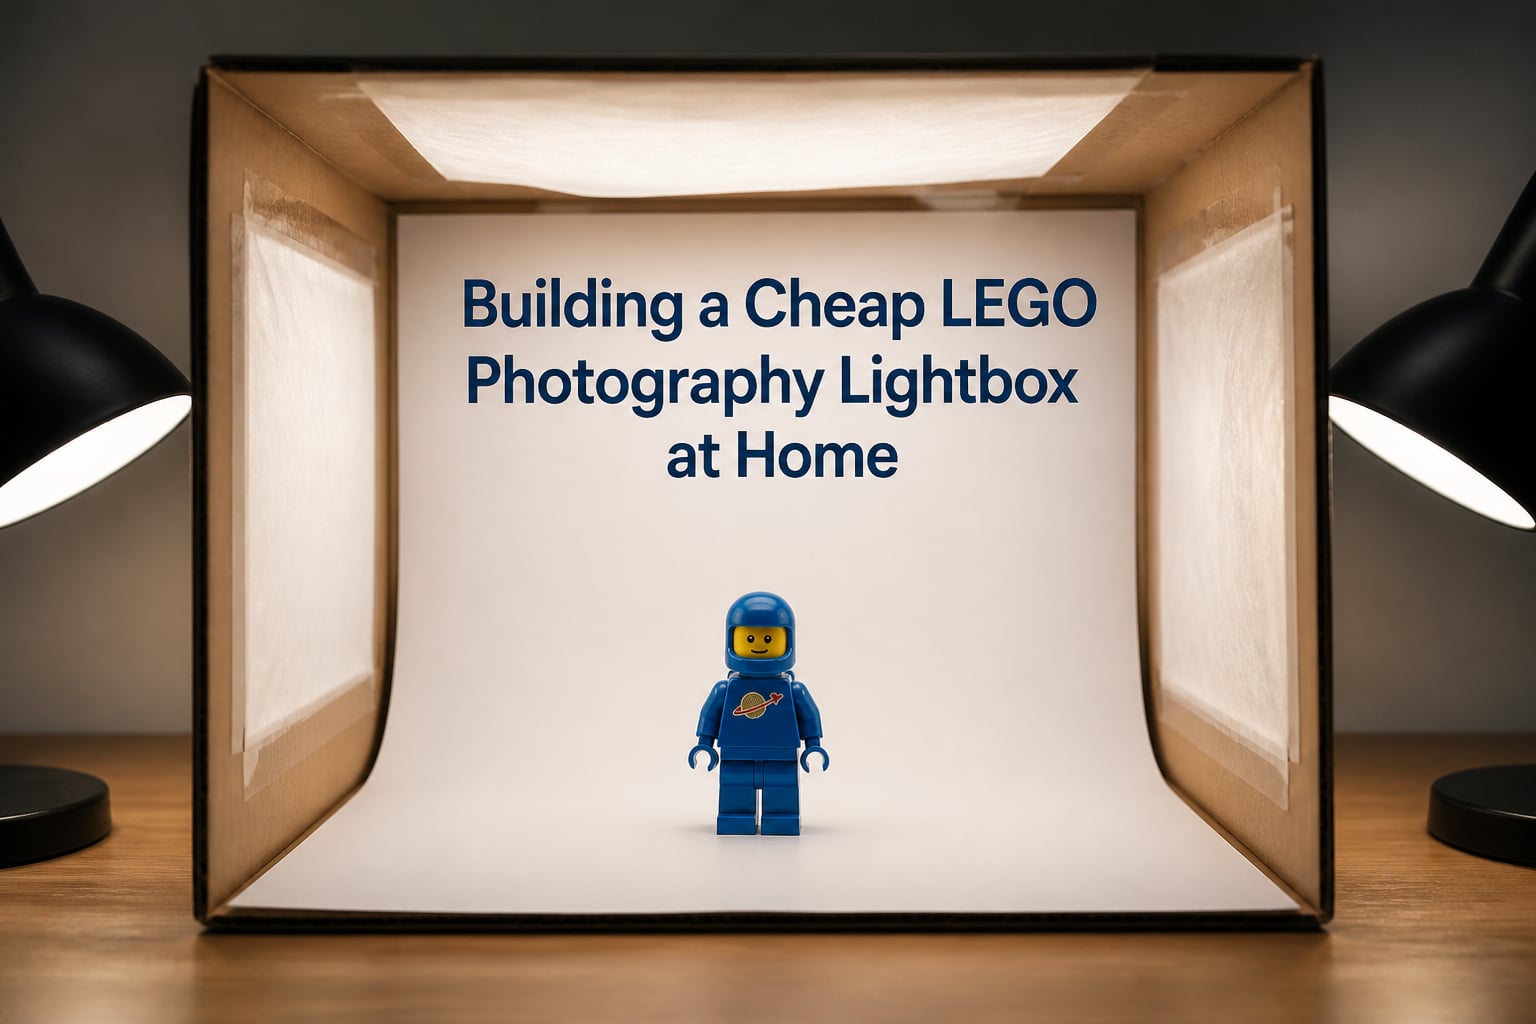
Great LEGO photos start with great light. If you have ever snapped a photo of a minifigure on your desk and ended up with harsh shadows, washed-out colors, or dark grainy results, the problem is almost never your camera. It is your lighting setup.
That is where a LEGO photography lightbox comes in. A lightbox wraps your subject in soft, even illumination from every angle, turning a flat snapshot into a clean, professional-looking shot. The best part? You can build one at home for a fraction of what a commercial setup costs.
In this guide, I will walk you through building a cheap LEGO photography lightbox at home using materials you probably already have or can pick up for under $10. I will cover two different designs, share the camera settings that work best for small-scale photography, and pass along tips I have picked up from the LEGO photography community.
Whether you are shooting minifigures for Instagram, documenting MOCs for a build portfolio, or listing sets on eBay, this DIY lightbox will make your photos stand out. Let us get building.
Table of Contents
Why a Lightbox Transforms Your LEGO Photography
A lightbox is a simple enclosure with translucent walls that diffuses light before it reaches your subject. Instead of light hitting your LEGO model from a single harsh angle, the translucent material scatters it in every direction. This creates soft, even illumination that wraps around your subject.
That diffusion does three things at once. It eliminates the sharp, ugly shadows that make LEGO photos look amateur. It reduces glare on glossy bricks and transparent pieces. And it smooths out the bright hotspots you get from bare bulbs or direct sunlight.
I remember my first attempt at photographing a LEGO castle on a white poster board under a single desk lamp. Half the model was blown out white, the other half sat in deep shadow, and every stud on every brick reflected the bulb like a tiny mirror. A lightbox fixes all of that.
Think of it this way. Without a lightbox, your light source is a firehose. With a lightbox, that same light becomes a gentle mist. Both deliver water, but the mist covers everything evenly without damaging anything.
For LEGO specifically, this matters more than for most subjects. LEGO bricks are small, detailed, and often glossy. Studs catch light and throw reflections. Minifigure accessories have tiny painted details that disappear in harsh light. Transparent and translucent pieces glow beautifully under diffused light but look terrible under a bare bulb.
Commercial lightboxes work great but cost anywhere from $30 to $150. The DIY version I will show you achieves the same soft diffusion for under $10, and you can customize the size to fit anything from a single minifigure to a large Technic set.
Materials You Need to Build a LEGO Photography Lightbox
One of the best things about this project is how flexible the materials are. You do not need anything specialized. Here is what I used, along with cheaper alternatives that work just as well.
For the frame:
1 cardboard box (a shipping box, shoe box, or Amazon delivery box works perfectly). Choose a size that fits your largest subject with a few inches of clearance on each side.
Alternative: A clear plastic storage container, milk crate, or even a LEGO-built frame if you want to stay on-theme.
For the diffusion panels:
White tissue paper, tracing paper, or a thin white cotton sheet. This is the material that wraps the box and softens the light.
Alternative: Wax paper, parchment paper, a white shower curtain liner, or even printer paper taped together for a small box.
For the backdrop:
A sheet of white poster board, thick cardstock, or craft foam. This creates the seamless infinity background that makes your subject float without a visible horizon line.
Alternative: For darker mood shots, use black poster board or colored construction paper.
For assembly:
Duct tape or masking tape (duct tape holds up better over time).
Scissors or a craft knife for cutting windows in the box.
A ruler or straight edge for clean cuts.
For lighting:
2 to 3 desk lamps, clip-on work lights, or LED panels. You want adjustable lights you can position around the box.
Bulbs rated at the same color temperature. Look for daylight-balanced bulbs around 5000K to 5500K so your colors render accurately.
Alternative: Natural sunlight through a window. Free, beautiful, but only available on nature’s schedule.
Total estimated cost: If you buy everything new, expect to spend $8 to $12. If you raid your recycling bin and junk drawer like I did, your cost drops to whatever the poster board and bulbs run you, often under $5.
One note on color temperature that trips up a lot of beginners. If you mix a warm bulb (2700K, yellowish) with a daylight bulb (5500K, bluish), your white LEGO pieces will look uneven and your color accuracy will suffer. Match your bulbs, or your photos will have a color cast that is frustrating to fix later.
How to Build a Cheap LEGO Photography Lightbox at Home: Step by Step
This is the core of the guide. I will walk you through the cardboard box method, which is the cheapest, most accessible approach. The entire build takes about 30 to 45 minutes once you have your materials gathered.
Step 1: Choose and Prepare Your Box
Pick a box that gives your subject breathing room. For minifigure photography, a shoe box is plenty. For mid-size sets, an Amazon shipping box works well. For large MOCs, look for a moving box or appliance box.
Tape the bottom flaps shut so the box is sturdy. Leave the top open for now, as you will decide later whether to light from the top or close it up.
Step 2: Cut Window Panels in Three Sides
Stand the box on its side so the opening faces you. This opening will become the front where your camera points in. The three other sides (left, right, and top) are where light will enter.
Using your craft knife and ruler, cut a large rectangular window in each of those three panels. Leave about a 1-inch border of cardboard around each opening so the box keeps its structural integrity. Remove the cutout pieces and discard them.
You should now have a box with three window openings and a solid back and front. Think of it as a skeleton frame with big holes on three sides.
Step 3: Cover the Windows With Diffusion Material
Cut your tissue paper, tracing paper, or cotton sheet to cover each window with some overlap. Tape the diffusion material flat and taut across each opening. Wrinkles and sagging will create uneven light, so smooth it out as you go.
This diffusion layer is the heart of your lightbox. It is what turns harsh lamp light into soft, wrapping illumination. If your first results look too harsh, double up the tissue paper for more diffusion.
Step 4: Create the Infinity Backdrop
Take your white poster board and curve it into the box so it forms an L-shape. The bottom portion becomes the floor your subject sits on, and the vertical portion becomes the seamless background behind it. Do not fold or crease the poster board. A gentle curve eliminates the visible horizon line that makes photos look amateur.
Tape only the top edge of the poster board to the back of the box. Leave the bottom loose so you can swap in different colored backdrops without rebuilding anything.
Step 5: Position Your Lights
Place one lamp outside each window. Two side lights at roughly 45-degree angles to your subject is the minimum. Add a top light for even more coverage, especially if your subject is tall like a LEGO tower or ship.
Point the lights directly at the diffusion panels, not into the box. The diffusion material does the work of spreading the light evenly. Adjust the distance of each lamp to control brightness. Closer lights are brighter and softer. Farther lights are dimmer and slightly more directional.
Step 6: Test and Adjust
Place a minifigure inside on the backdrop. Turn on all your lights. Look at the model from the front opening. You should see soft, even light with minimal shadows.
If one side is brighter than the other, move that lamp farther away or add a second layer of tissue paper to that window. If you see a harsh shadow directly under the model, add a small piece of white cardstock or foil as a reflector on the shadow side to bounce light back in.
Step 7: Fine-Tune for Your Subject
Different subjects need different setups. Small minifigures look great with all three lights at equal distance. Larger sets may benefit from dimming the top light slightly to add a bit of depth and dimension. Transparent LEGO pieces glow best with strong backlighting through the diffusion panel behind them.
Take test shots after each adjustment. It is much easier to fix lighting while you are standing next to the box than to try to rescue bad light in editing software later.
Two Lightbox Designs: Quick 15-Minute Build vs Sturdy Permanent Setup
Not everyone needs the same thing. Here are two distinct designs so you can pick the one that fits your situation, your budget, and your patience level.
The 15-Minute Quick Build
If you just want to photograph a set right now and do not care about a permanent setup, grab a translucent plastic storage container. Flip it upside down so the opening sits on your desk and the translucent bottom faces up. Place your poster board backdrop inside, set your subject on it, and aim a desk lamp or sunlight at the container from above.
The translucent plastic does all the diffusion work. No cutting, no taping, no crafting. I have used this method for quick eBay listing photos and the results are surprisingly clean. Total cost: zero, assuming you already own a storage container.
The downside is limited control. You cannot easily adjust the diffusion or add side lights. But for speed and simplicity, nothing beats it.
The Sturdy Permanent Build
If you photograph LEGO regularly, invest an afternoon in the cardboard frame build described in the step-by-step above. Reinforce the inside corners with extra tape, and consider gluing the poster board backdrop permanently into place.
For an even more durable version, some builders in the LEGO community use PVC pipe and three-way elbow joints to build a frame, then drape it with a white cotton sheet. This approach costs about $15 in PVC parts but creates a lightbox you can disassemble, store flat, and reassemble in minutes. A 2-foot cube frame handles most LEGO sets comfortably.
The permanent build gives you consistent, repeatable results. Once you dial in your light positions and camera settings, every photo session starts from the same baseline. That consistency is invaluable if you are running a review channel, an eBay store, or a social media account where visual quality matters.
Lighting Tips for Professional-Quality LEGO Photos
The lightbox is only half the equation. How you light it determines whether your photos look professional or mediocre. Here is what I have learned from hundreds of LEGO photo sessions.
Use Multiple Light Sources
A single light source always creates shadows. Even inside a lightbox, one lamp leaves one side of your model slightly darker. Two lights from opposite sides balance each other out. Three lights (left, right, and top) create the most even illumination and are what I use for almost every shot.
Match Your Color Temperature
This is the most common mistake I see. If your left lamp has a warm white bulb and your right lamp has a cool daylight bulb, your subject will have a split color cast that looks unnatural and is hard to correct. Buy identical bulbs, or at minimum check the Kelvin rating on each one and match them.
Daylight bulbs around 5000K to 5500K give the most accurate LEGO colors. Warm household bulbs around 2700K make white bricks look yellow. Avoid mixing the two at all costs.
Control Light Intensity With Distance
You do not need a dimmer to control brightness. Moving a lamp closer to the diffusion panel increases brightness and softness. Pulling it farther away dims the light and adds a touch more directionality. This gives you fine control without buying any extra gear.
Use Reflectors to Fill Shadows
Even with three lights, you may get a small shadow on one side of your subject. A simple reflector fixes this. Use a piece of white cardstock, aluminum foil crumpled and flattened for a softer silver bounce, or even a sheet of white printer paper propped opposite the shadow.
The reflector catches stray light from your lamps and redirects it into the shadow area. It costs nothing and makes a visible difference, especially on detailed minifigures where facial features can get lost in shadow.
Natural Light vs Artificial Light
Sunlight through a window is free and beautiful for LEGO photography. It has a full, even color spectrum that renders LEGO colors accurately. The problem is consistency. Cloud cover changes, the sun moves, and golden hour lasts about 20 minutes.
Artificial lights give you total control. You can shoot at midnight and get the same results every time. For most LEGO photographers, I recommend starting with natural light to learn the basics, then switching to artificial lights once you want repeatable results.
Photographing Transparent and Translucent Pieces
Clear and colored transparent LEGO bricks are tricky. They catch and refract light in unpredictable ways. For these, try backlighting. Place your strongest light behind the subject, shining through the diffusion panel directly toward the camera. This makes transparent pieces glow from within and shows off their color beautifully.
Camera Settings and Smartphone Tips for LEGO Photography
You do not need a DSLR to get great LEGO photos. A smartphone with a decent camera will produce excellent results if you use the right settings. Here is what works.
Use Macro Mode
LEGO models are small, and you will be shooting close-up. If your phone has a macro mode (usually indicated by a flower icon), use it. This allows the lens to focus at very short distances so fine details like minifigure printing and tile textures stay sharp.
Turn On the Timer or Use a Tripod
At close range, even the tiny movement of tapping the shutter button causes blur. Set a 2-second or 3-second timer so you can press the button, then hold steady until the shot fires. Better yet, use a small tripod or a GorillaPod-style flexible tripod.
If you do not have a tripod, some LEGO photographers build one from LEGO Technic parts. It is a fun side project and keeps with the theme. A stack of books works too.
Disable the Flash
The on-camera flash on your phone or camera is the enemy of lightbox photography. It fires a tiny, harsh burst of light directly at your subject, creating a blown-out hotspot and a sharp shadow directly behind the model. Your lightbox provides all the light you need. Turn the flash off and leave it off.
Keep ISO Low and Aperture Controlled
If you are using a dedicated camera, keep your ISO at 100 or 200 to minimize grain. Use an aperture around f/8 for good depth of field, which keeps more of your subject in focus. LEGO models have depth, and a too-shallow depth of field can blur the back of your subject while the front stays sharp.
Shoot in the Highest Resolution
Always shoot at your camera’s maximum resolution. You can always crop and resize later, but you cannot add detail back. High-resolution photos also give you room to crop tight on details like minifigure faces or specific build techniques.
Common LEGO Photography Mistakes and How to Fix Them
Even with a lightbox, a few issues crop up regularly. Here are quick fixes for the most common problems.
Problem: Visible seam where the backdrop meets the floor. Fix: Curve your poster board more gently so there is no crease. Use a thicker material that holds its curve, like foam core. A small roll of tape under the front edge can also help maintain the sweep.
Problem: Dust and fingerprints showing up on bricks. Fix: Wipe your subject with a microfiber cloth or a soft brush before shooting. Dust shows up far more in close-up photography than it does to the naked eye. A can of compressed air helps with hard-to-reach spots.
Problem: Colors look wrong or have a tint. Fix: Check that all your bulbs share the same color temperature. If they do, try a manual white balance adjustment on your camera using a white piece of paper as a reference.
Problem: Reflections of your camera or phone visible on glossy bricks. Fix: Cut a small hole in a piece of black cardstock just big enough for your lens. Hold it between the lightbox and your camera. This blocks stray reflections while letting the lens see through.
Problem: One side of the model is consistently darker. Fix: Add a reflector on the dark side, or move the lamp on the bright side slightly farther away to balance the exposure.
Frequently Asked Questions
How to make a cheap lightbox?
Cut windows in three sides of a cardboard box, cover each window with white tissue paper for diffusion, curve a sheet of white poster board inside for a seamless backdrop, and position desk lamps outside each window. Total cost is typically under $10 using household materials.
What can I use instead of a lightbox?
A translucent plastic storage container flipped upside down works as an instant lightbox. Other alternatives include a white shower curtain stretched over a frame, a milk crate wrapped in tissue paper, or even a sheet of paper curved behind your subject on a windowsill with natural light.
How to do lego photography?
Use a lightbox or diffused lighting setup, enable macro mode on your camera or phone, turn off the flash, use a timer or tripod to avoid blur, and match all your light bulb color temperatures. Position two to three lights around your subject and use a white poster board backdrop for a clean, seamless background.
Are photo light boxes worth it?
For LEGO photographers who shoot regularly, a lightbox is absolutely worth it. It eliminates harsh shadows, reduces glare on glossy bricks, and creates consistent professional-looking results. Building your own costs under $10 and delivers the same soft diffusion as commercial lightboxes that cost $30 to $150.
Wrapping Up: Your DIY Lightbox Awaits
Building a cheap LEGO photography lightbox at home is one of the highest-impact upgrades you can make to your toy photography. For under $10 and an hour of your time, you get soft, even, professional lighting that transforms how your minifigures, MOCs, and sets look on camera.
The cardboard box method gives you the best balance of cost and quality. The storage container trick gives you instant results in 15 minutes. Either way, the principles are the same: diffuse your light, create a seamless backdrop, match your color temperatures, and shoot without flash.
Start with what you have. Grab a box, some tissue paper, and a couple of desk lamps. Take some test shots, adjust your lights, and watch your LEGO photos go from flat to fantastic. Your bricks deserve to look their best, and now you have everything you need to make that happen.