
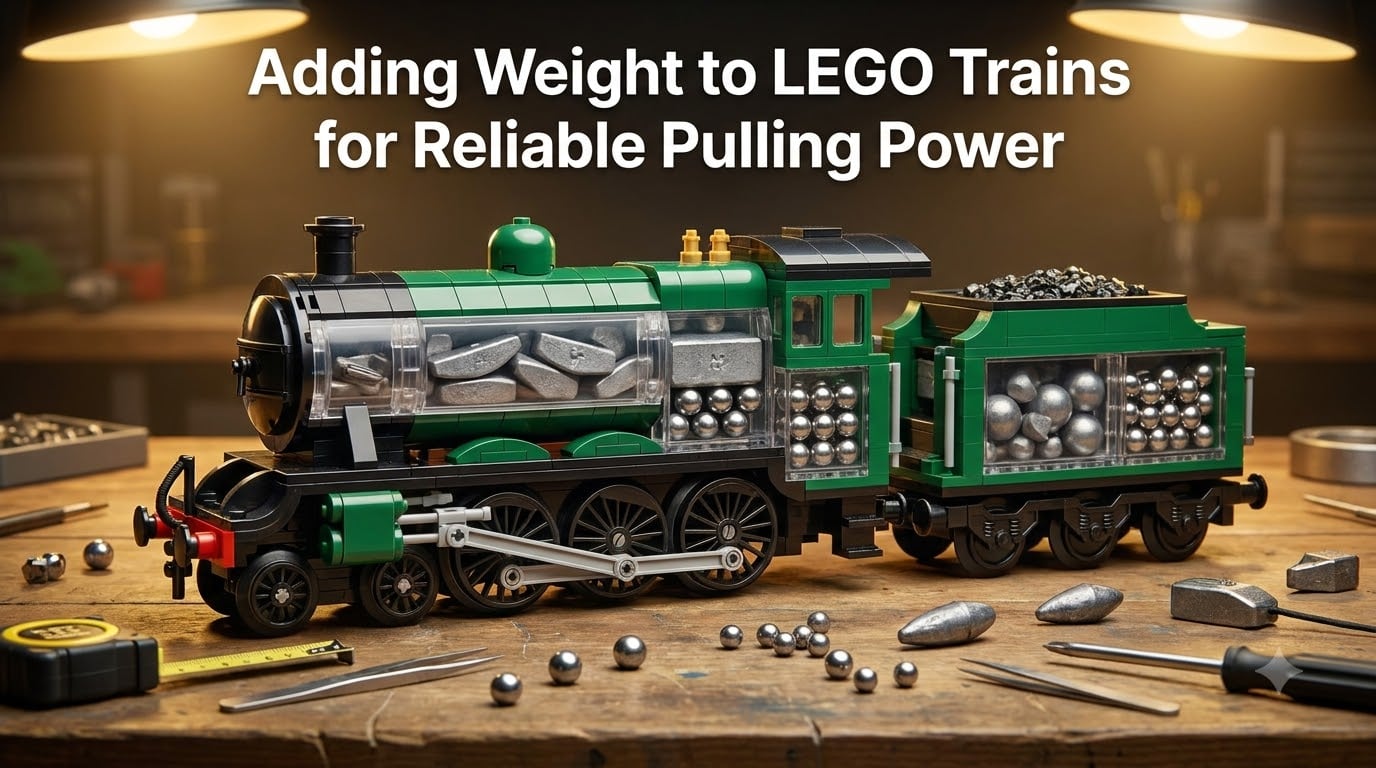
Every LEGO train builder hits the same wall. You connect six passenger cars, flip the switch, and watch your locomotive spin its wheels on the curves. The motor hums, the train stays put, and you wonder what went wrong. The answer is almost always the same: your locomotive needs more weight. Adding weight to LEGO trains is the single most effective upgrade you can make for reliable pulling power, and it is far simpler than most builders realize.
I have been wrestling with this problem for over a decade, building MOC steam locomotives and running layouts with my kids. I have tested boat weights, fishing weights, lead shot, tungsten putty, and more. Some worked. Some did nothing. One combination added enough traction to pull 14 cars up a 4% grade. In this guide, I will share everything I have learned about weighting LEGO locomotives, including the physics behind traction, the best materials to use, where to place them, and the safety rules you need to follow.
Table of Contents
Why Your LEGO Train Keeps Slipping
LEGO trains slip because the drive wheels cannot generate enough friction against the rails. Friction depends on two things: the coefficient between the wheel and rail material, and the downward force pressing them together. LEGO train wheels are plastic, and LEGO rails are plastic, so the coefficient is fixed. That means the only variable you control is downward force, which comes from the weight sitting directly above the drive wheels.
A stock City locomotive weighs roughly 300 grams. A heavy steam MOC might weigh 500 grams before you add anything. Compare that to a real-life N scale locomotive at over 100 grams per car, scaled up, and you see the gap. LEGO trains are toys, not scale models, and they are engineered for safety and play, not pulling capacity.
When the motor tries to pull more cars than the wheels can grip, the wheels spin. Modern PF and Powered Up motors include thermal protection that cuts power after a few seconds of stall. So you get a few seconds of slip, then the motor times out, and your train sits there mocking you. Adding weight solves this by giving the wheels the grip they need to actually transfer motor torque into motion.
Understanding LEGO Motor Power and Pulling Limits
LEGO makes several train motors, and each has different pulling capacity. The old 9V train motor, often called the “big motor,” was a beast. Builders still pull it out for heavy layouts because it delivers significantly more torque than newer motors. The Power Functions (PF) train motor is the workhorse of modern LEGO trains. It pulls 6 to 8 cars on flat track with a stock locomotive, less on grades or curves.
The Powered Up train motor is smaller and lighter than the PF version. It pulls about 4 to 6 cars stock. The L motor and XL motor are geared for speed, not pulling, so they are poor choices for long trains. The Servo motor can pull moderate loads but requires different mounting and control software.
Here is the practical breakdown I use when planning a layout:
- 9V train motor: 10-12 cars stock, 16+ weighted
- PF train motor (88002): 6-8 cars stock, 10-12 weighted
- Powered Up train motor: 4-6 cars stock, 8-10 weighted
- L motor: 2-3 cars stock, 4-5 weighted (speed-focused)
- XL motor: 3-5 cars stock, 6-8 weighted (speed-focused)
These numbers assume flat track and no tight curves. Curves add rolling resistance, and grades multiply it dramatically. A 4% grade roughly doubles the effective load on your motor. So a train that pulls 10 cars on flat track might only pull 5 up a hill.
Boat Weights: The Classic LEGO Train Solution
The boat weight, LEGO element 2738, has become the unofficial standard for weighting trains. Each brick weighs 18.7 grams, which is heavy for a single LEGO element. More importantly, the boat weight is shaped exactly to fit inside standard locomotive bodies. Builders have been slotting them into tenders, cabs, and boiler shells for years, and the technique works.
The boat weight measures 4 studs long, 2 studs wide, and has a curved top. Most locomotives have hollow spaces behind the boiler or inside the tender where a boat weight fits perfectly. Stack two or three of them and you can add 40 to 60 grams without major modification. That is enough weight to double the pulling capacity of most PF-driven trains.
I have used boat weights in nearly every MOC I have built. They are cheap on BrickLink, easy to find, and integrate cleanly with standard LEGO construction. For a beginner, start here. Add two boat weights and see how your train performs. If you still slip on curves, add a third.
Comparing Weight Materials: Lead, BBs, Tungsten and More
Boat weights are not the only option, and they may not be the best for every situation. After years of experimenting and reading forum posts from veteran builders, I have compiled a comparison of the most common materials. The table below shows density in grams per cubic centimeter, approximate cost per gram, and a safety rating for each.
| Material | Density (g/cm³) | Cost per gram | Safety | Best For |
|---|---|---|---|---|
| Tungsten putty | 11.0 | High | Safe (non-toxic) | Small spaces, pilot trucks |
| Lead shot | 11.3 | Low | Hazard (toxic) | Bulk weight, sealed compartments |
| Steel BBs | 7.8 | Very low | Safe but choking hazard | Bagged inside tenders |
| Steel balancing weights | 7.8 | Low | Safe but small parts | 1×2 brick cavities |
| Fishing sinkers | 7-11 (varies) | Low | Depends on material | Bulk weight, drop-in solutions |
| LEGO boat weight | N/A (calibrated) | Medium | Safe | Beginner-friendly |
| Copper-coated BBs | 8.0 | Low | Safe but choking hazard | Glued into blocks |
| Inox (stainless) bolts | 7.9 | Low | Safe | Custom cavities |
Tungsten putty wins on density and safety, but it costs the most. A 50-gram tube runs around $25, compared to a few dollars for a pound of lead shot. For builders who want maximum weight in minimum space and have families with young children, tungsten is the smart choice.
Lead shot is the classic hobbyist option. It is dirt cheap, easy to find at sporting goods stores, and you can enclose it in small plastic bags or capsules to keep it contained. The downside is toxicity. Lead does not belong in a train a toddler might disassemble. If you go this route, seal every compartment with glue and never use loose shot in a layout where kids play.
Steel BBs are the budget-friendly middle ground. A 6mm BB weighs about 0.13 grams, so you need hundreds to make a meaningful difference, but a bag of 1000 costs less than $10. The challenge is containment. BBs rattle, leak through small gaps, and present a choking hazard if a child opens the locomotive.
Steel balancing weights from hardware stores are an underrated option. They are sold as wheel weights or shelf pins, weigh 5 to 10 grams each, and are precisely sized to fit 1×2 or 1×4 brick cavities. A few of these inside a tender can add 30 grams with zero modification to the visible train.
Where to Place Weight in Your Locomotive
Placement matters as much as material. Put weight too high and you raise the center of gravity, making the train tippy on curves. Put it too far from the drive wheels and you add dead weight without adding traction. The sweet spot is low, centered, and directly above the powered axles.
For a steam locomotive, the ideal location is inside the boiler, just above the drive wheels. Most LEGO steam designs have hollow boiler shells for exactly this reason. The brick-built boiler hides a cavity where you can stack boat weights or fill with lead shot. If your locomotive has a separate tender, the tender is even better because tenders are typically heavy with weight capacity.
For an electric locomotive like the Crocodile or the Powered Up passenger train, look inside the body shell. Most have removable roofs or panels that reveal hollow spaces. Place weight directly over the motor and driven wheels for maximum benefit.
Pilot trucks and trailing trucks are also good candidates. Adding 20 to 30 grams to the lead truck improves tracking through curves, especially on tight radius switches. Tungsten putty works particularly well here because you can mold it into odd shapes and press it into small cavities.
Whatever you do, avoid placing weight on top of the locomotive. It looks unrealistic and makes the train unstable. Keep it hidden inside the body, low and centered, and your train will look factory-built while performing dramatically better.
Safety Considerations: Lead, Choking Hazards, and Child Safety
Lead is the elephant in the room. It is the cheapest and densest weight material available, and hobbyists have used it for decades. It is also toxic, especially to children. Lead dust and chips from friction can be inhaled or ingested. Lead shot, if a child opens the locomotive and puts a pellet in their mouth, can cause acute lead poisoning.
If your layout will be touched by children under six, skip lead entirely. Use tungsten putty, boat weights, or sealed steel weights instead. If you must use lead, seal every compartment with cyanoacrylate glue or epoxy so the shot cannot escape. Mark your locomotives with a small sticker inside noting that they contain lead, so any future owner or repair technician knows.
Small parts present a different but equally serious hazard. BBs, small nuts, and tiny weights all fit in a child’s mouth and throat. The LEGO train system is marketed to ages 6 and up, but individual builders often have younger siblings around. Treat any weighted locomotive like a real model railroad: assume a toddler will eventually open it, and design accordingly.
When working with lead shot, wear gloves and a dust mask. Wash your hands thoroughly afterward. Do not sand or cut lead indoors. Dispose of lead scraps at a hazardous waste facility, not in household trash.
Advanced Techniques: Rubber Bands and Friction Tricks
Weight is not the only path to better traction. A few advanced builders swear by O-rings and rubber bands slipped over the drive wheels. The idea is the same as a real traction tire: increase the coefficient of friction between wheel and rail. A small rubber band stretched over a LEGO train wheel adds noticeable grip, especially on plastic rails.
This works, but it has trade-offs. Rubber bands stretch out, collect dust, and can leave black marks on light-colored rails. They also change the wheel diameter slightly, which can affect gear mesh on some motor setups. I use them only as a supplement to weight, not a replacement.
Another technique is reducing rolling resistance on the unpowered cars. Real LEGO train wheels turn on plastic axles, which have higher friction than metal bearings. Several builders swap to ball bearings from third-party suppliers or extract bearings from old PF motors. Smoother rolling means less work for the locomotive, which means it can pull more cars even without added weight.
The holy grail for serious builders is adding both ball bearings and weight. One Eurobricks user reported pulling 22 cars on a single PF motor with a weighted locomotive and ball-bearing rolling stock. That is exceptional, but it shows what is possible when you treat LEGO trains like the engineering hobby they really are.
Frequently Asked Questions
How much weight can a LEGO train motor pull?
A stock Power Functions train motor can pull roughly 6 to 8 cars on flat track. Adding 50 to 100 grams of weight to the locomotive typically increases this to 10 to 12 cars. The Powered Up train motor has less torque and pulls 4 to 6 cars stock, or 8 to 10 weighted. The old 9V motor is the strongest and can pull 10 to 12 cars stock, or 16+ with added weight.
How much torque does a LEGO train motor have?
The PF train motor delivers approximately 5 Ncm of torque at the output shaft. The Powered Up train motor is rated lower, around 3.5 Ncm. The 9V train motor produces roughly 12 Ncm, which is why vintage 9V locomotives outperform modern ones on heavy trains.
What is the best weight material for LEGO trains?
Tungsten putty offers the best combination of density, safety, and ease of use. It weighs nearly as much as lead but is non-toxic and moldable into tight spaces. For builders on a budget, sealed steel BBs or LEGO boat weights are safer alternatives to lead shot while still providing meaningful traction improvements.
Is lead safe to use in LEGO trains?
Lead is toxic and not recommended for layouts accessible to children. Adult builders who use lead should seal every compartment with glue and wear gloves and a dust mask when handling shot. For families with young children, choose tungsten putty, boat weights, or sealed steel weights instead.
Where should I place weight in a LEGO locomotive?
Place weight low, centered, and directly above the drive wheels for maximum traction. Inside the boiler or tender is ideal for steam locomotives. Avoid placing weight on top of the locomotive, which raises the center of gravity and causes instability on curves.
How many cars can a LEGO train pull?
With a stock PF train motor and no added weight, expect 6 to 8 cars on flat track. Adding 50 grams of weight to the locomotive can raise this to 10 to 12 cars. On grades, expect roughly half the flat-track capacity. With ball bearings on rolling stock and added locomotive weight, 15 to 20 cars is achievable on flat track.
Final Thoughts
Adding weight to LEGO trains is the simplest way to transform a frustrating, slipping locomotive into a reliable puller. Start with boat weights if you are new to this. They are safe, easy to find, and proven across thousands of builds. Graduate to tungsten putty or steel BBs when you need more weight in less space. Treat lead shot as an adult-only material with proper sealing and handling.
Test, adjust, and repeat. Every locomotive is different, and the layout, curve radius, and grade all affect how much weight you need. Run weighted trains on a test loop before committing them to your main layout, and keep notes on what works. After a few builds, you will develop an instinct for placement and material that no guide can fully teach. Welcome to the rabbit hole, and enjoy your longer, heavier, more reliable LEGO trains.