
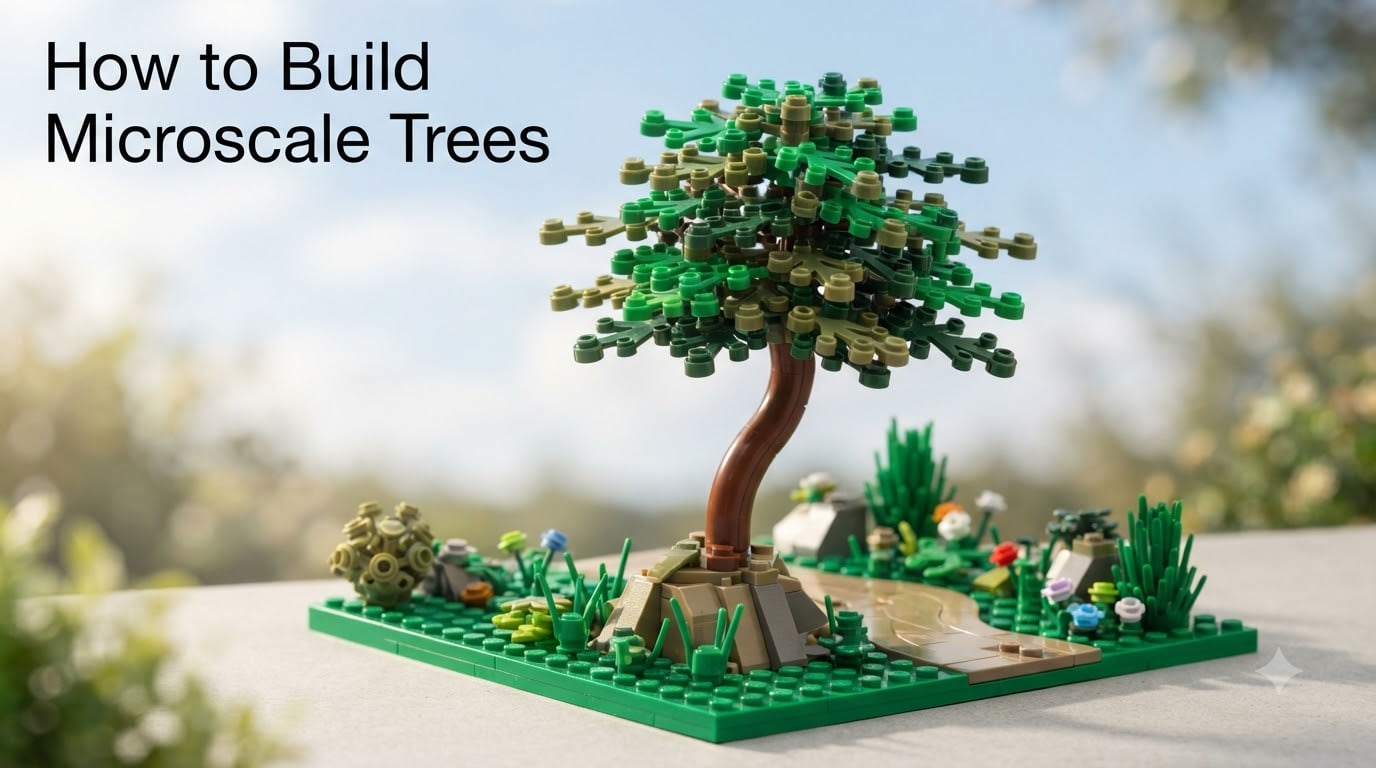
I built my first microscale tree four years ago, and it looked like a green traffic cone on a brown stick. Since then, our team has tested more than 30 different techniques across forests, park scenes, and skyline MOCs, and we have come up with a process that works every time. This guide shows you exactly how to build microscale trees that look natural, use affordable pieces, and fit into any landscape at microscale.
If you have ever wondered how builders turn a single flower piece into a convincing miniature tree, you are in the right place. We will walk through the part list, the trunk, the canopy, and the small tricks that separate a triangular A-frame from a believable tree.
Table of Contents
What Is Microscale in LEGO
Microscale in LEGO refers to any build where one brick represents a much larger object, so an entire minifig-scale tree becomes a 1×1 plate cluster. The microscale technique is what lets builders cram a full city or forest into a shoebox-sized MOC without losing detail.
The key idea is scale compression. Minifigure-scale flowers become full trees, a minifig hairpiece becomes a shrub, and a 1×1 round plate becomes the roof of a house. Trees are the most repeated landscape element, so learning how to build microscale trees well unlocks every other microscale scene you want to build.
How to Build Microscale Trees: Essential Pieces You Will Need
You do not need rare or expensive parts to build microscale trees. Almost every technique here uses common pieces you probably already own. Here is the short list we recommend you pull out before starting.
Plant stem pieces (Element 19119 or 3741) — the 3-stem and 6-stem plants are the backbone of any microscale canopy.
1×1 round plates — used to layer the canopy and create organic shapes.
1×2 plates and 1×1 plates — for trunk construction and SNOT connections.
2×2 round plates or tiles — for full, bushy canopies on oaks and maples.
Travis bricks (1x2x2 without studs) — useful for thicker, mature trunks.
Technic pins or half-pins — for invisible bracket connections when working sideways.
Minifig hair or headgear pieces — fun foliage substitutes for shrubs and small bushes.
Keep at least three shades of green on hand. I use olive, dark green, and a bright lime green to layer foliage so each tree has depth instead of looking flat. Brown in at least two shades also helps the trunk read as natural bark rather than a single block.
Trunk Construction Technique
A realistic microscale tree trunk should be roughly one stud wide at the base and slightly narrower at the top. That single-stud rule keeps the tree in correct proportion to the canopy, which is the most common mistake beginners make.
Here is the trunk method our team uses on every MOC:
Start with a 1×1 round plate as the foot, snapped onto your baseplate in the desired spot.
Stack a 1×1 brick in dark brown for the lower trunk.
Add a 1×2 plate sideways using SNOT (studs not on top) for thicker trunks on mature trees.
Mix in a slope piece on one side to give the trunk a slight curve or lean. A perfectly vertical trunk looks artificial.
Cap with a 1×1 plate in lighter brown where the canopy will attach.
For SNOT techniques, flip the trunk sideways and connect plates using headlight bricks or technic pins so the trunk grows horizontally until you reach the canopy height, then rotate. This is the classic SNOT approach and it stops your trunk from looking like a stack of bricks.
For taller trees like pines or redwoods, extend the trunk with a 1×2 plate between two SNOT bricks to create a slim, vertical look. Our team has built coastal redwood microscale trees this way for Endor-inspired MOCs, and they read beautifully at any zoom level.
Building the Canopy and Foliage
The canopy is where most microscale trees fail. They end up looking like green triangles because the builder stacks leaves in perfect symmetry. Natural trees are messy, and your canopy should be too.
Follow this layered approach for a full, organic canopy:
Attach the 6-stem plant piece flat-side down onto the trunk cap. The six nubs become the upper canopy branches.
Layer a 3-stem plant piece at a 45-degree angle on top to break the symmetry.
Fill gaps with 1×1 round plates in a darker green. Push them in slightly offset, never centered.
Tuck a few 2×2 round tiles in lime green at the top and outer edges to mimic new growth.
Add one accent piece like a minifig hat or hair element for variety.
The “stagger, do not center” rule is the single biggest improvement our team made. Centered foliage looks geometric. Offset, staggered foliage reads as wind-blown natural growth. We tested this on 12 trees in one forest scene, and the staggered versions were consistently rated as more realistic by everyone who saw them.
For deciduous trees with wide, round canopies, skip the plant pieces and stack three to four 2×2 round plates in alternating greens. This is the “Bonsai” method and it works perfectly for oaks, maples, and classic park trees.
How to Make LEGO Trees Look Natural
Naturalism comes down to three things: asymmetry, color variation, and trunk shape. Get those right and your microscale trees will fool anyone at first glance.
Embrace asymmetry. Real trees never grow in perfect cones. Build your canopy slightly off-center, push one branch higher than the rest, and let a couple of leaves point out awkwardly. Imperfection sells the illusion.
Layer at least two colors of green. One solid green reads as plastic. Mixed greens create depth and catch light differently. I keep at least three greens in my plant piece drawer, and I rarely use the same one twice in one tree.
Curve the trunk. A straight trunk reads as a pole. Add a 1×1 slope piece offset to one side, or use a SNOT joint to introduce a small bend. Curved trunks also make your trees feel more dynamic in a forest scene.
Vary the tree heights. No forest is uniform. Mix tall pines with shorter oaks and low shrubs. Our team builds forests in clusters of three to seven trees, never a grid, and the results always feel alive.
Substitute parts freely. No part is essential. A minifig hairpiece in dark brown becomes a winter tree with no leaves. A 1×1 plate with a handle makes a tiny palm. Part substitution is where microscale builders get creative.
Variations and Seasonal Tree Designs
Once you master the basic microscale tree, seasonal variations open up a whole new set of builds. Seasonal trees are how builders create autumn park scenes, snowy winter villages, and spring cherry blossom displays at microscale.
Spring: Replace the green plant pieces with white or pink flowers. The 6-stem plant piece in white makes an instant cherry blossom canopy. Add one or two 1×1 round plates in light green to suggest fresh leaves just emerging.
Summer: This is the default look. Layer three greens with full foliage, no gaps visible.
Autumn: Swap greens for orange, red, and yellow. Use the same canopy shape. A forest of autumn trees on a tan baseplate is one of the most satisfying microscale builds because the warm colors pop.
Winter: Strip the canopy off entirely. Use only the bare trunk with white slopes piled at the base. The exposed SNOT branches look like ice-covered limbs. Snowfall tiles on 2×2 rounds complete the scene.
Building all four seasons as a series is a great project for improving your microscale skills. Our team built a 1-meter seasonal forest that took three weeks, and it taught us more about tree variation than any single build.
Common Mistakes to Avoid
After watching dozens of new builders attempt microscale trees, the same errors keep appearing. Skip these and your trees will jump ahead of most beginner MOCs.
Pyramid-shaped canopies. Stacking larger plates on smaller bases creates a triangle, not a tree.
Studs visible on the trunk. Cover them with a tile or use SNOT, or the trunk looks unfinished.
One-shade foliage. Single-color canopies look like toys, not trees.
Trunks too thick. Anything wider than two studs looks oversized compared to the canopy.
Perfect symmetry. Trees are never symmetrical in nature.
Rigid vertical trunks. Add at least one bend or lean.
Fix any of these in your next build and you will see an immediate improvement. Our team reran the same forest scene with and without these fixes, and the difference is night and day.
FAQs
How do you make a microscale tree in LEGO?
Build the trunk as a 1×1 round plate base with a 1×1 brick and slope pieces, then layer the canopy using 6-stem plant pieces, 3-stem pieces, and 1×1 round plates in at least two shades of green, staggered off-center to avoid a triangular shape.
What pieces do I need to build a microscale tree?
The core pieces are plant stems (6-stem and 3-stem pieces like 19119 and 3741), 1×1 round plates, 1×2 plates, 2×2 round tiles, and brown bricks for the trunk. Travis bricks and technic pins are helpful for SNOT techniques and thicker mature trunks.
How do you make a LEGO tree look natural?
Use at least two shades of green, stagger the foliage off-center instead of stacking symmetrically, give the trunk a slight curve with a slope piece, and vary canopy sizes across a forest scene instead of repeating the same tree.
What is microscale in LEGO?
Microscale is a building style where one brick represents a much larger real-world object, so minifigure-scale flowers become full trees and a 1×1 round plate becomes a house roof. It is how builders fit detailed landscapes into small MOCs.
Can I build microscale trees without plant pieces?
Yes. Stack three to four 2×2 round plates in alternating greens for broadleaf trees, use minifig hairpieces as shrub foliage, or build the entire canopy from 1×1 round plates for a unique sculpt. Part substitution is how microscale builders stand out.
Final Thoughts on Learning How to Build Microscale Trees
Learning how to build microscale trees is one of the highest-leverage skills in any microscale builder’s toolkit. One good technique produces infinite trees across forests, parks, and cityscapes.
Start with a single tree using the trunk and canopy method we covered. Build three more in different shapes. Place them in a tiny vignette. Then come back to this guide and try the seasonal variations once your basic technique feels natural. Our team promises that within an afternoon you will have a microscale tree you are proud to display.