
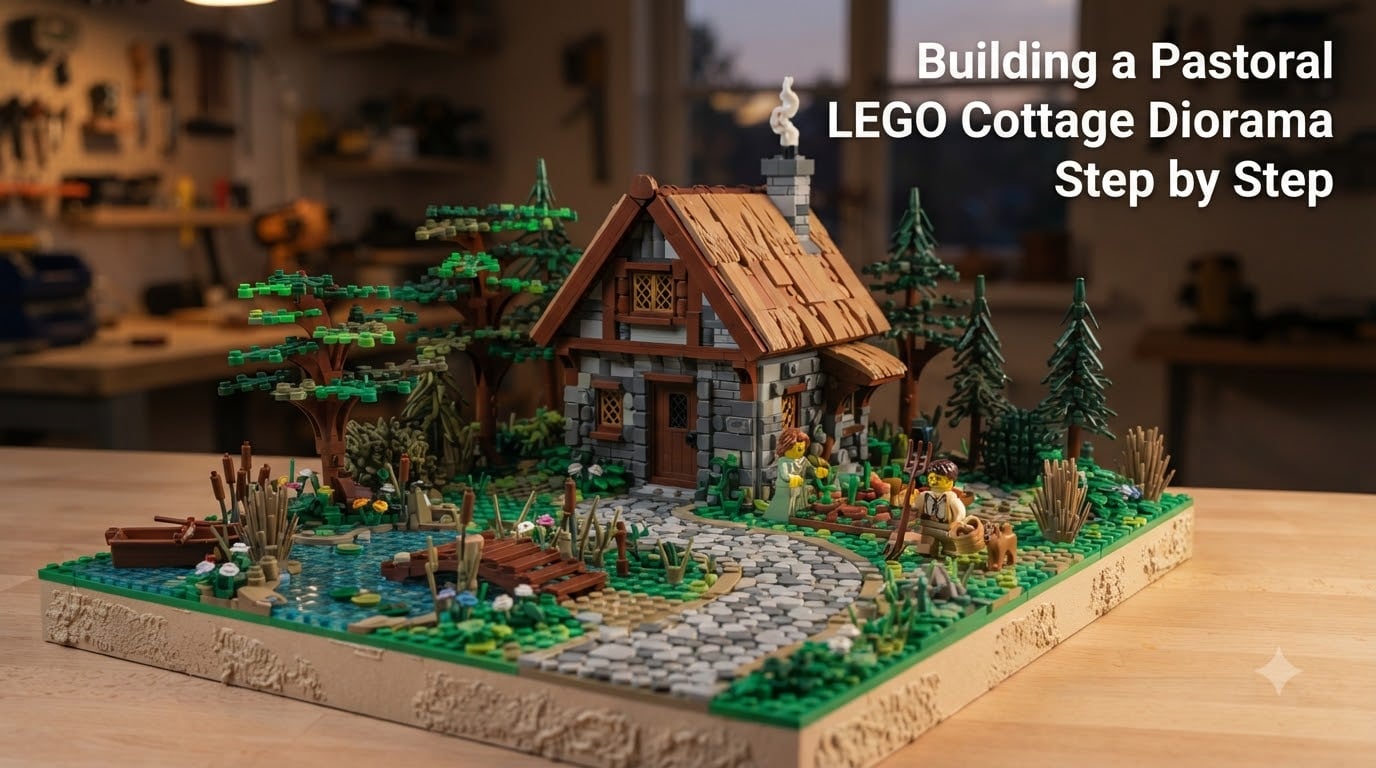
Building a pastoral LEGO cottage diorama lets you turn a handful of bricks into a tiny world that tells a story. I built my first cottage scene back in 2026 after years of collecting minifigures, and the moment I added a thatched roof and a winding path, the whole thing came alive. In this guide, I’ll walk you through every phase of the build, from choosing your base to storytelling details that make your scene feel real.
By the end, you’ll know how to plan a scene, build a stable base, master the 5:2 rule for diagonal walls, landscape like a pro, and avoid the mistakes that trip up most beginners. Whether you’re working with a $20 parts haul or raiding your existing collection, this step-by-step tutorial will give you a complete roadmap.
Table of Contents
Materials and Tools You Need for Your LEGO Diorama
You don’t need every piece under the sun to start. I built my first cottage scene with about 600 bricks and a foam board, and it looked great. Here’s what I recommend gathering before you begin.
Bricks, Plates, and Specialty Pieces
Start with a core supply of standard bricks in earth tones. Sand green, dark tan, reddish brown, and medium stone grey will cover most of your cottage and landscaping needs. Slope bricks and curved slopes are the secret to a polished roof, and a small collection of 1×1 round plates or tiles helps with texture variation.
For foliage, pick up fern pieces, leaf pieces, and small plant elements. If those are out of budget, flag pieces work surprisingly well as makeshift leaves and grass tufts. I learned this trick from a forum thread where builders were cutting costs on large-scale dioramas.
Base Materials
The base sets the foundation for everything else. Most builders use one of three options:
- Foam board: Lightweight, easy to cut, and cheap. Perfect for beginners building their first diorama.
- Wood (MDF or plywood): More durable and heavier, ideal for display pieces you plan to keep long term.
- Stacked LEGO plates: Pure LEGO solution. Use 16×16 or 32×32 baseplates, but plan for the studded look.
For a pastoral scene, I prefer foam board wrapped in a baseplate. The foam lets me sculpt hills and slopes while the LEGO top layer keeps everything modular.
Tools Beyond Bricks
You only need a few extras. A sharp craft knife for trimming foam, white glue or PVA for securing loose elements, and a few sheets of sandpaper for smoothing foam edges. Skip the spray paint, by the way. It melts LEGO plastic and ruins pieces. I learned this the hard way and lost an entire bucket of dark grey bricks.
Optional but helpful: a brick separator (obviously), tweezers for placing tiny elements, and a small brush for clearing dust off finished builds.
Planning Your Pastoral Scene Before You Build
Every great diorama starts on paper, not on the baseplate. I’ve seen builders dive straight into construction only to rip it apart halfway through. A 20-minute planning session saves hours of frustration.
Define the Story Moment
Ask yourself: what story does this scene tell? A pastoral LEGO cottage diorama might capture a farmer tending sheep at sunrise, a family dinner by candlelight, or a quiet afternoon by the garden gate. Pick one moment and design around it. The narrower your focus, the more powerful the scene.
For my first build, I chose a “goatherd at dusk” theme. Knowing this from the start helped me pick colors (warm oranges and soft browns), choose the cottage orientation (facing west to catch the imaginary sunset), and decide which minifigures to include.
Sketch the Layout
Grab a piece of paper and sketch your diorama from above. Mark where the cottage sits, where the path winds, where trees go, and where your minifigures will stand. Don’t worry about art skills. A rough diagram with labeled boxes works fine.
Pay attention to scale. A standard minifigure is about 4 bricks tall (4.8 cm), so a one-story cottage should be roughly 8-10 bricks tall to look proportional. Windows, doors, and roof pitch all need to match this scale or your scene will feel off.
Choose Your Color Palette
Pastoral scenes rely on earthy, harmonious colors. Limit yourself to 4-6 main colors and stick to them. Mixing too many tones creates visual chaos. My go-to palette for cottage builds: dark tan walls, reddish brown roof, sand green for grass, dark stone grey for paths, and medium nougat for wood details.
How to Build a LEGO Diorama Step by Step
Now the fun begins. I’ll walk you through the actual building process in clear, numbered steps. We’ll start with the foundation and work our way up to the smallest details.
Step 1: Build the Base and Terrain
Cut your foam board to size and start shaping terrain. For a pastoral scene, gentle rolling hills work better than dramatic mountains. Use your craft knife to carve slopes, then sand the edges smooth.
Cover the foam with LEGO baseplates or large flat tiles. If you’re stacking LEGO plates, build up your terrain shape first, then add grass tiles and sloped pieces on top. Secure the foam to a wooden board underneath for stability.
Test the level surface by placing a few bricks on it. If they wobble, your base isn’t flat enough. Take time here. Every problem you fix now saves you three later.
Step 2: Construct the Cottage Walls
Build the four walls separately on a flat surface, then attach them to the base. This is much easier than building up from the baseplate. For a classic cottage look, alternate brick orientations to create texture. Don’t just stack uniform rows. Mix in offset patterns, occasional plates for windowsills, and SNOT (Studs Not On Top) sections for sideways details.
Leave openings for doors and windows. A standard minifigure door is 1x3x4 bricks, and windows are usually 1x2x3 or 1x4x3 depending on style. Frame these openings with darker bricks to make them pop.
Step 3: Add the Roof and Chimney
Roofs make or break a cottage diorama. Slope bricks in 33-degree, 45-degree, and 65-degree angles give you realistic pitches. For a pastoral thatched-roof look, layer reddish brown slopes with occasional dark tan highlights to mimic weathered straw.
Chimneys add instant charm. Build a small brick stack rising from one side of the roof, top it with a 1×1 round plate or a small smoke element, and you’ve got instant coziness.
Step 4: Build the Landscape
Now step back and look at your cottage. Where does the eye naturally fall? Build your landscaping around those focal points. Start with the grass area closest to the cottage, then work outward.
Use green baseplates or 1×2 plates to fill grass areas. Mix 2-3 shades of green for variation. Add small flowers (1×1 round plates in white, yellow, and red) scattered throughout. Build a winding path with stone grey plates and tiles, leaving small gaps between them for a cobblestone feel.
Step 5: Add Trees, Fences, and Garden Details
Trees anchor a pastoral scene. Build simple trunks from 1×1 round bricks or stack dark brown cylinders, then attach leaf elements on top. Vary tree heights and shapes to avoid a cookie-cutter look.
Fences are quick to build and add tremendous character. Use 1×2 plates with fence elements on top, or build simple post-and-rail fences from 1×1 bricks and 1×4 plates. Place them around gardens, along paths, or near animal pens.
Don’t forget the small details: a wheelbarrow made from a few grey and brown pieces, a water pump or well, a stack of firewood, or a tiny vegetable patch with colored dots representing crops.
Step 6: Place Minifigures and Final Touches
Now position your characters. Each minifigure should have a clear purpose in the scene. The farmer works in the field. The child feeds the chickens. The dog sits by the door.
Step back and look at the whole scene. Anything missing? Add a few finishing touches: a bird perched on the chimney, a cat by the garden, a wisp of “smoke” from a white string element. These tiny additions breathe life into your diorama.
Understanding the 5:2 Rule in LEGO Building
The 5:2 rule is one of the most useful techniques in advanced LEGO building, and it’s especially helpful for diagonal cottage walls, curved paths, and angled roof sections. Let me explain it clearly.
The 5:2 rule states that for every 5 studs of horizontal distance, you rise 2 plates vertically (or roughly 2 bricks). This ratio creates a slope that visually approximates a 22-degree angle, which looks natural to the human eye and avoids awkward stair-stepping in diagonal builds.
Here’s how to apply it. If you’re building a diagonal wall that needs to travel 10 studs sideways while rising, you’d step up 4 plates (or 2 bricks) over that distance. Place a plate, skip ahead 5 studs, place another plate, skip ahead 5 studs, and so on. The result is a smooth-looking slope that integrates with standard bricks.
Why does this work? It follows the proportions of a right triangle where the horizontal leg is 5 and the vertical leg is 2. This is similar to a Pythagorean triple scaled for LEGO’s modular grid. The 5:2 rule is the foundation for diagonal building techniques used in everything from cottage walls to cave ceilings.
I use the 5:2 rule whenever I need angled walls or paths. It saves time and produces results that look intentional rather than improvised. Try it on your next build and you’ll see the difference immediately.
Adding Landscaping and Natural Details
Landscaping transforms a collection of bricks into a believable scene. The secret is layering and texture variation. A flat green lawn looks fake. A lawn with mixed greens, scattered flowers, and a few textural elements looks alive.
Grass and Ground Cover
Mix at least three shades of green for grass areas: olive, sand green, and bright green. Use 1×2 plates and 2×2 tiles interchangeably to break up the pattern. Add tiny 1×1 plates in yellow and white for wildflowers.
For tall grass, attach small fern or leaf pieces to 1×1 plates or use clip pieces to add height. A few clusters of tall grass near fences and walls create depth without overwhelming the scene.
Trees and Shrubs
Build trees in layers. Start with a brown trunk, then add a few branches using small clip pieces, then top with leaves in 2-3 green shades. Mature trees should be 12-16 bricks tall. Saplings and shrubs can be much smaller.
For shrubs, ball-joint pieces or even modified 2×2 round bricks work well. Cluster them in groups of three or five for natural placement.
Water Features
A small pond or stream adds tremendous charm to a pastoral scene. Use trans-blue tiles or 1×2 plates for the water surface. Add a few trans-clear pieces for ripples, and surround the water with sand green plates to suggest a soft edge.
Don’t make water features too large. A small pond fits better with the intimate scale of a cottage scene than a sprawling lake.
Paths, Fences, and Borders
Paths guide the eye through your diorama. Build them with stone grey plates and tiles, slightly recessed below the grass level if possible. Edge them with darker grey bricks or small flower clusters.
Fences separate spaces and add visual rhythm. Place them where the eye needs a break: around gardens, near animal pens, along property lines. Keep fence styles consistent within a small area for visual unity.
Advanced Techniques: SNOT and Texturing
Once you’re comfortable with basic building, SNOT (Studs Not On Top) techniques open up a whole new world of possibilities. SNOT lets you place studs on the sides or bottom of a build, which is essential for smooth walls, sideways details, and complex shapes.
What Is SNOT?
SNOT is any building method where studs face sideways or downward instead of up. Common SNOT bricks include 1×1 plates with side studs, 1×2 jumper plates, and SNOT bricks with studs on multiple faces. These pieces let you build perpendicular surfaces without visible studs on the front.
For cottage walls, SNOT lets you create smooth front-facing surfaces while attaching details like windows, shutters, and signs on the sides or back. The result is a more realistic, polished look.
Texture and Color Harmony
Texture variation makes walls look real. Mix bricks of different sizes, alternate orientations, and use occasional inverted slopes or recessed sections. A flat wall of identical bricks looks fake. A wall with subtle pattern breaks looks weathered and lived-in.
Color harmony matters as much as texture. The 60-30-10 rule works well for dioramas: 60% dominant color (usually green for grass or tan for walls), 30% secondary color (brown for wood, grey for stone), and 10% accent color (red roof, yellow flowers, blue water).
Common Mistakes to Avoid in Your First Diorama
Every builder makes mistakes. The trick is learning from others instead of repeating the same errors. Here are the pitfalls I see most often.
Mistake 1: Skipping the Planning Phase
The biggest mistake is jumping straight into building. I’ve watched friends spend 10 hours on a diorama only to realize halfway through that the scale was wrong or the layout didn’t work. Twenty minutes of planning saves hours of rebuilding.
Mistake 2: Ignoring Scale and Proportion
A common error is making the cottage too big or too small for the minifigures. Standard minifigure scale is roughly 4 bricks tall. Make sure your door heights, window placements, and furniture all match this proportion.
Mistake 3: Using Too Many Colors
New builders often use every piece in their collection. Restraint creates better scenes. Limit yourself to a tight palette and let a few accent colors shine.
Mistake 4: Neglecting Structural Integrity
If your walls wobble or your roof sags, the diorama will fall apart during handling. Build solid foundations, use plates between brick layers for strength, and consider SNOT techniques for hidden structural support.
Mistake 5: Forgetting the Story
A technically perfect diorama without a story feels empty. Always ask: what is happening here, and why should the viewer care? Add elements that suggest activity: an open book on a table, a half-eaten meal, tools leaning against a wall.
Mistake 6: Overspending on Pieces
Building large dioramas can get expensive fast. Buy bricks in bulk from online marketplaces, raid your existing collection first, and substitute specialty pieces with cheaper alternatives when possible. A $50 build can look just as good as a $500 build with the right techniques.
Tips for Making a LEGO Diorama That Tells a Story
The difference between a diorama and a pile of bricks is storytelling. Here are techniques I’ve used to bring scenes to life.
Use minifigure poses to suggest action. A minifigure with raised arms reads differently than one standing at rest. Place characters in conversation, working, or staring off into the distance to imply narrative.
Add environmental storytelling elements. A drying rack with fish suggests a recent catch. A pile of chopped wood suggests hard work. These small details reward closer inspection.
Consider lighting. A single warm-colored LED placed inside the cottage can simulate evening light streaming through a window. Position lights to create shadows that suggest time of day.
Think about the viewer’s eye path. Build so the eye naturally moves from one focal point to another. The cottage draws attention first, then the eye follows a path to a character, then to a tree or fence in the background.
Keep building and refining. My best diorama went through at least five iterations before I was satisfied. Don’t be afraid to dismantle sections and rebuild them. The process is part of the joy.
Frequently Asked Questions
How to create a simple LEGO diorama?
Start small with a single baseplate, one structure, and a few minifigures. Build a basic base using foam board or stacked plates, add one cottage or focal building, then landscape around it with grass tiles, a simple path, and 2-3 trees. Focus on one story moment rather than trying to capture everything.
What is the 5:2 rule in LEGO?
The 5:2 rule states that for every 5 studs of horizontal distance, you rise 2 plates vertically. This creates a 22-degree slope that looks natural for diagonal walls, paths, and roof sections. It works because it follows Pythagorean triple proportions scaled for LEGO’s modular grid.
What can I use as a base for a LEGO diorama?
The three most common base options are foam board (lightweight, easy to cut, budget-friendly), MDF or plywood (durable and heavier, ideal for permanent displays), or stacked LEGO baseplates (pure LEGO solution with a studded surface). Foam board wrapped in a LEGO baseplate offers the best balance for most builders.
What kind of material should I use to make a floor in a LEGO diorama?
For interior floors, use flat LEGO tiles in brown, tan, or grey to suggest wood or stone. For exterior ground, use a combination of green plates for grass, stone grey tiles for paths, and sand green baseplates for variation. Match your floor material to the surrounding landscape for visual continuity.
What are some tips for making a LEGO diorama?
Plan your scene on paper before building, stick to 4-6 main colors, use the 5:2 rule for diagonal walls, vary brick patterns for texture, and always build with a story in mind. Add small details like tools, food, or animals to suggest activity. Limit yourself to one focal moment rather than cramming too much in.
What are some cool LEGO building techniques?
Key advanced techniques include SNOT (Studs Not On Top) for sideways details, the 5:2 rule for diagonal walls, hinge plates for opening roofs and doors, and texture variation through brick orientation. Use mixed brick sizes, inverted slopes, and recessed sections to create weathered, realistic surfaces.
What is the best base for a LEGO diorama?
The best base depends on your goals. Foam board is best for beginners and budget builds. MDF or plywood is best for permanent, heavy displays. Stacked LEGO baseplates are best for modular builds you want to rearrange. For most pastoral cottage scenes, a 16×16 or 32×32 baseplate on foam board offers the ideal combination of flexibility and stability.
How to build with LEGO step by step?
Start with planning your design on paper. Build a solid base using foam or plates. Construct walls separately before attaching to the base. Add a roof using slope bricks for realism. Landscape around the structure with grass, paths, and trees. Finish with minifigures and small storytelling details. Work from large structural pieces to small accents.
Conclusion
Building a pastoral LEGO cottage diorama is one of the most rewarding projects you can tackle as a LEGO enthusiast. You start with loose bricks and end with a tiny world full of warmth and personality. Follow the step-by-step process outlined here, master the 5:2 rule for diagonal work, and don’t skip the planning phase. Most importantly, build with a story in mind. Your pastoral LEGO cottage diorama should capture a single moment that feels alive, whether it’s a farmer at work, a family dinner, or a peaceful afternoon by the garden gate.
Grab your bricks, sketch your scene, and start building today. Your first diorama won’t be perfect, and that’s exactly right. Each build teaches you something new, and the next one will be even better. If you get stuck, revisit the FAQ section above or browse community builds for fresh inspiration. Happy building.