
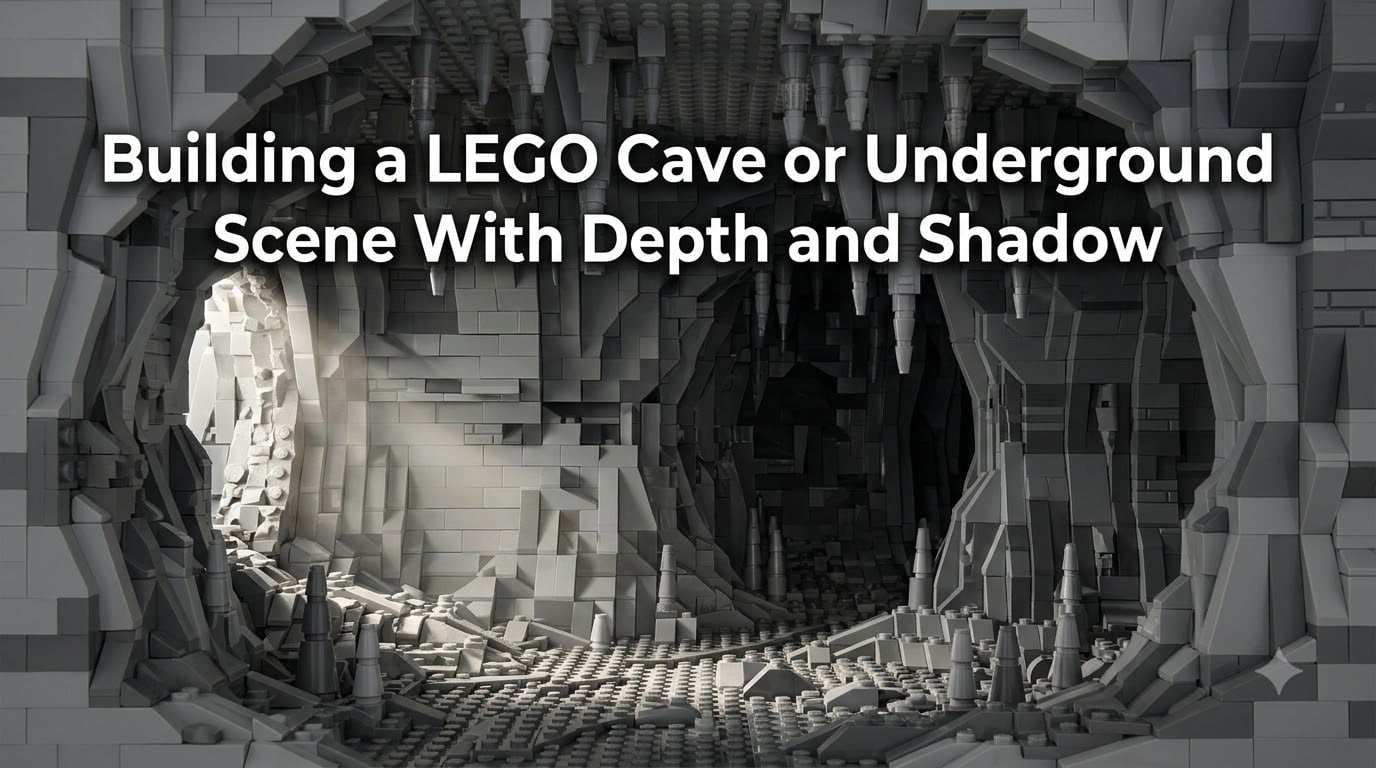
Building a LEGO cave or underground scene with depth and shadow is one of the most satisfying challenges in custom LEGO building. Unlike above-ground structures where straight walls and clean lines look right, caves demand irregular surfaces, layered textures, and carefully controlled light to feel convincing. I have spent years refining my LEGO cave building techniques, and I want to share everything I have learned about making underground scenes that look like they could swallow your Minifigures whole.
In this guide, you will discover how to create depth using layered wall construction, SNOT techniques for organic rock textures, and lighting tricks that make shadow do the heavy lifting in your builds. Whether you are designing a dungeon lair, a mine shaft, a crystal cavern, or a natural rock formation, these methods will transform flat brick walls into immersive underground environments.
The core idea is simple: real caves feel three-dimensional because they are. Surfaces jut out and recede at unpredictable angles. Light enters from one direction and fades into darkness. Colors shift from weathered highlights on exposed surfaces to deep blacks in untouched recesses. Replicating that chaos with precision LEGO elements is exactly what makes LEGO cave building techniques so rewarding to master.
Table of Contents
Understanding Depth and Shadow in LEGO Builds
Depth in a LEGO build means the viewer’s eye perceives multiple layers of distance within a single structure. In cave scenes, this happens when walls are not flat planes but instead feature sections that push forward and pull back from the main surface. The more variation you build into the depth of your walls, the more convincing the underground environment becomes.
Shadow is the natural partner of depth. When parts of your cave wall protrude and other parts recede, light hits some surfaces and misses others. Those unlit areas create shadow, and shadow communicates volume and mass to the viewer. You do not need paint or special effects to achieve this. The physical structure of your build creates real shadows under real lighting.
Underground scenes benefit from depth and shadow more than almost any other LEGO environment. A castle wall can look fine as a relatively flat surface with some texture. A cave cannot. Caves are defined by their irregular geometry, their play of light and dark, and their sense of enclosed space. Without depth, a LEGO cave looks like a gray box. With it, the same bricks become a mysterious cavern.
Here is what creates depth in any underground build:
Layered wall sections built at different distances from the viewer
Overhangs and ledges that cast shadow on surfaces below them
Color gradients from dark recesses to lighter protruding surfaces
Textural variety using different brick types to break up large flat areas
Directional lighting from a single source to emphasize the above
Keep these five elements in mind as you work through each technique in this guide. Every method I cover serves at least one of these goals.
Choosing the Right Color Palette for Underground Scenes
Color is the single most powerful tool for creating depth and shadow in a LEGO cave. Before you touch a slope piece or experiment with SNOT, you need to plan your color strategy. The wrong colors will make even the most intricately textured cave look flat and unconvincing.
The fundamental rule of LEGO cave coloring is simple: dark colors go in the deepest recesses and lighter colors go on the most exposed surfaces. This mimics how real rock behaves. Surfaces that catch light weather and lighten over time, while protected areas stay dark and shadowed. When you replicate this with your brick choices, the human eye reads the color gradient as natural depth.
For a standard natural stone cave, I recommend this base palette:
Black for the deepest, most shadowed areas where no light reaches
Dark bluish gray for deep recesses and interior cave walls
Medium bluish gray for mid-tone surfaces and the majority of your rockwork
Light bluish gray for protruding surfaces, ledges, and areas that catch light
Tan or dark tan for sandy floors, sediment layers, and earthy transitions
Older LEGO gray colors (solid gray and dark gray from before 2004) can add useful variation if you have them. Their slightly warmer tone creates a weathered look that mixes well with modern bluish gray shades. Many experienced cave builders deliberately mix old and new gray to avoid a uniform appearance.
For specialized cave types, adapt the palette. Crystal caves benefit from transparent neon green, blue, or pink elements contrasting against dark backgrounds. Volcanic caves call for dark red, reddish brown, and black with occasional trans-orange accents. Mine shafts pair gray stone with reddish brown wooden supports and dark orange dirt layers.
Avoid using a single color for large wall sections. Even if your cave is mostly medium bluish gray, break it up with patches of dark and light tones. A wall that transitions through three shades of gray over its surface immediately looks more natural than one made entirely of a single color.
LEGO Rockwork Techniques for Cave Walls
Rockwork is the backbone of any cave build. The way you shape your walls determines whether your underground scene looks like a natural cavern or a tiled hallway. Let me walk through the key slope and rockwork techniques that experienced builders rely on.
Basic Slope Layering
The simplest rockwork technique uses standard slope bricks at varying angles to create an irregular surface. Start with a flat wall of bricks as your base, then attach slopes pointing outward at different heights and positions. Mix 45-degree slopes with 33-degree slopes, curved slopes, and inverted slopes to break up any repeating pattern.
The key principle here is to avoid repetition. I see many beginner cave builds where the same slope type appears at regular intervals, creating a obvious template look. Real rock is chaotic. Your slope placement should feel random, with clusters of steep angles next to smoother curved sections.
Curved Slopes for Eroded Surfaces
Curved slope pieces are some of the most useful elements for natural rockwork. Their smooth transitions between angles mimic how water and time erode stone surfaces. Use the larger curved slope pieces (3×1 and 2×1) for broad wall sections, and the smaller 1×1 curved slopes for detailed transitions and edges.
Curved slopes work particularly well for cave entrances where you want a weathered, flowing shape rather than sharp angular rock. Layer them so the curves flow into one another, creating the sense that water once carved this opening. Point the concave sides in different directions to simulate natural erosion patterns.
Wedge Plates and Modified Slopes
Wedge plates add jagged, dramatic edges that straight slopes cannot achieve. These angled plates create sharp transitions and narrow protrusions that cast strong shadows. Use them sparingly for dramatic rock features like sharp outcroppings, broken stone sections, or areas where the cave wall has cracked and shifted.
Modified slopes with notches, cutouts, or textural details add another layer of variety. The 1×2 slope with a smooth stud and the 2×2 corner slope are both excellent for building wall sections where you want controlled irregularity without too many exposed studs.
Masonry Profile Bricks and Modified Plates
Masonry profile bricks, those modified bricks with vertical groove lines on the side, are outstanding for cave wall texture. When turned sideways or mixed with standard bricks, the grooved surfaces catch light and shadow in ways that simulate layered sedimentary rock. Builders on the LEGO community forums consistently recommend these as a must-have part for any serious rockwork.
Modified plates with bars, clips, or handles attached sideways create small protrusions and attachment points that break up flat surfaces. Use them as rocky outcroppings or connection points for additional detail elements like plant pieces, crystals, or debris.
Mixed Angle Strategy
Here is a technique that experienced rockwork builders swear by: never build an entire wall at one angle. Instead, create sections that face slightly different directions. Some parts of your cave wall should lean inward, some outward, and some should be nearly vertical. This multi-angle approach means light hits each section differently, producing a complex shadow pattern that flat or uniformly angled walls never achieve.
One way to do this is to build your wall in vertical columns, each column offset slightly from its neighbors. Connect them at the back with plates or technic bricks for stability. The gaps between columns create natural recesses where shadow collects, and the offset surfaces create natural-looking variation without any advanced techniques.
Using SNOT to Add Texture and Depth to Cave Surfaces
SNOT stands for Studs Not On Top, and it is arguably the most important building concept for LEGO cave construction. Standard building places every brick studs-up, creating repetitive textured surfaces. SNOT techniques turn bricks sideways, upside down, or at angles so the smooth sides, grooved sides, or unusual surfaces face outward. For cave building, this is essential.
The reason SNOT matters so much for caves is texture variety. Natural rock surfaces are not covered in uniform studs. They have smooth areas, rough areas, grooved layers, and random protrusions. By turning bricks in different orientations, you access sides of elements that look nothing like standard stud surfaces, giving you an enormous range of textural options.
Bricks with Studs on the Side
The simplest SNOT elements for cave building are bricks with studs on one or more sides. The classic 1×1 and 1×2 bricks with a single side stud let you attach small plates and tiles sideways to create protrusions. Larger versions like the 1×4 brick with four side studs allow you to mount entire textured sections perpendicular to your main wall.
Attach curved slopes, masonry bricks, or modified plates to these side studs to create cave wall sections that jut outward at right angles to the main surface. This immediately creates depth because the attached elements sit a full plate or brick width away from the wall behind them.
Brackets and Jumper Plates
Brackets are angle pieces that create a 90-degree turn from studs-up to studs-on-side. They are perfect for quickly adding sideways-facing sections to any wall. Attach a bracket to your wall, then mount textured plates or slopes on the side-facing surface. This creates an instant protrusion with minimal complexity.
Bracket pieces come in various sizes. The 1×2 bracket is the most common and fits almost anywhere. Use multiple brackets along a wall at different heights to create a staggered texture pattern that light can interact with.
Creating Overhangs and Recessed Pockets
SNOT techniques excel at creating two specific features that caves need: overhangs and recessed pockets. An overhang is a section of wall that extends outward beyond the wall below it. Build these by mounting slopes or bricks sideways from an upper wall section so they project outward. Overhangs cast strong shadows on the surfaces beneath them, instantly adding perceived depth.
Recessed pockets are the opposite: sections where the wall surface pulls inward, creating a shallow cavity. Build these by leaving gaps in your wall and lining the back of the gap with darker colored bricks. When viewed from the front, these pockets read as dark, shadowed recesses in the cave wall.
Combine overhangs and recesses throughout your build. The alternation of protruding and receding surfaces is what gives a cave wall its three-dimensional character. Every transition between an overhang and a recess creates a shadow line that reinforces the sense of depth.
Building Stalactites and Stalagmites
Stalactites and stalagmites are the signature features of any serious cave MOC. They instantly communicate that the viewer is looking at an underground limestone cavern, not just a rocky room. Building convincing ones requires thinking about parts in unconventional ways.
Stalactite Techniques: Building Upside Down
Stalactites hang from cave ceilings, which means you are building downward. This is where SNOT and inverted building come into play. The ceiling of your cave needs to have studs or attachment points facing down, which you can achieve using bricks with studs on the bottom or by building the ceiling as an inverted layer.
Here are the parts I reach for most often when building stalactites:
Round 1×1 bricks stacked in descending size for classic cone shapes
Cone pieces (the small 1×1 cones) for pointed tips
Antenna parts for thin, elongated stalactites
Minifigure accessories like flippers, horns, or teeth for organic variety
Plant stem pieces for slightly curved, natural formations
Wheel parts and hub caps for thicker, bolder stalactites
The most important principle is asymmetry and randomness. Real stalactites do not grow in neat rows. Cluster some areas with dense formations while leaving other ceiling sections bare. Vary the lengths dramatically, with some stalactites barely poking down and others extending halfway to the floor. This irregularity is what sells the natural look.
Stalagmite Techniques: Stacking From the Ground
Stalagmites grow upward from the cave floor, formed by mineral deposits dripping from stalactites above. Building them is more straightforward than stalactites since you are stacking normally. But making them look natural requires the same attention to irregularity.
Use round bricks and cones stacked from largest at the base to smallest at the top. Some stalagmites should be tall and thin, others short and squat. Group them in clusters where water would naturally pool, near the center of the cave floor or beneath prominent stalactites.
For a really convincing effect, pair stalactites and stalagmites that are close to meeting. In real caves, these formations sometimes merge into columns. Build one of these columns in your cave to create a dramatic vertical feature that breaks up the horizontal space and adds architectural interest.
Color Choices for Cave Formations
Real stalactites and stalagmites are typically off-white, cream, or pale gray because they are made of calcium carbonate deposits. Use light bluish gray, white, or very light bluish gray for your formations. Pearl and metallic colors can work for mineral-rich variations. For fantasy or crystal caves, transparent elements in neon colors create stunning formations that catch and transmit light.
The contrast between pale formations and dark cave walls is visually powerful. Light-colored stalactites hanging against a dark bluish gray ceiling immediately draw the eye and create a sense of scale and atmosphere that flat-colored caves lack.
Step-by-Step: Building a LEGO Cave Entrance With Depth
Now let me walk you through a complete cave entrance build. This tutorial combines all the techniques covered so far into one practical project you can adapt to any scale.
Step 1: Build the Base and Frame
Start with a sturdy base made of plates or a baseplate. Outline the footprint of your cave entrance using standard bricks, establishing the overall width and shape. A good starting width is about 8 to 10 studs across for a Minifigure-scale entrance. Build the frame walls up to roughly 6 to 8 bricks tall on each side.
The frame does not need to look good at this stage. It is structural support that will be hidden behind your rockwork. Focus on making it solid and stable since it will hold the weight of your textured layers.
Step 2: Layer Slopes for the Arch
Begin shaping the cave opening by attaching slopes to the inner edges of your frame. Start at the bottom of each side and work upward, using curved slopes to create a natural arch shape. Step each slope inward as you go up, narrowing the opening until the two sides nearly meet at the top.
Mix slope sizes and types as you build. Use a 3×1 curved slope on one side and a 2×1 on the other. Throw in an occasional 33-degree slope or inverted slope to create irregular transitions. The top of the arch should not be a clean peak but rather a jagged, uneven meeting point.
Step 3: Add SNOT Texture to the Walls
Now attach bricks with side studs to your frame at various points around the entrance. Mount masonry profile bricks, modified plates, and small slopes on these side studs to create wall sections that protrude outward from the main surface. Space these SNOT sections irregularly, with dense clusters in some areas and sparse coverage in others.
This is where your cave starts to look three-dimensional. Each sideways-mounted element creates a shadow behind it. The more varied your SNOT placements, the richer the shadow pattern becomes.
Step 4: Deepen the Entrance With Recessed Layers
Build interior wall layers behind your entrance frame. These should be set back further from the viewer, creating visible depth when looking into the cave. Use at least two or three depth levels so the cave mouth visibly recedes. The deepest layer should be barely visible from the outside, just a dark shape suggesting more space beyond.
This is the single most important step for creating the illusion of depth. Without recessed layers, your cave entrance looks like a flat facade. With them, the viewer’s eye travels into the darkness and the cave feels real.
Step 5: Add Shadow With Dark Colors Inside
Color the deepest recessed layers with black or dark bluish gray bricks. Use medium bluish gray for the middle layers and light bluish gray for the outermost surfaces. This gradient from dark to light reinforces the physical depth you built in the previous step and mimics how light actually behaves in a cave entrance.
The transition between color zones should not be a clean line. Blend the colors by mixing a few dark bricks into the medium zone and a few light bricks into the dark zone. Natural cave walls do not have sharp color boundaries.
Step 6: Detail With Rocks, Roots, and Debris
Now add the finishing details that bring the entrance to life. Scatter round plates and small slope pieces on the cave floor to represent fallen rocks and debris. Attach plant root pieces hanging from the top of the entrance for an overgrown, abandoned feel. Add a few transparent elements in dark colors to simulate wet patches or mineral deposits.
Place a few stalactites hanging from the upper interior if your cave goes deep enough. Even two or three simple formations will make the entrance feel like the opening to a larger cave system rather than a shallow alcove.
Step 7: Apply Final Lighting and Display Choices
Position your completed cave entrance under a single directional light source. A desk lamp or display light placed to one side at a 30-to-45 degree angle will cast dramatic shadows across your textured surfaces. Experiment with light position until the shadow pattern emphasizes the depth and detail you built into the structure.
For permanent display, consider adding a light brick or two inside the cave, aimed outward or upward. This creates an internal glow effect that suggests the cave continues into the depths. Transparent neon elements near the light source will scatter colored light through nearby surfaces for a striking crystal-cave effect.
Lighting Techniques for Shadow Effects in Underground Scenes
Lighting is the secret weapon that most LEGO cave builders overlook. You can build the most intricately textured cave in the world, but without proper lighting it will look flat and lifeless. Understanding how to use light and shadow transforms a good cave build into a great one.
Single-Source Directional Lighting
The most effective lighting setup for any underground LEGO scene is a single light source from one direction. This mimics how caves actually receive light: through a single entrance, a crack in the ceiling, or an artificial light like a torch or lamp. Single-source lighting creates strong directional shadows that emphasize every textured surface and depth layer in your build.
Position your light at an angle rather than straight on. A light coming from directly in front will flatten all your carefully built textures. A light from the side or from above at an angle will cast shadows behind every protrusion and into every recess, maximizing the three-dimensional effect of your rockwork.
Transparent Elements for Glow Effects
Transparent and translucent LEGO elements can simulate light sources within your cave. Transparent neon green, blue, pink, and orange pieces arranged in clusters create convincing crystal or bioluminescent formations. Place them strategically in dark cave sections where they appear to glow with their own light.
For a more active glow, position actual light bricks behind or beneath transparent elements. The light brick illuminates the transparent piece from within, creating a genuine light source embedded in your cave structure. This technique is especially effective for fantasy-themed underground scenes like enchanted grottoes or alien caverns.
Creating Contrast Between Lit and Unlit Areas
The most dramatic underground scenes feature strong contrast between lit and unlit areas. Rather than trying to light your entire cave evenly, deliberately leave some sections in darkness. A cave that is half-lit and half-shadowed feels far more atmospheric than one that is uniformly bright.
Use the architecture of your cave to control light. Build walls or rock formations that block light from reaching certain areas. Create chambers that only receive light through narrow gaps. The interplay of bright pools of light and deep pools of shadow is what gives underground scenes their mysterious, exploratory feel.
External Display Lighting
For permanent display, invest in small LED lighting designed for LEGO builds. These lights can be threaded into your cave structure to create permanent internal illumination. Place warm white LEDs near the cave entrance to simulate daylight filtering in, and position them deeper inside to represent torches or lanterns.
The investment in proper display lighting pays off enormously for cave builds specifically. No other type of LEGO creation benefits as much from controlled lighting as underground scenes, because the entire atmosphere depends on the contrast between light and shadow.
Creating Underground Tunnel Systems With Depth
A single cave chamber is impressive, but a connected tunnel system creates a truly immersive underground world. Building tunnels introduces new challenges around structural support, view angles, and maintaining depth and shadow across multiple connected spaces.
Modular Tunnel Sections
Build your tunnel system as a series of modular sections that connect together. Each section should be a self-contained piece of tunnel with its own walls, floor, and ceiling, designed to attach to the next section at either end. This approach lets you build incrementally, test different configurations, and reconfigure your tunnel layout without rebuilding from scratch.
Standardize your connection points so any section can attach to any other. A common approach is to leave a row of studs exposed at each end of a tunnel section, with corresponding holes or bracket attachments on the connecting section. This keeps the system flexible and structurally sound.
Ceiling Height Variation
Vary the ceiling height throughout your tunnel system to create dramatic moments. A section where the tunnel narrows and the ceiling drops low creates a claustrophobic squeeze that makes the next open chamber feel expansive by comparison. These height changes also change how light behaves in each section, with low ceilings blocking light and high ceilings allowing it to spread.
Include at least one section where the tunnel opens into a tall, wide cavern. This provides a visual payoff for anyone exploring your tunnel system and gives you space to deploy your best stalactite and stalagmite techniques in a grand setting.
Curves and Narrowing
Straight tunnels look artificial. Build your tunnels with gentle curves and periodic narrowings to create a sense of natural passage. Curves also serve a practical purpose: they block the line of sight, so the viewer cannot see the entire tunnel at once. This creates mystery about what lies around each bend and encourages closer inspection.
Narrow the tunnel at certain points using inward-jutting rock formations. These pinch points create natural gateways and thresholds between sections. They also cast interesting shadow patterns as light passes through the narrow gap and expands into the wider space beyond.
Connecting Multiple Chambers
Design your tunnel system to connect several distinct chambers, each with its own character. One chamber might feature a water pool, another might be a crystal cavern, and a third might contain ruins or artifacts. The tunnels serve as transitions between these themed spaces, each one building anticipation for what comes next.
Give each chamber a different dominant color or feature. This visual variety prevents the underground scene from feeling monotonous and gives the viewer a reason to explore every section. The tunnels connecting them should feel like real passages, with their own rockwork and detail, not just empty hallways.
Pro Tips for Realistic LEGO Cave Textures
After building dozens of cave MOCs, I have collected a set of tips from my own experience and from the broader LEGO building community. These are the techniques that separate a decent cave build from an exceptional one.
Embrace Asymmetry
This is the number one rule of natural rockwork: nothing should be symmetrical. If your cave entrance is the same shape on the left and right sides, it looks designed, not natural. Force yourself to make each side different. Different slope counts, different heights, different textures. The more irregular the overall shape, the more convincing the cave becomes.
Mix Element Types Freely
Do not limit yourself to slope pieces for rockwork. Mix in plates, tiles, bricks, modified pieces, plant elements, and even Minifigure accessories. The more variety in your element types, the less your cave looks like it was made from a specific set of parts. Bionicle pieces, in particular, offer organic shapes that work beautifully for cave formations.
Use Unusual Parts
Some of the best cave textures come from parts that were never designed for rockwork. Minifigure accessories like flippers, wrenches, and horns make excellent stalactites and small rock protrusions. Animal tail pieces create curved organic formations. Wheel and tire pieces add circular elements that break up angular surfaces. Do not be afraid to repurpose any element that has an interesting shape.
Weathering With Color Variation
Real cave walls show their age through color variation. Water stains, mineral deposits, moss growth, and general weathering create patches of different colors across the rock surface. Simulate this by inserting small patches of brown, dark orange, olive green, or even reddish tones into your predominantly gray walls. Keep these patches small and irregular, like natural staining rather than painted sections.
Community-Approved Techniques
Builders in LEGO community groups consistently share a few key pieces of advice that I want to pass along. First, step back from your build frequently and look at it from the viewer’s perspective. Details that look essential up close may be invisible from a normal viewing distance. Second, photograph your build under different lighting conditions to see how shadows change the overall effect. Third, do not be afraid to tear sections apart and rebuild them if they are not working. Cave building is an iterative process, and the best results come from multiple attempts at each section.
FAQs
How do you build realistic cave walls in LEGO?
Build realistic LEGO cave walls by mixing slope angles, using curved pieces for eroded sections, and applying SNOT techniques to add studs-on-side texture. Layer dark colors in recesses and lighter tones on protrusions to create natural depth and shadow. Avoid repeating the same slope pattern and aim for asymmetry throughout.
What techniques create depth in LEGO caves?
Create depth in LEGO caves by building multiple wall layers at different distances from the viewer, using color gradients from dark to light, adding overhangs and recessed pockets, and positioning a single light source to cast directional shadows across textured surfaces.
What is the best color palette for a LEGO underground scene?
The best palette combines black for the deepest shadows, dark bluish gray for recesses, medium bluish gray for mid-tones, and light bluish gray for highlighted protrusions. Add tan for earthy floors and transparent colors for crystal or mineral formations.
What is an illegal LEGO build technique?
An illegal LEGO building technique is any connection method that stresses, damages, or deforms elements beyond their intended design tolerances. This includes forcing pieces together at angles that bend studs or inserting plates between studs in ways the parts were never designed to accommodate.
What is the 5/2 rule in LEGO?
The 5/2 rule describes a spacing relationship: five plates stacked vertically equal the height of two standard studs placed side by side, or roughly two brick widths. This ratio allows builders to align elements precisely in SNOT and sideways building techniques.
How do you make LEGO stalactites?
Make LEGO stalactites by building downward from the cave ceiling using round bricks, cone pieces, antenna parts, and Minifigure accessories. Vary the lengths and thicknesses randomly, and use light bluish gray or pearl colors for a natural limestone appearance.
Bringing Your Underground World to Life
Building a LEGO cave or underground scene with depth and shadow is about combining several techniques into a cohesive whole. Slope layering and curved pieces create the basic rock forms. SNOT techniques add the textural variety that makes walls look natural. Strategic color placement creates the illusion of depth through light and shadow gradients. Lighting choices, whether from a simple desk lamp or integrated LEDs, determine how all of these elements read to the viewer.
The LEGO cave building techniques in this guide are starting points, not rules. Every builder develops their own style and preferred methods over time. Start with the step-by-step cave entrance tutorial to practice the fundamentals, then branch into tunnel systems, stalactite clusters, and themed caverns as your confidence grows. The most important thing is to experiment and iterate. Your first cave will not be your best, but it will teach you what works and what does not.
I would love to see what you build. Tag The Brick Fantastic in your cave MOC photos and share your underground creations with our community. Every great cave builder started with a simple gray wall and a desire to make something more. Now grab your slopes, sort your dark gray bricks, and start digging into your next underground build.