
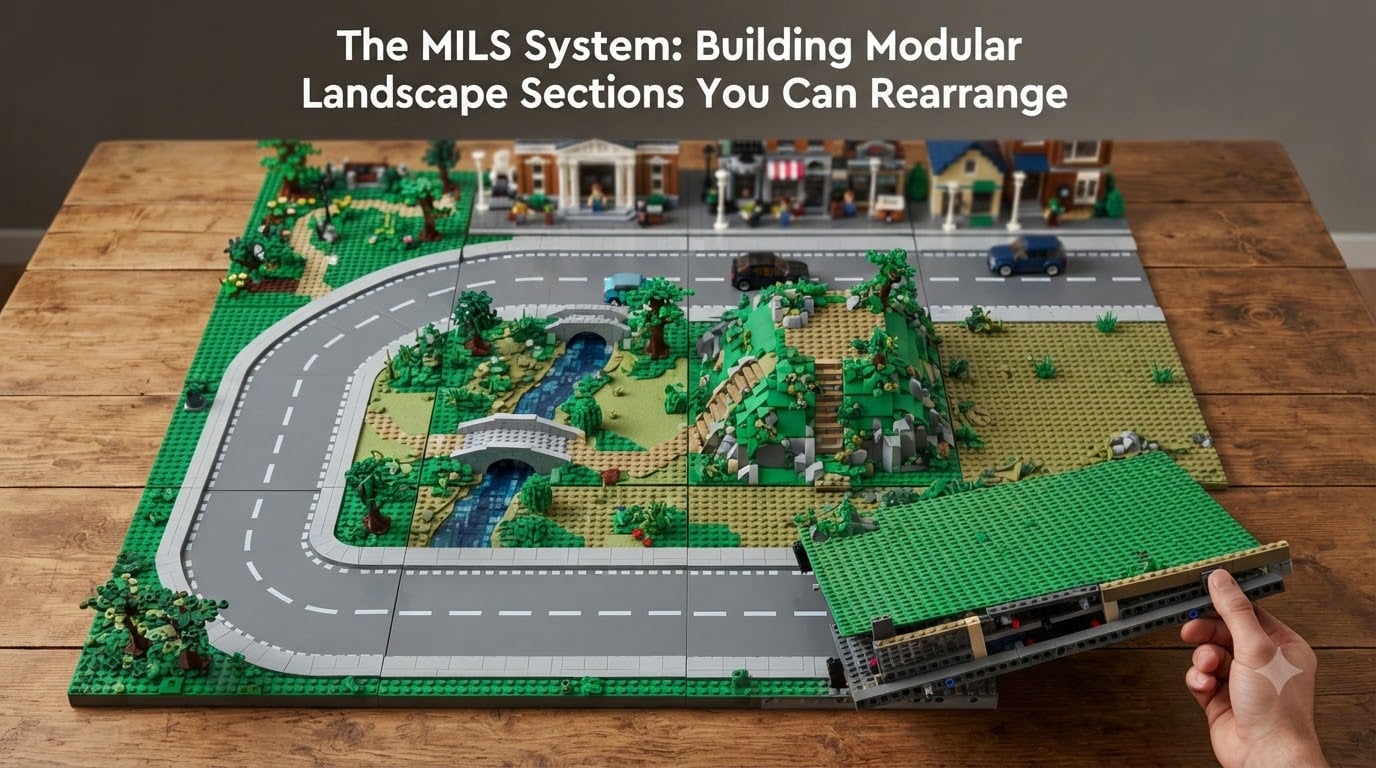
MILS stands for Modular Integrated Landscaping System, and it is a community-developed standard for building modular, interchangeable LEGO landscape sections you can rearrange, transport, and expand over time. If you have ever built a city layout that grew too big to move, or wanted to display your LEGO at a convention without rebuilding everything from scratch, the MILS system LEGO builders rely on solves that exact problem.
I built my first MILS plate in 2019 after hauling a 6-foot city to a local show and watching half the roads crack on the drive home. Three years later, every module in my collection connects to every other module in under a minute. In this guide I will walk you through the rules, the module types, the connection method, and the small mistakes I wish someone had warned me about before I started.
Table of Contents
What Is the MILS System?
The MILS system is a community standard that defines how LEGO builders should build baseplates into modular, interchangeable landscape sections. MILS was first published by HispaBrick Magazine as a set of rules any AFOL could follow so that modules built by one person would connect cleanly to modules built by anyone else.
The acronym expands to Modular Integrated Landscaping System, and it covers the baseplate footprint, the height of ground level, the location of connection points, and the way modules are stacked, transported, and identified. Think of it less as a building technique and more as a contract between builders: follow these rules, and your work will be compatible with mine.
Three things make MILS different from just placing LEGO on a baseplate. First, every module is exactly 32×32 studs, so they line up to any other module. Second, modules connect with Technic pins instead of friction, so they do not shift during transport. Third, the standard covers terrain height, so a road on one module meets a sidewalk on another at exactly the right elevation.
Why Use MILS for Your LEGO Builds?
After three years of MILS builds, I can point to five concrete benefits that changed how I plan every layout.
Portability: Each 32×32 module fits in a standard stackable storage box, so a full city layout breaks down into pieces one person can carry. I drove a 24-module layout to a show in a hatchback with the seats folded down.
Collaboration: At conventions, builders swap modules like trading cards. My hill section sat next to a builder from another club, and our modules clicked together without a single adjustment because we both follow the same rules.
Repairability: When a section gets damaged, you rebuild that one module. The rest of the layout stays intact. Before MILS, I had to take apart half a display to fix a cracked road tile.
Expandability: Adding to a MILS layout is just dropping a new module on the grid. I started with four grass plates and now have a 28-module city without ever throwing away the originals.
Standardization: You can share instructions, parts lists, and module designs knowing other MILS builders will understand the dimensions without a paragraph of explanation.
The Core MILS Rules and Module Anatomy
MILS is built on a small set of rules. Once you internalize them, every module you build will follow the same logic.
Module footprint: Every MILS module sits on a 32×32 stud baseplate. This is the canonical size. Some builders use 16×32 or 16×16 plates for sub-modules, but the standard reference unit is 32×32.
Ground level: The terrain surface of a MILS module sits four plates above the baseplate. This height lets a sidewalk line up with a LEGO Modular Building’s ground floor without steps or ramps.
Connection points: The middle of each side of a module carries the connection hardware. Modules connect edge-to-edge using Technic bricks and pins, not studs.
Stud-free border: The outer edge of a module should leave at least one stud of baseplate visible all the way around. This buffer absorbs small manufacturing differences between official plates and gives you room to handle the module without crushing terrain.
Module height limit: Tall features like hills or mountains should still leave room to stack another module on top. Most builders cap individual modules at about 30 bricks of vertical height for safe stacking.
I keep a printed copy of these rules taped to the inside of my parts cabinet. Every MILS module I build starts by checking the footprint, then the ground level, then the connection points, in that order.
BTM vs CTM: Module Types Explained
Once you understand the two main module categories, the MILS system LEGO community uses becomes much easier to navigate.
BTM (Basic Terrain Module): A BTM is a 32×32 baseplate topped with terrain plates or bricks. The terrain covers the full surface, with a stud-free border around the edge. Grass fields, paved plazas, and water sections are typical BTMs.
CTM (Compatible Terrain Module): A CTM is a 32×32 module that includes features which interact with neighboring modules. Roads that continue onto the next module, rivers that flow into another river, and railway tracks that extend to the next plate are all CTMs. The “C” stands for Compatible because the terrain crosses module boundaries.
The distinction matters for layout planning. BTMs work anywhere on your grid. CTMs only work where the connection makes sense: a road CTM needs another road or a compatible intersection on at least one edge.
When I built my first city, I treated every module as a BTM and ended up with streets that dead-ended at module edges. Converting those to CTMs by adding road plates that continued across borders made the whole layout feel like one piece.
MILS Profile System: Null, Long, Short, and Full
Modules rarely sit at exactly the same height as their neighbors. Hills rise, rivers drop, roads dip. The MILS profile system describes how a module’s edge meets the baseplate of the module next to it.
Null profile: Both modules share the same ground level. The seam is invisible. This is the default for most grass and road modules.
Short profile: One module’s terrain sits one or two plates above the baseplate while the neighbor sits at the standard four-plate height. Used for shallow dips or curb edges.
Long profile: One module drops three to six plates below ground level. Used for canals, tunnels, and sunken roads.
Full profile: The terrain runs all the way to the baseplate. Used for deep water features and the lowest points of a layout.
Mark the profile of each module with a small colored tile on the ID corner so you can see at a glance how it will sit next to its neighbors.
How to Build a MILS Plate Step by Step
Here is the exact process I follow for every new MILS plate I build. The first one takes about two hours. By the fifth, you can finish in 45 minutes.
Step 1: Gather the baseplate. Use a 32×32 stud baseplate. Grey is the most flexible choice because it disappears under most terrain. Green works for grass-only modules.
Step 2: Mark the connection points. On the center of each side, place a 1×4 Technic brick with the holes facing outward. These are where your half-pins will live.
Step 3: Build up to ground level. Cover the baseplate with four layers of plates, leaving the outer one-stud border exposed. This is the standard MILS ground level.
Step 4: Add terrain. Stack tiles, slopes, and bricks on top of the ground level to create your surface. Leave the stud-free border clear on all four sides.
Step 5: Install Technic half-pins. Slide Technic half-pin #4274 into the holes of the 1×4 Technic bricks on each side. Two pins per side, evenly spaced, is standard.
Step 6: Add the ID corner. Place a colored 1×1 tile or plate on one corner of the module to identify its type. Green for grass, grey for road, blue for water, brown for hills is a common color code.
Step 7: Test-fit the module. Before you commit to the terrain, connect this module to a known-good module on all four sides. Confirm the connections are firm and the terrain heights match.
Technic Pin Connection Method
The connection method is what makes MILS feel solid. Forget friction between studs. MILS uses Technic hardware to lock modules together so they survive transport.
The standard connection uses two parts. First, a 1×4 Technic brick (part 3700) sits inside the module with its holes facing the edge. Second, a Technic half-pin (part 4274) slides into those holes and protrudes about one stud beyond the module border.
Two adjacent modules connect when the protruding half-pins of one slide into the open holes of a 1×2 Technic brick on the neighbor. The pin-brick-pin-brick sandwich creates a rigid joint that does not shift when you lift the layout.
I tested this by carrying a 12-module layout up two flights of stairs. Two of the connections were half-pin only (the older method), and three shifted during the climb. The other ten, which used the full Technic pin sandwich, did not move at all.
One warning: half-pins can wear out over years of use. Keep a small bag of replacement half-pins in your parts drawer.
Common Terrain Types You Can Build
Once the base rules feel natural, you can build any terrain you want on a MILS plate. Here are the four most common module categories in my collection.
Grass modules: Green plates cover the ground level with a few flower or bush details. These are the easiest first MILS build and the most reusable module in any layout.
Road modules: Dark grey plates form roads, with white tiles or printed road plates marking lanes. CTM roads that continue across module borders are the most useful.
Water modules: Blue tiles and translucent plates form rivers, ponds, and lakes. Most water modules are BTMs because water rarely continues across a seam cleanly.
Hill modules: Brown and dark tan slopes build up from the ground level to a peak. Hills are usually full-profile on at least one edge so they meet neighboring modules at the baseplate level.
ID Corner Color Coding and Module Identification
Once you have more than ten modules, you need a way to tell them apart at a glance. The MILS community uses an ID corner, a single 1×1 tile or round plate placed in a specific corner of the module.
Pick a corner as your reference, usually the front-left when looking down at the module. Place a colored tile there. Common color codes include green for grass, grey for road, blue for water, brown for hill, yellow for sand, and white for snow.
You can also use multiple tiles stacked to indicate profile. One tile for null profile, two for short, three for long, four for full. This makes stacking and layout planning almost automatic.
I use a black 1×1 round plate as my personal signature on every module I build, plus the terrain color. When I bring my collection to a show, anyone can tell which modules are mine and what each one contains.
MILS for Train Layouts
Trains were the original use case for MILS, and train layouts still drive a lot of MILS module design. The 32×32 grid maps neatly to standard LEGO track curves and switches.
Straight track modules hold a single straight section, usually two studs longer than the baseplate footprint so the rails extend onto the neighbor. Curve modules hold R40 curves for smooth transitions. Switch modules hold a turnout that branches to a second route.
Return loop modules let a train reverse direction without manual intervention. Level crossing modules carry road CTMs over track modules. The combination of these track types lets you build a complete layout from reusable pieces.
The L-Gauge.org community tracks MILS-compatible train modules and hosts an annual event where builders bring layouts built entirely from MILS plates. Most modules you see at a train show connect to any other MILS module on the floor.
Storage and Transport Tips
Storage is where MILS really pays off. Each 32×32 module fits inside a standard 6-liter stackable storage box, the kind with latching lids you find at any hardware store.
Label every box on the side with the module’s ID color and a number. I keep a printed layout map in the lid of each box so I can rebuild the layout from storage without thinking.
For transport, stack no more than four boxes high. Heavier boxes go on the bottom. Foam sheets between modules cushion the terrain. I have driven 400 kilometers with 18 modules and arrived with zero damage.
Long modules (over 32×32) should be split into smaller MILS-compatible sections before transport. Trying to move a 64×64 plate is the fastest way to crack a road tile.
Common Mistakes to Avoid
After watching newer builders in our club struggle with their first modules, I keep a running list of mistakes that show up again and again.
Island baseplates: Building a module without checking how it connects to neighbors leaves you with isolated pieces that cannot join a larger layout. Always test-fit against a reference module before declaring a build complete.
Forcing official LEGO plates: Official LEGO road plates do not always line up to a 32×32 grid. Use custom road sections built from regular plates and tiles for the cleanest MILS connections.
Skipping the stud-free border: Terrain that runs to the very edge of the baseplate looks fine on the table but breaks when you lift the module. Keep that one-stud buffer.
Ignoring profile heights: Modules at different ground levels do not sit flat against each other. Plan profiles before you commit to terrain.
Too many pins per side: More than two half-pins per side makes connections stiff and hard to disconnect. Stick to two unless you have a specific reason to add more.
Cost Breakdown: What One MILS Module Really Costs
New builders always ask about cost. Based on my own BrickLink orders and our club’s shared parts pool, a single MILS module runs about $25 to $60 depending on terrain complexity.
A 32×32 baseplate costs around $8 to $15 depending on color and source. The Technic hardware (two 1×4 bricks plus four half-pins per module) runs about $2. The remaining cost is terrain plates and details, which can range from $10 for a simple grass plate to $40 for a detailed city block.
Buying in bulk drives the per-module cost down fast. Our club places one BrickLink order per year and shares the parts. Our average per-module cost dropped from $52 to $28 once we ordered 20 baseplates and 200 Technic bricks at once.
Used official LEGO baseplates from eBay are usually cheaper than new BrickLink orders, but be sure to check that they are genuine 32×32 plates. Knockoff plates sometimes measure 31×31 and throw off your whole grid.
MILS and LEGO Modular Buildings
LEGO’s Modular Building Series sets sit on raised baseplates designed for display, not for MILS grids. Adapting them takes some care, but the result is worth it.
Most modular buildings can be carefully removed from their original baseplate using a flat brick separator. Once separated, you can mount the building on a MILS-compatible foundation built from plates and tiles at the correct ground level.
The ground floor of the Modular Building Series lines up with the four-plate ground level of a standard MILS module, which is why MILS works as well as it does. You may need to add or remove a plate layer under the building to get a perfect match.
LEGO has not discontinued the Modular Building Series as of 2026. New sets still release annually, and every new modular building works with MILS once you transfer it to a MILS plate.
Frequently Asked Questions
What is the LEGO MILS system?
MILS stands for Modular Integrated Landscaping System. It is a community-developed standard for building 32×32 stud LEGO landscape modules that connect to other MILS modules using Technic pin connections. The standard defines module size, ground level height, and connection placement so modules from different builders fit together seamlessly.
Why are some LEGO Technic builds considered illegal?
In the LEGO community, illegal builds are techniques that stress LEGO elements beyond their design limits, such as forcing a Technic pin into a stud hole or wedging bricks at angles that warp the plastic. MILS avoids illegal techniques entirely by using only Technic bricks with proper half-pin connections and respecting part tolerances.
What is the 5/2 rule in LEGO MILS layouts?
The 5/2 rule in MILS refers to a common module proportion where the terrain detail spans 5 baseplate units while the connection hardware occupies 2 baseplate units. It is a soft guideline rather than a hard rule, and it helps builders plan modules where terrain fits comfortably inside the connection borders.
Did LEGO discontinue Modular Buildings?
No, LEGO has not discontinued the Modular Building Series as of 2026. New modular buildings still release each year, and every official set works with the MILS system once transferred onto a MILS-compatible baseplate at the correct ground level.
Start With One Module
The MILS system LEGO builders use to create modular, rearrangeable landscapes starts with a single 32×32 plate. Build one grass module this weekend. Connect it to a second module next weekend. By the end of the month, you will have a small but expandable city that fits in two storage boxes and can be assembled in under five minutes.
For deeper specifications and the original MILS documentation, the HispaBrick Magazine archives and the L-Gauge.org wiki are the two resources our community trusts most. Both are free, both are kept current, and both treat MILS as the living standard it has become.