
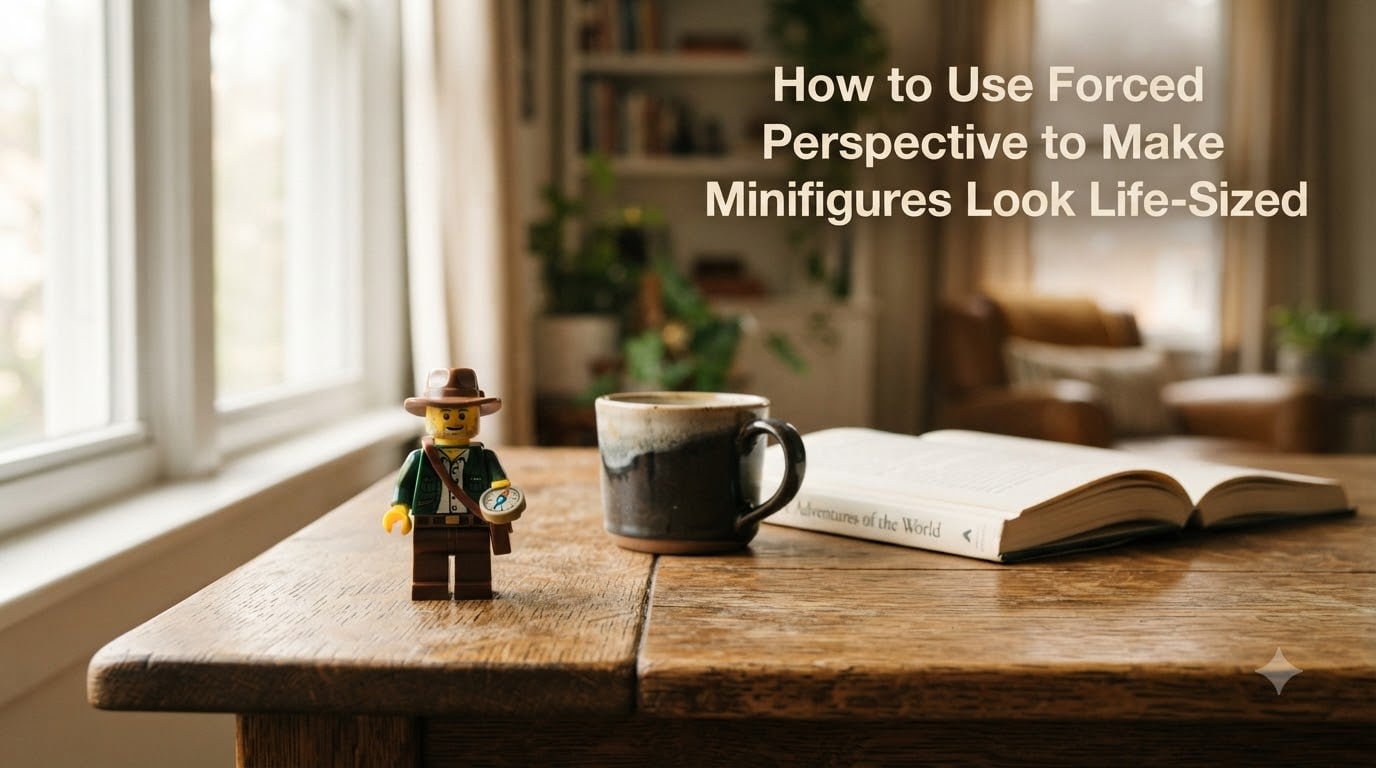
Shoot low, get to minifigure eye level, and let a wide-angle lens do the heavy lifting. That is the single most important thing to understand when learning how to use forced perspective to make minifigures look life-sized. The technique tricks the eye by placing a small subject close to the camera while a recognizable background sits much farther away, creating an optical illusion where a 1.5-inch plastic figure appears to be a real person standing in a real-world scene.
I have spent years photographing LEGO builds, and forced perspective remains my favorite trick for making minifigures command attention. Whether you want a Stormtrooper guarding your desk or a knight standing atop a mountain of laundry, this technique turns everyday scenes into epic stories. The best part is that you do not need expensive gear to get started.
This guide breaks down everything from lens selection and camera angles to lighting and depth of field, all tailored specifically for LEGO minifigure photography. I will walk you through each step with real settings and practical tips you can apply today, whether you shoot with a mirrorless camera or the phone in your pocket. By the end, you will know exactly how to position, light, and frame your minifigures so they look larger than life.
Table of Contents
What Is Forced Perspective?
Forced perspective is a photography technique that manipulates how the human brain perceives scale. By carefully controlling the distance between objects, the camera, and the background, you can make a small subject appear enormous or a large object appear tiny. The illusion works because cameras capture a single viewpoint with no true depth perception, so the brain relies on relative size and context clues to judge how big things are.
In toy photography, this means placing your minifigure close to the lens while positioning real-world elements like buildings, cups, or landscapes in the distance. When the proportions line up correctly, the minifigure looks like it belongs in the same space as the background objects. The effect is convincing because our brains automatically assume objects in the same frame share the same scale.
Filmmakers have used forced perspective for decades, most famously in fantasy films where actors of different heights appear to be vastly different sizes. Peter Jackson used it extensively in The Lord of the Rings to make hobbits look small next to humans. The same principles apply to your minifigure photos, just on a tabletop scale. The key is understanding that distance from the camera dictates perceived size more than actual size does.
Why Minifigures Are Perfect for Forced Perspective
LEGO minifigures are ideal subjects for forced perspective photography because they carry instantly recognizable human proportions. Their printed faces, articulated arms, and detailed accessories read clearly as characters even at small scales. When you photograph a minifigure next to a real coffee cup, viewers immediately process the figure as a person interacting with an everyday object.
The variety of minifigure designs also gives you enormous creative range. A space miner with a helmet and air tank looks natural standing on a pile of gravel. A medieval knight with a shield and sword feels right at home perched on a garden rock. Each minifigure carries enough visual detail that the viewer fills in the story, making the scale illusion more believable.
Unlike generic toy figures, minifigures have consistent proportions across themes, so once you learn the right camera distance and angle for one figure, that knowledge transfers to nearly every minifigure in your collection. This consistency makes them the perfect practice subjects for mastering forced perspective techniques.
Essential Equipment for Forced Perspective Minifigure Photography
You can start shooting forced perspective photos with almost any camera, including your phone. That said, certain tools make the process significantly easier and produce sharper, more convincing results. Here is what I recommend based on hundreds of minifigure shoots.
Camera body: Any interchangeable lens camera works well, whether DSLR or mirrorless. A mirrorless camera with an articulating screen is especially helpful because you can tilt the screen upward when the camera is low to the ground, letting you compose without lying in the dirt. If you are using a smartphone, any model from the last few years with portrait mode and manual focus capabilities will produce solid results.
Lenses: A macro lens in the 90mm to 105mm range lets you focus close enough to fill the frame with a minifigure while maintaining a comfortable working distance. A wide-angle lens in the 16mm to 35mm range exaggerates scale differences between foreground and background, which strengthens the forced perspective effect. If you only own a kit lens (typically 18-55mm), you can still get great shots by zooming to the widest focal length and getting very close to the minifigure.
Tripod: A sturdy tripod is essential for consistent framing and sharp images at small scales. Look for one that can go very low to the ground, either by reversing the center column or using a tabletop tripod. Camera shake becomes magnified when shooting close to small subjects, so the tripod eliminates that problem entirely.
Props and scale references: Everyday objects are your best friends. Coffee cups, keyboards, plants, books, and kitchen utensils all provide recognizable scale cues. Collect a variety of small props that you can position in the background to sell the illusion. A Blu-tack or mounting putty is also useful for keeping minifigures standing in outdoor or uneven settings.
Understanding Lens Choice: Macro vs Wide-Angle
Your lens choice fundamentally shapes how the forced perspective effect reads to the viewer. Different focal lengths create different relationships between foreground and background, so understanding this tradeoff helps you pick the right tool for each scene.
A macro lens (typically 90mm to 105mm) lets you focus extremely close to the minifigure, capturing fine details like torso prints and facial expressions with razor sharpness. The longer focal length also compresses the background, bringing it visually closer to the subject. This compression can work well for forced perspective because it makes distant background elements appear larger relative to the minifigure. The tradeoff is that macro lenses have very shallow depth of field at close range, which can blur parts of your scene.
A wide-angle lens (16mm to 35mm) exaggerates the size difference between objects at different distances. Objects close to the lens appear much larger than they are, while distant objects shrink rapidly. This exaggeration is exactly what you want for forced perspective, because it amplifies the scale illusion. The challenge is that wide-angle lenses can distort the minifigure’s proportions if you get too close, so you need to find the sweet spot where the figure looks natural but still dominates the foreground.
For beginners, I recommend starting with a wide-angle zoom at around 24mm. This gives you enough foreground magnification for a strong effect without excessive distortion. Once you are comfortable with the technique, experiment with macro lenses for detail-rich close-ups where the background serves as a softer context element.
Smartphone shooters can use the main wide lens for the forced perspective effect. Avoid the telephoto lens for this technique because it compresses distances, reducing the scale exaggeration. If your phone supports a 0.5x ultra-wide mode, that can produce dramatic results, though you may need to crop slightly to remove edge distortion around the minifigure.
How to Use Forced Perspective to Make Minifigures Look Life-Sized: Step-by-Step
This is the core of the technique, broken into seven repeatable steps. Follow these in order for your first few shoots, and they will become second nature quickly.
Step 1: Choose your concept and scene. Decide what story you want the photo to tell. A minifigure sitting on the edge of a coffee cup, standing on a keyboard, or leaning against a book spine are all simple concepts that immediately read as life-sized. Pick a scene where the background object is something viewers instantly recognize, because that recognition is what makes the scale trick believable. Sketch the idea mentally before setting anything up.
Step 2: Position the minifigure in the foreground. Place your minifigure on a stable surface 8 to 15 inches from the camera lens. This distance varies depending on your lens, but the goal is to have the minifigure fill roughly one-third to one-half of the frame height. Use mounting putty under the feet to keep the figure steady, especially outdoors where wind can topple it. Make sure the minifigure faces the camera directly or at a slight three-quarter angle for the most natural look.
Step 3: Get the camera to minifigure eye level. This is the single most important step and the one most beginners get wrong. A minifigure standing on a table is roughly 1.5 inches tall, which means the camera lens needs to be about 1.5 inches above the surface. Most people shoot from a standing or seated position, which immediately kills the illusion because the viewer sees the minifigure from above, making it look like a toy. Lower your tripod until the lens is at the same height as the minifigure’s eyes. If your camera has an articulating screen, flip it up so you can compose comfortably while the camera sits on the ground.
Step 4: Position the background for scale matching. Place your scale-reference object (coffee cup, book, plant, or real-world scene) much farther from the camera, typically 3 to 6 feet away. The exact distance depends on how large you want the background element to appear relative to the minifigure. Move the background object closer or farther until the proportions look believable in your viewfinder. Take test shots and check the relative sizes on your camera screen, where the illusion is easier to evaluate than through the viewfinder.
Step 5: Set your aperture for the right depth of field. Start at f/8 to f/11, which gives you enough depth of field to keep the minifigure sharp from head to toe while still blurring the background slightly. If you need both the foreground and background in sharp focus (for example, a minifigure standing in front of a detailed cityscape), stop down to f/16. Keep in mind that diffraction softens images at very small apertures, so f/16 is usually the practical limit. If f/16 still does not give you enough depth of field, you will need focus stacking, which I cover in the next section.
Step 6: Focus and shoot. Switch to manual focus for precise control, since autofocus often struggles with small subjects at close range. Focus on the minifigure’s face or chest, where the viewer’s eye will naturally land. If your camera has focus peaking, turn it on to visually confirm which parts of the scene are sharp. Use a remote shutter release or your camera’s self-timer (2-second delay works well) to avoid introducing shake when pressing the shutter button.
Step 7: Review and adjust. Check your shot on the camera screen, zooming in to verify the minifigure’s face is sharp. Look at the overall composition and ask yourself whether the scale reads as believable. If the minifigure looks too small, move it slightly closer to the camera or lower the camera angle further. If the proportions look distorted, pull the camera back slightly and zoom in to compensate. Most forced perspective shots require 3 to 5 attempts to nail the illusion, so iterate patiently.
Managing Depth of Field at Minifigure Scale
Depth of field is the range of distance in your photo that appears acceptably sharp, and it is one of the biggest technical challenges in minifigure forced perspective photography. When you focus on a subject just 10 inches from the camera, even at f/11, the depth of field might only be an inch or two deep. That means the minifigure’s face might be sharp while the feet are soft, or vice versa.
To maximize depth of field, use apertures between f/8 and f/16. Going wider than f/16 introduces diffraction, which softens the entire image. If you still cannot get enough of the minifigure in focus, the solution is focus stacking. This technique involves taking 3 to 7 photos at different focus points (face, chest, legs, background) and blending them together in Photoshop or free software like Hugin. The result is a single image where everything from the minifigure’s nose to the distant background is tack sharp.
Focus stacking requires a tripod and a subject that does not move, so it works best for controlled indoor shoots. For outdoor shots with natural wind or changing light, stick with a single exposure at f/11 to f/16 and accept that the background may be slightly soft. That softness can actually help the illusion by separating the minifigure from the background.
There are times when shallow depth of field helps rather than hurts. If your background is cluttered or distracting, a wide aperture like f/2.8 or f/4 blurs it into a smooth wash of color that keeps attention on the minifigure. Experiment with both approaches to see which suits each scene.
Lighting Tips for Minifigure Forced Perspective
Good lighting makes the difference between a convincing illusion and one that looks obviously fake. The goal is consistent, natural-looking light that treats the minifigure and the background as if they share the same environment. When the lighting direction or quality differs between foreground and background, the viewer’s brain immediately senses something is off.
For outdoor shoots, overcast days are ideal because clouds act as a giant diffuser, wrapping soft, even light around the minifigure. Direct sunlight creates harsh shadows that look unnatural on a small figure, especially on printed faces where deep shadows hide details. If you must shoot in bright sun, use a small diffuser (a piece of white paper works) held between the sun and the minifigure to soften the light.
For indoor shoots, position the minifigure near a window for soft directional light. Avoid using your camera’s built-in flash, which creates a flat, harsh look and tiny hard shadows that immediately give away the small scale. If you need more light, use a small LED panel or even a desk lamp aimed at a 45-degree angle to the minifigure, and bounce a piece of white card on the opposite side to fill shadows.
The most important lighting rule for forced perspective is matching. If the background is lit by warm afternoon sun, make sure your minifigure is lit by the same light or a close approximation. Mismatched color temperature between foreground and background is one of the fastest ways to break the illusion.
Smartphone Forced Perspective Photography
You absolutely can create convincing forced perspective shots with a smartphone, and many LEGO photographers produce stunning work using only their phones. The principles are identical to those for dedicated cameras, but a few phone-specific tips will help you get the best results.
Start by locking focus and exposure. Tap and hold on the minifigure’s face in your camera app to lock focus, then slide your finger up or down to adjust exposure if the figure looks too dark or bright. On iPhones, this is called AE/AF Lock. On Android, the process varies by manufacturer but most phones support a similar long-press lock. This prevents the camera from refocusing on the background when you move slightly between shots.
If your phone has a portrait mode, experiment with it for forced perspective. Portrait mode uses computational depth effects to blur the background, which can enhance the scale illusion by separating the minifigure from distant elements. Be aware that portrait mode sometimes misidentifies the edges of small subjects, so check the results carefully and switch to standard mode if the effect looks unnatural.
Getting low with a phone is actually easier than with a DSLR because phones are thin and can lie nearly flat on the ground. Flip your phone upside down so the lens is at the bottom edge, closest to the surface. This puts the camera at true minifigure eye level without any special rig. Use the volume button to trigger the shutter so you do not shake the phone by tapping the screen.
Clip-on wide-angle lenses for phones are inexpensive and can exaggerate the forced perspective effect further. Look for ones with minimal edge distortion, and test them by photographing a straight edge to check for warping before using them in a real shoot.
Common Mistakes and How to Avoid Them
Even experienced photographers fall into common traps when shooting forced perspective with minifigures. Recognizing these mistakes ahead of time will save you hours of frustration and help you produce better results from your very first shoot.
Shooting from too high: This is the number one reason forced perspective fails. If you shoot from even a slightly elevated angle, the viewer sees the top of the minifigure’s head, which immediately reads as a toy on a table. The fix is simple but requires discipline: always check that the camera lens is at or below the minifigure’s eye level before pressing the shutter.
Inconsistent lighting between subject and background: If your minifigure is lit by a warm desk lamp while the background shows cool daylight, the color mismatch signals to the viewer that these elements do not belong together. Always match the color temperature and light direction of your foreground and background, either by using the same light source for both or by shooting entirely in natural light.
Wrong prop scale: A minifigure holding a pencil that is clearly thinner than its arm breaks the illusion instantly. Pay close attention to how real-world objects relate to the minifigure’s body proportions. Coffee cups, keyboards, and books tend to work well because their scale relationship to a human translates believably to a minifigure. Avoid thin objects like pens, utensils, and coins that reveal the true size of the figure.
Cluttered backgrounds: Busy backgrounds compete with the minifigure for attention and make the scene feel chaotic. Choose simple, clean backgrounds that provide context without distraction. A plain wall, open sky, or smoothly blurred natural setting works far better than a messy desk or crowded room.
Ignoring focus accuracy: At close range, even a millimeter of focus error can leave the minifigure’s face soft. Use manual focus with focus peaking if available, and zoom into the image on your screen after each shot to confirm sharpness. A perfectly focused minifigure against a slightly soft background looks intentional and professional. A soft minifigure just looks like a blurry photo.
Creative Scene Ideas to Try
Once you master the technical fundamentals, the creative possibilities are endless. Here are some scene concepts that work particularly well for minifigure forced perspective and that I have found consistently produce shareable images.
Place a minifigure on the rim of a real coffee cup so it appears to be sitting on the edge of a giant mug. Position the camera at cup-rim height with a wide-angle lens to exaggerate the cup’s size. This setup works beautifully on a clean table with soft window light.
Stand a minifigure on your keyboard and shoot from the side so the keys look like a futuristic cityscape. The rows of keys create natural leading lines that draw the eye to the figure, and the recognizable keyboard texture provides an immediate scale reference.
Take your minifigures outdoors and photograph them among garden plants, rocks, or fallen leaves. A knight standing on a moss-covered stone looks like it is exploring an ancient ruin. A space minifigure in a bed of clover appears to be walking through an alien forest. Natural textures and lighting sell the illusion effortlessly.
For a more ambitious scene, photograph a minifigure in front of a real building or cityscape. Get the camera very low on a flat surface, position the minifigure 8 to 12 inches away, and frame the building in the background. With the right angle, the minifigure appears to be a person standing in front of a skyscraper. This works best at dawn or dusk when the light is dramatic and the background is not cluttered with people.
Frequently Asked Questions
How to make a miniature look life size?
To make a miniature look life size, place it close to the camera and position a recognizable background object much farther away. Get the camera down to the subject’s eye level and use a wide-angle lens to exaggerate the size difference between foreground and background. Shoot at f/8 to f/11 for enough depth of field to keep the subject sharp.
How to achieve forced perspective?
Achieve forced perspective by following these steps: 1) Place your small subject 8 to 15 inches from the camera. 2) Lower the camera to the subject’s eye level. 3) Position a recognizable scale-reference object 3 to 6 feet in the background. 4) Use a wide-angle lens to exaggerate the size difference. 5) Focus on the subject and shoot at f/8 to f/16 for adequate depth of field.
What camera trick makes things look miniature?
The camera trick that makes things look miniature is called the tilt-shift effect, which uses a shallow depth of field to blur the top and bottom of the frame, simulating the look of a macro photo. For the reverse effect, making small things look large, you use forced perspective with a wide-angle lens placed at the subject’s eye level.
How to photograph LEGO minifigures?
To photograph LEGO minifigures, use a macro or wide-angle lens, get the camera to minifigure eye level, use natural window light or soft diffused light, and shoot at f/8 to f/11 for depth of field. Use a tripod for sharp images and manual focus for precision. Add props or real-world backgrounds to create forced perspective scenes that make the figures look life-sized.
What equipment is needed for forced perspective photography?
You need a camera (DSLR, mirrorless, or smartphone), a wide-angle or macro lens, a tripod that can go low to the ground, mounting putty to stabilize subjects, and props or scale-reference objects for the background. No special equipment is required to start, and smartphones can produce excellent results with the right technique.
Conclusion
Learning how to use forced perspective to make minifigures look life-sized comes down to three core principles: get low, get close, and choose your background carefully. Once those become habit, the rest is creative experimentation with props, lighting, and scene ideas that bring your minifigures into the real world. Grab a figure, lower your camera, and start shooting. The illusion becomes more convincing with every attempt, and the results are some of the most fun and shareable photos you can create with your LEGO collection.