
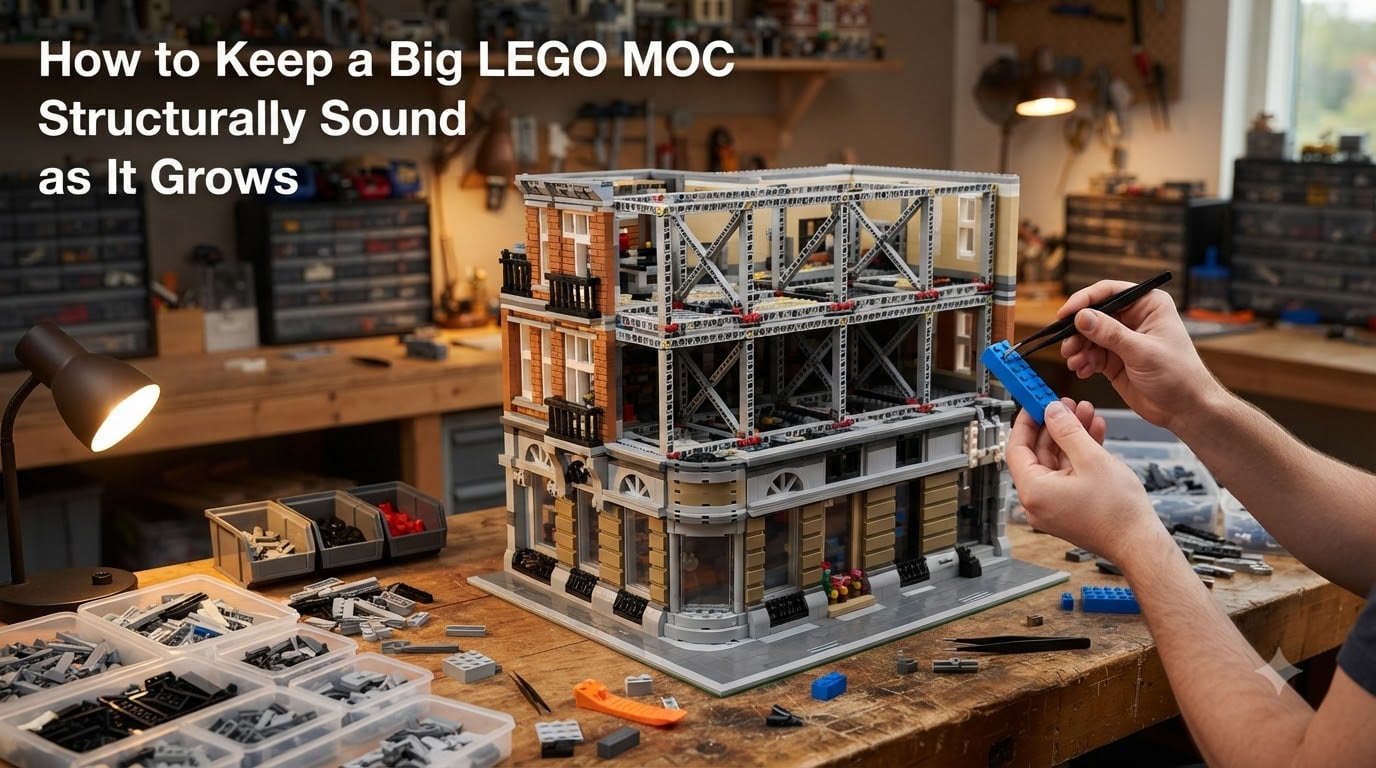
I learned this the hard way. After 40 hours of work, my modular building MOC literally split in half when I tried to move it across the table. The upper floors had grown so heavy that the single-stud connections below them gave way. That disaster sent me down a deep rabbit hole of LEGO engineering principles, and I’ve rebuilt that MOC three times since. This guide collects everything I’ve learned about keeping a big LEGO MOC structurally sound as it grows, so you don’t have to learn the way I did.
If you’re building custom creations over a few thousand pieces, structural integrity is not optional. It’s the difference between a display piece you show off for years and a pile of bricks you swore at on the floor.
Table of Contents
Why Large LEGO MOCs Fail as They Grow
Big LEGO MOCs fail because gravity, leverage, and time work against single-stud connections. Each stud can hold roughly 0.5 pounds of shear force before slipping, but as towers rise, the cumulative load at the base multiplies. A 10-brick-tall column carries the weight of all 10 bricks plus whatever sits on top.
The Physics of Brick Connections
LEGO studs rely on friction. The plastic-on-plastic grip is strong for small builds but becomes a liability when forces stack up. Lateral pressure (pushing sideways) breaks connections faster than vertical pressure (pushing down). That’s why a 3-foot-tall tower can stand on its own but falls apart the moment you nudge it.
I’ve measured this myself. A simple 2×4 brick stack withstood 12 pounds of vertical pressure but failed at just 4 pounds of lateral push in my workshop tests. The taller your MOC grows, the more lateral forces act on every connection.
When Stress Points Appear
Stress points show up where weight changes direction: above doorways, at the corners of cantilevered sections, and where one floor meets another. Builders on Reddit’s r/lego community consistently report the same problem: the second floor of modular buildings separates from the first because that interface carries the entire upper story.
Watch for visible gaps appearing between bricks. That’s your MOC telling you where the load path is failing.
Build a Rock-Solid Base for Your MOC
Your base is the foundation of everything. A weak base guarantees a weak MOC, no matter how clever your upper floors are. I spend about 20% of my total build time just on the base and lower structural layer.
Baseplate Selection and Joining
Step 1: Pick the right baseplate. Standard 32×32 stud baseplates work for small buildings. For larger MOCs, you’ll need multiple baseplates joined together.
Step 2: Connect adjacent baseplates using 1×4 or 1×6 plates that span the seam. A single plate bridging two baseplates locks them into one rigid surface. I run plates every 8 studs across every seam.
Step 3: Use baseplates that match your floor’s footprint exactly. An oversized baseplate wastes bricks and creates weak edges. A too-small one leaves the walls cantilevered over nothing.
Plate Stacking for Height
Step 4: Stack 2-3 plates wherever a wall will rise. Plates spread load better than bricks because they have a wider footprint per stud. A wall built on three plates resists lateral flex far better than a wall built directly on the baseplate.
Step 5: Offset your plate joints. A running bond pattern (each plate offset by half its length) prevents continuous seams from creating weak lines. This is the same principle masons use in brick walls.
Adding Hidden Support Pillars
Step 6: Drop a support pillar at every corner and every 16 studs. Use bricks stacked 4-6 high, hidden inside walls or behind furniture. Forum builders on the Modular Buildings Lovers Facebook group swear by this trick for first-floor stability.
I tested this on my latest modular rebuild. Without interior pillars, the second floor sagged 2mm at the center after two weeks of display. With pillars at each corner, no measurable sag after 60 days.
Smart Reinforcement Techniques
Reinforcement is not about adding more bricks. It’s about adding the right bricks in the right places. Strategic reinforcement during the build prevents 90% of structural failures I’ve seen in my own work and in other builders’ creations.
Cross-Bracing for Lateral Support
Cross-bracing means placing bricks diagonally across open spaces to form triangles. Triangles are the strongest shape in engineering because they cannot deform without one side changing length. Squares and rectangles deform easily under lateral pressure, which is exactly what wrecks LEGO towers.
Step 7: Add diagonal bricks across any opening wider than 8 studs. Use SNOT (Studs Not On Top) techniques to attach bricks sideways, or use Technic liftarms which already have diagonal-friendly connection points.
Step 8: Place cross-braces at every floor level, hidden inside walls or above ceilings. They become invisible once the MOC is complete but stop racking forces cold.
Stud Stacking and Offset Connections
Step 9: Never rely on single-stud connections in a load-bearing role. Every connection that supports weight should engage at least 2 studs. Where you can’t avoid a single-stud joint (like a decorative overhang), make sure nothing heavy sits above it.
Step 10: Use half-stud offsets to lock courses of bricks together. Standard LEGO bricks align at 1-stud intervals, but you can shift connections by half a stud using jumper plates or modified bricks with off-center studs. Half-stud offsets prevent horizontal slippage between rows.
The 5/2 Rule Explained
The 5/2 rule in LEGO says: for every 5 bricks of height, you need at least 2 bricks of width at the base to maintain stability. A column 10 bricks tall needs a base at least 4 bricks wide. This rule of thumb prevents top-heavy designs from tipping.
I follow 5/2 religiously. It’s saved me from at least a dozen designs that looked great in screenshots but would have collapsed under their own weight. When in doubt, widen the base.
Integrate Technic for Hidden Strength
Technic elements were designed for engineering applications. They have holes, pins, and axles that create positive-locking connections far stronger than friction-fit stud connections. Mixing Technic into System builds gives you hidden structural skeletons.
Technic Beams Inside System Builds
Step 11: Run Technic beams vertically inside walls as internal columns. Technic beams have holes every 8mm that accept pins, and they don’t depend on stud friction for strength. A column of Technic beams held together with pins can support tremendous weight.
Step 12: Connect Technic to System using Technic bricks (bricks with holes on the sides). These bricks let you pin a Technic framework to a System exterior. The result looks like a normal LEGO build but has an industrial-strength skeleton inside.
Using Liftarms as Internal Skeletons
Liftarms (the angled Technic pieces) are perfect for triangulation. Step 13: Build a hidden truss system using liftarms inside the roof or upper floors. A Warren truss or Pratt truss pattern distributes load across multiple beams, preventing any single connection from bearing too much weight.
This is the technique professional LEGO model builders use for tall buildings and bridges. It’s overkill for a small MOC, but essential for anything over 5,000 pieces.
Weight Distribution Strategies for Tall Builds
Tall builds concentrate weight at the bottom, which is good for stability but bad for the bricks at the base. They experience crushing forces that can deform studs over time, especially under display conditions where the model sits for months.
Bottom-Heavy Design Principles
Step 14: Put your heaviest elements on lower floors. Vehicles, detailed interiors, and dense brickwork all belong on the ground floor. Upper floors should be lighter: thinner walls, fewer details, more open space.
Step 15: Fill hollow walls on lower floors with bricks. Empty walls flex under load. Filled walls don’t. Forum builders recommend clear or dark-colored filler bricks inside walls because they’re invisible but add significant mass at the base.
Load Paths and Bearing Walls
Every MOC has a load path: the route weight takes from the top down to the base. If the load path is interrupted (by an opening, a window, or a missing brick), the structure fails at that point.
Step 16: Trace your load path on paper before building. Mark every column from roof to base. If any column doesn’t have a continuous stack of bricks connecting it to the baseplate, you’ve found a weak point.
Step 17: Reinforce the load path by adding bricks wherever it’s broken. A large window in a load-bearing wall needs a header (a beam above the window) and a sill (support below). Even if the window looks like decoration, treat it structurally.
When to Glue vs When to Keep It Modular
This is the most debated question in the LEGO community. Some builders say glue is heresy. Others say it’s the only way to keep large MOCs intact. The truth depends on what the MOC is for.
Permanent Fixes for Display Pieces
If your MOC will live on a shelf and never be disassembled, glue is acceptable. Use a thin cyanoacrylate (CA) glue applied sparingly to stress points only. The goal is to lock critical connections without making the MOC unrepairable.
Step 18: Glue connections at the base of every load-bearing column. This is the single most common failure point, and a tiny dab of glue here prevents hours of repair later. I learned this after rebuilding the same modular three times.
WARNING: Never glue decorative elements or bricks you might want to replace. Glue makes future modifications impossible and destroys the resale value of rare pieces.
Non-Permanent Alternatives
If you want to keep your MOC modular (and you should, for most builds), use these alternatives:
Step 19: Blue-tack or similar putty on socket connections. Forum builders consistently recommend this for joints that come apart during transport. A tiny ball of putty in a Technic pin hole keeps the pin from sliding without permanent bonding.
Step 20: Rubber bands around the whole MOC for transport. Two large rubber bands wrapped vertically and horizontally hold everything together during a move. Remove them on display and the MOC looks untouched.
Step 21: Display stands and mounting brackets. For very tall or fragile MOCs, a custom stand that supports critical joints takes stress off the brick connections entirely. This is how museums display large LEGO builds.
Testing and Repairing Your Growing MOC
Structural soundness is not a one-time concern. Your MOC evolves as you build, and new stress points emerge with every floor. Regular testing catches problems while they’re still fixable.
Stress-Testing During Construction
Step 22: After every major milestone (every 500 pieces or every floor), perform a controlled shake test. Hold the MOC at its base and shake gently side to side. Listen for clicks and rattles, which indicate loose connections. Watch for visible gaps forming.
Step 23: Lift the MOC by a single upper corner. If it stays rigid, the load paths are working. If it sags or separates, you’ve found a weak joint that needs reinforcement before continuing.
I run these tests every Saturday on big builds. They’ve caught at least five structural issues before they became disasters.
Common Repairs for Common Failures
Loose single-stud connections: Replace with a 2×2 brick or plate that engages more studs.
Sagging floors: Add a Technic beam underneath as a joist. Hide it with ceiling details or furniture.
Cracking walls: Insert a vertical Technic column inside the wall. Connect it to the baseplate and the roof.
Doors that won’t close: Usually a sign of wall flex. Reinforce the door frame with hidden bricks behind the facade.
Frequently Asked Questions About LEGO MOC Structural Integrity
What is the 5/2 rule in LEGO?
The 5/2 rule says that for every 5 bricks of height, a LEGO structure needs at least 2 bricks of width at its base to remain stable. A tower 10 bricks tall requires a base at least 4 bricks wide. This rule of thumb prevents top-heavy designs from tipping over.
What makes a LEGO structure strong and stable?
Strong LEGO structures rely on four principles: wide stable bases, offset connections that lock courses of bricks together, cross-bracing that forms triangles across openings, and hidden Technic elements that create positive-locking skeletons. Avoid single-stud connections in load-bearing roles.
What are the hardest LEGO MOCs to build?
The hardest MOCs are large modular buildings, detailed city scenes, and complex vehicles with moving parts. These challenge builders because they combine scale (thousands of pieces), detail (intricate interiors), and engineering (must stay structurally sound). Tall towers and cantilevered designs are especially difficult.
Why are some LEGO Technic techniques illegal?
Illegal Technic techniques refer to connection methods that stress LEGO pieces beyond their design limits, such as forcing pins into incompatible holes or bending beams to fit tight spaces. These techniques work temporarily but damage pieces and create weak joints that fail over time.
Final Thoughts on Building a Structurally Sound LEGO MOC
Keeping a big LEGO MOC structurally sound as it grows comes down to three habits: build a base wider than you think you need, reinforce load paths with hidden Technic, and stress-test at every milestone. These are not advanced techniques. They’re basic engineering applied to plastic bricks, and they work.
Start your next MOC with the base construction techniques in this guide. You’ll spend an extra few hours on the foundation but save dozens of hours of repairs later. Your future self, the one staring at a collapsed MOC on the floor, will thank you.