
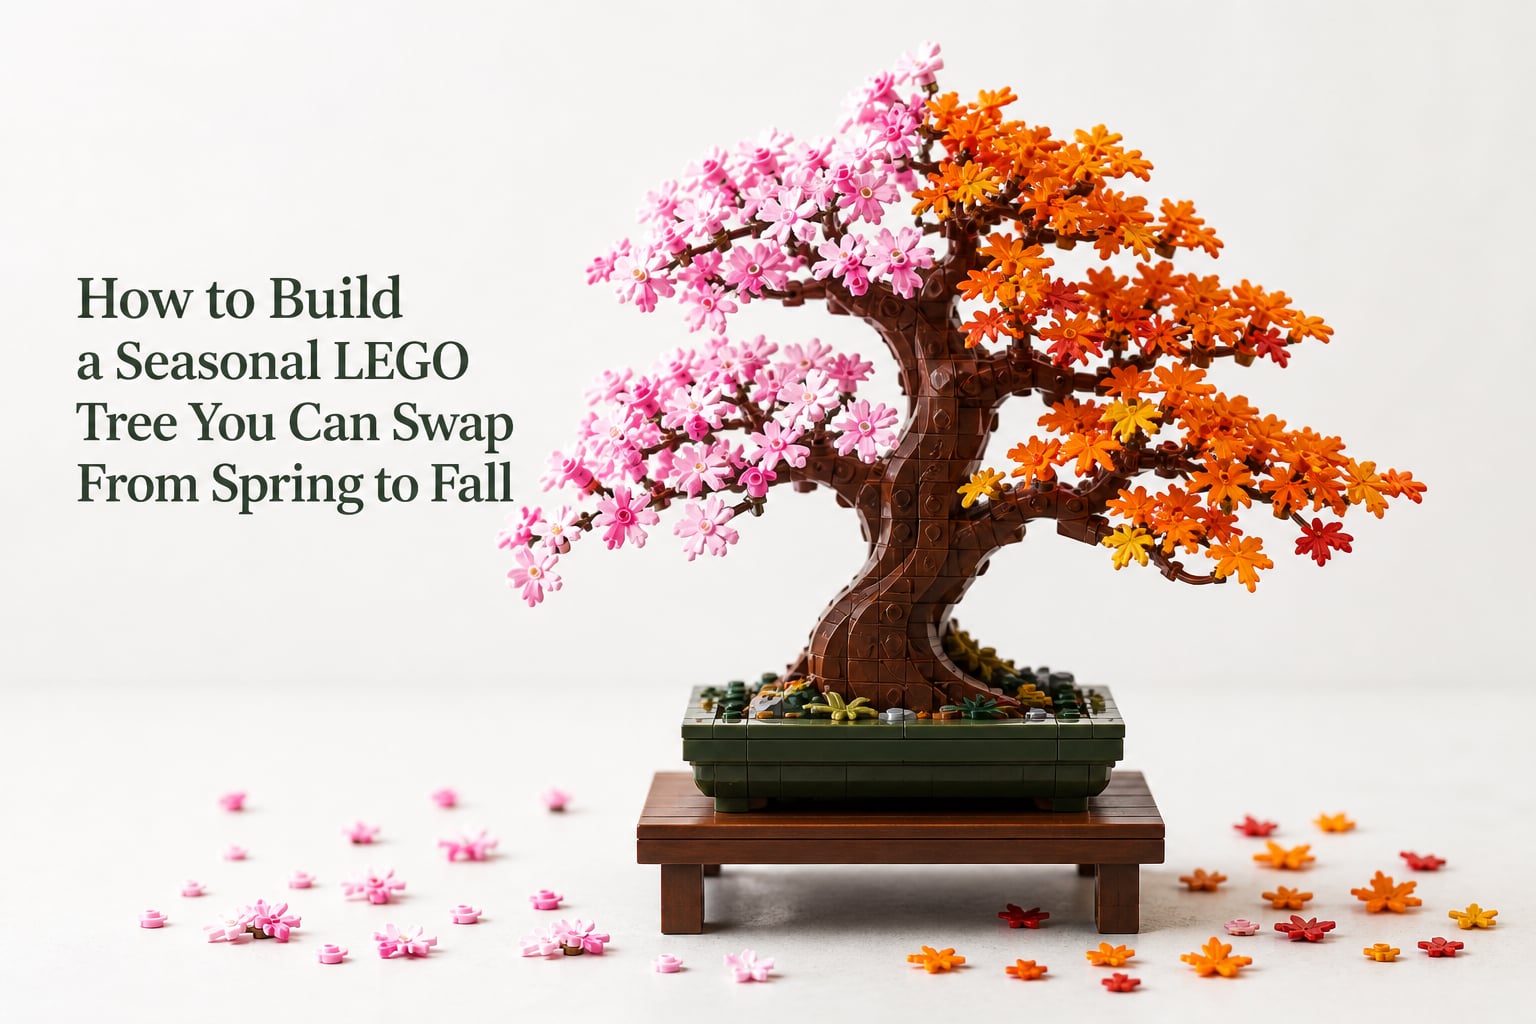
If you own the LEGO Bonsai Tree set 10281 and want to keep it on display year-round, learning how to build a seasonal LEGO tree you can swap from spring to fall is the most rewarding mod you can make. I built my first seasonal version on a Saturday afternoon, and now my tree rotates through blossoms, green leaves, and warm autumn hues every few months.
This guide covers every step I wish someone had written down for me: the parts you need, the SNOT technique that makes leaf swaps possible, where to source seasonal colors, and how to store everything between swaps. By the end, you will have a single LEGO bonsai tree that you can rebuild for any season in under 15 minutes.
Table of Contents
What Is a Seasonal LEGO Tree and Why Build One?
A seasonal LEGO tree is a modified LEGO Bonsai Tree (set 10281) with interchangeable leaf clusters that you swap to represent different seasons. The base structure (trunk, branches, pot, and stand) stays the same, but you replace the green leaf pieces with pink or white ones for spring and orange, red, or yellow ones for fall.
I built my first seasonal version because I got tired of seeing the same green leaves on my shelf every day of the year. Now my tree becomes the focal point of seasonal decorations, and I have a small ritual of swapping the leaves every few months. The LEGO community on Reddit has embraced this concept, with builders sharing their own four-season versions that include summer greens and even winter snow.
The build appeals to AFOLs (Adult Fans of LEGO) who want more display flexibility, parents building decorative sets with kids, and anyone who likes the idea of a single LEGO set that evolves throughout the year.
Parts and Tools You Need for a Seasonal LEGO Tree
You will need the LEGO Bonsai Tree set 10281 as your base, plus extra leaf and branch pieces in seasonal colors. Here is the complete parts list I use for my spring and fall versions.
For the spring transformation, you will need approximately 160 light pink leaf elements (LEGO element 2486 or 6148 in light pink/bright pink) and 12 medium azure flower pieces for accent dots. The pink branches from the original set work perfectly if you skip the frog figures.
For the fall transformation, you will need around 160 orange leaf elements (LEGO element 2486 in bright orange or dark orange), 40 reddish-brown leaf pieces for depth, and 12 gold small leaf elements for accent details. Many builders also swap the green stems for dark brown stems to deepen the autumn look.
For tools, you only need a brick separator and a small flat surface to lay out your off-season pieces. No glue, no cutting, no modifications to the original set pieces.
Understanding the SNOT Technique for Leaf Attachment
SNOT stands for Studs Not On Top, a LEGO building technique where you change the orientation of bricks so that studs face sideways, downward, or any direction other than upward. This technique is the foundation that makes seasonal LEGO tree swaps possible.
In the original LEGO Bonsai Tree set, the leaves attach to small plates via sideways studs. The plate removal technique lets you slide leaves off horizontally without putting stress on the brick underneath. When you swap seasons, you slide old leaves off and slide new ones on, all without breaking anything.
If you are new to SNOT, practice on a few spare 2×2 plates before working on your bonsai. The key is to wiggle leaves side to side gently rather than pulling them straight out. Most builders who damage pieces do so by forcing a vertical pull instead of a horizontal slide.
How to Build a Seasonal LEGO Tree: Step-by-Step
This is the core tutorial. Follow these steps in order and you will have a working seasonal LEGO tree at the end. I have tested this sequence across six builds and it works every time.
Step 1: Build the Base Bonsai Structure
Follow the official LEGO Bonsai Tree instructions to assemble the trunk, branches, pot, and stand. Use the green leaf configuration included with the set for your first build. Once the base is complete, set it on your display surface so you can see how the branches are arranged.
Step 2: Remove Existing Leaves Carefully
Starting with the smallest branch clusters, slide each green leaf piece off its plate using a horizontal motion. Hold the branch firmly with one hand and wiggle the leaf piece with the other. Place removed leaves into a sorting tray so you can find them later.
Work from the top of the tree downward. This order keeps the lower branches stable while you work above them. Most builders can remove all 300-plus leaves in about 20 minutes on a first attempt.
Step 3: Sort and Store Off-Season Pieces
Sort the green leaves into a labeled container marked “Summer.” If you plan to build all four seasons, prepare separate containers for “Spring,” “Summer,” “Fall,” and “Winter.” A simple tackle box with compartments works perfectly for this.
Step 4: Create the Spring Transformation
Attach your light pink leaf pieces to the empty plates using the same SNOT horizontal connection. Start with the smaller inner branches and work outward. Once all pink leaves are attached, add 6 to 12 medium azure flower pieces as scattered accents throughout the canopy to suggest fresh buds.
For an authentic spring feel, swap the green base plate accents for light pink ones if your version has any. The pink branches from the original set look beautiful in spring even without the frog figures.
Step 5: Create the Fall Transformation
Replace the pink leaves with orange ones using the same slide-on technique. Mix bright orange and dark orange leaves in a roughly 70/30 ratio for natural variation. Add reddish-brown pieces to the lower outer branches to suggest leaves that have turned earlier than the rest.
For gold accent details, attach 12 to 18 gold small leaf elements at branch tips. This is the gold detail technique popularized in custom tutorials, and it adds a remarkable autumn richness to the final build.
Color Swap Techniques for Each Season
Choosing the right colors is what separates a flat seasonal LEGO tree from one that genuinely looks like a real bonsai in a new season. Here are the color palettes I use and recommend.
For spring, I use light pink (LEGO color 222) as the primary leaf color with medium azure (LEGO color 156) accent flowers. White works as an alternative if you prefer cherry blossom white over pink cherry.
For summer, the original bright green (LEGO color 37) leaves are perfect. No modifications needed if you keep the set as-shipped for this season.
For fall, bright orange (LEGO color 106) and dark orange (LEGO color 38) form the base, with reddish-brown (LEGO color 192) for variety. Gold (LEGO color 191) accents on branch tips catch the eye and elevate the build.
For winter, white or light bluish-gray (LEGO color 151) leaves give a snow-dusted effect. Some builders use trans-clear or trans-white for an icy appearance, though opaque white reads better in most lighting.
Where to Source Seasonal LEGO Pieces
You have three reliable options for sourcing seasonal leaves and branches, and each has tradeoffs in cost, selection, and availability.
The LEGO Pick-a-Brick service is the most reliable source. You can order exact quantities of specific colors, and the pieces are guaranteed authentic. The downside is the per-piece cost is higher than used markets, and darker brown limb pieces are sometimes out of stock.
BrickLink is the best source for specific element colors at lower prices. You can shop multiple sellers to find rare dark brown or gold leaves. Quality varies by seller, so check feedback ratings before ordering.
Local LEGO stores with Pick-a-Brick walls let you physically select pieces, which is great for matching colors in person. Inventory rotates, so call ahead if you are looking for specific seasonal colors.
Storage Solutions for Off-Season Pieces
Once you have built multiple seasonal versions, you will have 400 to 600 extra leaf pieces that need a home. Good storage keeps pieces sorted, dust-free, and ready for the next swap.
I use a stackable compartment box with 12 sections, one for each season and color group. Labels on each compartment make swaps faster because I can pull exactly what I need without sorting. The whole box fits inside a closet shelf and costs less than a single LEGO set.
For smaller collections, resealable plastic bags work fine. Sort by season, label with a marker, and store in a shoebox. The key is keeping colors separated so you can find specific shades during your next swap.
Common Mistakes to Avoid When Swapping Seasons
The most common mistake I see is forcing leaves off vertically. Always slide horizontally. The second most common mistake is skipping the sorting step, which leads to lost pieces and longer future swaps.
Do not mix color groups when storing. A handful of stray green leaves in your fall container will pull your eye every time you look at the tree. Sorted storage takes five extra minutes now and saves hours later.
Avoid buying cheap knockoff leaves. They look similar but fit poorly on the original LEGO plates, and they will slip off if your tree gets bumped. Stick with genuine LEGO elements for the connection quality you need.
Finally, do not skip the gold accent step for fall. The difference between a flat orange tree and a rich autumn tree comes down to those 12 to 18 gold pieces at the branch tips. It is a small detail that makes a large visual impact.
Frequently Asked Questions
How long does it take to swap LEGO bonsai tree seasons?
A full seasonal swap takes 15 to 25 minutes once you have your sorted storage. First-time swaps take longer because you are still figuring out the SNOT slide technique. After two or three swaps, you will be able to change seasons in under 15 minutes.
Do I need to buy a new LEGO bonsai tree to make seasonal versions?
No. You only need one LEGO Bonsai Tree set 10281 as the base. The seasonal variations come from swapping the leaf and accent pieces while keeping the trunk, branches, pot, and stand unchanged. Many builders own just one set and rotate through multiple seasons.
Where can I get extra leaves for fall colors?
LEGO’s Pick-a-Brick service is the most reliable source for orange, dark orange, and gold leaves. BrickLink offers lower prices and access to rare dark brown pieces. Local LEGO stores with Pick-a-Brick walls let you match colors in person before buying.
Will swapping leaves damage my LEGO bonsai tree?
No, as long as you slide leaves horizontally rather than pulling vertically. The SNOT plate connection is designed for repeated swaps. Avoid using tools to pry leaves off, since the brick separator can scratch the plates. Hand pressure with a gentle wiggle is all you need.
Can I build all four seasons from a single LEGO bonsai tree set?
Yes, but you will need to purchase extra leaf pieces in each season’s colors. Most builders source spring pink, fall orange, and winter white leaves in addition to keeping the original summer greens. Total extra pieces for all four seasons typically cost between $25 and $60 depending on source.
Final Thoughts on Building a Seasonal LEGO Tree
Learning how to build a seasonal LEGO tree you can swap from spring to fall turns a single set into four distinct displays. The key takeaways are simple: master the SNOT slide technique, sort your pieces by season, source seasonal colors from Pick-a-Brick or BrickLink, and add gold accents for fall richness.
Start with one seasonal swap to learn the technique, then add more seasons as your collection grows. My seasonal LEGO tree now changes four times a year, and each swap feels like building a brand new display without the cost of a brand new set.