
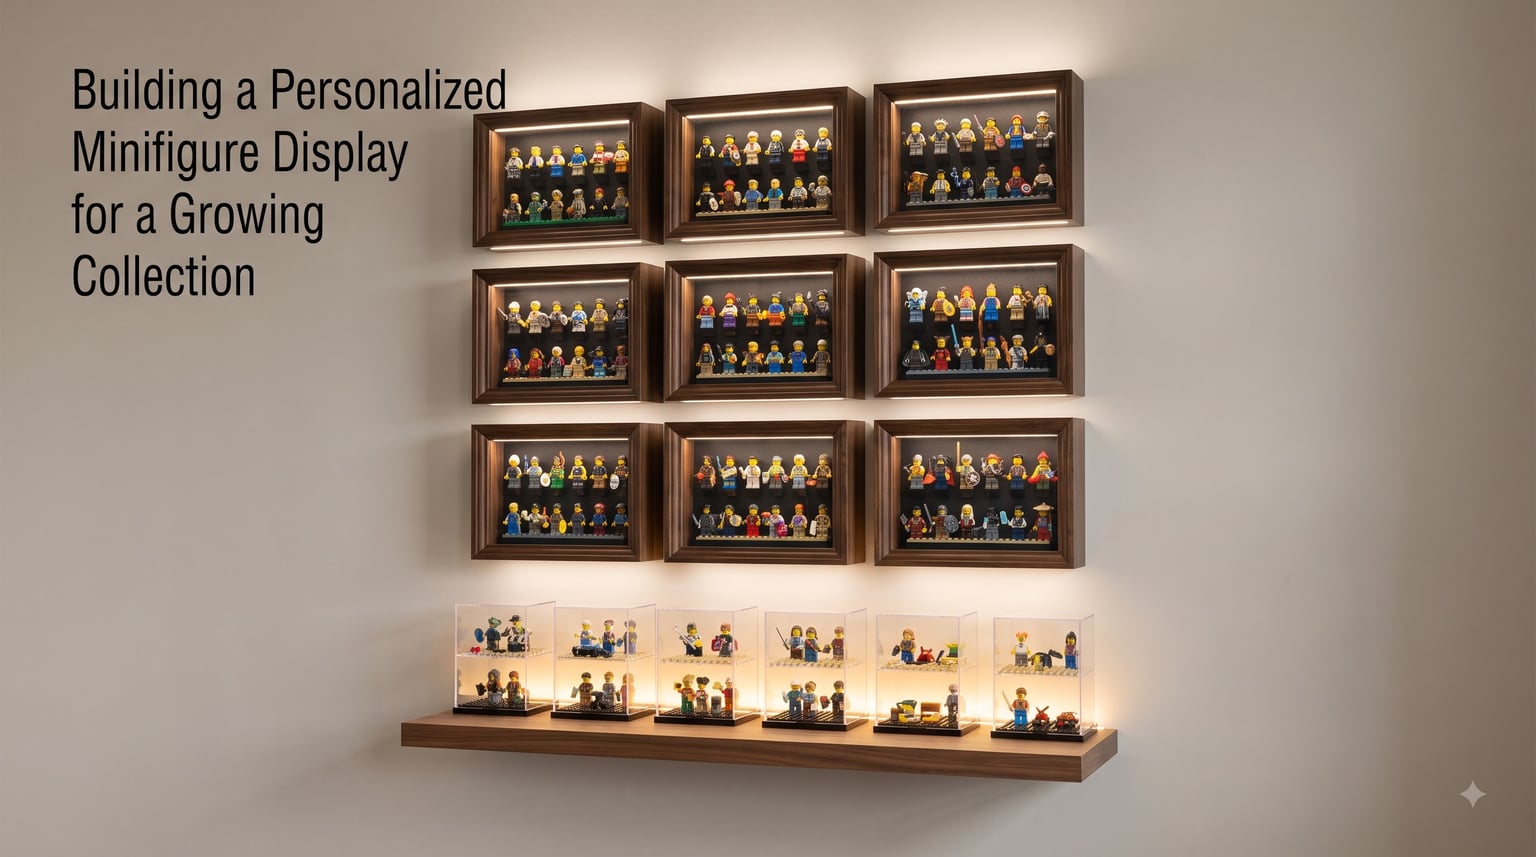
I still remember the day my minifigure collection outgrew the windowsill. What started as a handful of favorite characters from a single LEGO set had quietly ballooned to over 200 figures, and they were crammed onto every flat surface in my office. That is when I realized I needed a real minifigure display system, not just a place to dump them.
A minifigure display is a dedicated storage and presentation solution that showcases your LEGO collection while protecting each figure from dust, UV damage, and accidental damage. Whether you have 20 figures or 2,000, how you display them determines whether your collection looks like a curated gallery or a cluttered mess.
In this guide, I will walk you through everything I have learned about building a personalized minifigure display for a growing collection. We will cover planning your space, choosing the right display type, DIY builds like the popular IKEA Ribba hack, organizing and protecting your figures, and designing a system that expands as your collection grows. By the end, you will have a clear roadmap for creating a display you are proud to show off.
Table of Contents
Planning Your Minifigure Display
Building a minifigure display starts long before you pick up a hammer or buy a case. The collectors who end up with the best displays are the ones who plan first. I learned this the hard way after building a beautiful wall unit that could not accommodate the larger figures I started collecting months later.
Here is the step-by-step process I recommend for planning any minifigure display, whether you are starting fresh or redesigning an existing setup.
Step 1: Count and Categorize Your Collection
Before anything else, count your figures. Not roughly, actually count them. Then break them into categories that make sense for how you want to display them. Common groupings include theme (Star Wars, City, Harry Potter), character type (human, creature, droid), or chronological order by release year.
I group mine by theme and then by sub-theme within each shelf. This makes it easy to find specific figures and creates visual cohesion. If you have a growing collection, add 20 to 30 percent to your current count when planning capacity. Trust me, you will fill that extra space faster than you think.
Step 2: Measure Your Available Space
Grab a tape measure and get precise dimensions of the wall, shelf, or tabletop where your display will live. Measure width, height, and depth. A standard minifigure stands about 1.5 inches wide and 4 centimeters tall, so depth of at least 2 inches is the minimum for any shelf or case.
For wall-mounted displays, check that your wall can support the weight. A large filled display case can weigh 15 to 30 pounds. Use a stud finder to locate wall studs, or plan to use heavy-duty wall anchors rated for the total weight.
Step 3: Set a Realistic Budget
Minifigure display costs range wildly depending on your approach. A simple DIY shadow box might cost $15 to $30 in materials. A commercial acrylic display case can run $40 to $170. Custom-built wooden displays with LED lighting can exceed $200. There is no single right answer, but you should know your number before you start shopping or building.
I recommend budgeting in tiers. Start with one display unit that covers your current collection, then set aside funds for a second unit when you need it. This keeps costs manageable and lets you adjust your approach based on how the first display works in practice.
Step 4: Choose Your Display Location
Where you display matters as much as how. Avoid direct sunlight, which causes plastic colors to fade over time. Stay away from heating vents and humid areas like bathrooms. A climate-controlled room with indirect natural light or adjustable artificial lighting is ideal.
Also think about viewing angle. Displays at eye level get the most enjoyment. If you are building for a child’s room, place the display lower so they can see and access their figures easily.
Types of Minifigure Display Solutions
There is no one-size-fits-all answer to how to display your LEGO collection. The right choice depends on your space, budget, collection size, and whether you prioritize protection or accessibility. Let me break down the main categories so you can find the best fit.
Wall-Mounted Minifigure Display Frames
Wall-mounted frames are the most popular choice for collectors with limited floor space. These are typically shadow box-style frames with a baseplate or stepped platform inside where figures stand upright. They mount flush against the wall and turn your collection into wall art.
The biggest advantage is space efficiency. A single wall frame can hold 30 to 60 figures while taking up zero floor or table space. The downside is that accessing figures requires removing the frame from the wall or opening a hinged cover, which can be inconvenient if you like to swap figures frequently.
Wall frames work best for collectors who want a polished, gallery-style look and rarely need to handle individual figures. They are also excellent for dust protection since the enclosed designs keep figures clean.
Tabletop Minifigure Display Cases
Tabletop cases are freestanding acrylic or glass enclosures that sit on a desk, shelf, or dresser. They typically have a clear front panel and a baseplate floor where figures stand. Many include stackable designs so you can add layers as your collection grows.
I like tabletop cases for smaller curated selections, maybe your top 20 favorite figures on a desk or bookshelf. They offer great visibility from multiple angles and are easy to move when rearranging a room. The trade-off is that they consume surface space and typically hold fewer figures than wall-mounted options.
Stackable acrylic cases are worth considering if you want flexibility. You can start with one layer and add more as needed, creating a modular tower of minifigures that grows with your collection.
Minifigure Display Shelves
Open shelving is the simplest and most accessible option. A dedicated shelf or set of shelves with a thin lip or rail along the front edge lets figures stand in rows. You can use existing bookshelves, floating wall shelves, or purpose-built display ledges.
The appeal here is cost and access. Shelves are inexpensive, and you can grab or rearrange figures anytime without opening a case. The major drawback is dust. Open shelves expose figures to dust buildup, which means regular cleaning. Figures are also more vulnerable to being knocked over.
I recommend shelves for active collections that get handled often, or for brick-built displays where you construct custom stands and backdrops using LEGO pieces themselves.
Custom-Built Minifigure Displays
For collectors who want something truly personalized, custom builds offer unlimited possibilities. This category includes wooden display cabinets with individually sized compartments, repurposed furniture like printmaker’s drawers, and fully bespoke wall installations.
One approach I have seen work beautifully is using a quarter-round wood trim routed with shallow channels. Each minifigure sits in its own groove, creating a clean uniform row. You can stain or paint the wood to match your room’s decor.
Custom builds take more time and skill but result in a display that is uniquely yours. If you enjoy woodworking or crafting, this can be a rewarding project that becomes a conversation piece in its own right.
Brick-Built LEGO Minifigure Displays
Many collectors prefer to build their displays out of LEGO bricks themselves. A stepped platform made from plates and bricks creates tiered rows so back figures are visible above front ones. You can use baseplates as the standing surface and build a frame around them.
This approach is especially satisfying because it uses the same medium as the collection itself. It is also infinitely customizable since you can rebuild or resize at any time. The limitation is structural stability since brick-built displays can be heavy and may not support large enclosed designs without reinforcement.
Brick-built displays are perfect for collectors who see display construction as part of the hobby, not just a practical necessity.
DIY Minifigure Display Ideas
Some of the best minifigure displays I have ever seen were built by collectors at home for a fraction of what commercial options cost. DIY projects let you tailor every dimension, color, and feature to your exact collection. Here are four proven approaches that the LEGO community swears by.
The IKEA Ribba Frame Hack
This is the most popular DIY minifigure display in the LEGO community, and for good reason. The IKEA Ribba frame (now sometimes sold under the name RIBBA or HOVSTA depending on your region) is a deep shadow box frame that, with minor modifications, becomes a wall-mounted display holding dozens of figures.
Here is how to build one. Start with a Ribba frame in your preferred size. Remove the glass front and the backing. Cut a piece of minifigure baseplate material to fit snugly inside the frame backing. Most collectors use standard LEGO baseplates cut to size, though some use compatible alternatives. Adhere the baseplate to the frame’s back panel using strong double-sided tape or construction adhesive. Reassemble the frame with the glass front in place.
Stand your minifigures on the baseplate, close the frame, and mount it on the wall. A single large Ribba frame can hold 40 to 60 figures depending on spacing. The glass front provides excellent dust protection while keeping figures fully visible. Total cost is typically under $35.
The beauty of this hack is scalability. Mount multiple frames side by side or in a grid pattern to accommodate a growing collection. Each frame becomes a self-contained module that you can rearrange or expand independently.
Brick-Built Stepped Platform
If you have spare LEGO bricks, you can build a stepped display platform that costs nothing beyond what you already own. The concept is simple: create tiered levels using plates and bricks so each row of figures sits higher than the one in front. This creates an amphitheater effect where every figure is visible.
Start with a baseplate as your foundation. Build up the back rows using plates to create steps about two studs deep and one plate height tall per tier. A typical design has four to six tiers depending on how many rows you need. Attach a baseplate strip on each tier for figures to stand on.
You can leave this as an open display or build walls and a roof around it for dust protection. Some collectors add hinged transparent panels made from compatible building toy pieces or acrylic sheets for a fully enclosed brick-built case.
Shadow Box with Custom Background
A standard craft store shadow box, the kind used for displaying memorabilia, makes an excellent minifigure display with a few modifications. These boxes typically have a glass front and a deep interior, perfect for standing figures on a baseplate.
What sets this approach apart is the opportunity for custom backgrounds. Line the back of the shadow box with printed scenery, colored paper, or even a hand-painted diorama backdrop. A space-themed background behind Star Wars figures, or a brick-wall print behind City characters, adds personality that commercial cases cannot match.
Adhere a cut-to-size baseplate to the floor of the shadow box, arrange your figures, and close the glass front. These displays look fantastic on a wall in a group of two or three, each with a different theme and background.
Wood Trim Channel Display
For a more refined look, the quarter-round wood trim method mentioned by collectors on Reddit and LEGO forums creates a sleek professional display. Buy wooden quarter-round trim from a hardware store and use a router or table saw to cut a shallow channel along the top edge. The channel should be just wide enough for a minifigure’s feet to slot into.
Mount the trim strips horizontally on a backing board at evenly spaced intervals. Each strip holds a row of figures standing upright in the channel. Finish the wood with stain or paint, add an optional acrylic or glass front panel, and mount on the wall.
This method requires basic woodworking tools and skills, but the result is a clean modern display that looks like high-end furniture. Total material cost typically runs $25 to $50 depending on wood choice and size.
Organizing and Protecting Your Collection
Once you have a display solution, the next question is how to arrange and protect your figures within it. Organization and protection go hand in hand. A well-organized display is easier to maintain, and a well-protected collection stays looking new for years.
Organization Strategies
How you organize your minifigures is a personal choice, but some approaches work better than others. Thematic organization, grouping by LEGO theme, is the most common and visually striking method. Each shelf or frame becomes a dedicated zone for Star Wars, Harry Potter, Super Heroes, or whatever themes you collect.
Within each theme, consider sub-groupings. Arrange Star Wars figures by faction, Rebels versus Imperials versus bounty hunters. Group City figures by role, police, firefighters, civilians. This creates visual stories within each display section.
For collectors who value completeness, chronological organization by release year can be fascinating. It shows the evolution of minifigure design over time, from the simple smiley faces of the 1980s to the highly detailed prints of 2026. This approach works best if you have figures spanning multiple decades.
Whatever system you choose, leave breathing room between figures. Cramming figures shoulder to shoulder looks cluttered and makes individual figures harder to appreciate. A small gap between each figure lets every character stand out.
Dust Protection Methods
Dust is the number one enemy of displayed minifigures. It settles into joints, clings to textured surfaces, and dulls colors over time. Forum collectors consistently rank dust as their top display frustration.
The most effective dust protection is a fully enclosed display with a transparent front. Glass or acrylic panels sealed against a frame block nearly all dust. Cases with hinged or sliding fronts let you access figures while keeping dust out when closed.
For open displays, accept that regular cleaning is part of the deal. A soft makeup brush or camera lens blower works well for removing dust from figures without scratching plastic. Avoid compressed air cans, which can blow dust deeper into joints or knock figures over. Clean open displays every two to four weeks depending on your environment.
UV and Fading Prevention
Sunlight is the silent killer of minifigure collections. UV rays break down the pigments in LEGO plastic, causing colors to fade and white pieces to yellow. This damage is irreversible.
Never place displays in direct sunlight. If your display room gets sun, use UV-filtering window film or curtains. Some collectors use UV-protective acrylic instead of standard glass in their display cases. While more expensive, it blocks up to 98 percent of UV rays and provides long-term insurance for valuable figures.
LED display lights are a safe alternative for illumination. They produce minimal UV and very little heat, making them ideal for highlighting your collection without causing damage.
Physical Damage Prevention
Minifigures are surprisingly fragile. The classic cracking issue, where torso cracks develop over time, can be worsened by repeated handling and temperature fluctuations. Figures standing on baseplates are generally stable, but vibrations from doors slamming or foot traffic can topple them.
For high-value or rare figures, consider individual display stands. Small transparent acrylic stands that grip a minifigure’s waist provide stability without obstructing the view. These are especially useful for figures with top-heavy accessories or unusual poses.
In earthquake-prone areas or homes with active pets and children, museum wax or mounting putty under each figure’s feet adds security without permanent adhesive. A small dab keeps figures upright through vibrations but can be removed without residue.
Scaling Your Display for a Growing Collection
The biggest challenge most collectors face is not building their first display, it is what happens when it fills up. A collection that starts at 50 figures can double within a year if you are an active builder, BrickLink buyer, or minifigure series collector. Planning for growth from day one saves money and frustration.
Design for Modularity
The single best decision I made was choosing a modular display system from the start. Instead of one massive custom build, I used three identical wall-mounted frames arranged in a row. When my collection outgrew them, I simply added two more frames below. The display looks intentional and unified, not patched together.
Modularity means each display unit can function independently but also work as part of a larger arrangement. Stackable acrylic cases, identical shadow boxes in a grid, or a shelving system with adjustable compartments all qualify. The key is consistency: use the same frame style, color, and spacing across all units.
Plan Your Expansion Path
Before you build or buy your first display unit, map out where future units will go. If you fill one wall, where does the next display go? Having a planned expansion path prevents the panic of a suddenly overflowing collection with nowhere to put new figures.
I recommend sketching your wall or room and marking current display placement plus two future expansion zones. This gives you a visual roadmap and helps you commit to a consistent layout rather than adding units wherever they fit.
Also consider vertical space. Many collectors focus at eye level and forget that space above and below is available. A floor-to-ceiling display wall maximizes capacity in the same footprint.
Budget for Future Expansion
Cost is a real factor when scaling. If your first display costs $150, scaling to three or four units gets expensive fast. Build your budget around a per-unit cost model. Know what each display module costs, whether that is $25 for a DIY frame or $80 for a commercial case, and set aside funds accordingly.
One strategy I use is a collection tax. Every time I buy new minifigures, I set aside 15 percent of the purchase cost toward future display expansion. This creates a self-funding system where display growth keeps pace with collection growth automatically.
Reserve a Rotating Display Zone
Not every figure needs to be on permanent display. A rotating zone, one shelf or frame section that you refresh monthly, lets you showcase new acquisitions or seasonal favorites without needing permanent space for every figure.
Store off-display figures in stackable containers with dividers. Keep them in a cool, dark, dry place to prevent fading and degradation. Label each container by theme so you can find figures when rotating them in. This approach lets you enjoy your full collection over time even if you cannot display it all at once.
Enhancing Your Display with Lighting and Design
A good display protects and organizes. A great display tells a story. Lighting and thoughtful design choices elevate your minifigure collection from storage to showcase, making it a focal point of your room.
LED Strip Lighting
LED light strips are the easiest upgrade you can make to any display. Thin adhesive-backed strips tuck under shelf edges, along the top of display cases, or behind wall frames to create a soft glow that highlights your figures. Most kits are battery-powered or USB-powered and cost $10 to $25.
Warm white LEDs create a cozy museum-like ambiance. Cool white gives a brighter more clinical look. For themed displays, colored LED strips can match your collection, red and blue for Star Wars, green for Harry Potter, or a multicolor RGB kit that you can change at will.
The shopPOPdisplays guide recommends LED lighted bases specifically for tabletop display cases, where light shines upward through the figures. This creates a dramatic floating effect that draws the eye.
Themed Display Backdrops
Backdrops add context and personality. For framed displays, print background images sized to fit behind your figures. A starfield for space collections, a Hogwarts castle silhouette, or a city skyline for LEGO City figures transforms a plain display into a themed diorama.
You can also build brick-built backdrops using colored plates and tiles. A simple gradient of dark blue to light blue creates a sky effect. Gray and black tiles form an urban wall. These brick-built backgrounds blend naturally with your LEGO collection.
Grouping for Visual Impact
How you arrange figures within a display affects its visual impact. Grouping figures in dynamic poses, as if captured mid-scene, creates energy and movement. A Jedi facing off against a Sith, or a team of heroes standing in formation, tells a story that static rows of figures cannot.
Vary the spacing too. Dense clusters of figures alternating with open space creates rhythm and draws attention to key pieces. Use your rarest or most detailed figures as focal points, placed at eye level with extra space around them.
FAQs
How to build a minifigure display?
Start by counting your collection and measuring your available space. Choose a display type (wall-mounted frame, tabletop case, or open shelf), then either build a DIY solution like the IKEA Ribba frame hack or purchase a commercial case. Mount a minifigure baseplate inside your chosen frame or case, arrange figures in thematic groups, and add dust protection like a glass or acrylic front panel. Most DIY builds take 2 to 4 hours and cost $15 to $50.
How do I display my LEGO collection?
The best way to display LEGO minifigures depends on your space and collection size. For small collections of 20 to 50 figures, a single wall-mounted shadow box or tabletop acrylic case works well. For larger collections, use multiple wall frames arranged in a grid, open shelving with baseplate surfaces, or a custom-built display cabinet. Always position displays away from direct sunlight to prevent fading.
How much does it cost to build your own minifigure display?
A DIY minifigure display typically costs between $15 and $50 depending on materials. The IKEA Ribba frame hack runs about $25 to $35 for the frame and baseplate. A shadow box with custom background costs $15 to $30. Wood trim channel displays cost $25 to $50. Commercial display cases range from $40 to $170, and fully custom wooden builds with LED lighting can exceed $200.
How to protect minifigures on display?
Use enclosed displays with glass or acrylic fronts to block dust. Keep displays out of direct sunlight to prevent UV fading and plastic yellowing. Add LED lighting instead of placing displays near windows. For stability, use small acrylic display stands or museum putty under figures to prevent tipping. Clean open displays every 2 to 4 weeks with a soft brush.
What is the best way to organize a growing minifigure collection?
Group figures by theme for visual cohesion, then use sub-categories like faction, character type, or release year within each section. Use modular display units so you can add new sections as the collection grows. Keep a rotating display zone for new acquisitions, and store off-display figures in labeled containers sorted by theme. Always plan for 20 to 30 percent spare capacity when building new displays.
Conclusion
Building a personalized minifigure display for a growing collection is part engineering and part storytelling. The best displays protect your figures while showing them off in a way that reflects your personality as a collector. Whether you go with a $25 IKEA Ribba hack or a custom wooden wall installation, the principles are the same.
Plan before you build. Count your collection, measure your space, and set a budget you can sustain as you grow. Choose a display type that fits your lifestyle, whether that means enclosed cases for maximum protection or open shelves for easy access. Think modularity from day one so expansion feels planned, not panicked.
Protect what you have worked hard to collect. Dust-proof your displays, keep figures away from UV light, and use stands or putty for stability. Organize thematically so every section tells a story, and add lighting and backdrops to turn storage into showcase.
Your minifigure collection is a reflection of years of building, hunting, and trading. It deserves a display that does it justice. Start with one frame or shelf, get it right, and let your display grow alongside your collection. The result will be something you enjoy every single day.