
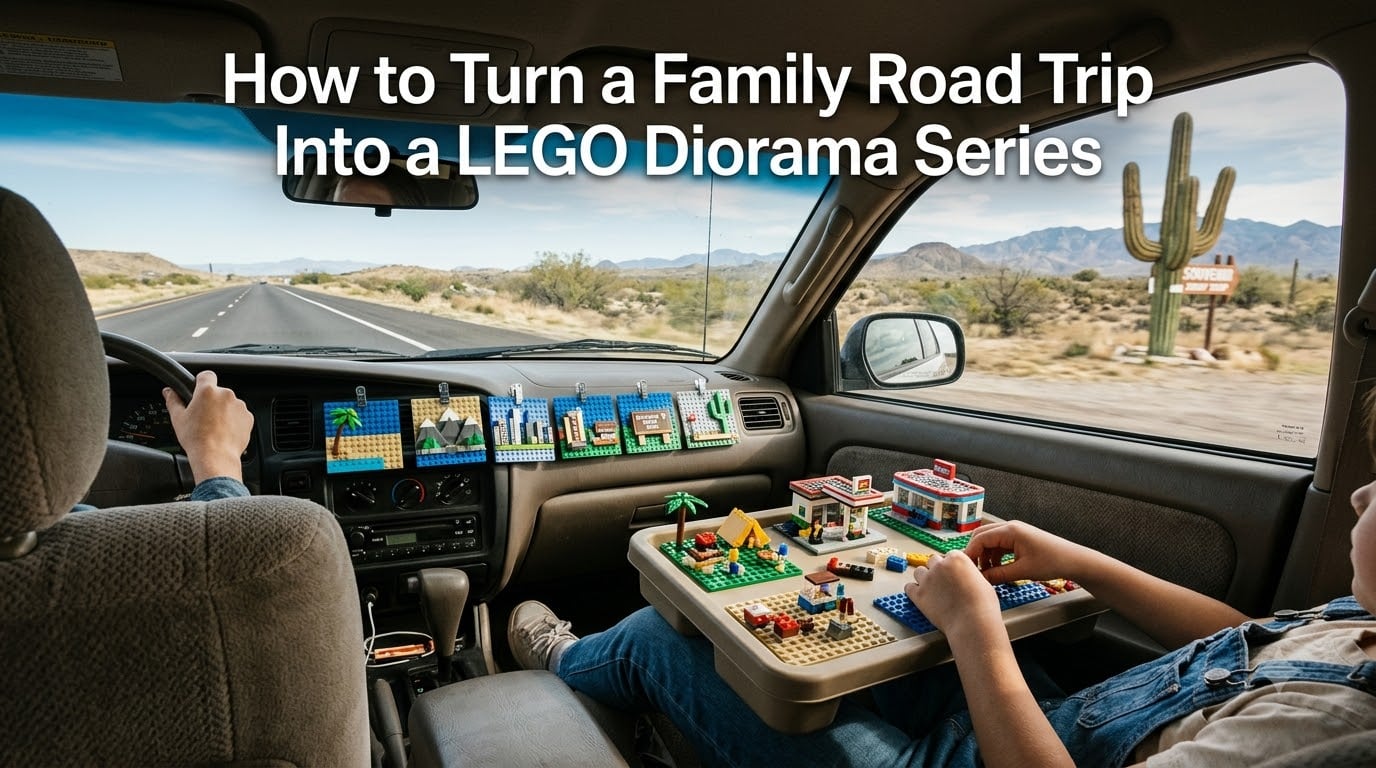
Last summer, our family drove 2,400 miles from Chicago to the Grand Canyon. By the time we pulled back into the driveway, the kids had three loose piles of bricks, a missing minifigure helmet, and one very bored attitude about the trip photos on my phone.
So this year I tried something different. We packed a portable LEGO kit, gave each stop its own scene, and built a family road trip LEGO diorama series one base plate at a time. The car was quieter. The memories stuck. And the kids still pull those little scenes off the shelf to “rebuild” the trip.
If you have ever wished your kids would look up from a screen during a long drive, this guide will show you how to turn a family road trip into a LEGO diorama series that captures every quirky roadside stop. I will walk you through planning, packing, building, and preserving a connected set of scenes that tells the story of your journey.
Table of Contents
What Is a LEGO Diorama Series and Why Build One on a Road Trip?
A LEGO diorama is a small, self-contained scene built on a base plate, often telling a single story moment. A LEGO diorama series is a collection of those scenes linked by a common theme, scale, or narrative. When you apply that idea to travel, each stop on your route becomes its own miniature moment, and the collection tells the bigger story of your trip.
I love this concept for three reasons. First, it turns passive screen time into active building time. Second, it gives kids something to look forward to at every stop. Third, you end up with a physical keepsake that is far more interesting than a shoebox of paper ticket stubs.
If you are new to diorama building, do not worry. You do not need advanced techniques or hundreds of pieces per scene. A 12×12 or 16×16 base plate, a few specialty bricks, and a small handful of minifigures is enough to start. The trick is consistency, not complexity.
Planning Your Road Trip Diorama Series
Good dioramas start before the engine turns over. Spend an hour with your family the week before departure to plan your series. Three decisions matter most: theme, stop list, and build schedule.
Pick a Theme That Ties Each Scene Together
A theme is the glue that turns random builds into a series. Pick something flexible enough to stretch across every stop on your route. We have used “American Roadside,” “National Parks,” and “Route 66 Sights” with great results.
The theme does not need to be rigid. It just needs to give each scene a shared identity so they look like they belong together on a shelf. When you choose your theme, ask three questions. Will every stop fit this theme naturally? Can a 6-year-old and a 12-year-old both contribute? Will the finished series look good together when displayed?
Map Your Stops as Potential Scenes
Print your route map or pull it up on a tablet. Mark every planned stop, plus two or three spontaneous ones you might add. Each marked stop is a potential scene. Try to keep your series between 4 and 8 dioramas. That is enough to tell a story without turning the trip into a build marathon.
For a 7-day trip, I aim for one scene every 1 to 2 days. For a long weekend, three scenes is plenty. Resist the urge to build a diorama at every single gas station.
Set a Realistic Build Schedule
Most of our building happens in the evening at the hotel or campsite, not in the car. Set a 45 to 90 minute build window each night and let the kids vote on which scene to tackle first. Build sessions that are too long lead to frustration and lost pieces.
Essential Supplies and Materials for a Travel LEGO Kit
Packing the right kit saves headaches on the road. After three road trips and a few lost pieces in seat cushions, here is what I actually bring.
Base Plates and Foundations
Base plates are the foundation of every scene. Pack one plate per planned diorama, plus one or two spares. Standard 16×16 plates are the sweet spot. They are large enough to feel like a real scene but small enough to fit on a hotel desk.
We use green plates for nature scenes, gray plates for city stops, and tan plates for desert or beach stops. Color coding saves time when you sit down to build. Bring at least 4×6 or 8×8 plates as well. These smaller foundations are perfect for quick micro-scenes like a single souvenir minifigure on a tiny patch of road.
Bricks, Plates, and Tiles to Pack
You do not need your entire collection. Bring a curated kit of about 400 to 600 pieces. Focus on:
1×1, 1×2, 2×2, and 2×4 bricks in neutral colors (white, gray, tan, black, brown)
Slope bricks for roofs and ramps
Round bricks and tiles for details
One or two specialty pieces per scene (a small cactus, a traffic cone, a flag)
Minifigures that match your theme (souvenir minifigs from gas stations make great additions)
Skip pieces with too many small parts. Loose wheels, antennas, and weapons vanish under car seats within an hour.
Storage, Sorting, and Travel-Friendly Tools
A dollar store tray with a snap-on lid becomes the ultimate portable LEGO tray. Glue a base plate to the inside of the lid. Now you have a flat building surface that catches dropped pieces. This is the same trick popular in travel LEGO hacks on TikTok and YouTube, and it really works.
For storage, small divided craft boxes hold sorted pieces by color or type. Pack a few small zip bags for true miniatures. Bring a roll of painter’s tape to mark sections of the tray if you are mid-build when the car has to move.
Skip the brick separator, since one always shows up at the bottom of someone’s backpack. Bring a small pair of tweezers for picking up dropped tiles in car cracks.
Step-by-Step: How to Turn a Family Road Trip Into a LEGO Diorama Series
This is the part where the idea becomes real. Follow these four steps in order, and you will have a finished series before you unpack the cooler.
Step 1: Build a Portable LEGO Travel Tray
Before the trip, buy a plastic tray with a lid from a dollar store. Use hot glue or strong double-sided tape to attach a 16×16 base plate to the inside of the lid. Snap the lid closed when you are not building. The tray base catches loose bricks so nothing rolls under the seat.
The whole thing stacks with your cooler and fits behind the passenger seat. Test the tray at home first. Build a small sample scene to make sure the lid closes without crushing your work. If it does not, swap to a deeper container or build shorter scenes.
Step 2: Capture Memory Prompts at Each Stop
At each stop, take three things to feed your build that night. Snap a photo of the most memorable feature. Pick up one small flat souvenir like a postcard, sticker, or pressed penny. Ask each kid to name one word that captures the stop. These prompts become the foundation of your scene.
I keep a simple notebook in the glove box labeled “Scene Ideas.” During the drive, the kids draw rough sketches of what they want to build. Those sketches are surprisingly accurate blueprints for that evening’s session.
Step 3: Build Each Scene at the Hotel or Campsite
After dinner, lay out the travel tray on the hotel desk. Read back the prompts you collected. Start with the base, then add the central feature (a building, a rock formation, a sign). Finish with minifigures and small details.
Time-box the build. Set a 60-minute timer. When the buzzer sounds, snap a photo of the scene and pack it away. Some of our best dioramas were built in under 45 minutes because the time pressure kept everyone focused.
Tip: let each child own one full scene. Even if their builds are chaotic, those scenes become the family’s favorites two years later. I have a very strange but much-loved “Gas Station of Doom” diorama my daughter made at age 7.
Step 4: Connect Your Scenes Into a Cohesive Series
Once you are home, line the dioramas up on a long shelf or table. Look at them as a group. Do they feel like one story? If not, make small unifying changes. Add the same border brick pattern to each base plate. Swap minifigure outfits so the same characters appear across scenes. Add small road tiles between dioramas to suggest a connected journey.
The finishing touch is a numbered title plate for each scene. Use 1×3 tiles with letters, or write on small cardstock flags. Now your family road trip LEGO diorama series has a beginning, middle, and end.
Scene-by-Scene Theme Ideas for Any Road Trip
If you are stuck choosing a theme, here are three directions that have worked for our family and for builders on Reddit and LEGO Ideas.
American Roadside Classics
Build the giant roadside attractions that define an American road trip. Think giant fiberglass dinosaurs, Route 66 neon signs, and old-fashioned diners. Each scene gets one quirky landmark plus a tiny vintage car. This theme is fun because the builds are simple but instantly recognizable.
Nature and National Park Stops
National parks are full of natural dioramas. Build a cliff face, a geyser, a sequoia grove, or a canyon overlook. Use slopes, SNOT (studs-not-on-top) techniques, and lots of green and brown bricks. National park scenes look great as a connected set because the color palette stays consistent.
City Skyline and Landmark Scenes
For city-focused trips, build a small skyline of each stop’s most famous building. A single tall tower, a stadium, or a museum makes a strong centerpiece. Add taxi or bus tiles in front to suggest urban motion. City scenes translate well into LEGO because architecture is the LEGO specialty.
Pro Tips: The 5/2 Rule and Other Diorama Building Techniques
These are the techniques that took our dioramas from “kids’ craft” to “shelf-worthy display.” Pick one or two to focus on each trip.
Master the 5/2 Rule for Diagonal Builds
The 5/2 rule in LEGO building refers to the most stable way to create diagonal slopes. Alternate five studs forward with two studs up, repeating the pattern. This produces a natural-looking 22.6-degree angle that holds weight without sliding.
It is the secret behind smooth LEGO mountains, ramps, and roads in dioramas. For road trip scenes with highways, mountain passes, or dune climbs, the 5/2 rule keeps your slopes locked in place even after a few thousand miles of car vibration.
Use Black Border Bricks for a Museum Look
One trick shared by LEGO builders on Facebook is to frame each base plate with a single row of black bricks and top them with smooth black tiles. The black border acts like a museum mat around a painting. It makes even a chaotic scene look intentional and pulls the whole series together visually.
Choose the Right Base Plate Size
Community builders consistently recommend 12×12 to 16×16 plates as the sweet spot for dioramas. Smaller plates feel cramped. Larger plates demand too many bricks. For travel, 16×16 plates also fit neatly in a standard tray lid, which matters when your “desk” is the hotel room’s only flat surface.
Storing, Photographing, and Displaying Your Finished Dioramas
The trip ends, but the series does not have to. Wrap each base plate in a single layer of bubble wrap for the drive home. Stack them in a plastic bin with crumpled paper between layers. When you arrive, store each diorama in a clear shoebox or under a fitted acrylic display case to keep dust off.
Take a final “group photo” of the full series on a clean background. Print it and slip it into the family album next to your road trip photos. Two years from now, your kids will pull out the dioramas and remember details they had forgotten about every single stop.
FAQs
What is the 5/2 rule in LEGO?
The 5/2 rule in LEGO is a building technique for creating stable diagonal slopes. You alternate five studs forward with two studs up, repeating the pattern. This produces a 22.6-degree angle that holds weight without sliding apart, making it perfect for diorama roads, mountains, and ramps.
What are some tips for making a diorama?
Start with a 12×12 or 16×16 base plate, choose one central feature per scene, and stick to a tight color palette. Use the 5/2 rule for diagonal slopes, frame the base with black bricks for a museum look, and time-box your builds to 45-90 minutes to keep momentum high.
What are some tips and ideas for building with LEGO?
Build small and often, sort your pieces before the trip, and let each child own at least one full scene. Sketch ideas on paper first, use souvenir minifigures from your stops, and connect scenes with small road tiles or matching border bricks to turn individual builds into a series.
What are the best LEGO diorama sets?
The best LEGO diorama sets for travelers are the 16×16 base plates paired with small classic boxes of mixed bricks. Modular Building Sets, the Winter Village Collection, and the LEGO Ideas Route 66 inspired builds are all great starting points. For a road trip series, you do not need a specific set, just a portable kit of curated bricks.
Conclusion
A family road trip LEGO diorama series turns a long drive into a shared creative project and leaves you with something tangible long after the suitcases are unpacked. Pick a flexible theme, pack a small curated kit, build one scene per stop, and connect them with matching borders when you get home.
Use the 5/2 rule for any slopes, frame each base plate in black, and let the kids own at least one full scene. The next time you pull those little scenes off the shelf, the whole trip comes rushing back.