
I built my first LEGO mosaic at 14 on the living-room carpet with a shoebox of 1×1 plates, no plan, and a very confused beagle.
That awkward, slightly crooked image of a Space Marine taught me something every mosaic builder eventually learns: the technique you pick matters more than the picture you pick. Pick the wrong approach and your masterpiece falls apart, looks blocky, or never quite matches the photo. Pick the right approach and you get a striking piece of wall art that survives years of moves and even the occasional curious cat.
In this guide I will walk you through every LEGO mosaic technique worth knowing in 2026, from the classic studs-out method used in official sets to the higher-resolution studs-up approach and the chunky brick mosaic look. By the end you will know which technique fits your image, your budget, and your patience level.
Table of Contents
What Is a LEGO Mosaic?
A LEGO mosaic is a two-dimensional picture made by arranging small LEGO elements so that each one acts like a pixel in a digital image. Instead of a screen pixel, every “pixel” in your mosaic is a physical piece – usually a 1×1 round plate, a 1×1 plate, or a full brick – snapped onto a baseplate or stacked on top of its neighbors.
The idea is simple but the execution rewards planning. You start with a digital photo, reduce it to a grid that matches your chosen technique, restrict the colors to the LEGO palette you actually own, and then build the result piece by piece. The finished build looks like pixel art rendered in plastic, and it can be hung on a wall or kept as a sculptural object.
A LEGO mosaic is different from a regular brick build because it focuses on image fidelity rather than three-dimensional form. You are not building a castle or a car. You are recreating the colors and shapes of a flat picture using only the building blocks you have on hand.
The Three Core LEGO Mosaic Techniques
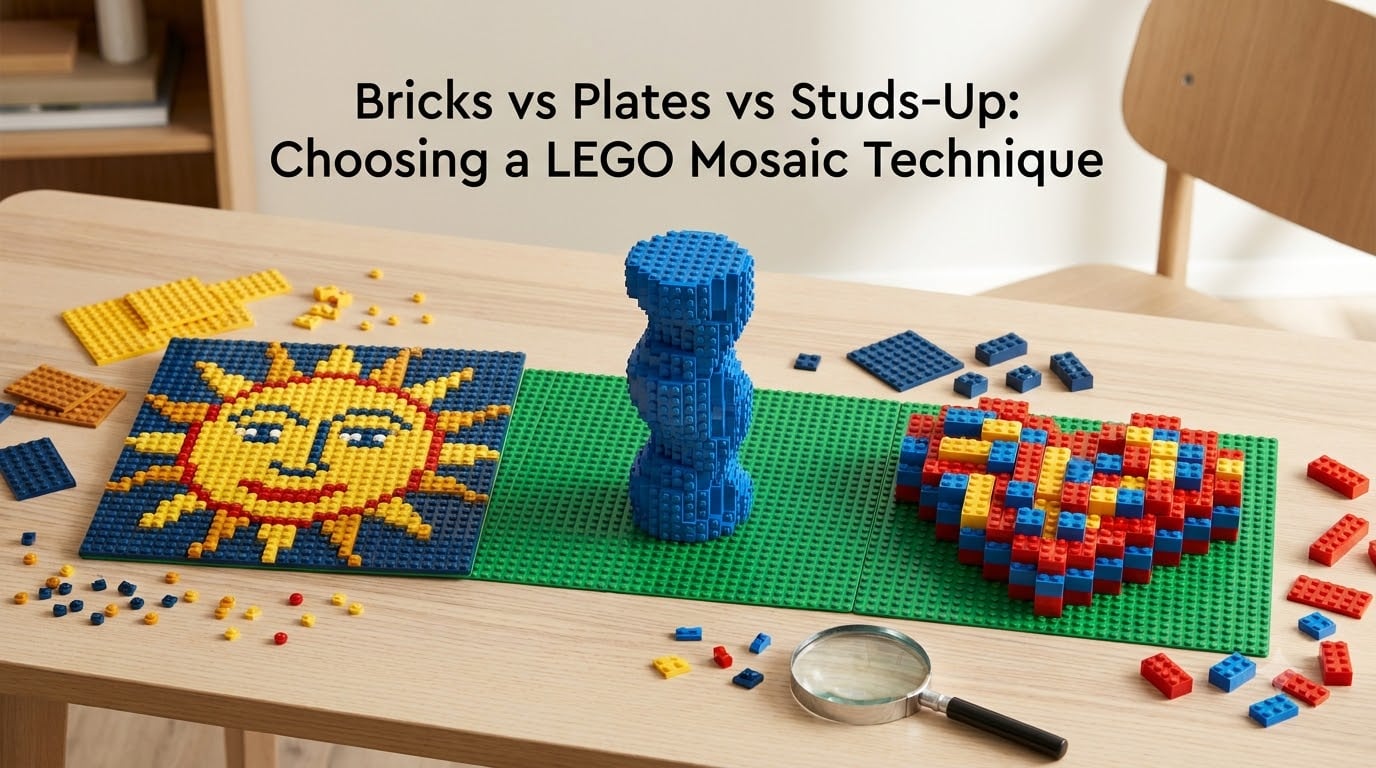
There are three LEGO mosaic techniques most builders use, and each one trades resolution, stability, and cost in a different way. Getting familiar with all three will help you pick the right one for your image and skill level.
- Studs-out mosaics – pieces lie flat with the studs facing you, snapping onto a baseplate. This is the official LEGO Art method.
- Studs-up mosaics – plates stand on edge so the thin 1×3 plate sides face you, increasing resolution dramatically.
- Brick mosaics – full 1×1, 1×2, and 1×3 bricks lie flat to create chunky, low-resolution images with bold color blocks.
Each technique belongs to a different point on the resolution-versus-stability curve. The rest of this guide breaks them down one at a time, then lines them up side by side so you can choose with confidence.
Studs-Out Mosaics Explained
The studs-out technique is the most familiar approach because LEGO has used it for the entire LEGO Art theme since 2020. You snap 1×1 round plates, 1×1 plates, and small specialty pieces onto a baseplate so the round studs face the viewer. Each stud is exactly 8mm wide, so every element occupies one “pixel” of your digital image.
This technique is forgiving, fast, and beginner-friendly. You can swap pieces without rebuilding anything, mistakes are easy to fix, and the official LEGO Art sets ship with sorted trays of plates that match a printed instruction booklet. If you have ever assembled a Beatles mosaic or a Star Wars portrait from LEGO, you have already built a studs-out mosaic.
The main downside is resolution. Because each pixel is one stud wide, your image grid is limited to roughly 48×48 studs on a standard 48×48 baseplate. That is enough for portraits, pop-culture posters, and abstract patterns, but it can look blocky on detailed photographs.
Studs-out mosaics also have one community-loved benefit: they disassemble quickly. When you finish your build you can pop the pieces off the baseplate and sort them back into your collection in minutes.
Studs-Up Mosaics Explained
The studs-up technique flips the pieces on their side so the thin profile of each plate becomes a pixel. Instead of one stud per pixel, you fit three studs per pixel because a 1×3 plate is the same height as a standard LEGO brick. That small change triples your horizontal resolution and gives you about 2.5x the detail of a studs-out mosaic of the same footprint.
To build a studs-up mosaic you stack 1×3 plates on edge, usually with a Technic brick or Technic pin hidden inside each column to keep the plates aligned. You then build one column at a time, treating the column like a stack of horizontal pixels. A single 48-stud baseplate footprint can hold roughly 120 columns of three-plate-wide pixels.
I love the extra resolution, but I have to be honest about the trade-offs. Studs-up mosaics are noticeably less stable than studs-out builds. They lean, twist, and need a frame or backing plate to stay square. They also take longer to assemble because you are working with thin plates rather than chunky bricks. And when you want to disassemble, you have to pull each plate off the column, which is more delicate work.
Studs-up is the right pick when detail matters more than speed or portability. It is the technique most often used for pixel-art portraits that need sharp eyes, readable text, or smooth gradients.
Brick Mosaics Explained
Brick mosaics use full-height LEGO bricks – mostly 1×1, 1×2, and 1×3 plates-thick pieces – laid flat to make a chunky, low-resolution image. Because each brick is about 9.6mm tall (including the stud) and 8mm wide, your pixels are large, your image is bold, and your build is extremely sturdy.
This is the technique I recommend for public installations, classroom projects, and family-friendly builds. There are no thin plates to snap, no fragile columns to support, and no baseplate required if you build on a flat surface. A 32×32 baseplate can hold a brick mosaic large enough to be read from across a room.
The visual style is intentionally retro. Brick mosaics look like 8-bit video game sprites brought into the real world. They are not subtle, and they do not aim for photorealism. If your image is a logo, a pixel-art character, a flag, or a bold geometric pattern, brick mosaics are often the most satisfying choice.
The downside is that small details vanish. A brick mosaic can show you the outline of a cat, but it cannot show you the whiskers. Plan your image around large shapes and you will be thrilled with the result.
Side-by-Side Technique Comparison Table
This comparison is the table I wish I had on my first build. It condenses the most important differences into one place so you can scan it quickly and decide which LEGO mosaic technique fits your project.
- Resolution per 32×32 baseplate: Studs-out 32×32 pixels, Studs-up about 80×32 pixels, Brick mosaic about 16×16 pixels.
- Piece thickness: Studs-out 3.2mm (one plate), Studs-up 9.6mm (one brick height), Brick mosaic 9.6mm to 19.2mm (one to two bricks tall).
- Stability: Studs-out very high, Studs-up medium to low, Brick mosaic very high.
- Skill level: Studs-out beginner, Studs-up intermediate, Brick mosaic beginner to intermediate.
- Disassembly: Studs-out fast, Studs-up slow, Brick mosaic medium.
- Best use case: Studs-out portraits and posters, Studs-up detailed portraits and pixel art, Brick mosaic logos, signage, public art.
- Approximate piece count (32×32 baseplate): Studs-out around 1,000 pieces, Studs-up around 2,500 pieces, Brick mosaic around 300 to 600 pieces.
Numbers come from typical builds at The Brick Fantastic. Your exact counts will vary with image complexity and color count.
Resolution and Detail Differences
Resolution is the single biggest factor that separates the three LEGO mosaic techniques. The math behind it is simple once you understand LEGO’s standard stud pitch, which is 8mm from the center of one stud to the center of the next.
In a studs-out mosaic, every pixel is one stud wide. In a studs-up mosaic, you fit three studs into the same horizontal space because the thin edge of a 1×3 plate is the height of a brick – exactly the same 9.6mm dimension as one stud measured vertically. That is where the 2.5x resolution multiplier comes from in most builders’ notes.
Brick mosaics sit at the opposite end of the spectrum. Because each brick is the height of three plates plus one stud, every “pixel” of your image is roughly three times the area of a studs-out pixel. You lose detail, but you gain visual impact and structural strength.
Higher resolution does not always mean a better mosaic. I have built 96×96 studs-up portraits that looked muddy because I tried to recreate photographic detail in plastic. I have also built 32×32 studs-out images that looked sharper than expected because the source art was already simple. Always start from a clean source image and work outward to the technique, not the other way around.
Color Quantization, Dithering, and Palette Limits
Before you place a single brick, your digital image has to be processed into something a LEGO palette can reproduce. That step uses two techniques every mosaic builder should understand: color quantization and dithering.
Color quantization is the process of reducing every color in your photo to the closest match from a list of available LEGO colors. If your image has 8,000 shades of blue but your palette has 22 blues, the algorithm picks the 22 that cover the range best and forces every pixel into one of those 22 colors. Most mosaic software, including the official LEGO Art Remix app, lets you choose your palette size and apply this step automatically.
Dithering is the clever trick that makes a limited palette look smoother. Instead of replacing each pixel with one flat color, dithering mixes two colors by placing them in an alternating pattern so the eye blends them into a third shade from a distance. The most common algorithm is Floyd-Steinberg dithering, but ordered dithering and Stucki dithering also work well for mosaic prep.
The 5/2 rule in LEGO mosaic design refers to the common practice of using at least two dithered pairs in any smooth gradient area, with each pair placed in roughly a 5-pixel-to-2-pixel ratio to avoid visible stripes. Builders use this rule of thumb to keep dithering patterns subtle without losing the blended effect. It is not an official LEGO guideline, but it has become a community shorthand for balanced color mixing in tight spaces.
If you skip quantization and dithering your mosaic will look flat and posterized. If you overdo either, your image will turn noisy. The sweet spot is a small, well-chosen palette – usually 25 to 60 colors – paired with dithering only where gradients demand it.
Baseplate Requirements and Stability
Every LEGO mosaic needs a sturdy foundation, but the right baseplate changes with your technique.
For studs-out mosaics, any standard LEGO baseplate works. The 32×32 stud baseplate is the most common starting point and the same one shipped with most LEGO Art sets. Larger 48×48 baseplates let you scale up without joining seams. Green and gray baseplates are the easiest to source, but you can also find blue, sand, and white versions for themed builds.
For studs-up mosaics, a Technic baseplate is the safer choice because the regularly spaced Technic holes line up with the hidden Technic pins inside each column. This keeps your columns vertical and prevents the twisting that ruins studs-up builds. If you do not have a Technic baseplate, you can glue a standard baseplate to a piece of MDF and pin your columns into that.
For brick mosaics, a baseplate is optional. Many builders lay out their first layer directly on a table or board, then stack from there. If you want a portable brick mosaic, snap the first layer onto a baseplate and build upward.
Warning: studs-up mosaics taller than 24 plates can lean or collapse under their own weight. Always add a backer board, picture frame, or display case for any studs-up build above that height. Treat it like a real wall-mounted object, not a casual tabletop toy.
When to Use Each Technique (Decision Framework)
Picking the right LEGO mosaic technique is faster when you ask three quick questions about your image, your skill level, and your intended display.
Use studs-out when your image is a portrait, a pop-culture poster, or a piece of wall art that needs to be moved and rebuilt often. It is also the right pick if you are a beginner or working with kids, because mistakes are easy to fix and the LEGO Art instruction books already exist as a template.
Use studs-up when your image has fine details, readable text, smooth gradients, or a low-resolution source that needs every extra pixel you can get. It is the technique of choice for pixel artists recreating retro game sprites and for portrait artists who want to capture eyes, hair texture, and subtle shading. Budget extra build time and have a frame ready.
Use brick mosaics when your image is bold, simple, and meant to be seen from a distance. Logos, flags, geometric patterns, video game sprites, classroom alphabet mosaics, and giant wall murals are all perfect fits. Brick mosaics are also the most durable option for public spaces and children’s rooms.
My rule of thumb: if the image is under 64 pixels wide on its longest side, go studs-out. If the source image is sharper than that but you want every detail, go studs-up. If the image is already chunky and graphic, go brick mosaic.
Common Mistakes to Avoid
I have made most of these mistakes myself, so you do not have to. Keep them in mind before you commit hundreds of dollars to a single mosaic.
- Ignoring aspect ratio. A square photo forced onto a rectangular baseplate will look stretched. Crop or resize your image to match your baseplate before snapping a single piece.
- Using too few colors. Fewer than 15 colors produces a posterized look. Aim for 25 to 60 colors for most photographs.
- Skipping dithering. Smooth gradients look bad without it. Apply Floyd-Steinberg or ordered dithering to any region with subtle shading.
- Forgetting stability for studs-up builds. Always add a backer, frame, or display case once the mosaic is complete.
- Mixing piece heights by accident. A single tall plate in a studs-out mosaic will not sit flush. Sort your pieces by height before you start.
- Buying all your pieces at once. Source colors in small batches first. Many “must have” shades turn out to be different when they arrive.
Avoid these and your build will look more polished than 80 percent of the mosaics posted in online communities.
Advanced Mosaic Types Worth Exploring
Once you have mastered the three core techniques, you can branch into advanced variants that use specialty pieces.
- Lenticular mosaics – use two or three layers behind a lenticular sheet so the image changes as you walk past it. The Beatles LEGO Art set is a famous example.
- 3D and isometric mosaics – stack mosaic pixels at different heights to create sculpted portraits or pixel-art terrain.
- Cheese slope mosaics – replace 1×1 plates with cheese slopes for a softer, more painterly look, especially in portraits.
- Headlight brick mosaics – use transparent headlight bricks for mosaics with glowing highlights, like sunsets or neon signs.
Each advanced technique builds on the same fundamentals: plan the grid, pick the palette, and respect the physics of the pieces. Once those feel natural, the specialty variants are mostly a matter of sourcing the right elements.
Frequently Asked Questions
What is the 5/2 rule in LEGO?
The 5/2 rule is a community guideline for dithering in LEGO mosaics. Builders use at least two color pairs in any smooth gradient area, with each pair placed in roughly a 5-pixel-to-2-pixel ratio. This prevents visible stripes and keeps the blended effect subtle when you look at the mosaic from a normal viewing distance.
What are the three types of LEGO mosaics?
The three main types of LEGO mosaics are studs-out, studs-up, and brick mosaics. Studs-out lays pieces flat on a baseplate with studs facing you. Studs-up stands plates on edge for higher resolution. Brick mosaics use full-height bricks for a chunky, low-resolution look that is highly stable.
Which LEGO mosaic technique is best for portraits?
Studs-out is the safest choice for portraits because it is the official LEGO Art method and forgives small mistakes. Studs-up is better for very detailed portraits where every extra pixel matters, but it requires more time, more pieces, and a frame for stability. Brick mosaics work for stylized, low-detail portraits only.
Why use plates instead of bricks for mosaics?
Plates are thinner than bricks, so plates let you fit more pieces into the same vertical space. This gives a mosaic finer resolution without making the build taller. Plates are also lighter, which helps when you are hanging a large mosaic on a wall.
Can I build a LEGO mosaic without a baseplate?
Yes. Brick mosaics can be built directly on a flat surface or board because full-height bricks lock together strongly. Studs-out and studs-up mosaics really do need a baseplate or a backer board, otherwise the first layer will shift during the build and your mosaic will not line up.
How do I increase resolution in a LEGO mosaic?
Switch from a studs-out build to a studs-up build. Standing your plates on edge triples the horizontal resolution of the same footprint, giving you about 2.5x the detail overall. You can also shrink each pixel by using multiple 1×1 plates per column, but studs-up is by far the most common way to boost resolution in a LEGO mosaic.
Final Verdict: Picking the Right LEGO Mosaic Technique for Your Build
There is no single best LEGO mosaic technique. There is only the right one for the image in front of you, the pieces you already own, and the time you want to spend.
If you want a safe, beginner-friendly, easy-to-disassemble build, choose studs-out. It is the official LEGO Art approach and it works for almost any image.
If you want the highest resolution a LEGO mosaic can deliver, choose studs-up. Plan your time, budget your pieces, and frame the finished build.
If you want bold, durable, kid-proof wall art, choose brick mosaics. They are quick, stable, and impossible to mess up.
Whichever LEGO mosaic technique you pick, you will end up with a piece of art that is part sculpture, part pixel art, and entirely yours. Build the first one for fun. Build the second one for keepsake. By the third one you will be hooked.